Author: Maya Collins

  • Zucchini Fritters With Feta and Mint

    Zucchini Fritters With Feta and Mint

    My garden gave up three zucchini in a single afternoon last week, and the usual suspects — zucchini bread, zucchini boats — were already on this month’s menu. My husband found a handful of mint growing by the back door and handed it to me like a dare. That’s when I remembered a recipe that never misses: zucchini fritters with feta and mint.

    They taste like a Greek taverna on a summer evening. Salty, bright, and crisp at the edges — and there’s no deep frying involved. You can serve them as a side, an appetizer, or a light dinner if you pile a tomato salad on top.
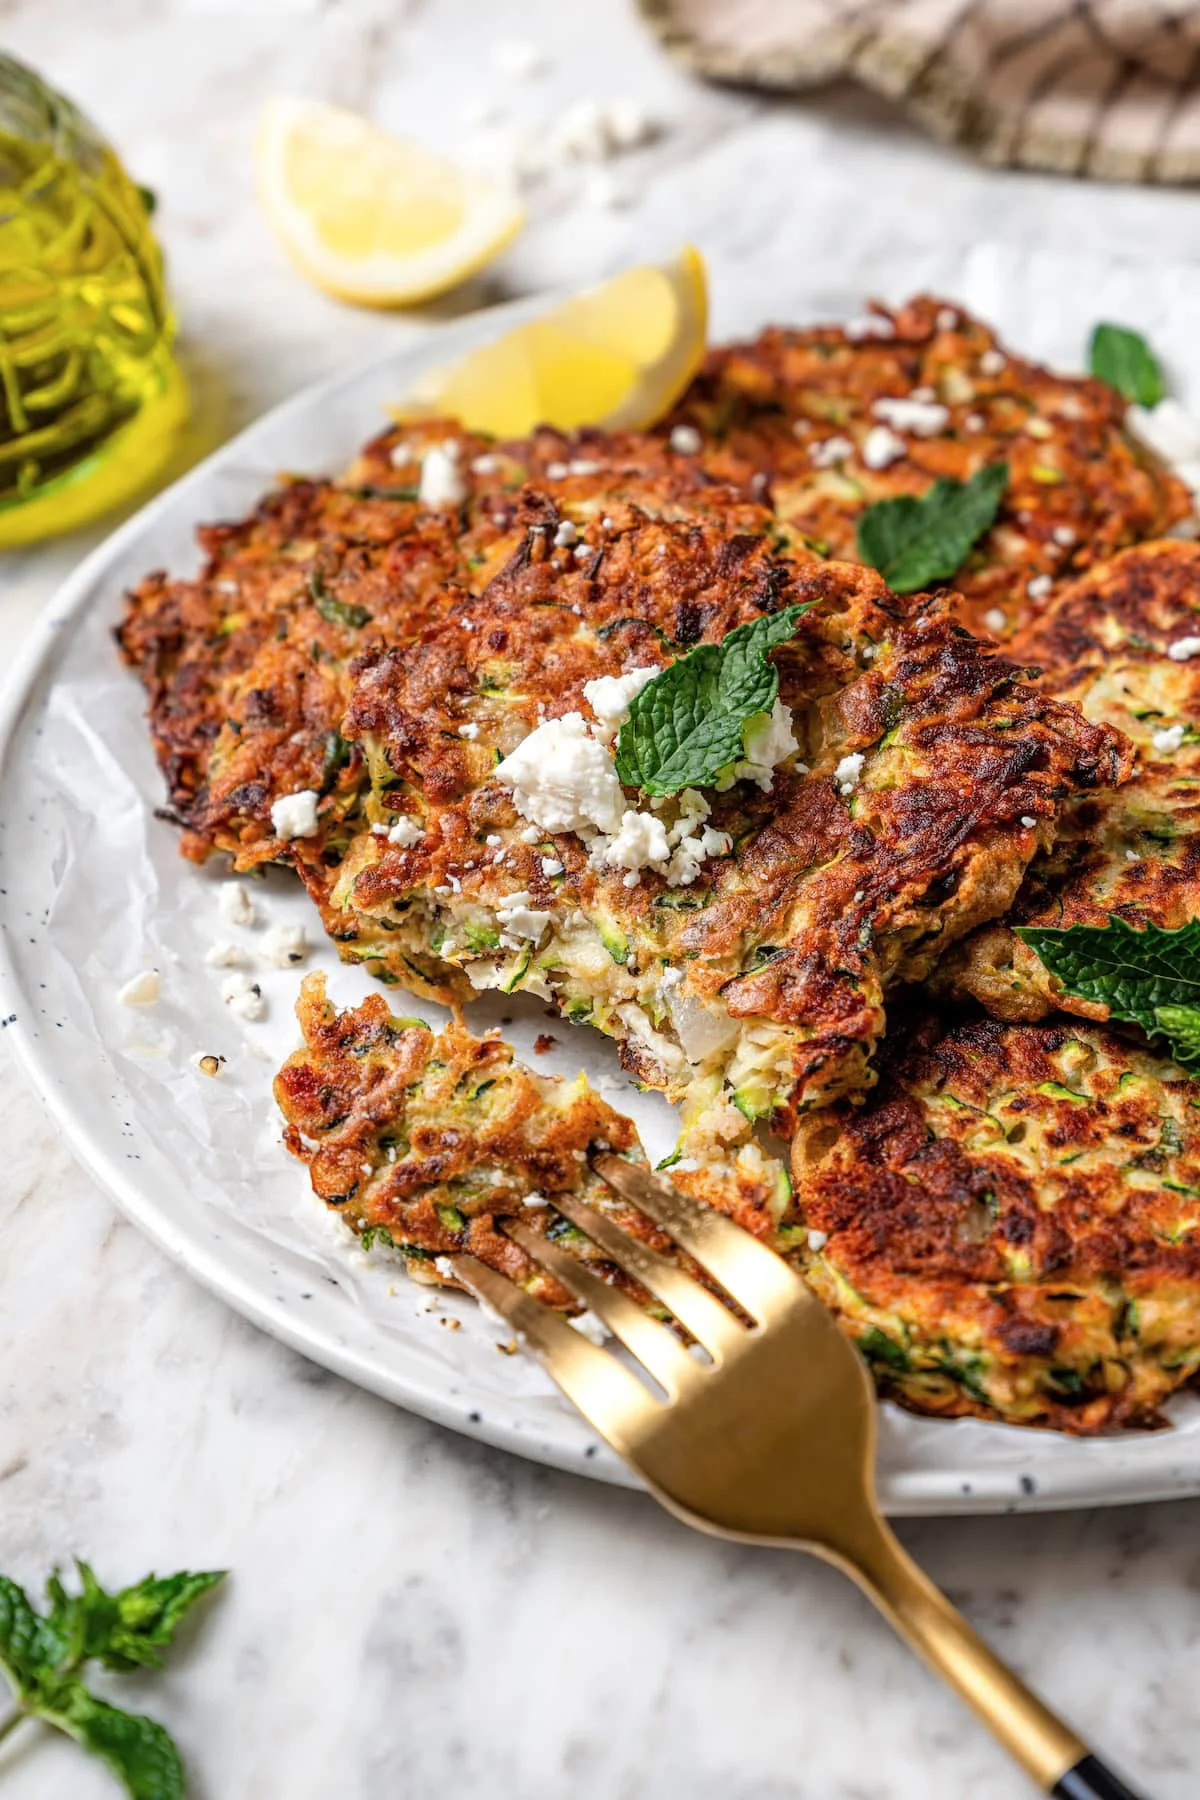
    Golden zucchini fritters with feta and fresh mint on a plate

    Real time: 30 minutes / Hands-on: about 20

    Prep is 15 minutes, cooking is 15, and the only thing you need is a nonstick skillet and a clean kitchen towel. They come out of the pan golden and crisp, and a batch costs about $1.66 per serving — less if your zucchini and mint are coming from the garden. The recipe comes from Lisa Leake’s 100 Days of Real Food on a Budget, a book full of simple ideas for cutting out processed food without breaking the bank, and I’ve made it on repeat every summer since.

    Why this one keeps winning

    It’s peak zucchini season, and this is the way I get through a crate of them without getting bored. A few things make it my default:

    • Crisp without deep frying — a small amount of oil in a pan gets you golden edges every time.
    • Feta, mint, and cumin carry all the flavor, so a dipping sauce is optional. I still make homemade tzatziki when I have it, though.
    • They work as an appetizer, a side, or a main with a tomato salad on top.

    What you’ll need
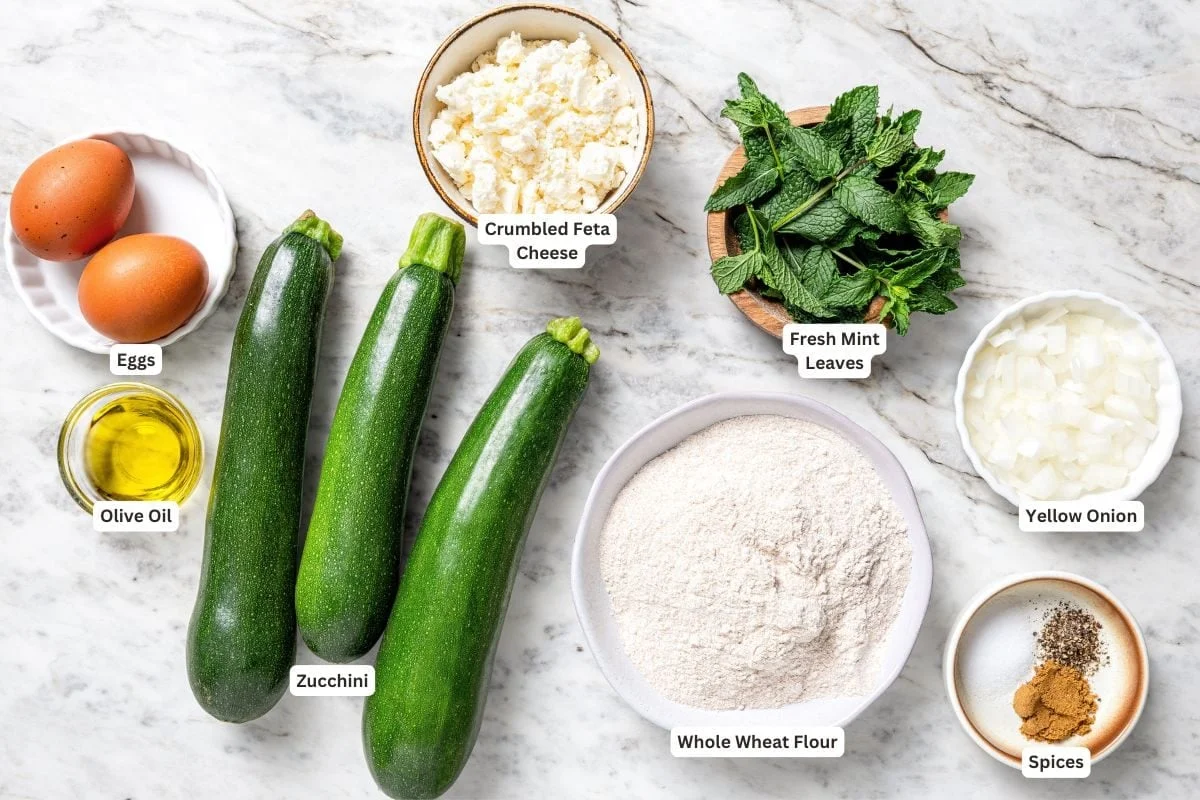
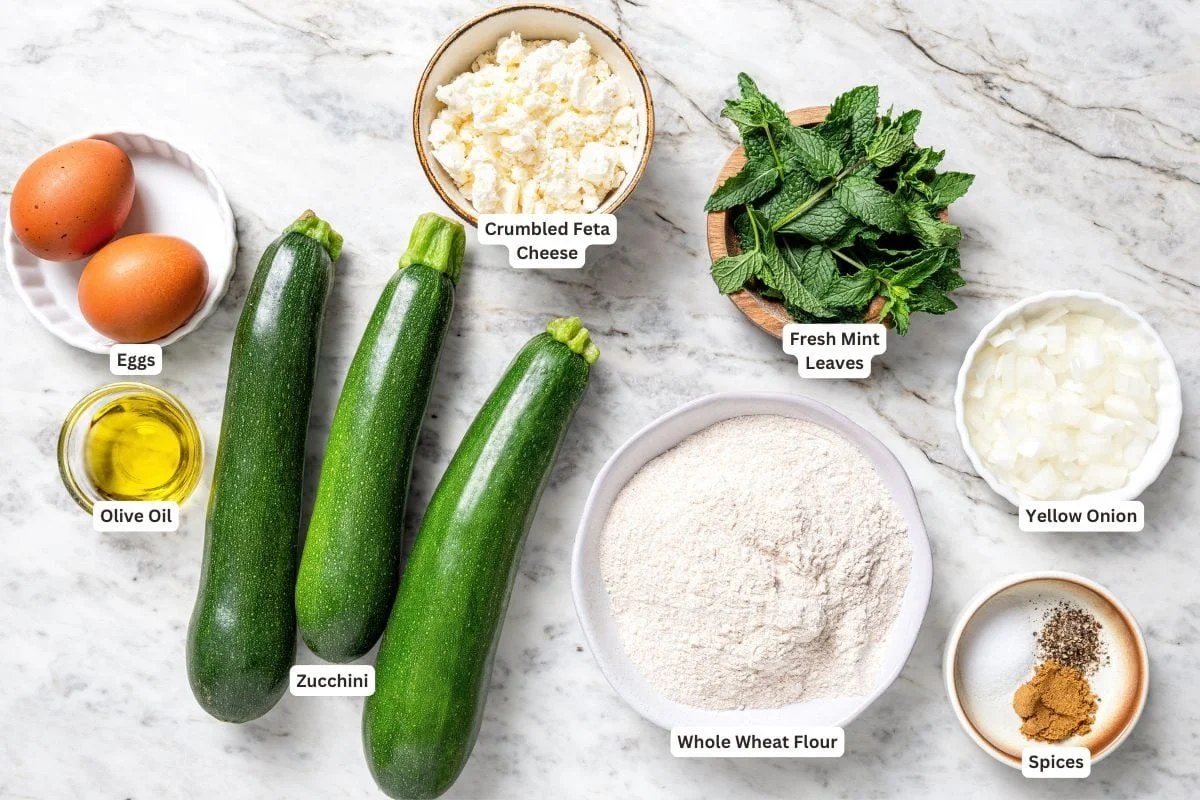
    Labeled ingredients for zucchini fritters on a marble surface

    Everything is in the recipe card below, but here’s the short version:

    • Medium zucchini — they have mild flavor and no giant seeds. Mine came to about 1½ pounds.
    • Eggs — work with the flour to hold the patties together.
    • Feta — the salty, tangy backbone of the whole thing.
    • Yellow onion, diced — savory background flavor.
    • Fresh mint — that bright finish. Dill, basil, or parsley work fine if that’s what’s in your garden.
    • Ground cumin, kosher salt, black pepper.
    • Whole wheat flour — or any gluten-free flour blend you already keep in the pantry.
    • Extra-virgin olive oil for the pan.

    How to make them

    Full details are in the recipe card. Here’s the order that matters.

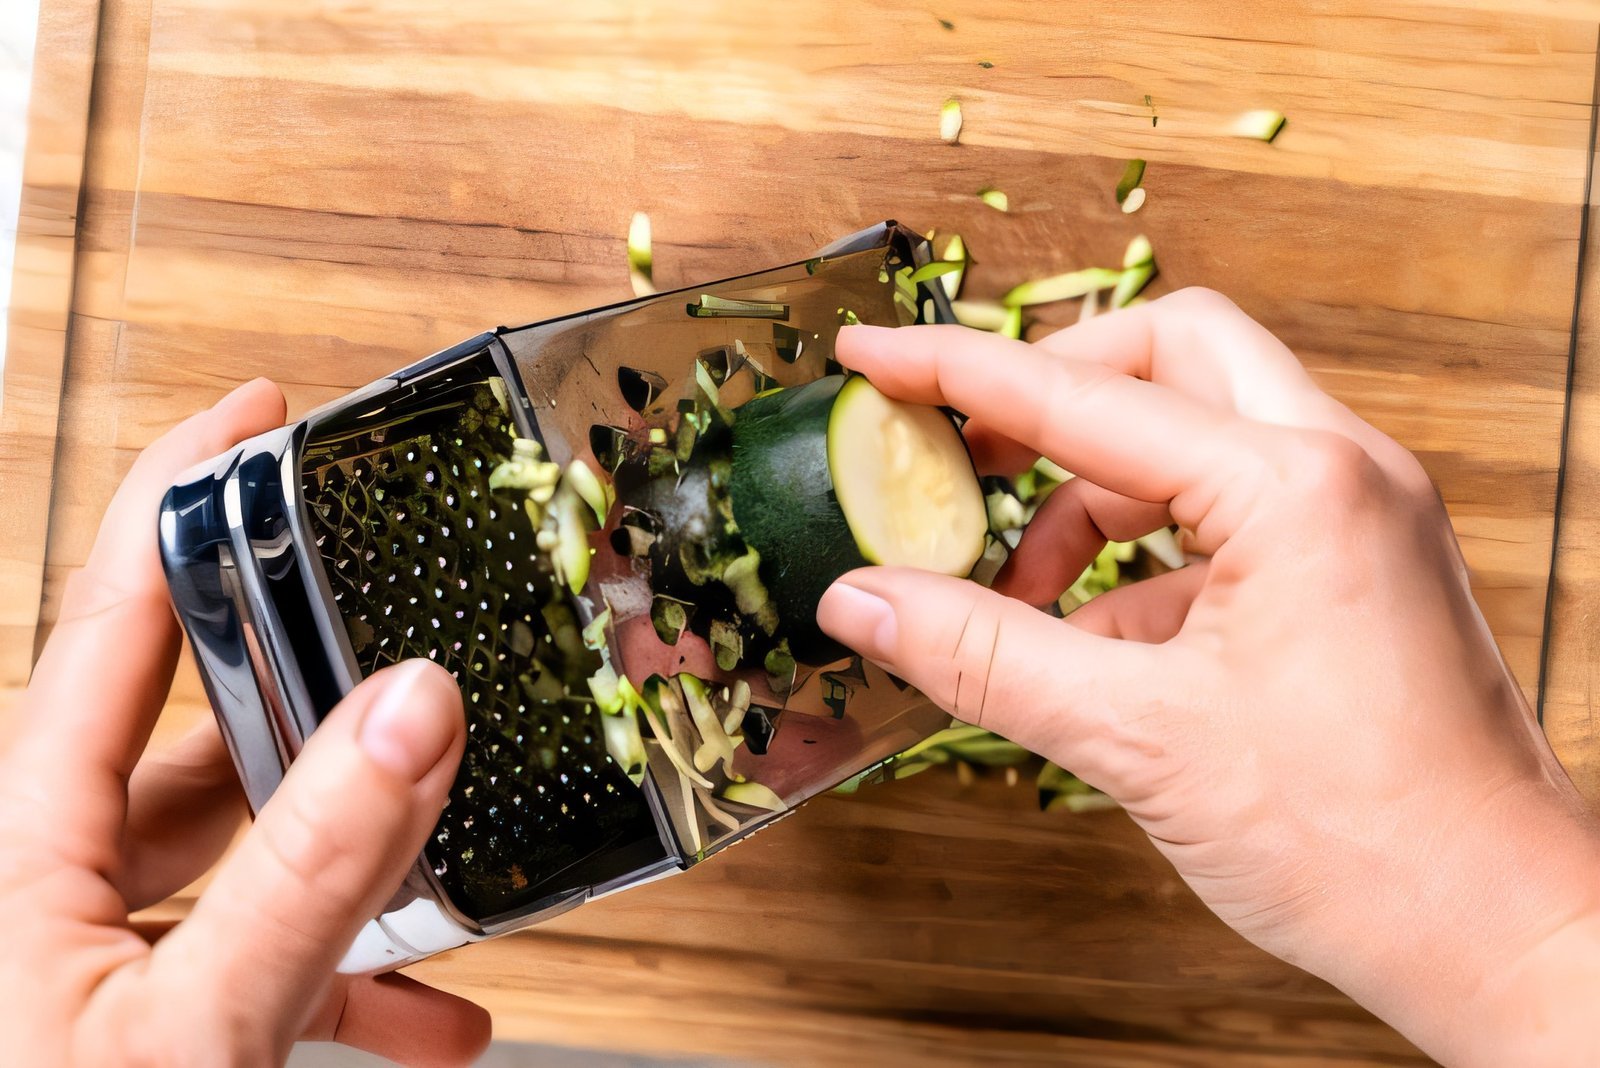
    1. Shred the zucchini on the large holes of a box grater (or the shredding disk in a food processor).
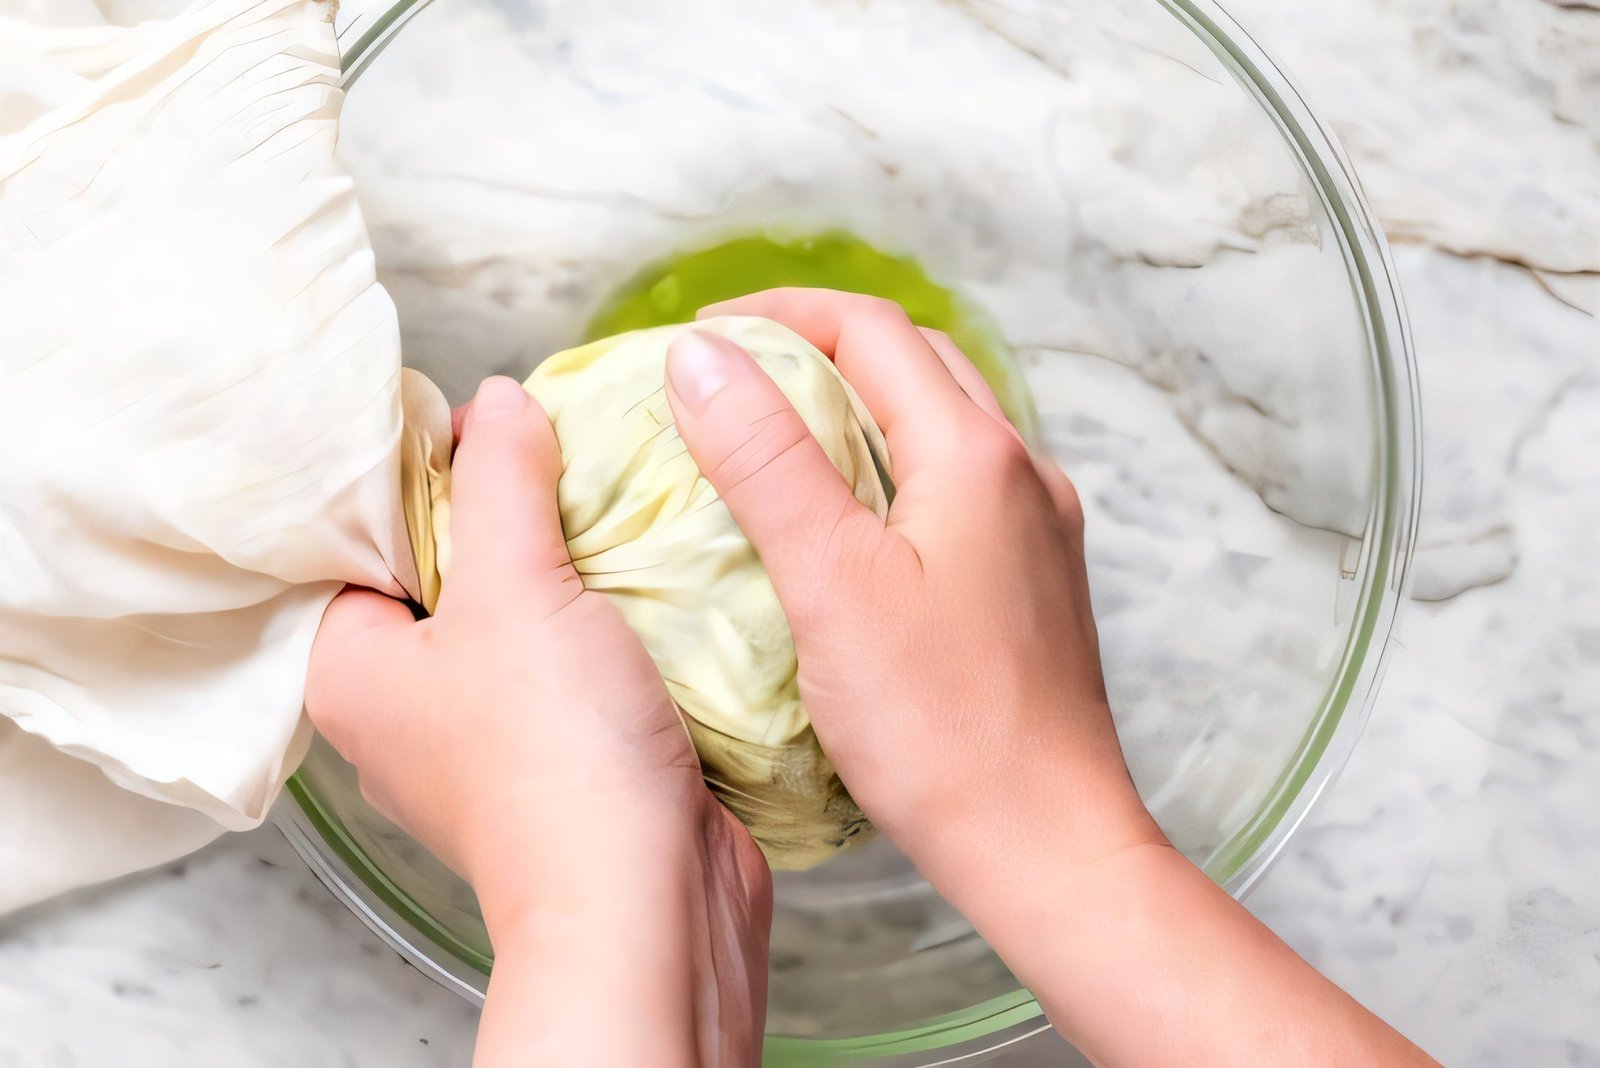
    2. Squeeze it dry. Wrap the shreds in a clean kitchen towel and squeeze out as much liquid as you can. This is the step everyone skips — and it’s the secret to crispy fritters.
    Hands squeezing moisture from shredded zucchini in a towel
    1. Mix the batter. In a large bowl, stir the zucchini with the eggs, feta, onion, mint, cumin, salt, and pepper. Stir in the flour until it’s evenly combined.
    Fritter batter mixed together in a large bowl
    1. Cook. Heat 1 teaspoon of olive oil in a large nonstick skillet over medium-low heat. Scoop about ¼ cup of the mixture into the pan for each patty — four at a time — and flatten gently with the back of the measuring cup.
    2. Flip and finish. Cook 3 to 5 minutes per side until golden and cooked through. Repeat with the rest of the batter, adding a little more oil as needed.
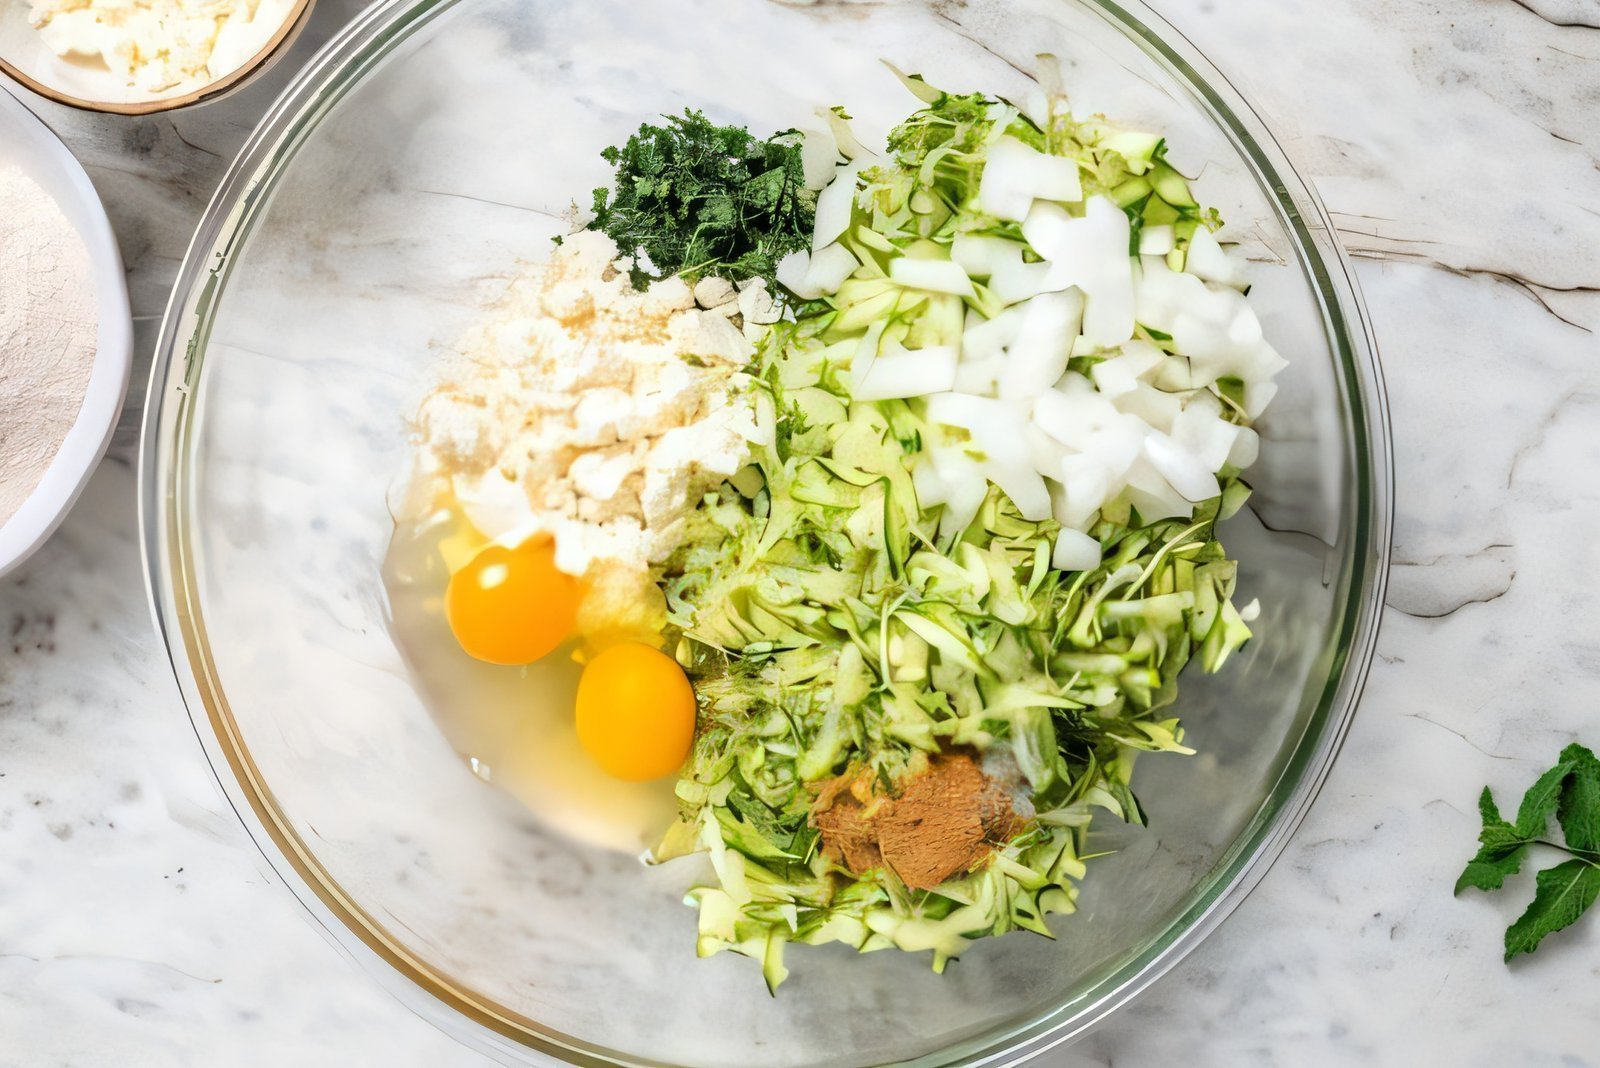
    Flour folded into the zucchini fritter batter

    Zucchini Fritters With Feta and Mint

    Course: Side Dish · Cuisine: Mediterranean

    Prep: 15 minutes · Cook: 15 minutes · Total: 30 minutes

    Yield: 8 servings · Serving size: 2 fritters

    Ingredients

    • 3 medium zucchini, about 1½ pounds, shredded
    • 2 large eggs, whisked
    • ½ cup crumbled feta cheese
    • ¼ cup diced yellow onion
    • ⅓ cup fresh mint leaves, chopped
    • ½ teaspoon ground cumin
    • ½ teaspoon salt
    • Ground black pepper
    • 1 cup whole wheat flour (or gluten-free flour blend)
    • 4 teaspoons extra-virgin olive oil

    Instructions

    1. Shred the zucchini using the largest holes on a box grater (or a food processor with a shredding disk).
    2. Wrap in a clean kitchen towel and squeeze out as much liquid as you can. Discard the liquid.
    3. Transfer to a large bowl and stir in the eggs, feta, mint, onion, cumin, salt, and pepper to taste.
    4. Stir in the flour.
    5. Heat 1 teaspoon olive oil in a large nonstick skillet over medium-low heat.
    6. Scoop out ¼-cup portions and drop them into the pan — about 4 at a time.
    7. Flatten the patties gently with the back of the measuring cup and cook until golden on both sides and cooked through, 3 to 5 minutes per side.
    8. Repeat to make the rest of the fritters.

    Per serving (2 fritters): 129 calories, 13 g carbs, 5.5 g protein, 6 g fat, 3 g fiber.

    Notes from my kitchen

    • Don’t skip the squeeze. Zucchini holds a lot of water. I squeeze the shreds until they almost feel dry to the touch — that’s the difference between a crisp patty and a soggy one.
    • Stay on medium-low. Like pancakes, high heat gets you a dark outside and a raw center. Patience wins.
    • Flatten them. Pressing each patty with the back of the measuring cup after it hits the pan helps the center cook all the way through.
    • Don’t crowd the skillet. Overpacked patties are hard to flip, and they steam instead of crisp up.

    Storage and reheating

    Leftovers keep in an airtight container in the fridge for up to 4 days. You can also freeze them: lay the cooked fritters in a single layer to freeze, then move them to a freezer-safe bag for up to 2 months. Reheat in a skillet, air fryer, or a 375°F oven until hot and crisp again. The microwave works in a pinch, but they won’t be crispy.

    Make it yours

    Mint out of season? Dill, basil, or parsley all work in its place. Swapping in a gluten-free flour blend makes these naturally gluten-free. And if you want a full dinner, top them with a simple tomato salad and call it a night — that’s exactly how we ate last week, and the plate was clean by 8.

    Happy cooking,
    Maya
    Keep Reading

  • Cloud Bread Recipe: That Viral TikTok Bread, Actually Made

    Cloud Bread Recipe: That Viral TikTok Bread, Actually Made

    I’ll be honest: I made this recipe three times before it worked. The first two attempts came out of the oven looking like deflated marshmallows, and my husband took one bite and just stared at me. But the third time? The cloud puffed up, jiggled when I touched it, and he actually said the word “impressive,” which from him is basically a standing ovation.

    Close-up texture of fluffy whipped meringue cloud bread

    If you’ve ever scrolled past a video of someone ripping open a giant, impossibly fluffy puff of “bread” that squishes like a stress ball, this is it. Cloud bread has exactly three ingredients: egg whites, sugar, and cornstarch. Under the hood it’s a softly baked meringue wearing a different hat — if you’ve had pavlova, lemon meringue pie, or a macaron, you’ve already eaten cloud bread. You just didn’t know it.

    What you get and how long it really takes

    Real time: 30 minutes. Hands-on: 10. One bowl, one mixer, one small baking sheet. It serves one generous cloud — think of it as a weekend afternoon treat, not dinner. And here’s the honest part up front: it’s more looks than taste. More on that below, because I think you need the truth before you commit to the eggs.

    Ingredients

    • 3 large egg whites (about 6 tablespoons from a carton). You can crack and separate your own, but get zero yolk in the whites or they won’t whip. I cheat and buy egg whites in a carton — it’s the move.
    • 2.5 tablespoons sugar (about 30 grams). Regular white sugar. This is what stabilizes the whites and gives the bread a little sweetness.
    • 1 tablespoon cornstarch (about 10 grams). A tiny amount, just to soak up extra liquid and give the meringue shine. No cornstarch? All-purpose flour works fine at this small quantity.
    • Food coloring — optional, if you want rainbow clouds for the kids (or the kid in you).

    Method

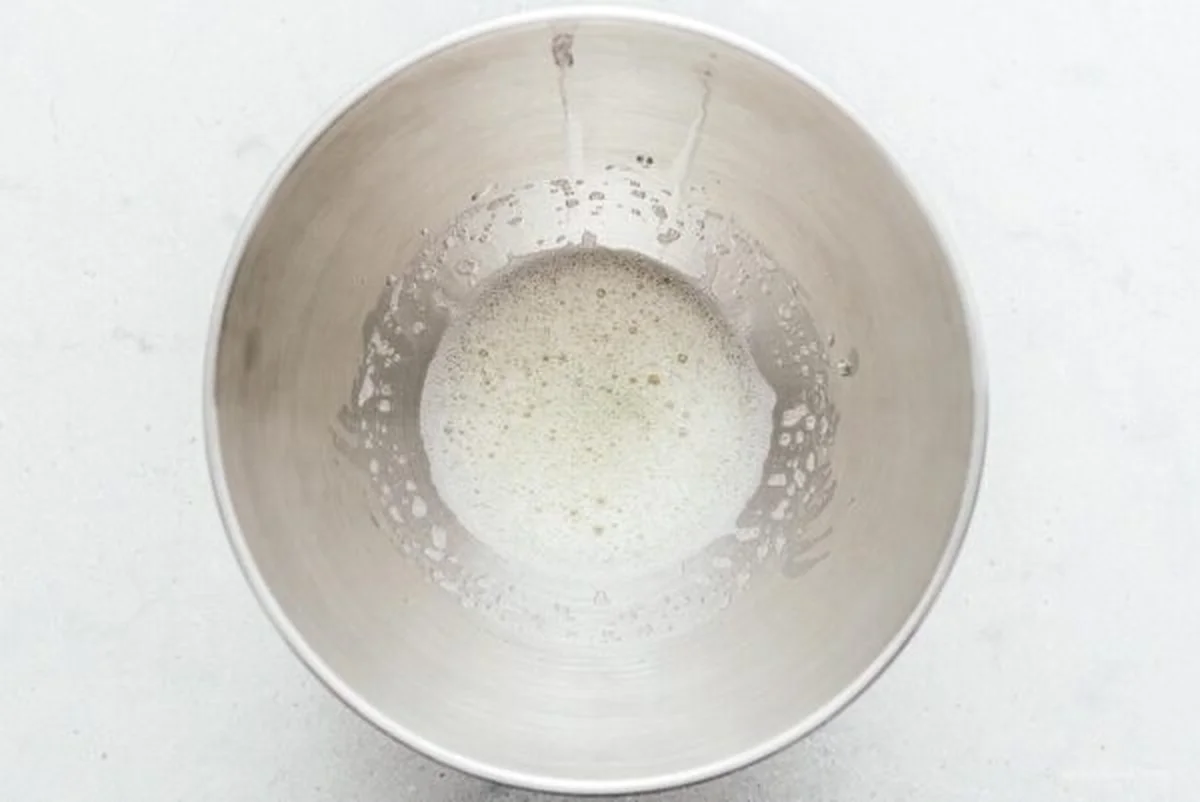
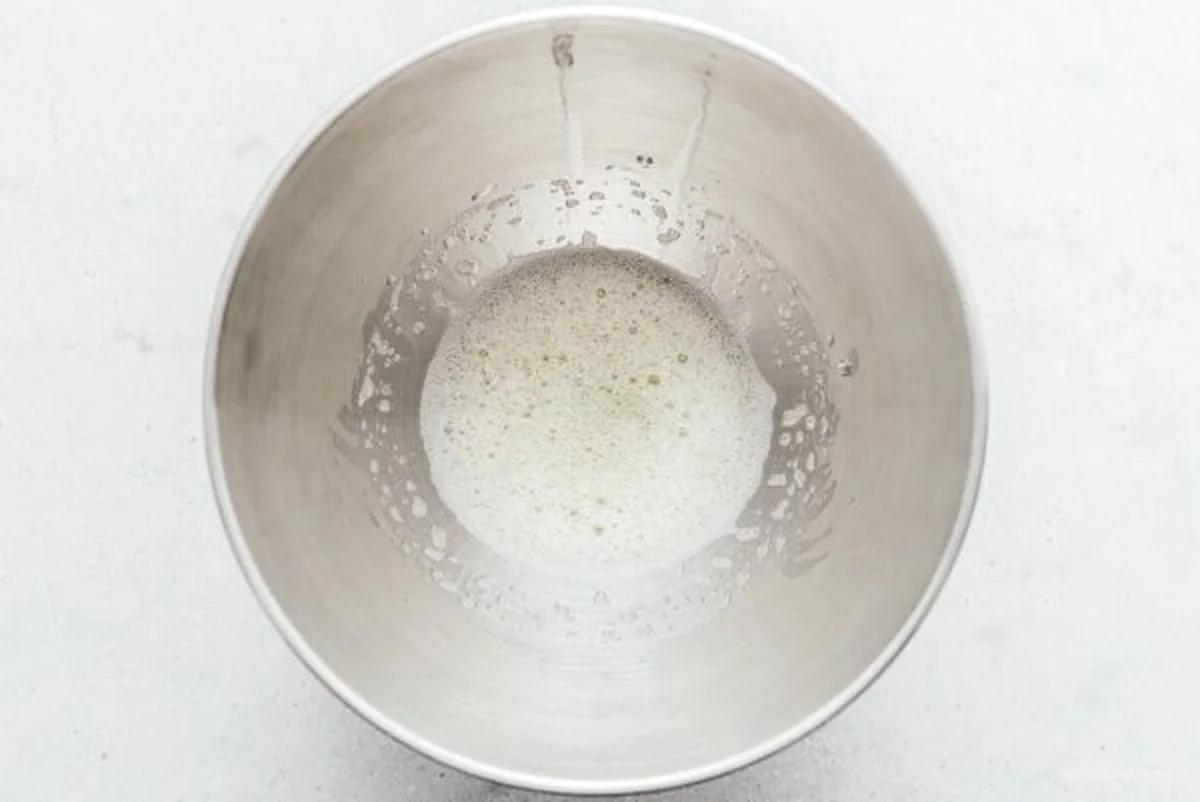
    1. Warm the whites, then whip. Separate eggs cold, but let the whites come to room temp before whipping — they whip up better. Get them into a very clean, grease-free stainless steel or glass bowl. (Skip plastic and silicone bowls; they hold invisible oil residue that ruins the whip.) Start on medium-low until frothy and pale.

    Frothy egg whites just starting to whip in a steel bowl

    2. Sugar in slowly. Add the sugar gradually, one tablespoon at a time, on high speed, until it dissolves and the whites start foaming. All the sugar at once and you’ll lose fluff you can’t get back.

    3. Sift in the cornstarch. Sifting keeps it lump-free. Keep whipping on high until the meringue is glossy, thick, and holds a stiff peak — about 5-6 minutes. Lift the beaters: the peak should stand up, and if you tilt the bowl, the meringue shouldn’t slide. Watch for grainy or weepy texture — that’s over-beaten, and over-beaten means deflated clouds.

    Mixing bowl with whipped egg white residue after shaping

    4. Shape the cloud. Preheat the oven to 300°F while you work. Using a rubber spatula, scoop the meringue onto a parchment-lined baking sheet and shape it into a fluffy cloud or mound. No perfect shape required. It’s a cloud. Let it be a cloud.

    5. Bake low and slow. 20-25 minutes at that 300°F, until the outside is a light golden brown. It will wrinkle as it cools — that’s normal, it’s the soufflé side of its nature. Eat it while it’s still a little warm.

    What does it actually taste like

    Full disclosure: light, airy, full of tiny air bubbles, and very, very squishy. Texture-wise it’s close to angel food cake. Taste-wise it’s a marshmallow that’s had a rough day. It tastes a little like egg, because egg is basically the whole recipe. If you want it sweeter and less eggy, bump the sugar up to 6 tablespoons and stir in 1 teaspoon of vanilla or almond extract when you add the cornstarch. Trade-off: it gets a bit stiffer and less fluffy, but it tastes a lot more like meringue.

    When it goes wrong (it will, at least once)

    Whites won’t whip no matter what you do. It’s fat. A drop of yolk, oil on the bowl, even grease on your hands while separating — fat is the enemy of meringue because it stops the egg proteins from bonding. Start with a spotless bowl and hands.

    Still stuck? Add 1/4 teaspoon of cream of tartar, white vinegar, or lemon juice to the raw whites before whipping. The acid stabilizes them and helps them get extra fluffy. I’ve tried this and it genuinely helps.

    Golden on the outside, raw inside. Your oven is running hot — some ovens have hot spots and won’t calibrate. Just put it back in the low oven for a few more minutes until it’s set through.

    Wrinkly and sad. That’s just cloud bread. There’s no flour to hold its shape, so it shrinks and wrinkles as it cools. It’s also extremely fleeting — don’t try to make it ahead. It’s best eaten straight from the oven.

    Do you need a stand mixer?

    Technically, no. A hand whisk or hand mixer gets the job done, but it will take a long time and some serious arm. A small milk frother works surprisingly well too, which is how I got through attempt one. Your choice — the cloud is the same either way.

    Sugar swap

    If you’re avoiding sugar, stevia, Splenda, or a monkfruit sweetener will keep it sugar-free. The meringue won’t fluff up quite as much, but it works.

    Make it yours

    Add vanilla or almond extract with the cornstarch for a meringue-like flavor. Dye the whites pastel blue or pink before baking — it turns out gorgeous and makes the squish test even more fun. Top it with a few drops of melted white chocolate or a sprinkle of flaky salt while it’s still warm. And if you’re making it for two people, just double the batch: two clouds, one very quiet kitchen competition.

    The recipe is credited to @linqanaaa and @abimhn on TikTok — go watch them squish some clouds.

    Happy cooking,
    Maya
    Keep Reading

  • Marry Me Chicken: A 30-Minute Creamy Dinner Worth the Name

    Marry Me Chicken: A 30-Minute Creamy Dinner Worth the Name

    It was a Thursday. I’d been standing over a pan for an hour, sauce thinning out, and I was done pretending that “quick and easy” was a real category. Then I tried this one. My husband took one bite, looked up from the table, and said he’d marry me for it. He’s married me anyway, but the chicken gets all the credit around here.

    Creamy marry me chicken with sun-dried tomato sauce in a skillet

    Here’s the honest version: this is a 30-minute skillet dinner, 6 servings, and the sauce does all the heavy lifting. Real time: 30 minutes, split 10 prep and 20 cook. You’ll want a quality skillet, and an instant-read thermometer if you have one — chicken cutlets are thin and they go from perfect to sad fast.

    Why this one earns the name

    What makes it work

    The sauce simmers in the same pan that seared the chicken, so it picks up the browned bits and turns savory. The Parmesan melts into the cream and gives it that depth that makes people ask what you actually did. It’s creamy, it’s garlicky, and it’s the kind of dish that works as a date night or a tired-night dinner that still feels like an occasion.

    Ingredients

    Everything is pantry-friendly. The only “special” thing is the sun-dried tomatoes, and most stores keep them near the pasta or in the canned goods aisle.

    • 6 boneless, skinless chicken breasts, sliced into thin cutlets
    • 1/2 teaspoon kosher salt
    • 1/4 teaspoon freshly ground black pepper
    • 6 tablespoons all-purpose flour (or gluten-free flour)
    • 2 tablespoons olive oil
    • 2 tablespoons unsalted butter
    • 3 cloves garlic, minced
    • 1 cup chicken stock
    • 1 cup heavy cream (full fat — half and half makes a thin sauce)
    • 1 cup freshly grated Parmesan
    • 1/2 teaspoon dried oregano
    • 1/2 teaspoon dried thyme
    • 1 teaspoon crushed red pepper flakes (optional)
    • 1 cup oil-packed sun-dried tomatoes, drained and chopped
    • Fresh basil, chopped, to finish

    How to make it

    1. Slice each breast lengthwise into cutlets. Season with salt and pepper, then dust lightly in flour, shaking off the excess.
    2. Heat the olive oil and butter in a large skillet over medium heat. When the butter is foaming, add the chicken in a single layer. Cook 4-5 minutes per side until golden and cooked through. Set aside on a plate.
    3. Turn the heat to medium-low. Add the garlic to the same pan and cook about 30-60 seconds until fragrant.
    4. Pour in the chicken stock and scrape up the browned bits. Stir in the cream and bring to a gentle simmer.
    5. Add the Parmesan, oregano, thyme, and red pepper flakes. Stir until the cheese melts and the sauce starts to thicken.
    6. Stir in the sun-dried tomatoes, then nestle the chicken back in the pan. Spoon sauce over it and simmer 3-5 minutes until the sauce coats a spoon and the chicken is hot all the way through.
    7. Shower with fresh basil and serve straight from the pan.

    Tips from the counter

    • Even cutlets cook evenly. If your breasts are uneven, flatten them with a meat mallet before slicing.
    • Trust the thermometer. Thin cutlets need no guesswork — check the instant read and pull the chicken when it hits target temperature. It’ll be tender, not dry.
    • If the sauce gets too thick, loosen it with a splash of broth or cream.
    • Serve over pasta or mashed potatoes, with crusty bread for mopping the pan clean.

    For wine, a French Chardonnay, a South African Chenin Blanc, or a crisp Pinot Grigio all stand up to the richness. Anything that can hold its own against cream and Parmesan.

    Marry me chicken, answered

    Is it the same as Tuscan chicken? Close cousins. Both are chicken in a rich, herby sauce. Tuscan chicken usually has spinach and basil; this one leans creamier and uses just oregano and thyme, with sun-dried tomatoes doing the heavy work.

    Can I use thighs? Yes — skinless thighs work fine, though they need a slightly longer simmer to heat through.

    What if I can’t find oregano or thyme separately? Italian seasoning is a fine stand-in.

    Dairy-free? Coconut milk can replace the cream. The sauce will be a bit thinner, so let it reduce a little longer or thicken it with a small amount of flour.

    Leftovers? Keep them in an airtight container in the fridge for up to 3 days. I don’t freeze it — creamy sauces don’t always come back right. Reheat on the stovetop over medium heat for 5-10 minutes, or in the microwave on half power in 1-minute intervals.

    Pasta or potatoes? I go with creamy mashed potatoes. But the flavors are very Italian, and it’s just as right over pasta.

    What’s the story behind the name? The joke goes that the dish is so good someone would marry it. Food editors landed on the phrase and it stuck. Make it for the person you love — you never know.

    Make it yours

    This is a slow-cooker-friendly recipe if you want to flip it into a set-and-forget version — just add everything and let it go low for a few hours. Chicken bouillon works in place of stock. And if you’ve ever wanted a one-dish dinner that disappears fast, start here: the pan is clean in 10 minutes because you cooked in it.

    Happy cooking,
    Maya
    Keep Reading

  • Pasta alla Norma (Roasted Eggplant Version)

    Pasta alla Norma (Roasted Eggplant Version)

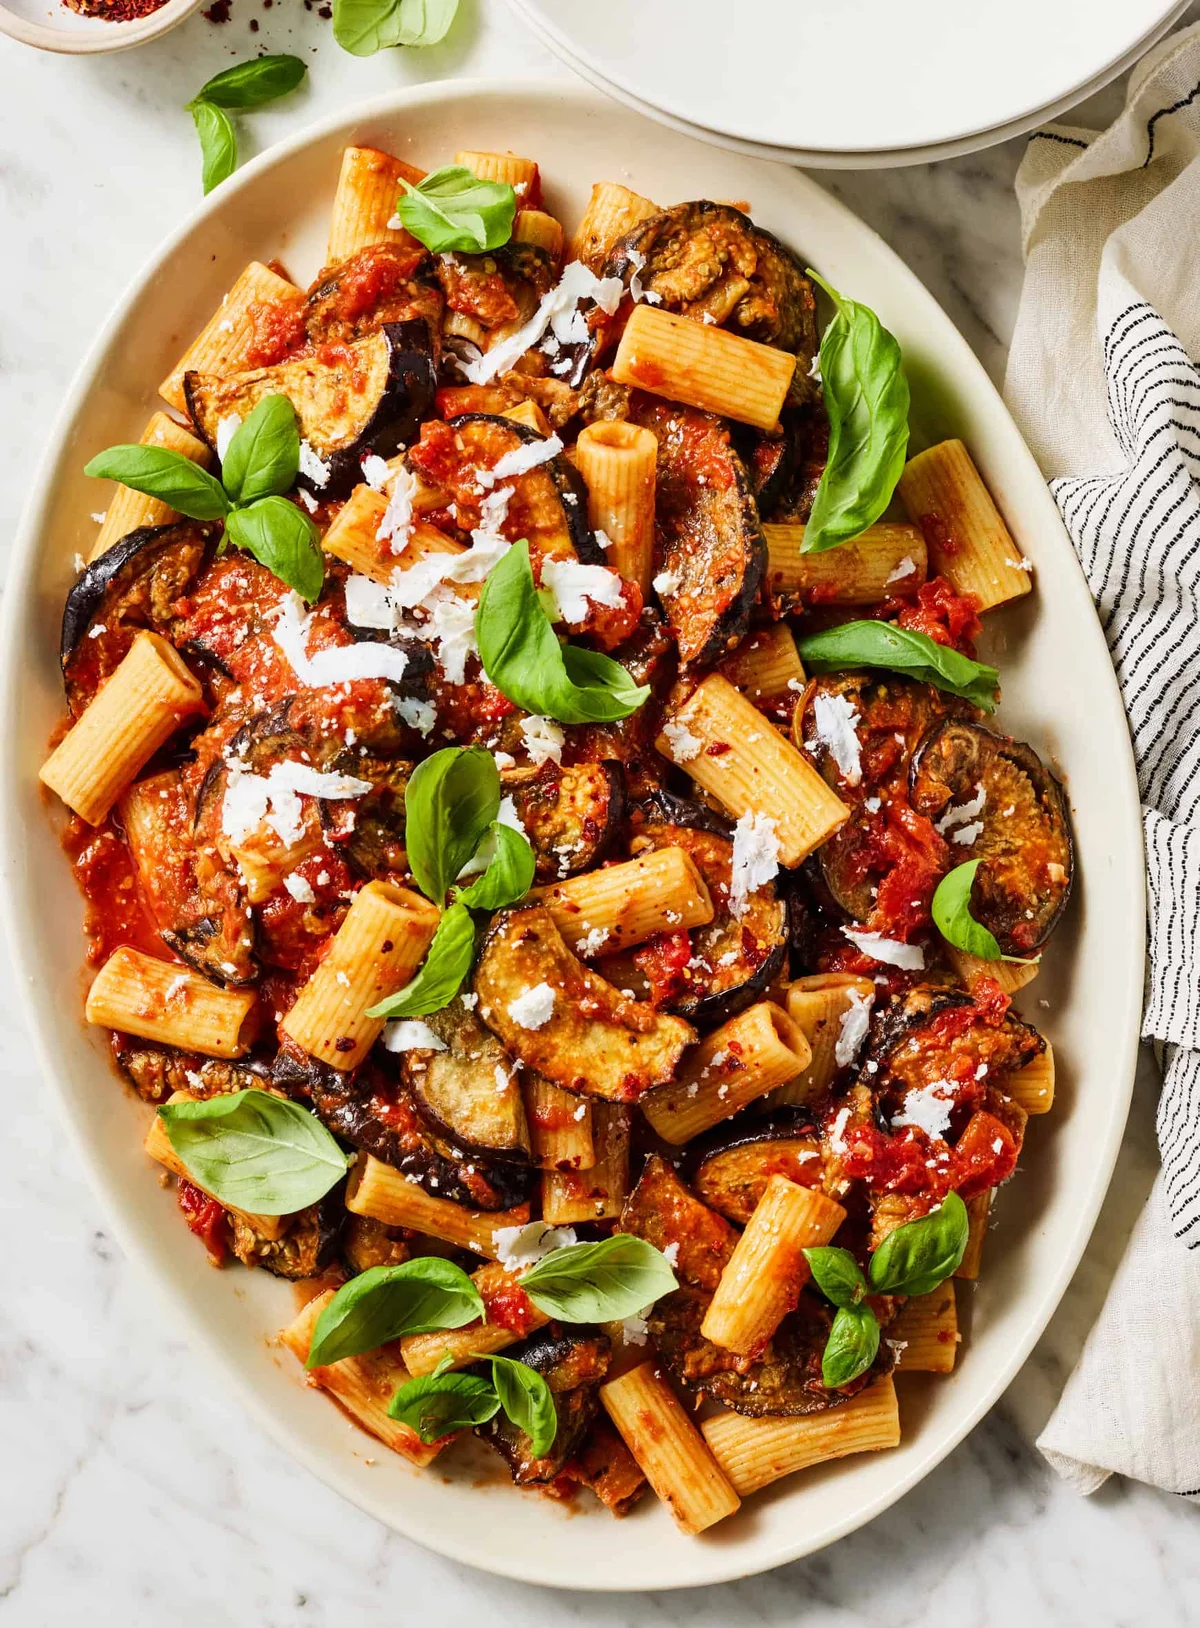
    The kitchen clock read 6:47 and we were out of ideas. My husband was on his phone at the table, I was staring at the fridge, and the only thing on the counter was an eggplant that had been getting better-looking by the day. So we did what we always do when the week collapses into the weekend: we went to the pantry and picked a classic. This is that dinner — a Sicilian pasta called alla Norma, with a garlicky tomato sauce, tender eggplant that practically melts into it, and a shower of ricotta salata and basil on top.

    Platter of pasta alla Norma with eggplant, tomato sauce, basil, and grated cheese

    Real time: 1 hour. Hands-on: about 25 minutes. The oven does most of the work, which is exactly how I want a Sunday night to go.

    Why This Dish, Why Now

    Pasta alla Norma comes from Catania, Sicily, and it’s the dish I make whenever eggplant is at its best — deep purple, heavy for its size, skin tight. The traditional version fries the eggplant, and honestly, I love it that way too. But for a real evening, I roast it. It’s hands-off: the eggplant caramelizes in the oven while the sauce simmers and the pasta boils, and there’s far less oil than a skillet would call for. Everything finishes at the same time, which is the whole trick.

    What You’ll Need

    • 2 medium eggplants, about 2 pounds — I use Italian globe or graffiato types because they have more flesh to skin. Look for taut skin that feels heavy.
    • 1 (28-ounce) can whole peeled tomatoes — crushed by hand for an irregular, natural texture. Crushed canned tomatoes work in a pinch.
    • 5 tablespoons extra-virgin olive oil, divided
    • 12 ounces rigatoni or ziti — the tubes capture the thick sauce. Long shapes like spaghetti and linguine work great too.
    • 2 tablespoons tomato paste
    • 3 garlic cloves, chopped
    • 1 teaspoon dried oregano
    • ¼ teaspoon red pepper flakes — skip them if you’re sensitive to spice
    • ¼ teaspoon sea salt, plus more for sprinkling
    • ½ cup grated ricotta salata, plus more for serving. It’s a firmer, aged, salty cheese — not the soft ricotta from lasagna. Pecorino Romano is a good substitute; Parmesan works in a pinch.
    • Fresh basil leaves, for garnish
    • Freshly ground black pepper
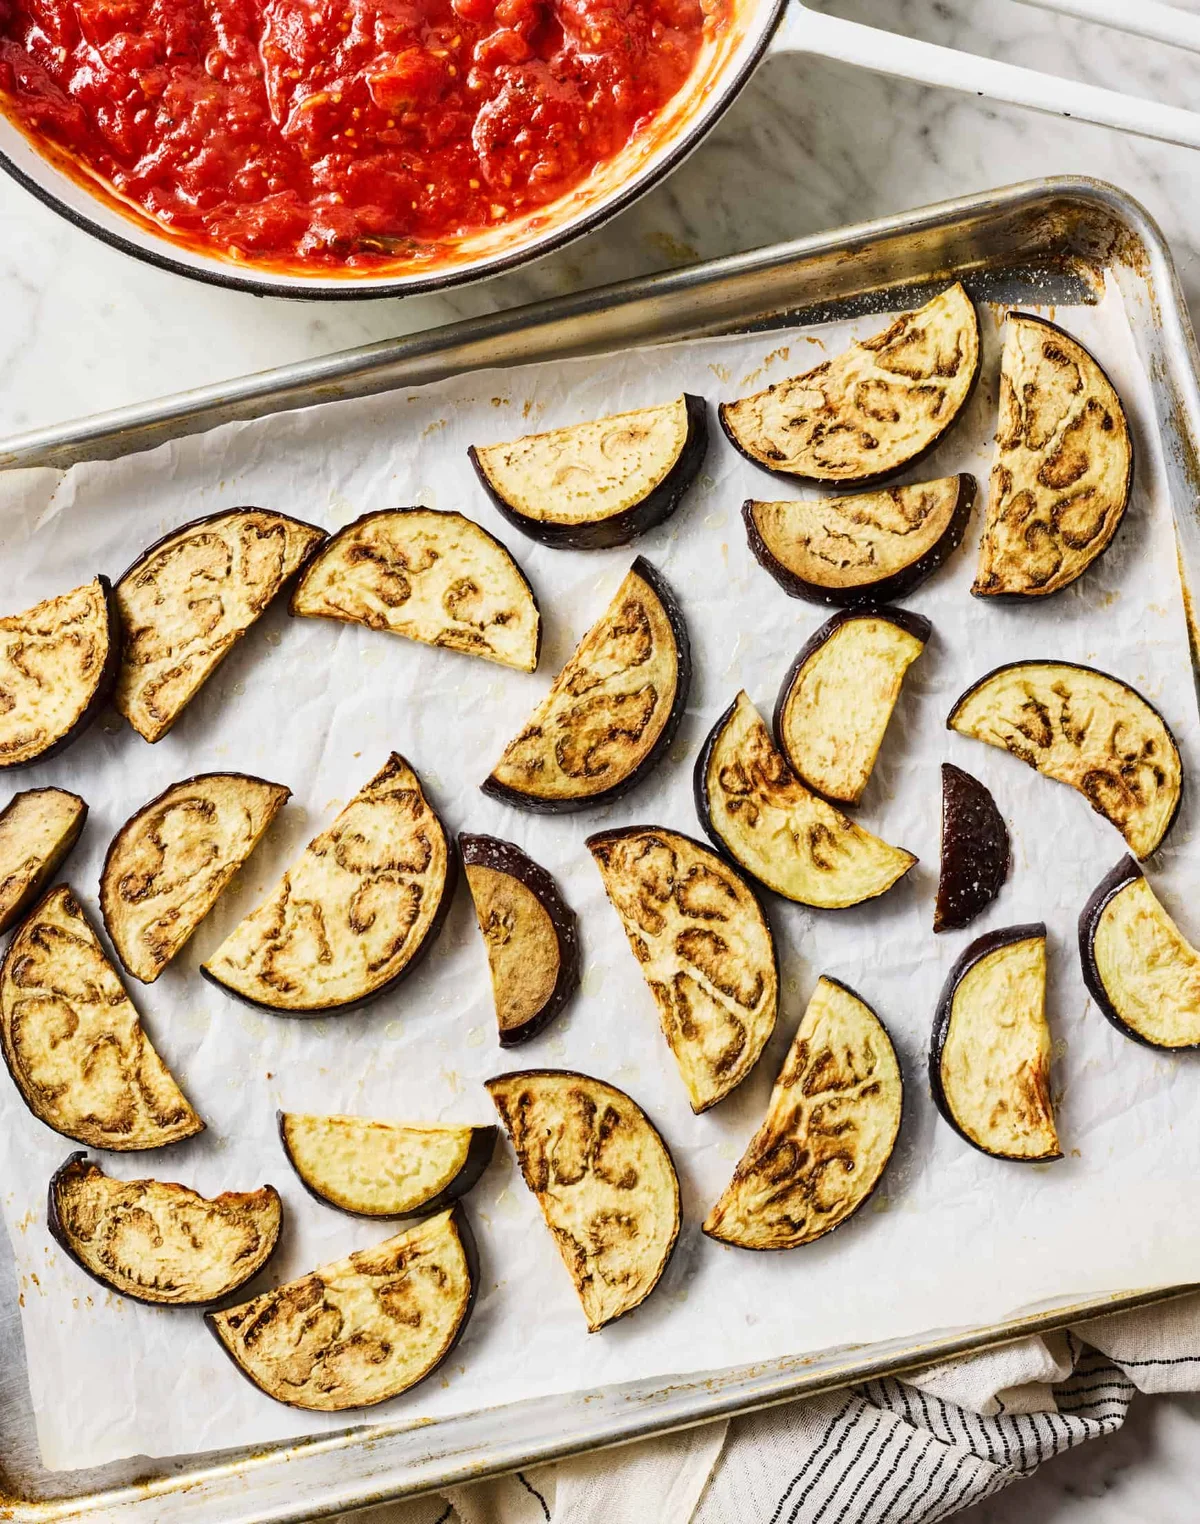
    Roasted eggplant half-moons on parchment-lined baking sheets in the oven

    How to Make It

    1. Preheat the oven to 425°F and line two large baking sheets with parchment paper. Put the tomatoes and their juices in a large bowl and crush them with your hands. Set aside.
    2. Halve the eggplants lengthwise, then cut each half into ¼- to ½-inch-thick half-moons. Cut any very large half-moons in half to form wedges. Divide them between the two sheets, drizzle each with 2 tablespoons of the oil (4 tablespoons total), sprinkle generously with salt and pepper, and toss to coat. Spread evenly and roast for 25 to 35 minutes, until tender and lightly browned.
    3. Bring a large pot of salted water to a boil and cook the pasta until al dente, per the package directions.
    4. Meanwhile, heat the remaining 1 tablespoon of olive oil in a large skillet over medium heat. Add the garlic, oregano, and red pepper flakes and sizzle for 30 seconds. Stir in the tomato paste, then add the crushed tomatoes, salt, and several grinds of pepper. Simmer for 10 minutes, until slightly thickened.
    5. When the pasta is al dente, use a spider (a large slotted spoon) to transfer it straight from the pot into the skillet with the sauce. Add the roasted eggplant and stir to coat. Add the cheese and stir until melted, loosening it with a splash of pasta water as needed.
    6. Season to taste and serve topped with basil and more cheese, if you like.

    Rigatoni and roasted eggplant being tossed in tomato sauce in a pot

    Notes From My Counter

    • Time the pasta with the sauce. My number one tip for a simple pasta night is to move the pasta straight from the pot into the sauce. It arrives lightly coated in starchy cooking water, which seasons the sauce and helps it cling. Prep the sauce ingredients before the pasta goes in, and simmer it while the pasta boils so everything finishes together.
    • Pasta water melts cheese. If the ricotta salata isn’t melting smoothly, add pasta water a little at a time to warm it and loosen it into the sauce. Sprinkle the cheese evenly over the pasta rather than in one pile, and it goes in faster.
    • Get ahead. Roast the eggplant up to 3 days ahead and keep it in the fridge until you’re ready. The full sauce keeps in the refrigerator for up to 3 days and freezes well for up to 3 months.

    Make It Yours

    Swap fresh parsley, thyme, or oregano for some of the basil if that’s what you have on hand. And if your kitchen can handle a second pot, this sauce is great with rigatoni the next night too.

    Happy cooking,
    Maya
    Keep Reading

  • Sweet Tartlet Shells: A 5-Ingredient Crust You’ll Actually Want to Eat

    Sweet Tartlet Shells: A 5-Ingredient Crust You’ll Actually Want to Eat

    The first time I made these tartlet shells, I had a whole bag of fresh raspberries in the fridge and absolutely no idea what to do with them. I’d been making big sharing tarts forever, but the idea of a proper single-serve shell I could actually eat with my hands without it falling apart? That won me over.

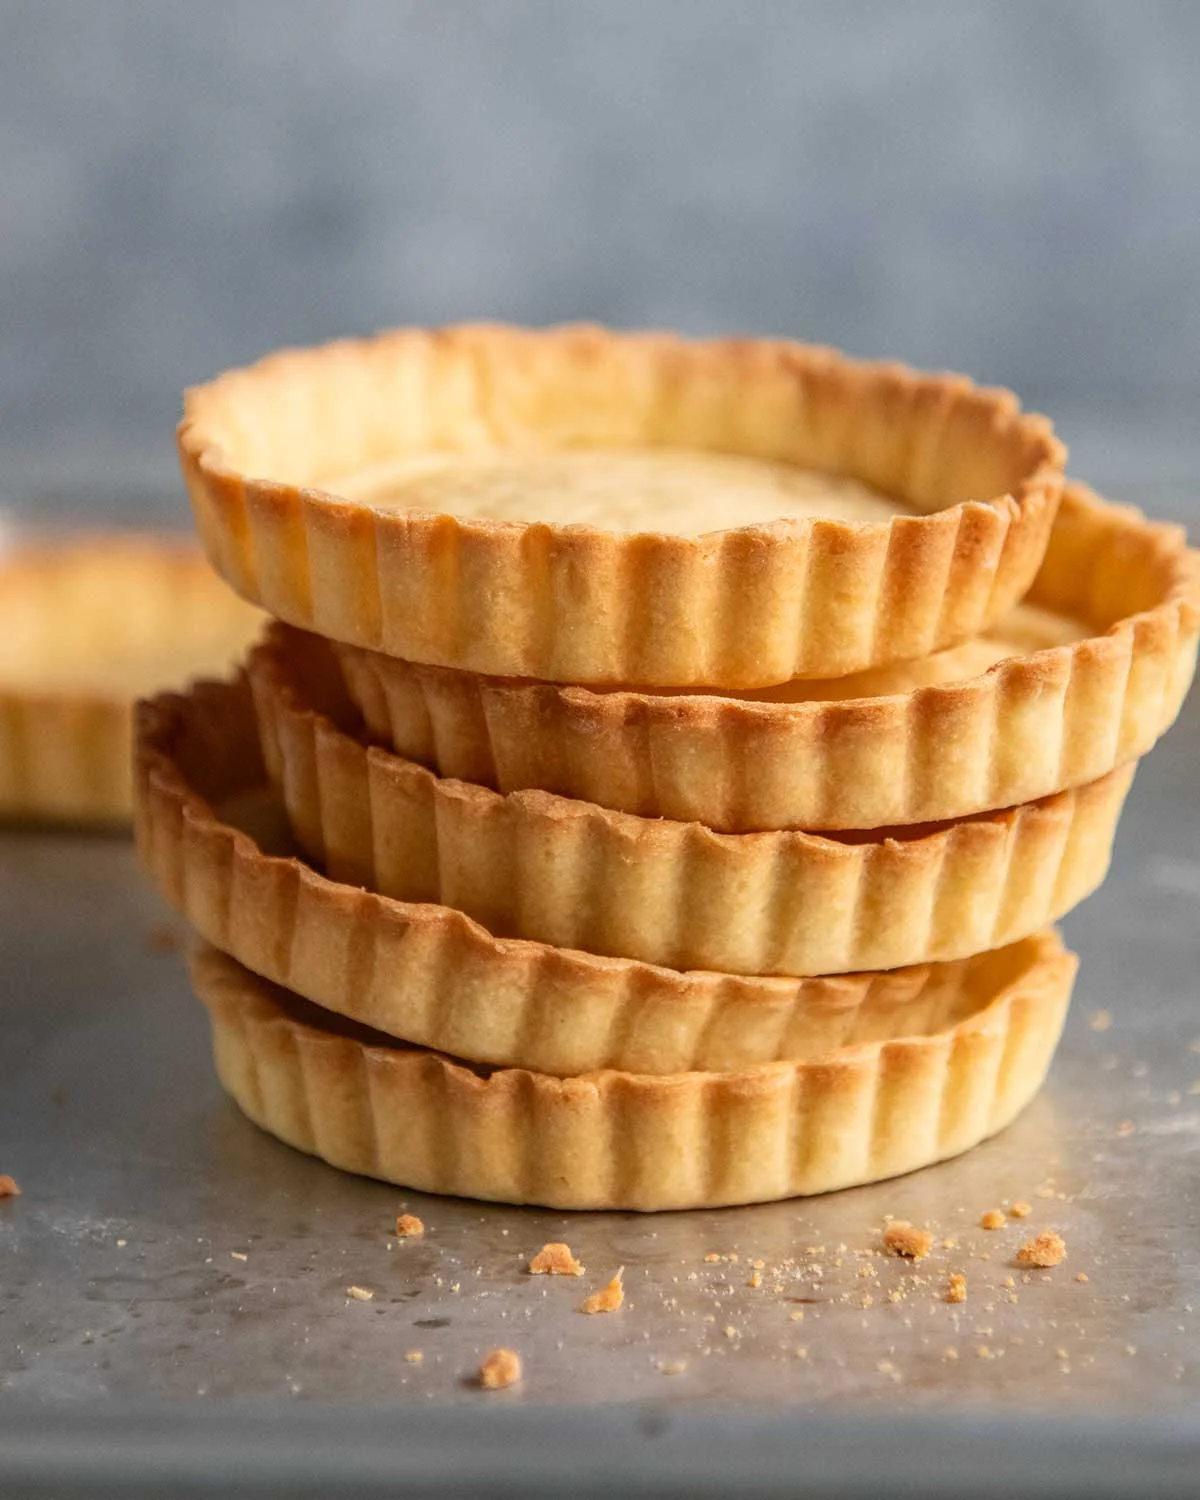
    Stack of golden individual tartlet shells ready to fill

    So I made pâte sucrée — the classic French pastry for sweet tarts — and it’s been my default ever since. It’s crisper and more delicate than regular shortcrust, and the dough is easier to work with. No crumbling mess when you take a bite. You get a shell that holds together while still feeling light.

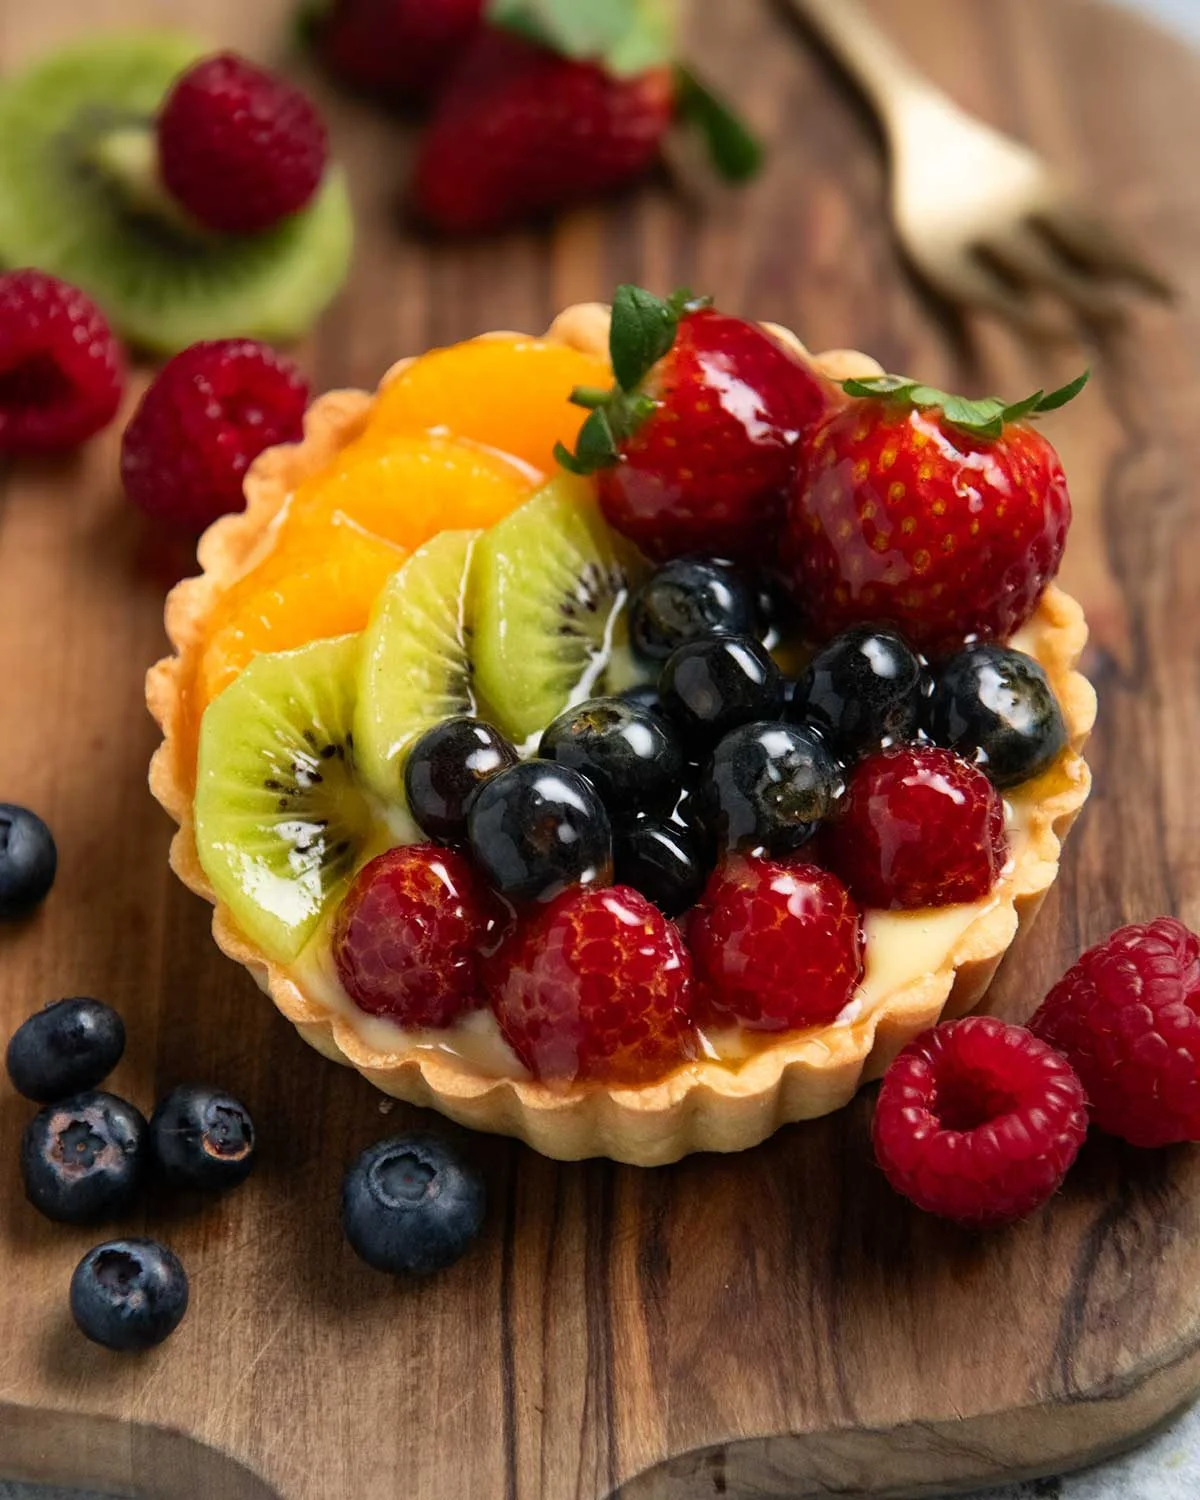
    Small fruit tart held in hand with glossy glaze

    Real time: about 1 hour and 32 minutes total, but only 20 minutes of it is hands-on. The rest is chilling in the fridge and baking. If you’ve ever looked at a French pastry recipe and felt it was asking too much of a Sunday afternoon, this is the one to start with.

    What you’ll need

    • 1 1/2 cups plain (all-purpose) flour
    • 1/2 cup soft icing sugar (powdered sugar), sifted
    • 2 1/2 tbsp almond meal (ground almonds) — not the finer almond flour
    • 1/4 tsp salt
    • 100g / 7 tbsp unsalted butter, softened and cut into small cubes
    • 1 large egg, at room temperature (about 50–55g / 2 oz)

    The almond meal and icing sugar are what set pâte sucrée apart from a regular shortcrust. The almond adds a quiet nuttiness that plays well with sweet fillings and keeps the texture a little more tender. The egg is what makes the dough actually pliable instead of prone to cracking.

    Can’t find almond meal? Ground hazelnuts work as a substitute, though the crust will taste of hazelnut instead. And if the icing sugar is on the coarser side, sift it so it folds into the dough smoothly.

    How to make the dough

    I used to make this by hand, mostly because it felt like it earned me extra French pastry points. Then I discovered the food processor takes about 30 seconds and comes out exactly the same. Now I use it. On a slow Sunday with nowhere to be, I still like the hands-on version, but I won’t pretend it’s the practical choice.

    By hand: Mix the flour, icing sugar, almond meal, and salt in a bowl. Rub the butter in with your fingertips until it looks like breadcrumbs — about 5 minutes at a leisurely pace. Then mix in the egg with a wooden or rubber spatula until it’s too thick to stir. Finish by kneading in the bowl with your hands until it comes together into a smooth ball.

    Food processor (about 30 seconds): Pulse the dry ingredients once to combine. Add the butter and pulse 4 to 5 times until it looks like breadcrumbs. Add the egg and pulse for 15 to 20 seconds until a dough ball forms.

    Turn the dough out onto a work surface. Knead lightly, then shape it into a disc about 2cm / 0.8 inch thick. Wrap it tightly in cling wrap and refrigerate for 30 minutes. This firms up the butter, which is what gives you the crisp, flaky edge in the finished shell.

    Rolling out and lining the tins

    For six standard tartlet tins around 12cm / 4.7 inch in diameter, the most efficient way is to portion the dough into six equal pieces and work with them individually. Cut the disc like a pizza, then roll each piece into a ball.

    Roll each ball out into a round about 15cm / 6.5 inch in diameter — roughly 3mm / 1/8 inch thick. Drape it into a tartlet tin and gently fold it into the corners. Don’t pull or stretch the pastry; that’s what makes it shrink in the oven. You don’t need to grease the tins, even if they aren’t non-stick. The butter in the pastry does that job on its own.

    Run the rolling pin across the top of the tin to trim off the excess. Prick the base with a fork about 10 times, not all the way through — this stops the base from puffing up during the blind bake. Refrigerate for another 30 minutes before baking. Think of it as an insurance policy for the butter in case it got too soft while you were rolling.

    If you’re making mini shells in a muffin tin instead, skip the individual balls. Roll the whole dough into one large sheet, cut out rounds with a cutter, line the tins, then gather the scraps and re-roll as needed. It’s a simpler workflow for a lot of small tins.

    Baking

    Preheat your oven to 200°C / 390°F (180°C fan-forced). For each tartlet, cut a piece of baking paper about 50% larger than the tin, crumple it into a ball, then unfold it. The creases make it flexible, so it presses neatly into the base and corners instead of springing back like a flat sheet would.

    Fill each lined tin with baking beads, or uncooked rice, or dried beans. The weights keep the shell in shape — they stop the base from puffing and the walls from sliding down as the butter melts.

    Bake for 12 minutes. If the tarts are going to be filled with something that needs to bake — frangipane, baked custard — leave them in for another 5 minutes after removing the weights, so the edges turn light golden. If they’re getting a no-bake filling like custard cream or chocolate ganache, bake for a full 14 minutes from the start so the base cooks all the way through. It’s a small difference, but it saves you from an underbaked base later.

    Use the paper overhang to pull out the beads — they’re hot, so give them a moment. Then let the shells cool completely in the tins before you fill or use them.

    For mini shells in a muffin tin, the timing changes: 12 minutes with the weights, then only 2 minutes uncovered to just get them golden. Smaller tins bake faster, and you don’t want them going past light golden.

    Mini raspberry tartlets lined up in a muffin tin

    What to put in them

    The shells are the blank canvas. No-bake fillings work great: pastry cream with fresh fruit, lemon curd, chocolate ganache, cheesecake filling, mousse. Baked fillings work too — almond cream frangipane with fresh raspberries on top is a favorite, or a baked custard. Just remember to blind bake for the shorter time first if the filling will go back into the oven, so the crust doesn’t get overly brown.

    Fresh fruit tart with custard cream and berries

    Unfilled shells keep for 3 days in an airtight container. Fridge if it’s hot out, pantry if it’s mild. The dough itself can be made ahead and kept in the fridge for up to 2 days; let it sit at room temperature for 20 to 30 minutes before you roll.

    A few quick answers

    Can I make a single large tart instead? Yes, but a recipe designed for one large tart handles the rolling and baking a bit differently, so it’s worth looking for one specifically for that size.

    What if I don’t have tartlet tins? A regular or mini muffin tin works fine. Roll one large sheet, cut circles, line the tins. Adjust the final bake down to 2 minutes uncovered.

    Can I skip the almond meal to make it nut-free? Probably fine — it’s a small amount and mainly there for flavor and texture. If the dough feels a little too sticky when you bring it together, dust a little extra flour on it and knead briefly.

    Will gluten-free flour work? I haven’t tested it. The absorbency is different, so I can’t promise the pastry will hold up the same way. Try it, but don’t be surprised if the texture shifts a bit.

    Make it yours

    Once you’ve got a batch of shells cooling on the counter, the filling is really up to you. A spoon of lemon curd and a few raspberries in summer. Chocolate ganache and a crack of sea salt in winter. Almond cream and fresh blackberries when you want something that tastes like a patisserie without the queue. The shell does the work; you just get to decide what it’s holding.

    Happy cooking, Maya
    Keep Reading

  • Almond Flour Scones (Gluten Free)

    Almond Flour Scones (Gluten Free)

    My husband asked for blueberry scones on a Saturday morning — the kind I made once before with all-purpose flour. Then he mentioned in passing that a coworker with celiac could finally join us for brunch.

    So I set about making them with almond flour. It took seven tries to get right, but the version below is the one that stays in the rotation. Tender insides, a light crunch along the edges, blueberries that burst when you bite in. You don’t even taste the almond much, and you don’t need to cut them out of your life at all — gluten-free or not, these are a keeper.

    Real time: 30 minutes · Hands-on: 15 minutes · Yield: 8 scones

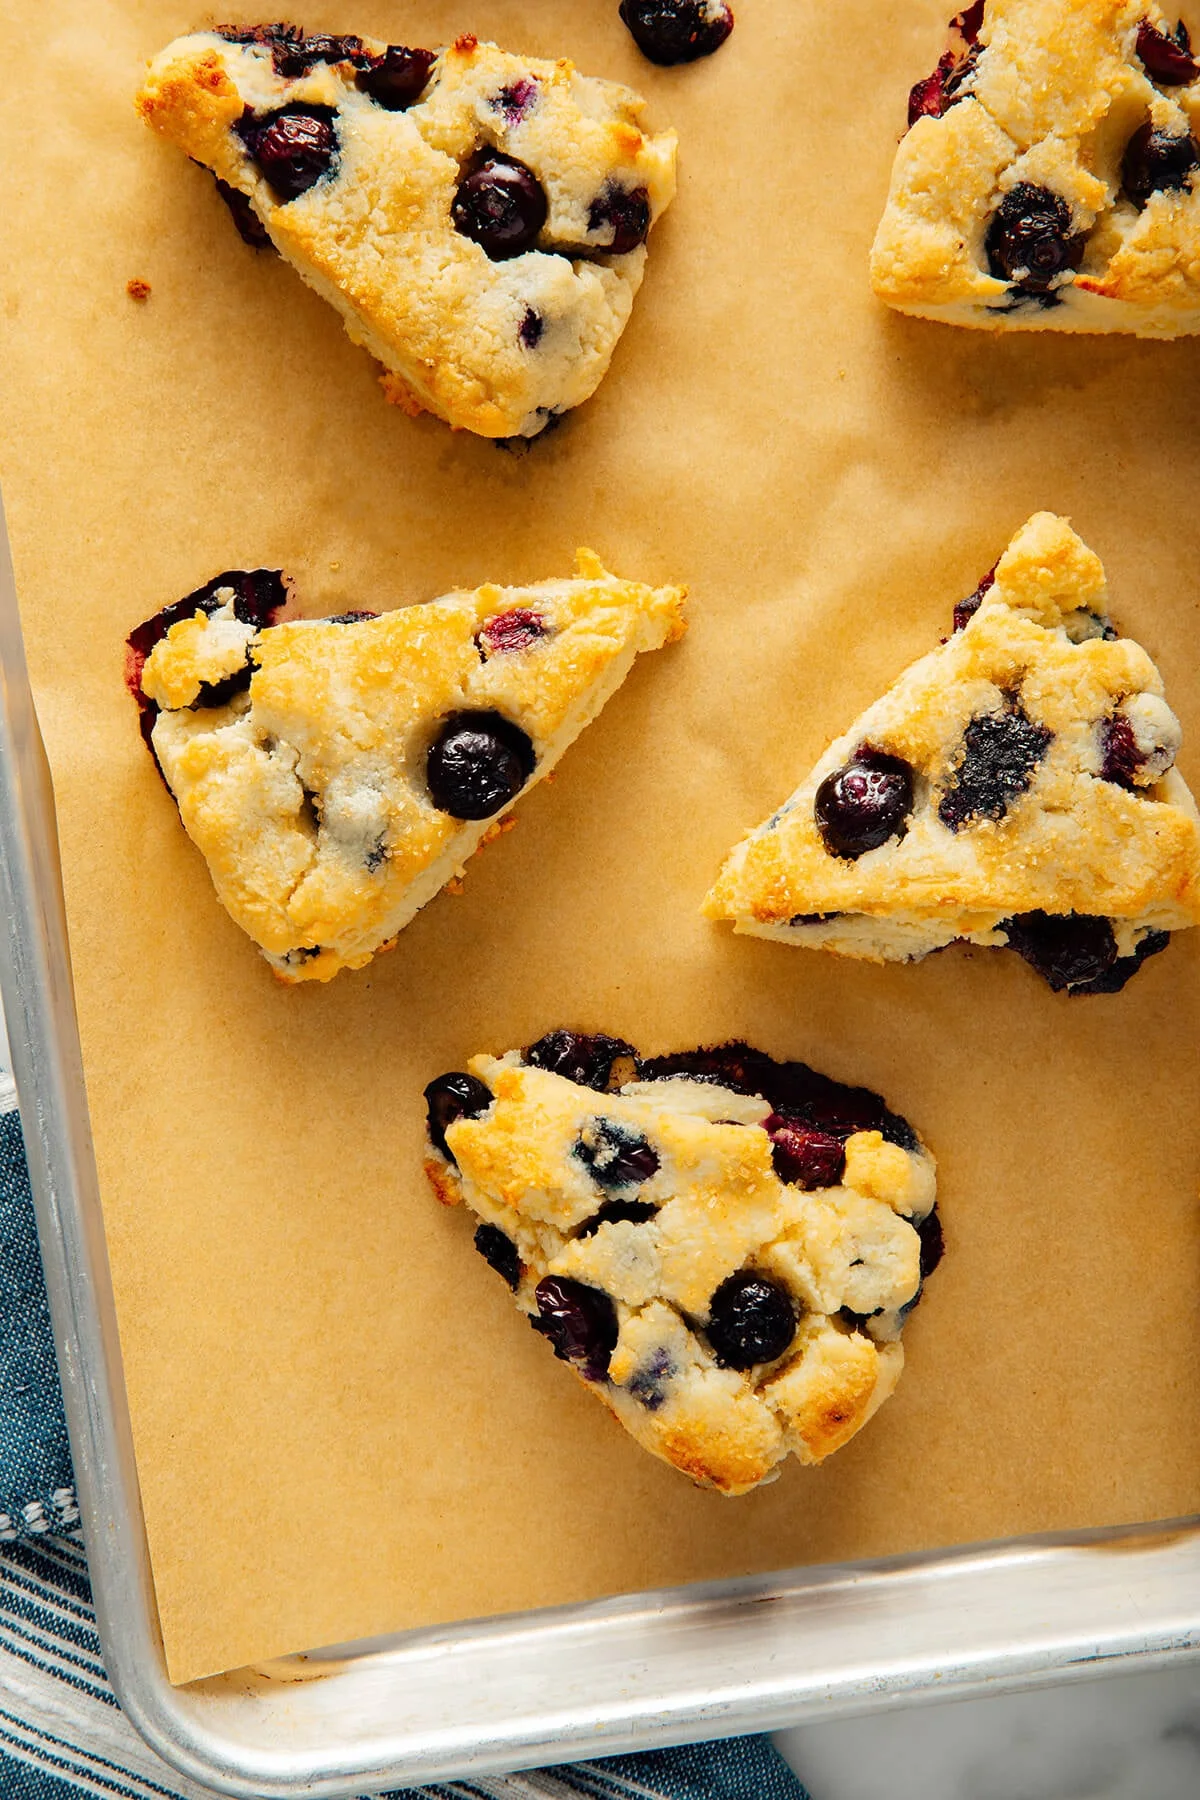
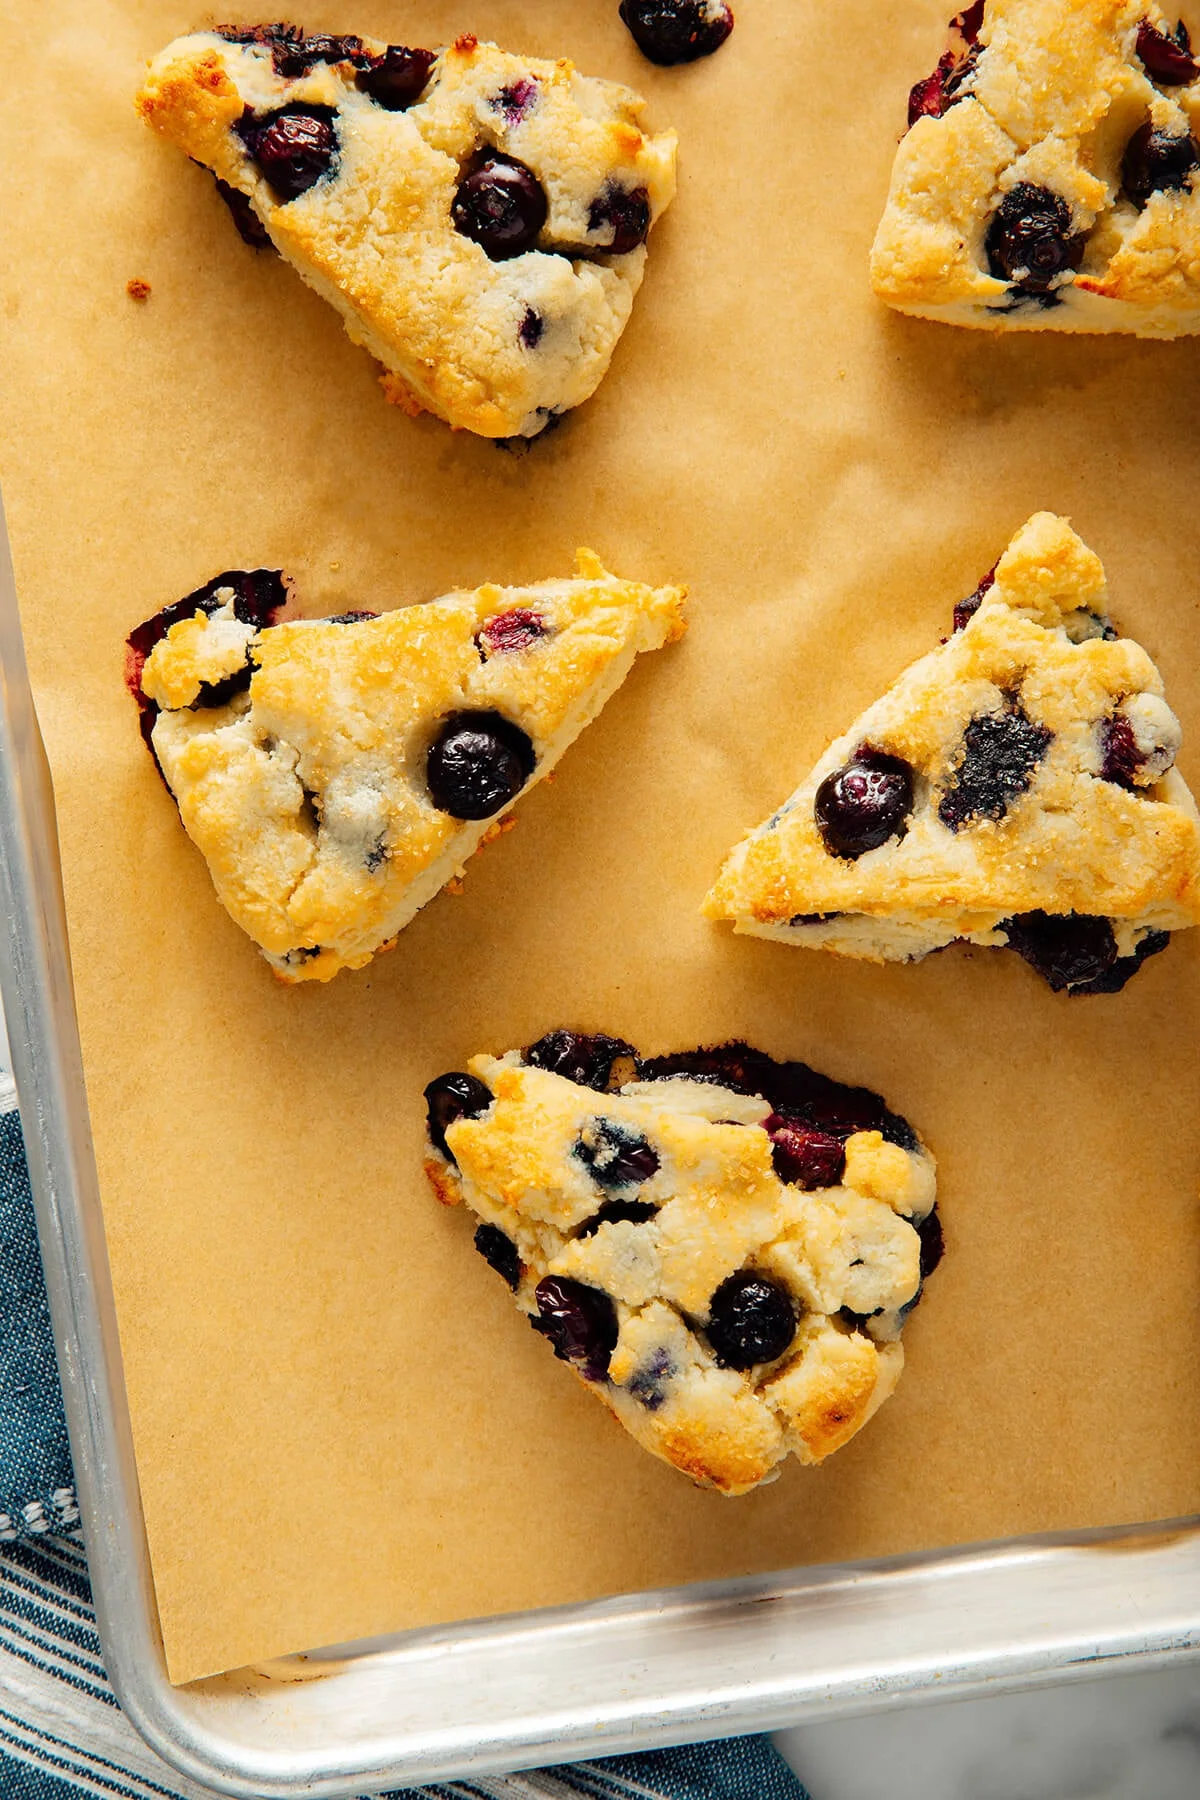
    Tray of golden, freshly baked blueberry scones

    What changed when I went almond flour

    Swapping in almond flour meant rethinking the recipe, not just swapping the powder. I kept the flour amount the same and adjusted everything else:

    • Added an egg — without it, the scones fall apart.
    • Went lighter on the butter, since almond flour carries its own fat.
    • Trimmed the sugar, because almond flour doesn’t blunt the sweetness the way wheat flour does.
    • Dropped the Greek yogurt and skipped milk — almond flour is naturally moist and less absorbent.
    • Reduced the blueberries a little to match the smaller batch.

    A few honest notes

    No pastry cutter. Regular scones need cold butterChunks for those tender pockets, but these turned out better with melted butter. You stir the whole thing together. That’s the trick that stopped the falling-apart phase.

    The dough is delicate. Cut with a sharp chef’s knife so you can slice right through the blueberries, then use a pie server or a small metal spatula to move them to the sheet. If a scone breaks along the edge, just smush it back together — think of it as working with soft playdough.

    Leave several inches of space around each one. They spread, and you don’t want them kissing each other mid-bake.

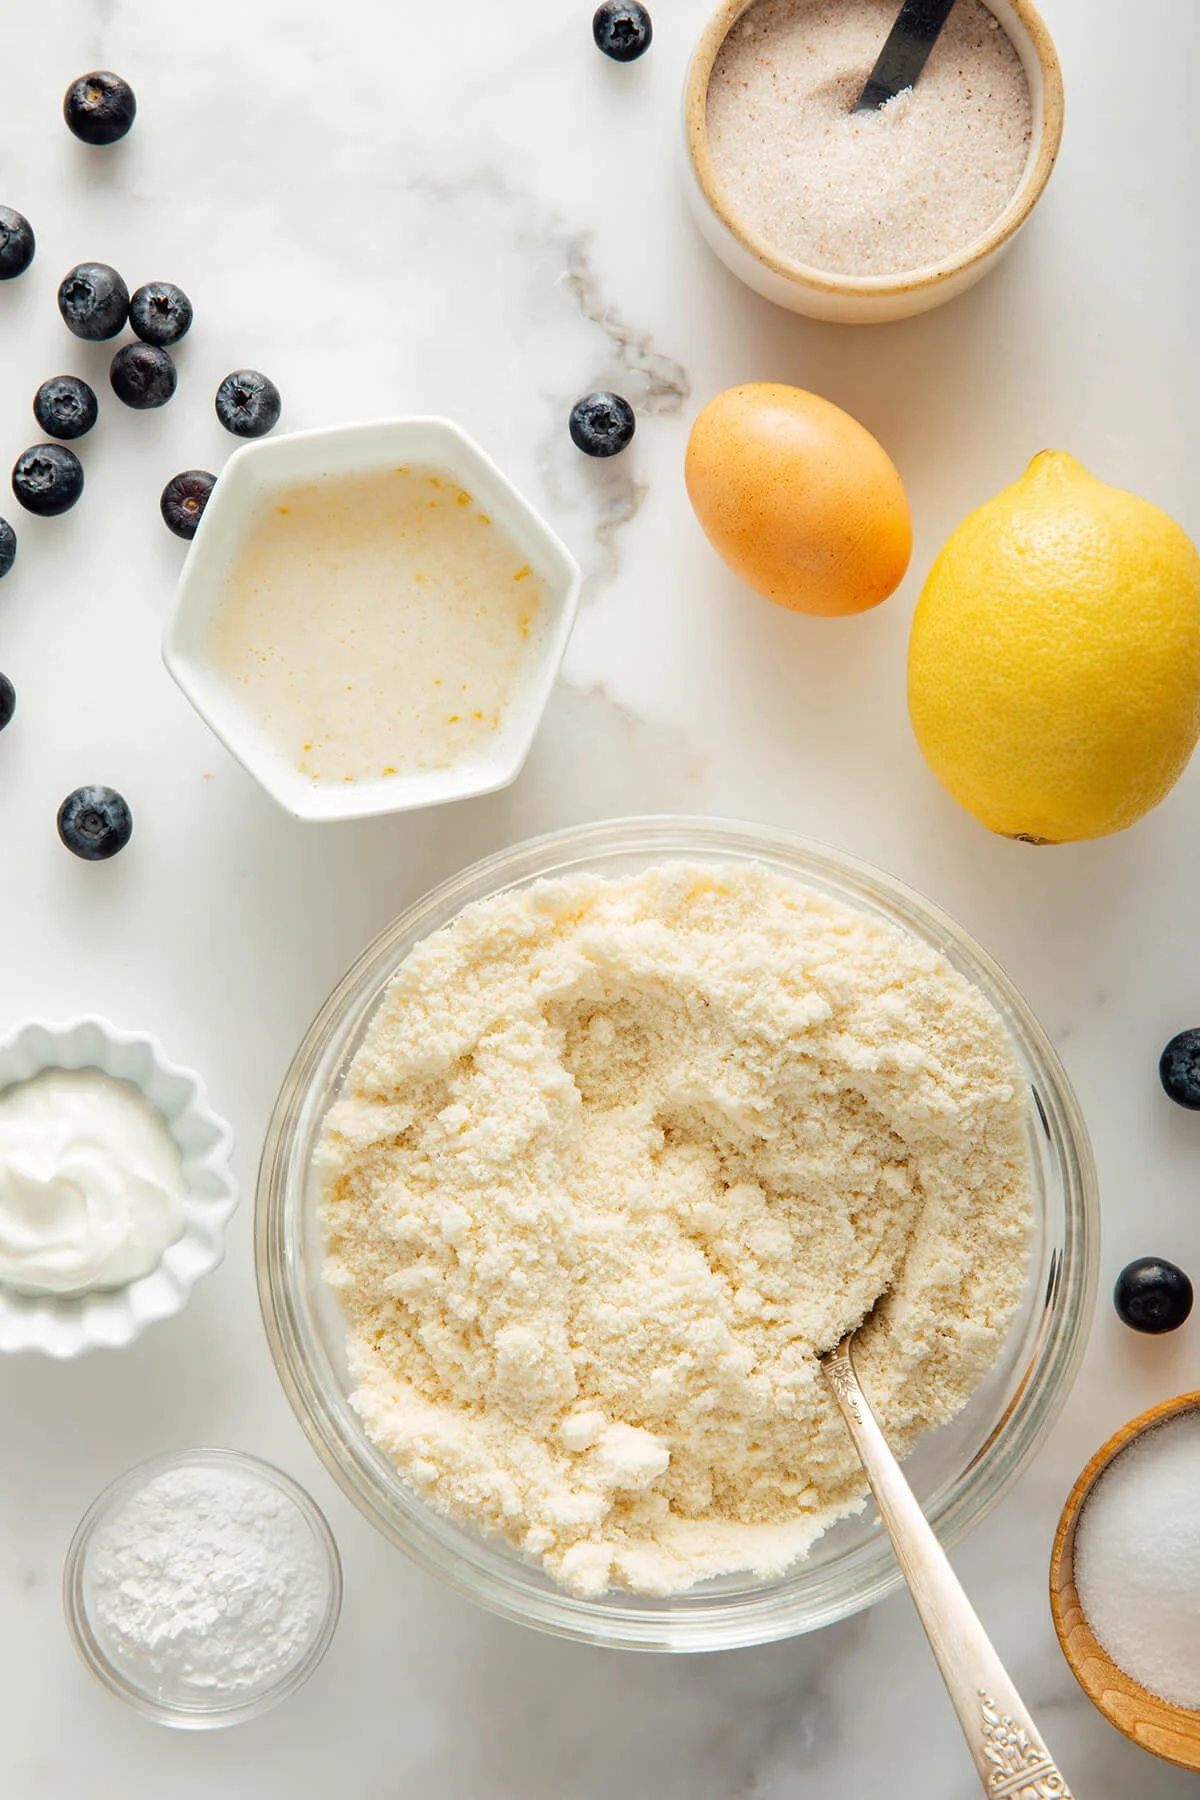
    Almond flour, lemon zest, and blueberries arranged for baking

    The recipe

    Ingredients

    • 2½ cups blanched almond flour, spooned and leveled (225 grams)*
    • 1 tablespoon baking powder
    • ¼ teaspoon fine salt
    • 3 tablespoons granulated sugar
    • Zest from 1 large lemon, about 1½ teaspoons
    • 5 tablespoons unsalted butter, just melted
    • 2 tablespoons plain whole-milk Greek yogurt
    • 1 large egg
    • 1 cup (4½ ounces) fresh blueberries
    • Optional: 1 teaspoon turbinado sugar for sprinkling on top

    Instructions

    1. Preheat the oven to 375°F (190°C) and line a large, rimmed baking sheet with parchment paper.
    2. In a mixing bowl, whisk together the almond flour, baking powder, and salt.
    3. In a small bowl, rub the lemon zest into the sugar with your fingers — it pulls more flavor out of the zest — then stir into the dry ingredients.
    4. Whisk the melted butter, yogurt, and egg in a small bowl. Pour into the dry mixture and stir until just combined. Gently fold in the blueberries.
    5. Turn the dough onto a clean surface, fold it over onto itself a couple of times, and shape it into a circle about one inch thick. Sprinkle with turbinado sugar if you’re using it.
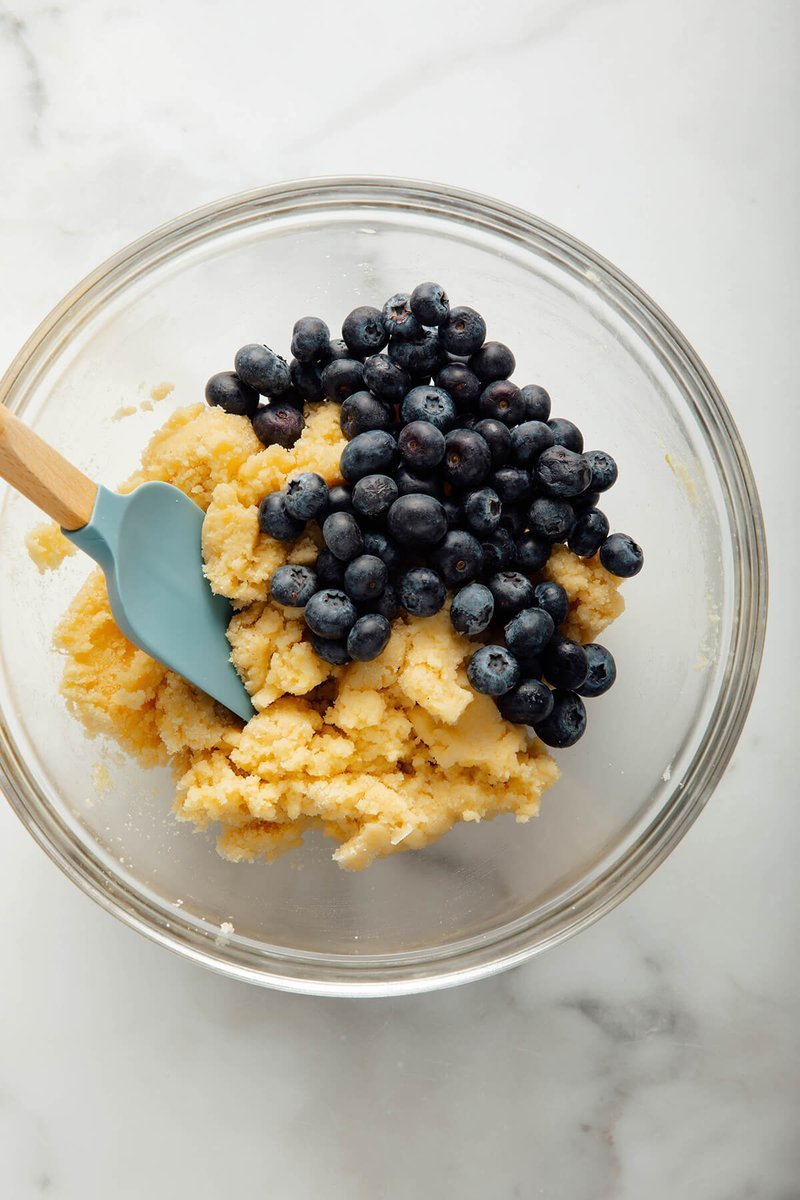
    6. Blueberry scone dough being mixed in a glass bowl
    7. Cut the round into 8 even wedges with a sharp chef’s knife. Transfer each to the prepared sheet with a few inches of space. If one breaks, patch it back together and tuck in any stray blueberries.
    8. Bake 15 to 18 minutes, until golden on top. Let them rest a little — the flavors settle as they cool. Leftovers keep up to 3 days at room temperature or 6 months in the freezer.

    Almond flour note

    Not every almond flour bakes the same. I tested with Bob’s Red Mill super-fine almond flour and Whole Foods 365 almond flour, and both worked well. Stick with one of those for the surest result.

    Make it yours

    This blueberry base goes in a lot of directions:

    • Berry scones: Swap the blueberries for raspberries, blackberries (halved if large), or sliced strawberries. Keep the lemon zest, or switch to orange.
    • Cherry scones: Use halved, pitted cherries. Leave out the lemon zest and add ½ teaspoon almond extract — it plays beautifully with cherry.
    • Chocolate chip scones: Skip the fruit and zest, add up to ¾ cup chocolate chips. I tried ½ cup semi-sweet chips with ½ cup toasted, chopped pecans and loved it.
    • Savory cheddar scones: Skip the fruit and zest, drop the sugar to 1 teaspoon, and stir in ¾ cup shredded sharp cheddar plus 3 tablespoons chopped green onion. This one has quietly become one of my favorite afternoon snacks.

    Happy cooking,
    Maya
    Keep Reading

  • 10 Kitchen Shortcuts That Save Weeknights

    10 Kitchen Shortcuts That Save Weeknights

    The kitchen clock reads 6:15 and the table is set for four. In my old restaurant life, that was when prep finished and the pass opened. At home, it’s when the first question lands: what’s for dinner? I’ve been answering it every weeknight since I left the industry, and I’ve quietly built a stack of shortcuts that cut real minutes off the evening. None of them need a gadget you’ve never bought. Here are ten.

    1. Marinate while you sleep

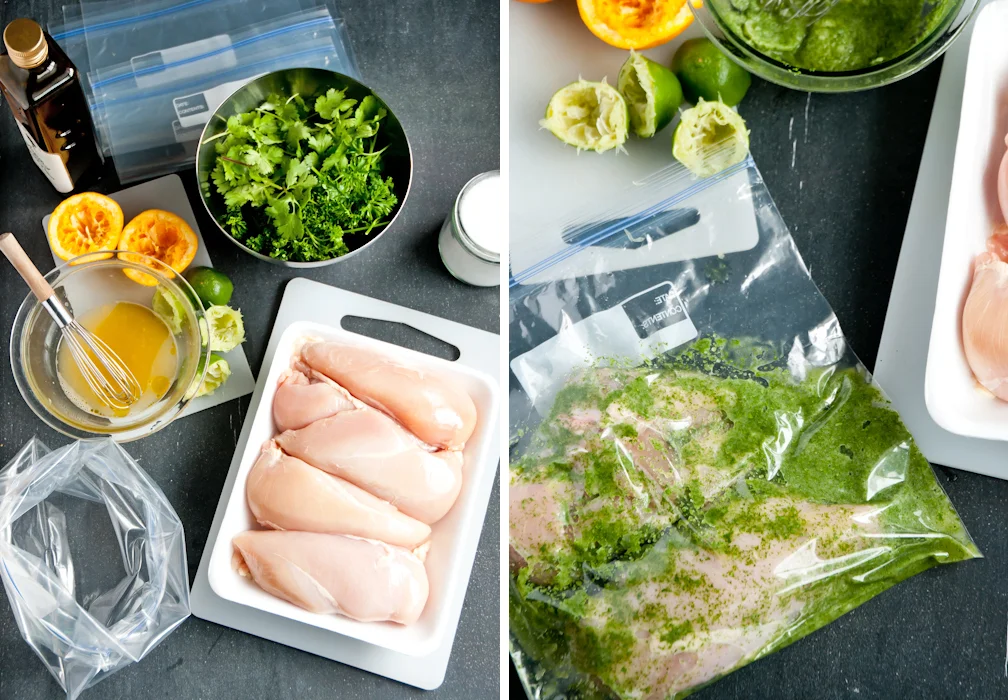
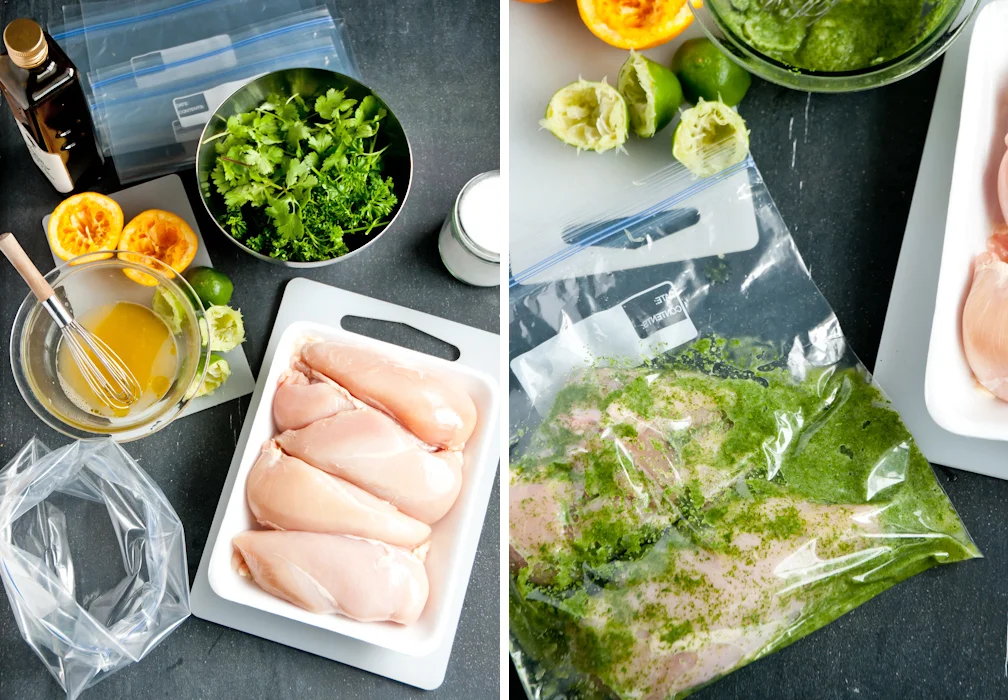
    Buy chicken in bulk when it’s on sale — one big package or several smaller ones, your choice. It saves time and helps the pocketbook. Separate it into resealable freezer bags, then add your marinade straight into the bag. Buying it already frozen? Same trick works.

    Raw chicken thighs marinating in a green herb and citrus mixture in a zip-top bag

    I keep a rotating list of favorite marinades. About 30 minutes after the grocery run, I stir them up and add them to the bags. Squeeze out the air, seal, freeze.

    On dinner day, pull one bag out in the morning and let it thaw in a bowl in the fridge. While it thaws, it marines. By the time the clock says 6, it’s ready to go. And yes — the same move works for any meat, not just chicken.

    2. Freeze the boring stuff in single portions

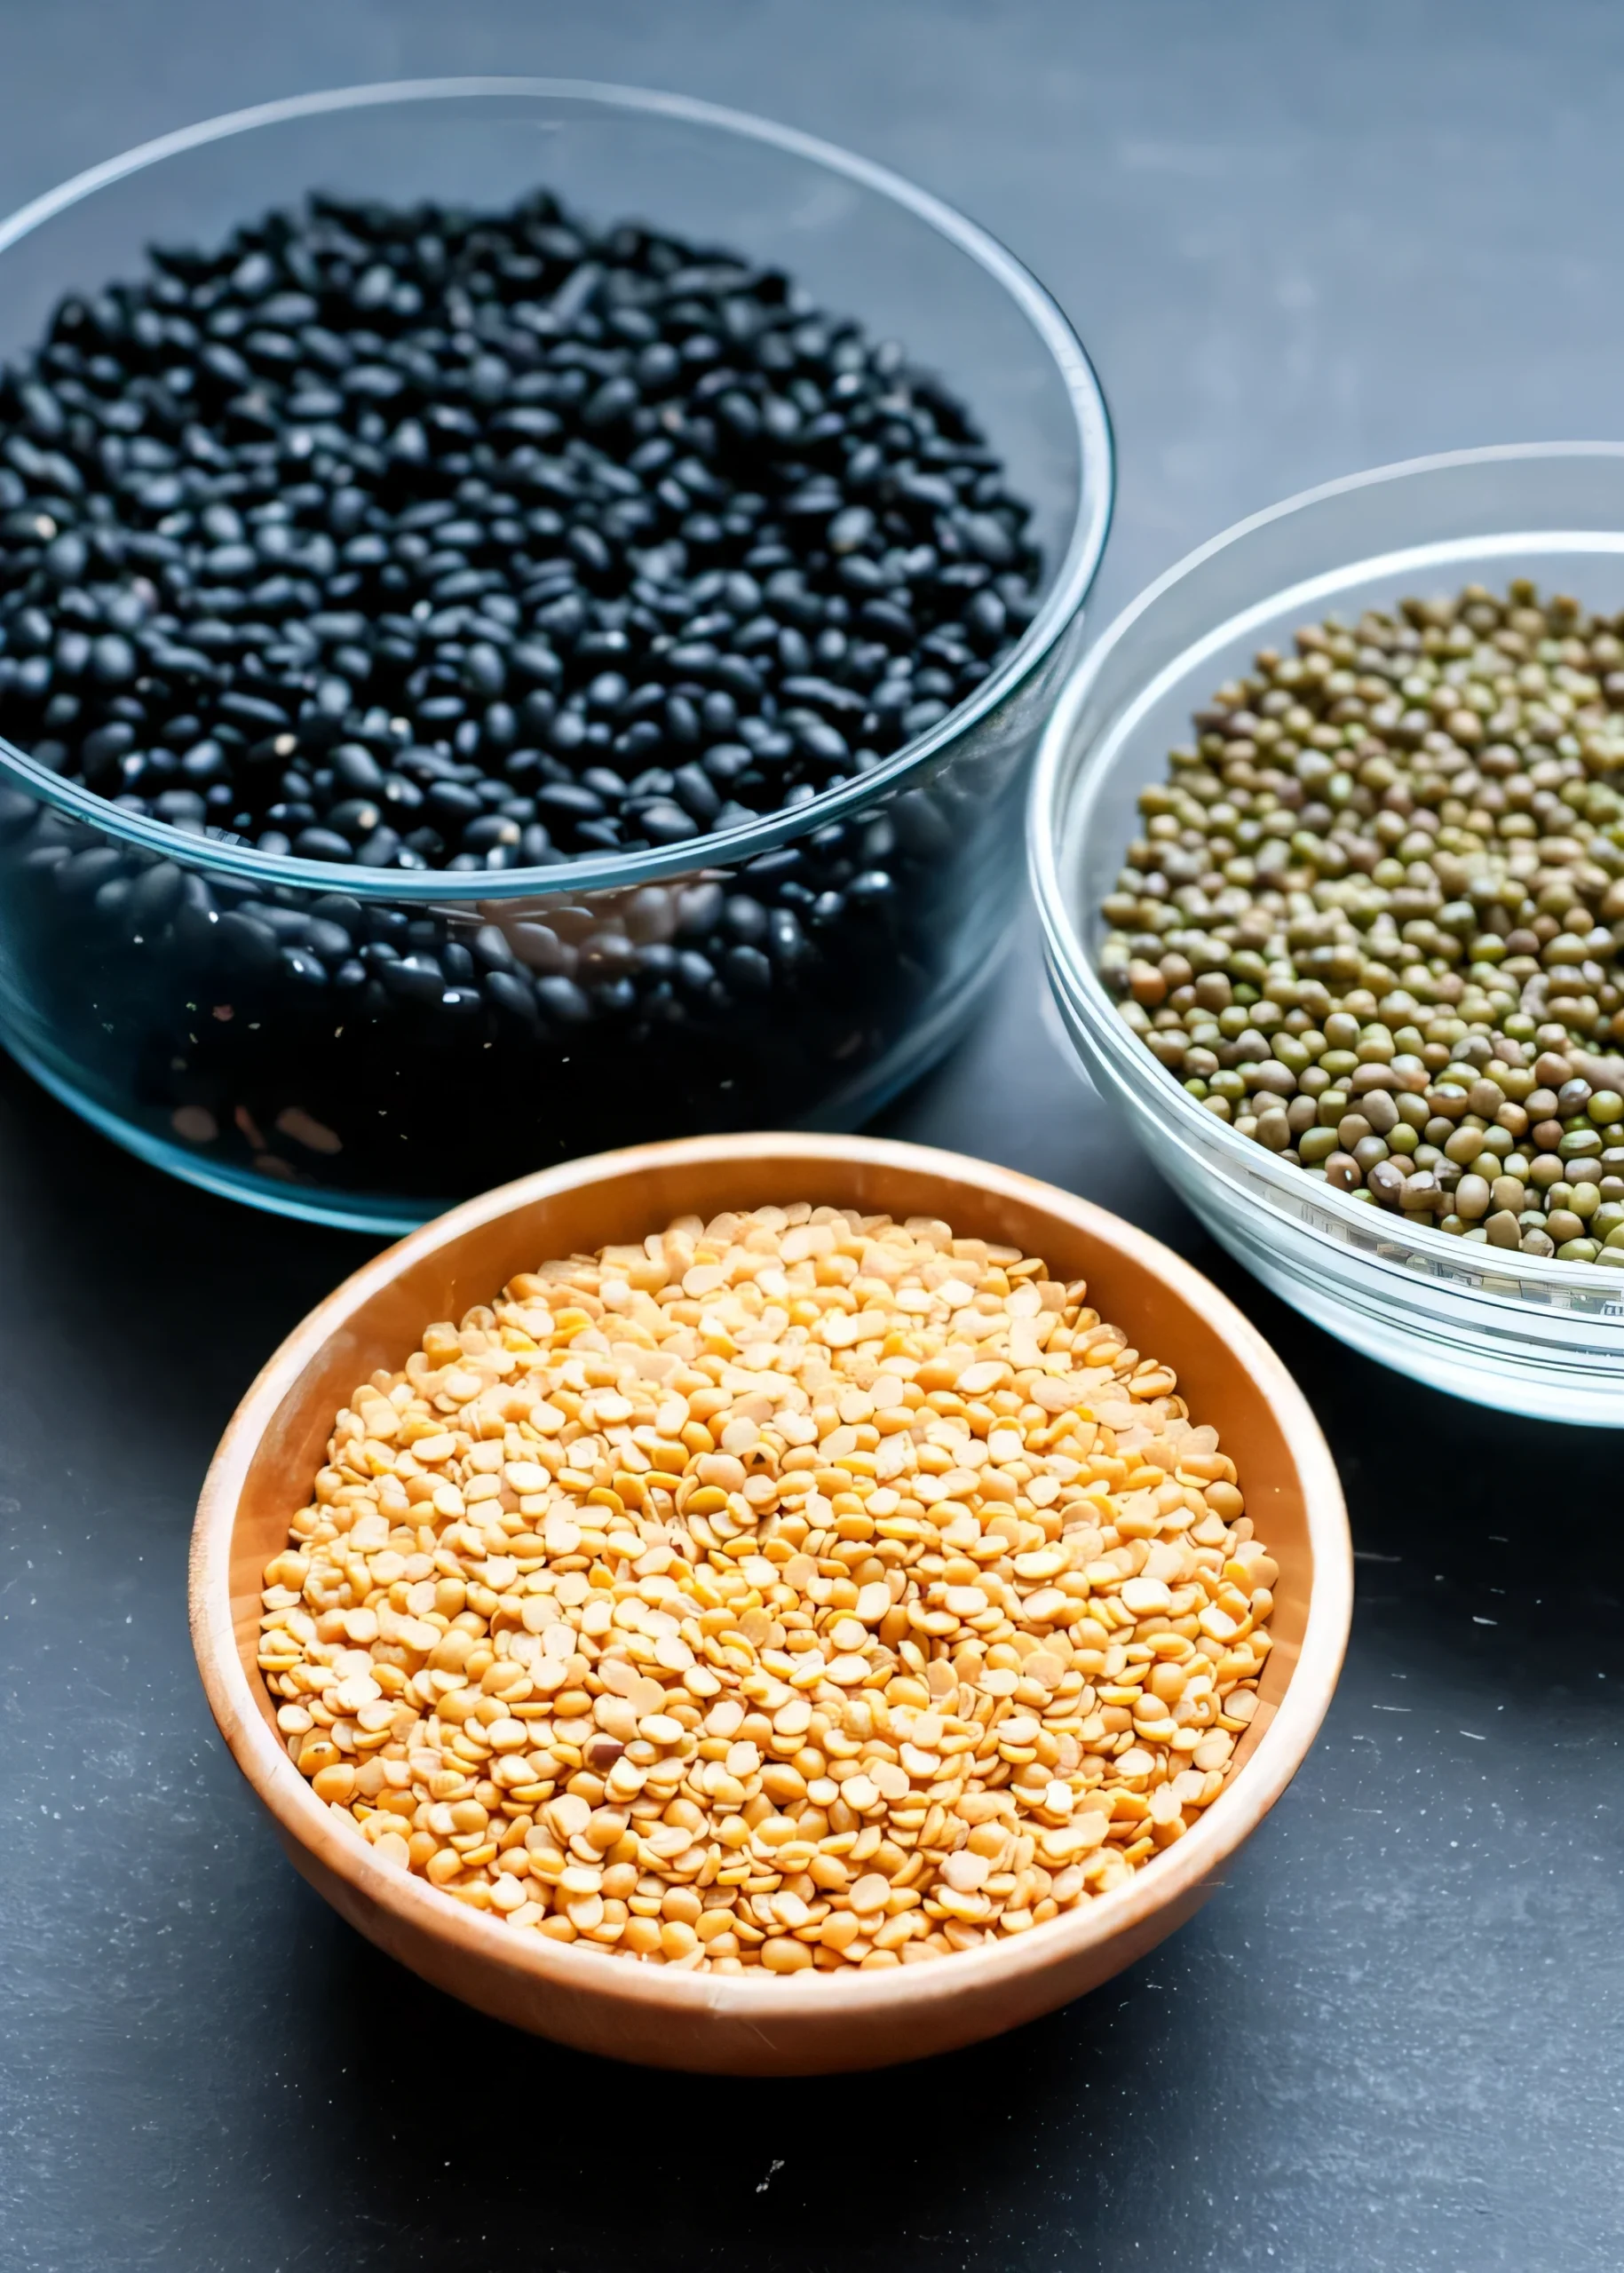
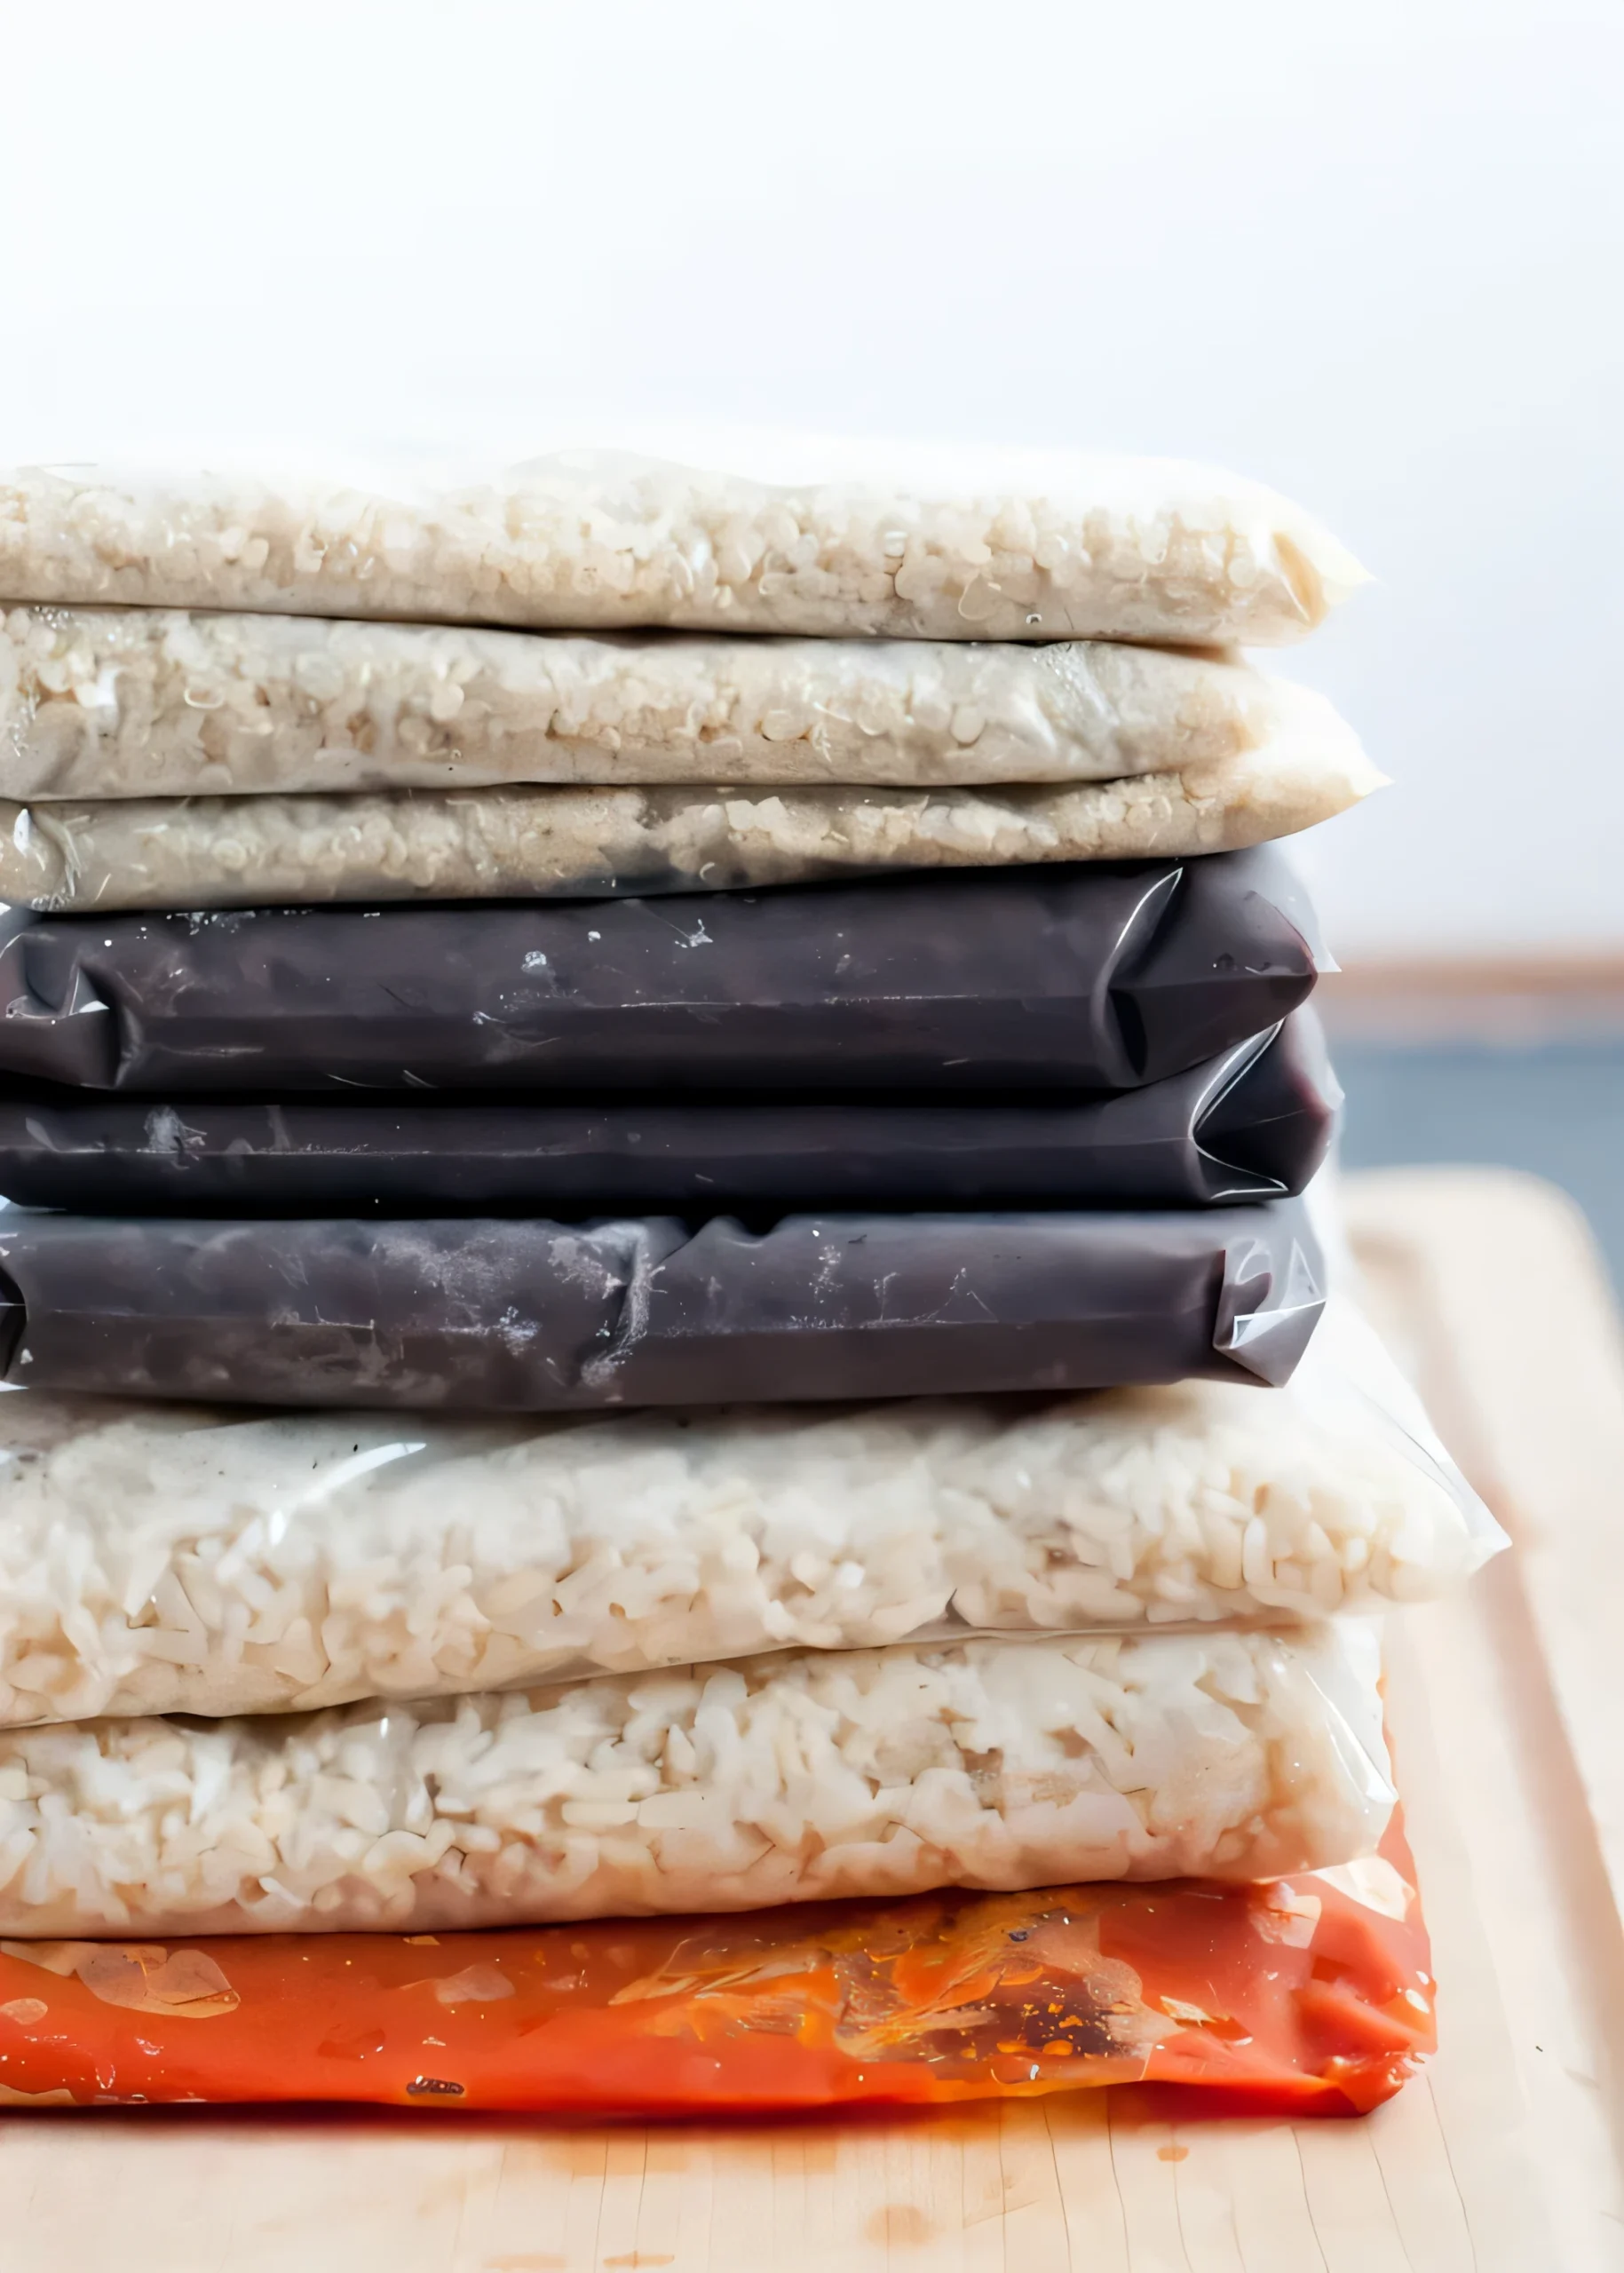
    Once a week I cook big batches of rice, quinoa, legumes, sauces, and soups, then freeze them in small individual bags. Flattened, they thaw in minutes in a bowl of warm water — or all day in the fridge if I remember to move one out first thing in the morning.

    A bowl of fluffy cooked white rice ready to be portioned

    Think about it: your whole meal could already be cooked, sitting in the freezer, waiting to be warmed up. It’s a new meaning for freezer meals. Slow cookers are great for this — I make regular batches of black beans, eat some fresh that night, and bag the rest. Just as easy as opening a can, but fresher and cheaper.

    3. Smoothie packs, ready before you’re up

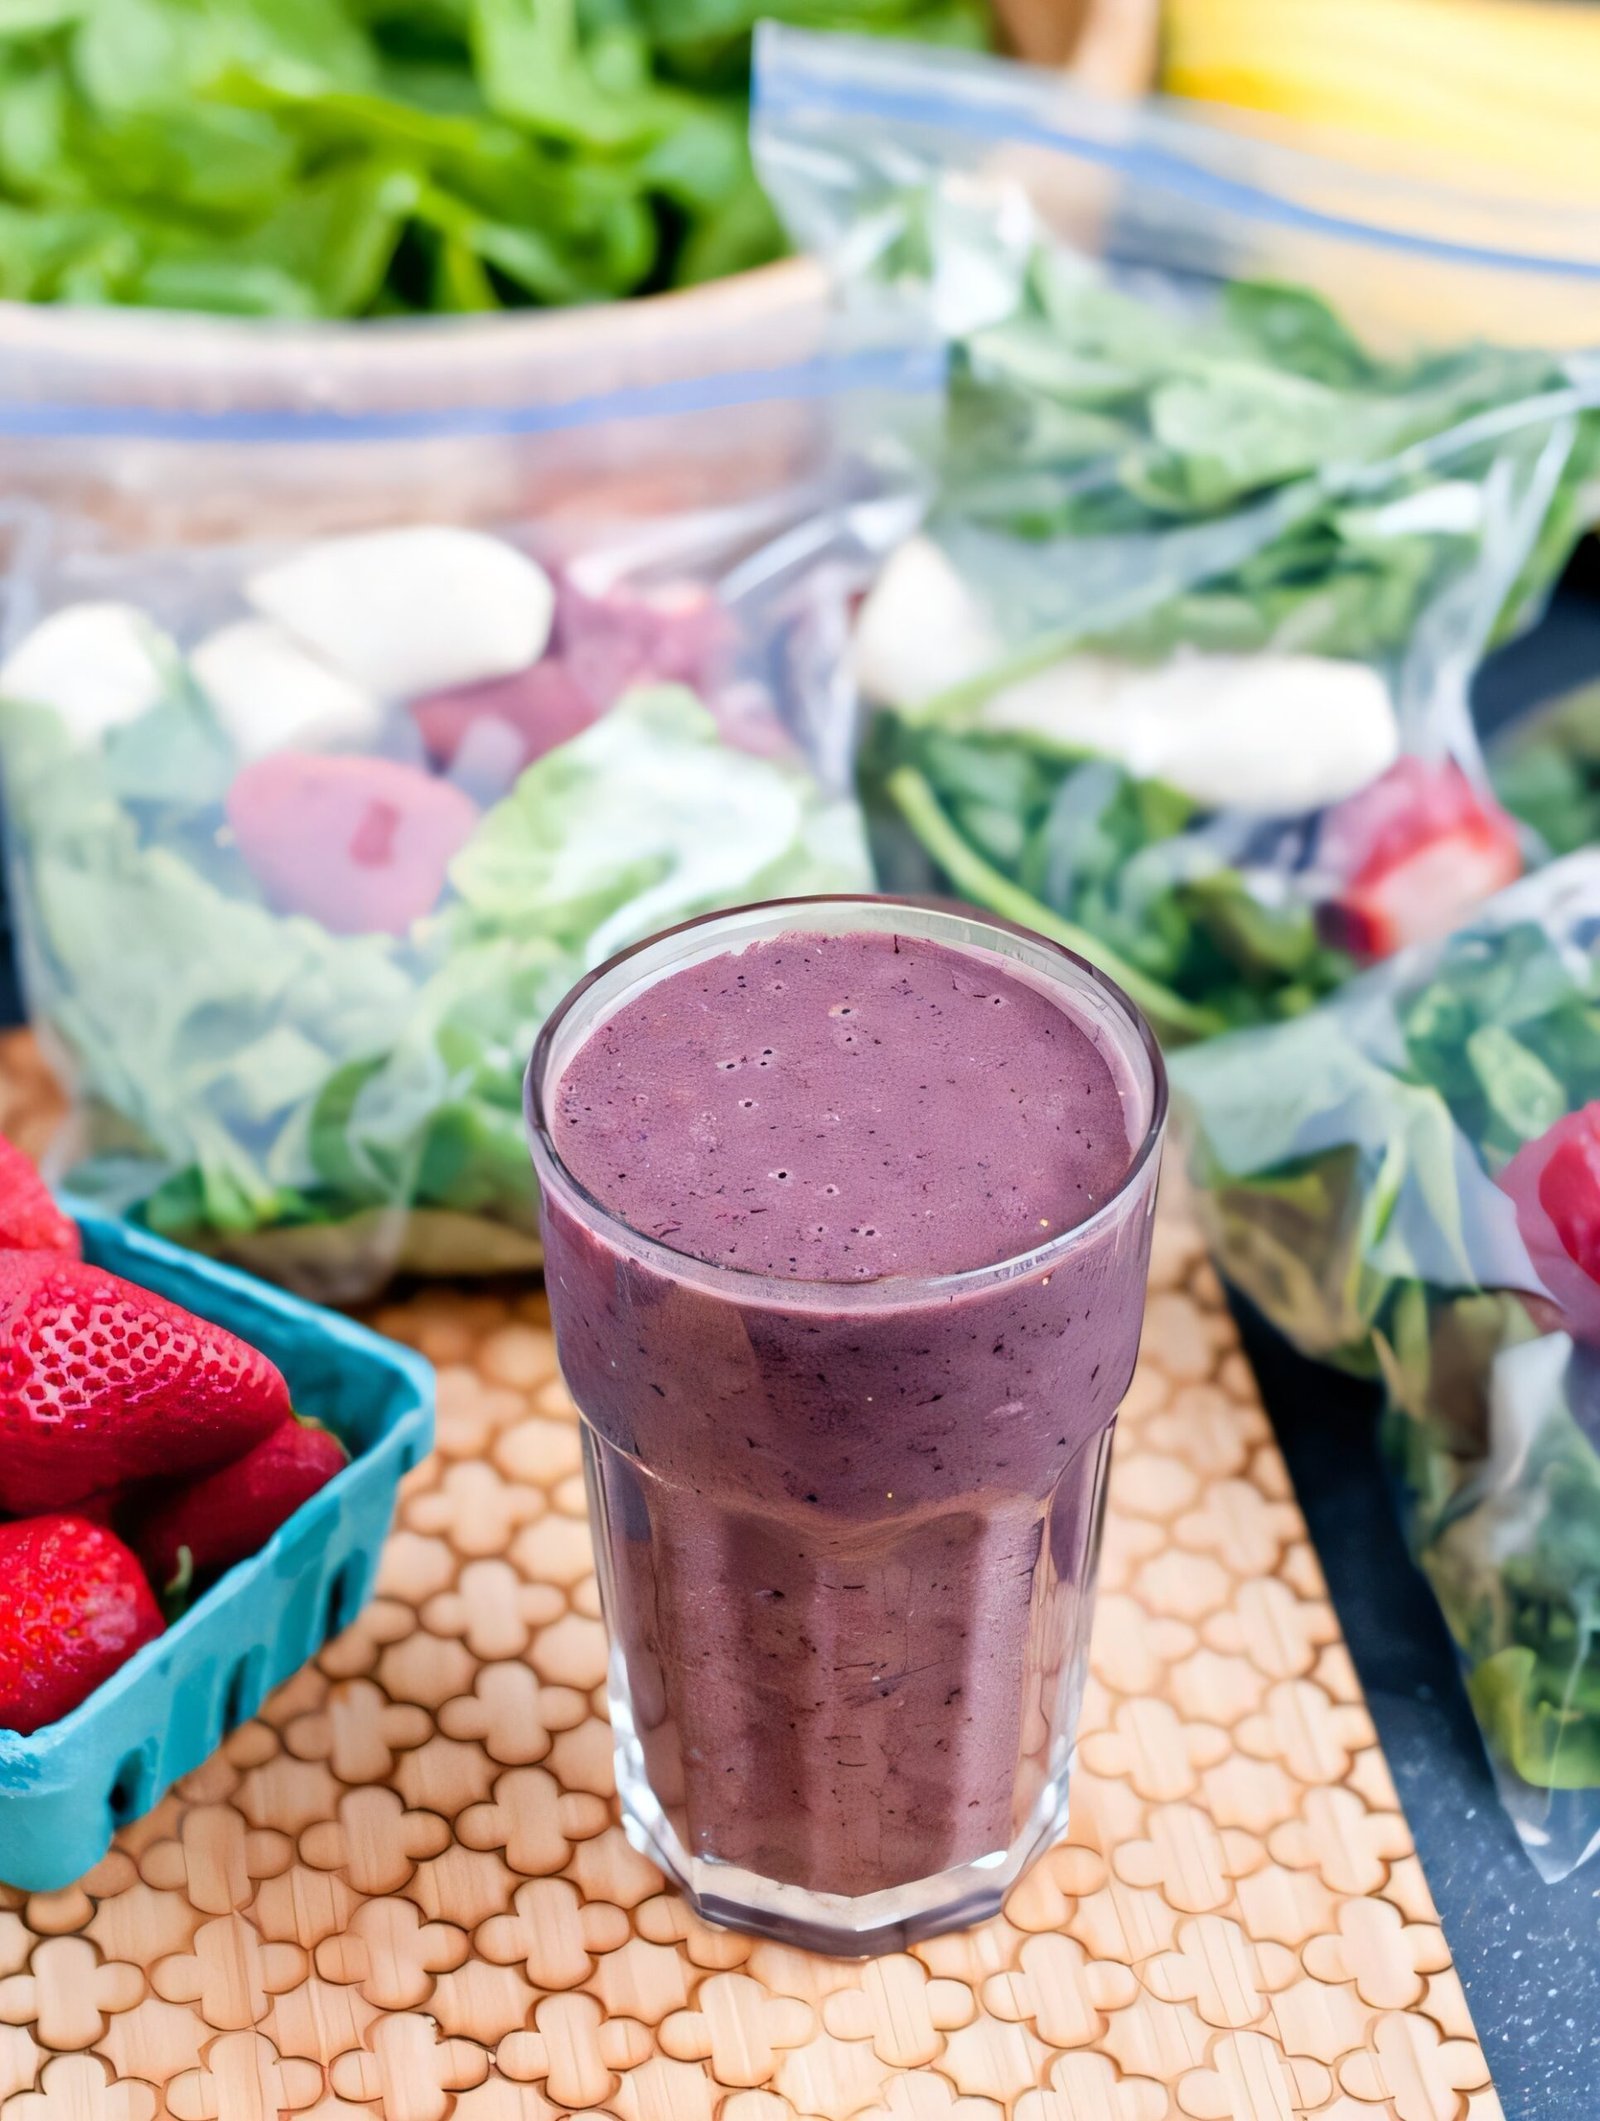
    Mornings run faster when the smoothie is already in a bag. Buy fruit in bulk or on sale, freeze your favorite combinations together, and I add fresh leafy greens from my CSA (Community Supported Agriculture — the farm-share subscription). No CSA nearby? Most major grocery stores carry frozen spinach and kale that work just as well.

    A prepared smoothie pack of chopped fresh ingredients in a glass bowl

    Morning routine: everything into the blender, add juice, yogurt, water, or milk, and you’ve got a smoothie for you and the kids before the kettle’s even on.

    4. A jar of your own garlic

    I used to groan mid-recipe when a dish called for fresh garlic. Either I was out of it, I didn’t want to pause to chop one measly clove, or my knife and board were dirty and I didn’t want to wash them. B and C are pure laziness, but still.

    The jarred garlic in the store is fine — though honestly, it can run strong. Better: make your own jar and keep it in the fridge. Peel the garlic, chop a few heads in a food processor or push them through a garlic press, put them in a jar, and top with olive oil. Do it once a week or every other week depending on how often you cook with garlic. If you’ve planned the menu ahead, you’ll know exactly how much you need.

    One honest caveat from the comments: storing garlic in oil in the fridge has a food-safety risk, so freezing the garlic the same way as the herbs below is the safer bet.

    5. Herb cubes in the ice tray

    Chop fresh herbs, top them with olive oil, and freeze them in ice cube trays. You may have seen this floating around Pinterest — it’s a genuinely great idea. Drop a cube into sauces and soups, pop one or two on hot pasta, or toss a couple in with rice while it’s cooking. Fresh herbs add a lot of flavor, but they wilt before you can use them all. This is the fix.

    6. Don’t let the wine die

    A recipe calls for 1/2 cup, and leftover wine only lasts a few days in the fridge. Freeze the extras in ice cube trays and you stop throwing wine away. (If I drank wine, this wouldn’t be a problem, I’m sure.) Next time a sauce needs a splash, or you’ve made a great sangria and don’t want to water it down, the cubes are there.

    7. Ginger, frozen in spoonfuls

    Bottled ginger just doesn’t taste as good as fresh, but grating it is one of the prep tasks I dread most. The fix is the same idea as the garlic, except I use the ice cube trays: grate it (my food processor’s grating disk does the work), drop tablespoon-sized spoonfuls into the wells, freeze, then pop them out into a resealable bag. It stays much fresher that way.

    8. Grate cold butter instead of cutting it in

    A friend of my husband’s cousin had a sudden craving for lemon bars. He grated cold butter straight into the dry ingredients, and the crust was ready in a flash. No pastry cutter needed — and that’s a tool not everyone keeps on hand. It works for pie crust too, and it’s a fast way to soften butter for cookies or cakes without reaching for the microwave.

    9. Kitchen shears beat the knife for small jobs

    Shears are one of my all-time favorite time-saving tools. Skip the knife when you’re only chopping a small amount of herbs and snip them into little bits — it’s faster than you’d believe. And the shears aren’t just for herbs: cutting tortillas and quesadillas is easy, and so is cutting chicken into pieces. They make quick work of snipping homemade candy like caramels, marshmallows, and taffy into bite-size pieces, and they’re great for snipping dried fruit into bits, cutting raw or cooked bacon into small pieces, or trimming fat from meat.

    10. Parboil, then finish under the broiler

    We eat roasted root vegetables every week, and waiting for the oven to heat up — then for the vegetables to roast until tender — is a long evening. Parboil them first and the time cuts roughly in half.

    Roasted root vegetables finished crisp under the broiler

    Then toss them with a little olive oil and finish under the broiler. You’ll wonder why you ever did it any other way. Same trick with onions: microwave diced onions to soften and start the caramelization, then finish them in a skillet.

    Tell me — what shortcuts actually save you time on a busy weeknight? I collect the good ones.

    Happy cooking,
    Maya
    Keep Reading

  • Stuffed Manicotti With Italian Sausage And Cheese

    Stuffed Manicotti With Italian Sausage And Cheese

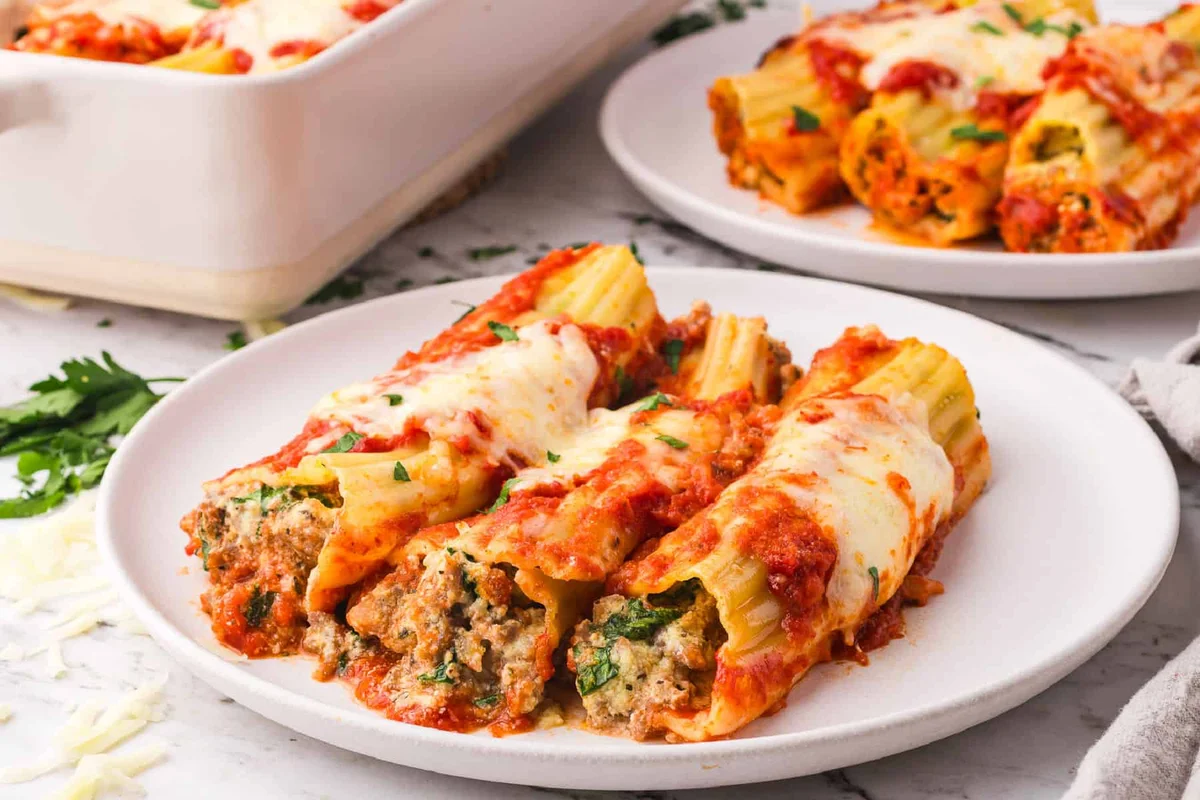
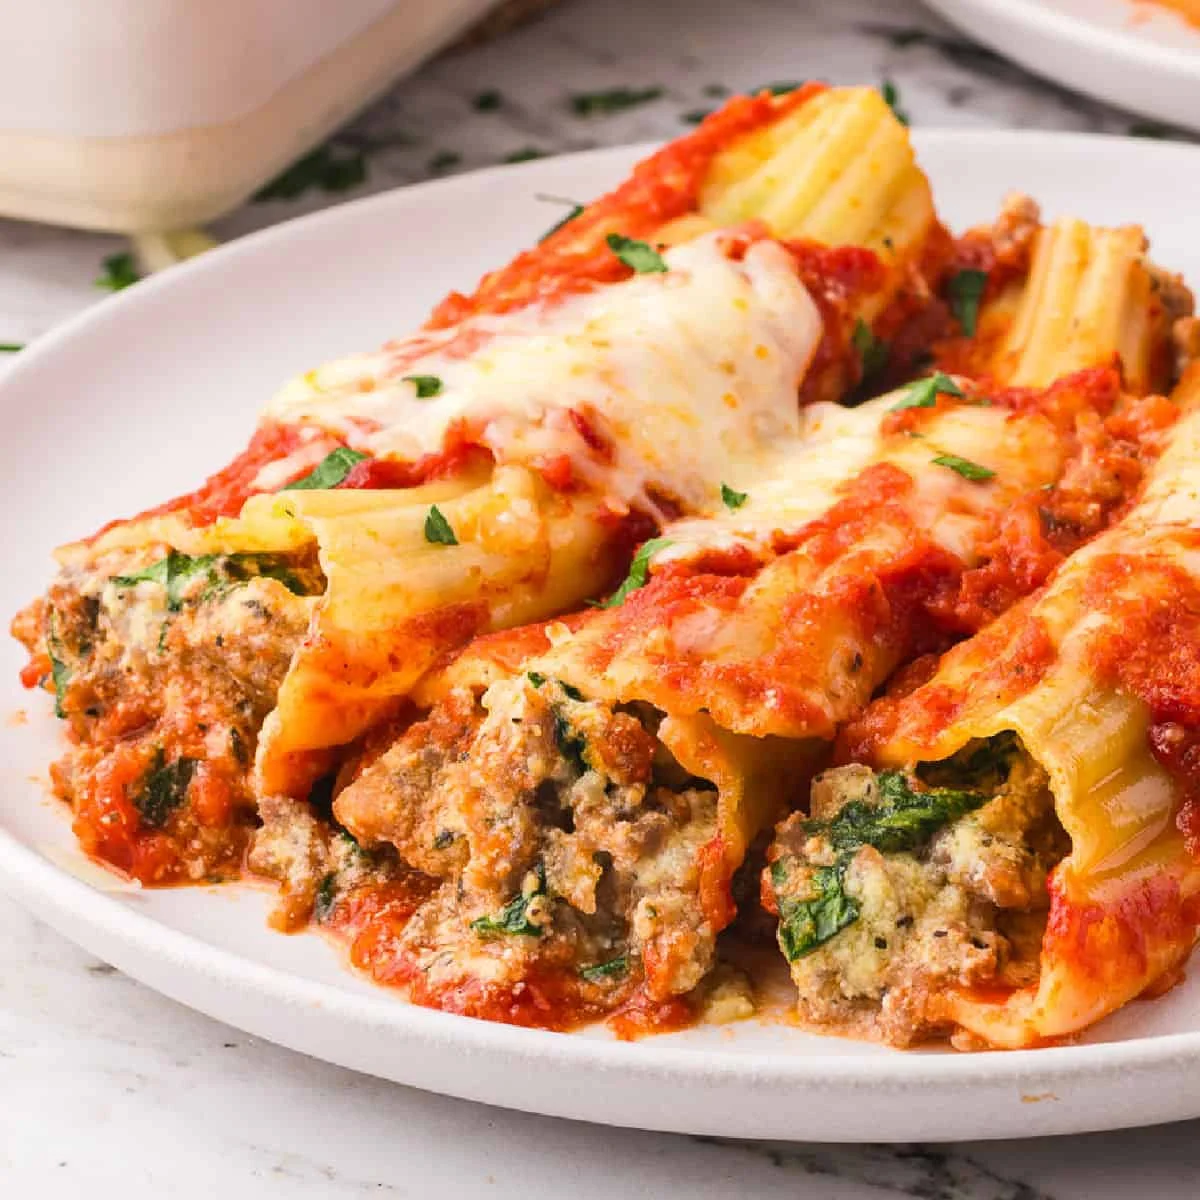
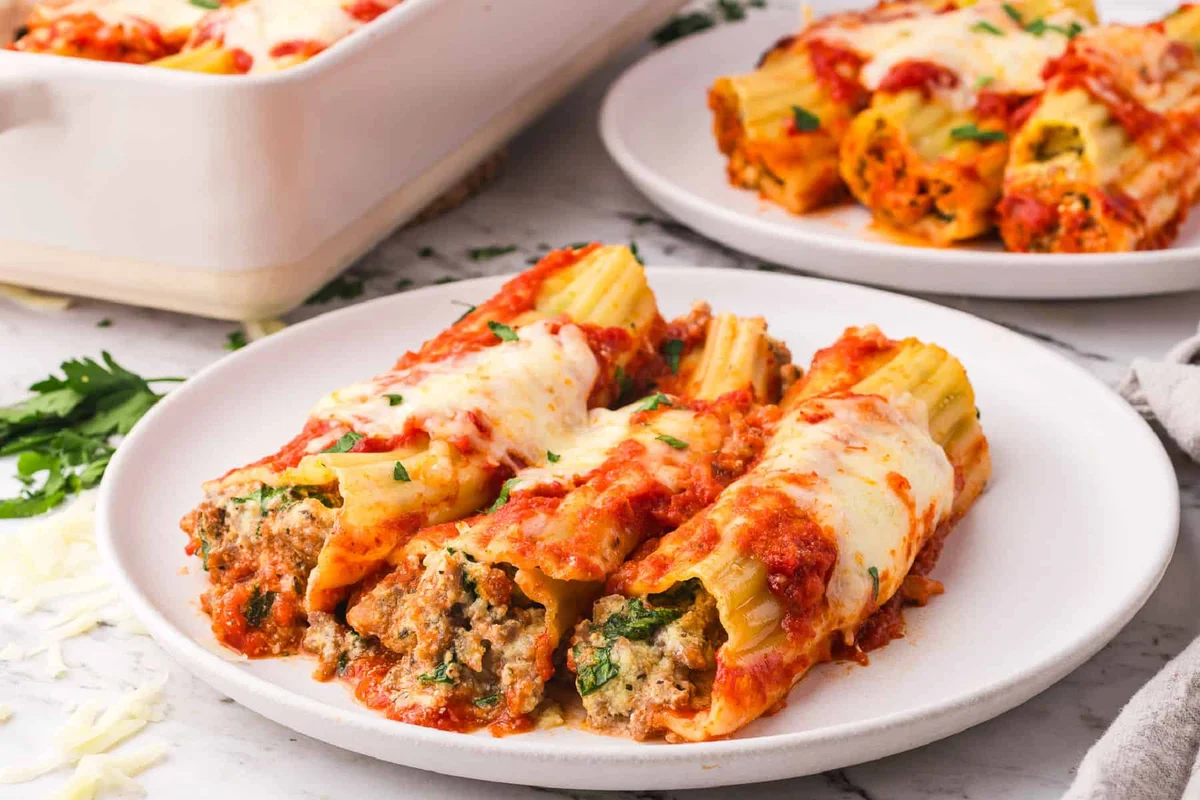
    There’s a particular sound a pan of manicotti makes when you peel the foil off in the last minutes of baking — a quiet, even bubbling — and you can tell from there whether dinner is a hit. This one is. The tube shapes split open just enough to show the sausage-ricotta filling inside, and the cheese on top goes from white to golden in under ten minutes.

    Baked manicotti shells with sausage and melted cheese

    The first three times I made these, something went wrong. Noodles I overcooked before filling split as I worked, and two batches ended up as ‘deconstructed manicotti’ — what I call a casserole of noodles, sauce, and cheese that still tastes great but doesn’t look like anything. Once I fixed the noodle timing, the rest fell into place. This is the version that finally works, and it makes a straight-forward, honest Sunday dinner about an hour long.

    Real time: about 1 hour 5 minutes Hands-on: 20 minutes Serves: 12

    Why this recipe is worth your Sunday

    A cozy dinner that feels special without being fussy. I’ve put a lot of casseroles on my table, and the ones that work are the ones that earn an “oh wow” from the people sitting around it. This is one of those. My husband has said out loud that he’d eat the leftovers for breakfast, which from him is a standing ovation.

    It freezes well. I almost always make a double batch and freeze half, so there’s dinner already ready to pop in the oven on a weeknight when I’m not up to cooking. Make this when you have a little extra time, and you’ll thank yourself later.

    It’s budget friendly. A pound of Italian sausage and a box of manicotti shells feed a whole table. And buying pork from any grocery store helps support small farmers right here in the US.

    It works for picky eaters who love pasta. One of the tricks to getting a kid to eat more variety is to start with a flavor they already accept and change it up just a little. If your kids live for spaghetti, lasagna, or meatballs, this is close enough to familiar to get them through the door.

    Ingredients

    No 47-ingredient list. Here’s everything you need.

    For the noodles:

    • 24 ounces marinara or your favorite pasta sauce, divided — about a cup for the bottom of the dish, the rest for the top
    • 12 manicotti shells (packages come with 12–14, and you’ll probably split one or two as you go)

    For the filling:

    • 1 pound Italian sausage, sweet or spicy
    • 2 cups whole-milk ricotta cheese (part-skim works if you add an extra egg, or the filling can turn dry and crumbly)
    • 1 1/2 cups shredded mozzarella cheese, divided
    • 1/4 cup grated Parmesan
    • 1 1/2 cups fresh spinach, chopped (frozen works — defrost it completely and press out all the water with paper towels, or the dish turns watery)
    • 1 large egg, lightly beaten
    • 1 teaspoon dried oregano (Italian seasoning works in its place)
    • 2 teaspoons dried basil (same swap)
    • 1/2 teaspoon minced garlic, or fresh cloves minced
    • 1/2 teaspoon salt
    • 1/4 teaspoon pepper
    • Zest of 1 lemon, optional — it adds a bit of brightness to the filling, but you can skip it

    The full method is in the numbered steps below.

    How to make manicotti with Italian sausage

    1. Get the oven and the water going. Preheat the oven to 375°F. Give a rimmed sheet pan and a 9×13 casserole dish a light spray of cooking spray, and spread about a cup of the pasta sauce across the bottom of the dish. Set the remaining sauce aside. Bring a big pot of salted water to a boil.

    2. Cook the noodles short. Add the manicotti to the boiling water and cook to al dente — closer to 6–7 minutes. Most packages want you to go longer. Don’t. They finish cooking in the oven, and undercooked shells are what keep them from splitting while you fill them. Drain and lay them in rows on the sprayed sheet pan with tongs, not touching.

    3. Brown the sausage while the water boils. Heat a large skillet on medium-high, sprayed with cooking spray. Add the sausage in bigger chunks at first, and break it up as it cooks for about two minutes. Keep breaking it until the pieces are no more than about 1/4 inch, so it pipes through the bag easily. Cook through, stirring a few times, about 8–10 minutes total. Drain the oil with a paper towel and set aside.

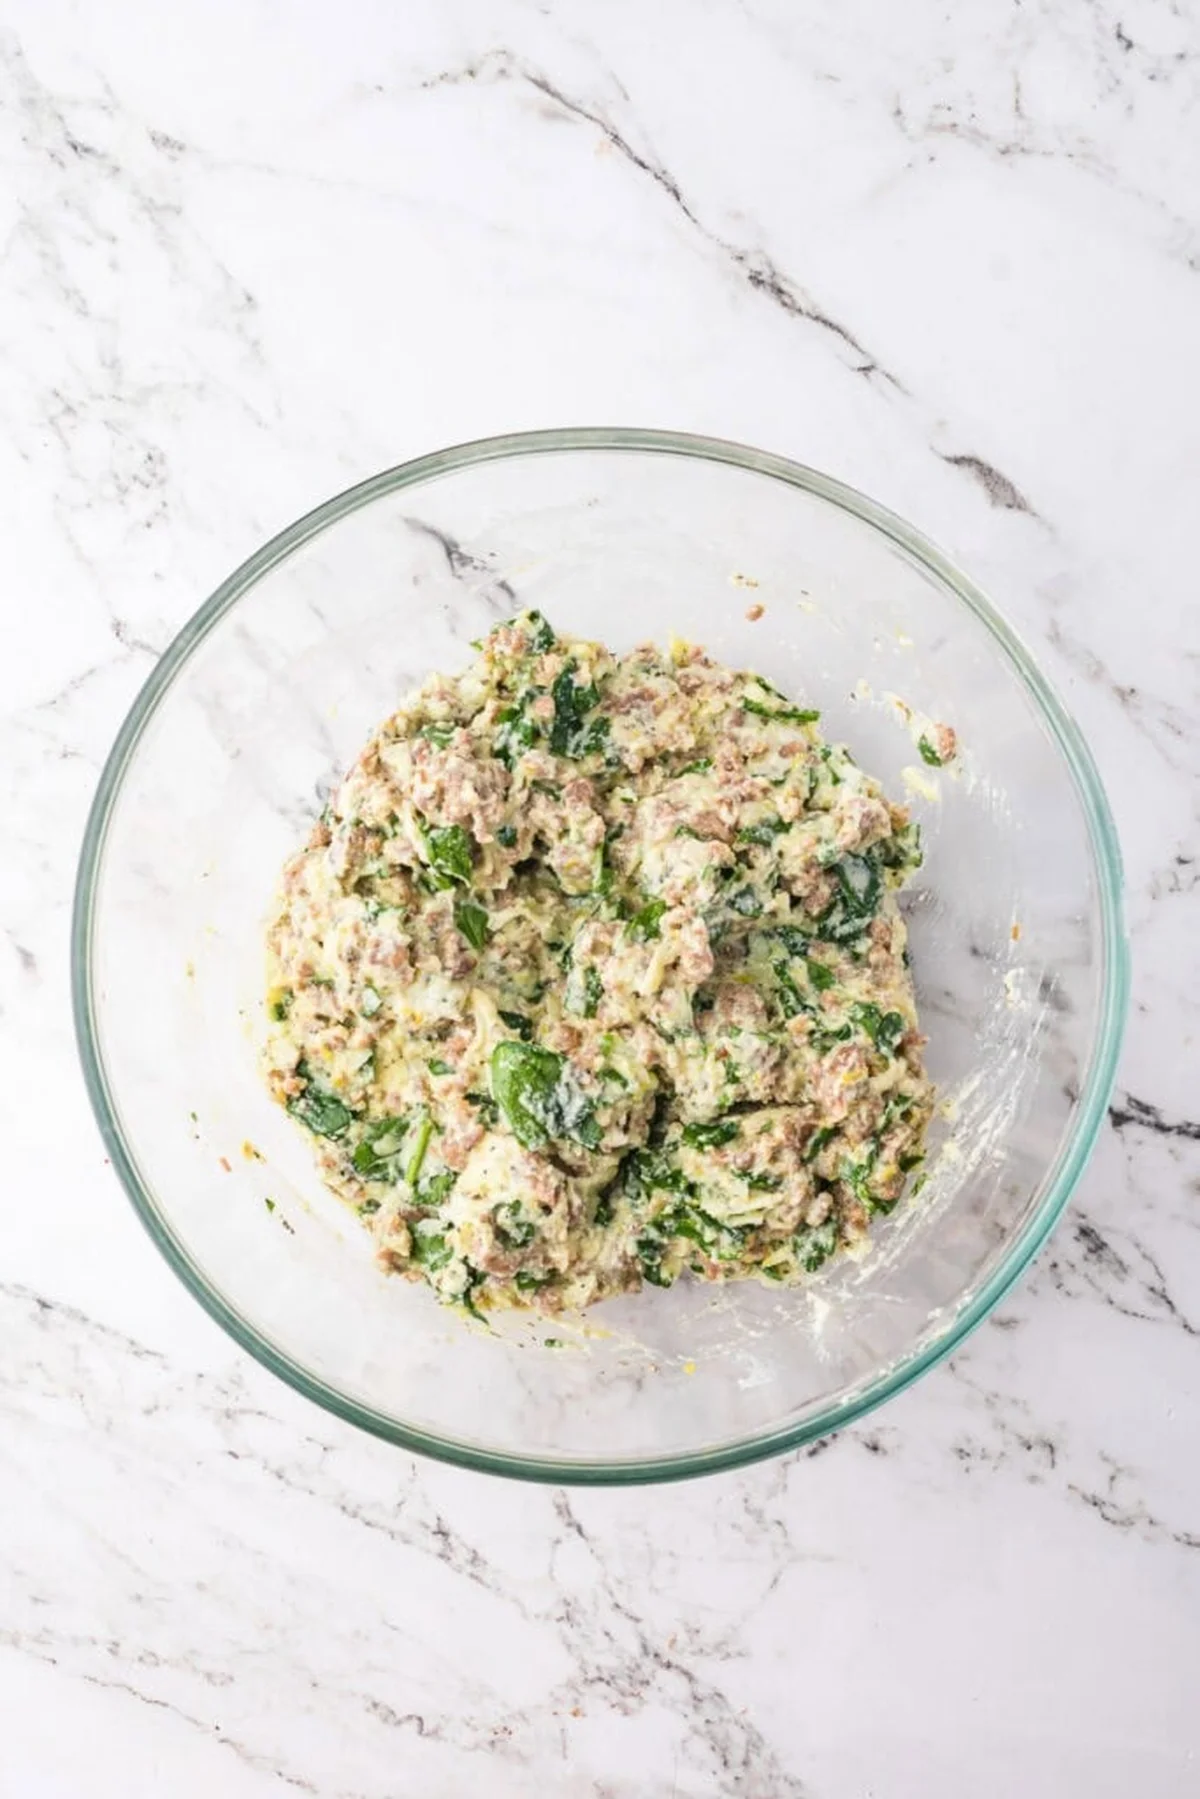
    4. Mix the filling. In a big bowl, combine the ricotta, 1/2 cup of the mozzarella, the Parmesan, the spinach, the egg, oregano, basil, garlic, salt, pepper, and lemon zest if you’re using it. Mix until smooth, then fold in the sausage. Set the remaining 1 cup of mozzarella to the side.

    Mixed sausage-and-ricotta filling in a glass bowl

    5. Pipe the mixture into a gallon-size zip-top bag. This is the secret, and it replaces a piping bag. Seal the bag tight, snip off a small corner, and pipe the mixture into the shells — I like to think of it as the opposite of a bagpipe. Gentle, slow pressure is the whole trick. Start at one end of a noodle, squeeze in half the filling, flip, and finish from the other end. If any filling escapes, push it back in with a spoon or a finger. You can hold the shell with your free hand so the filling doesn’t push it open too far.

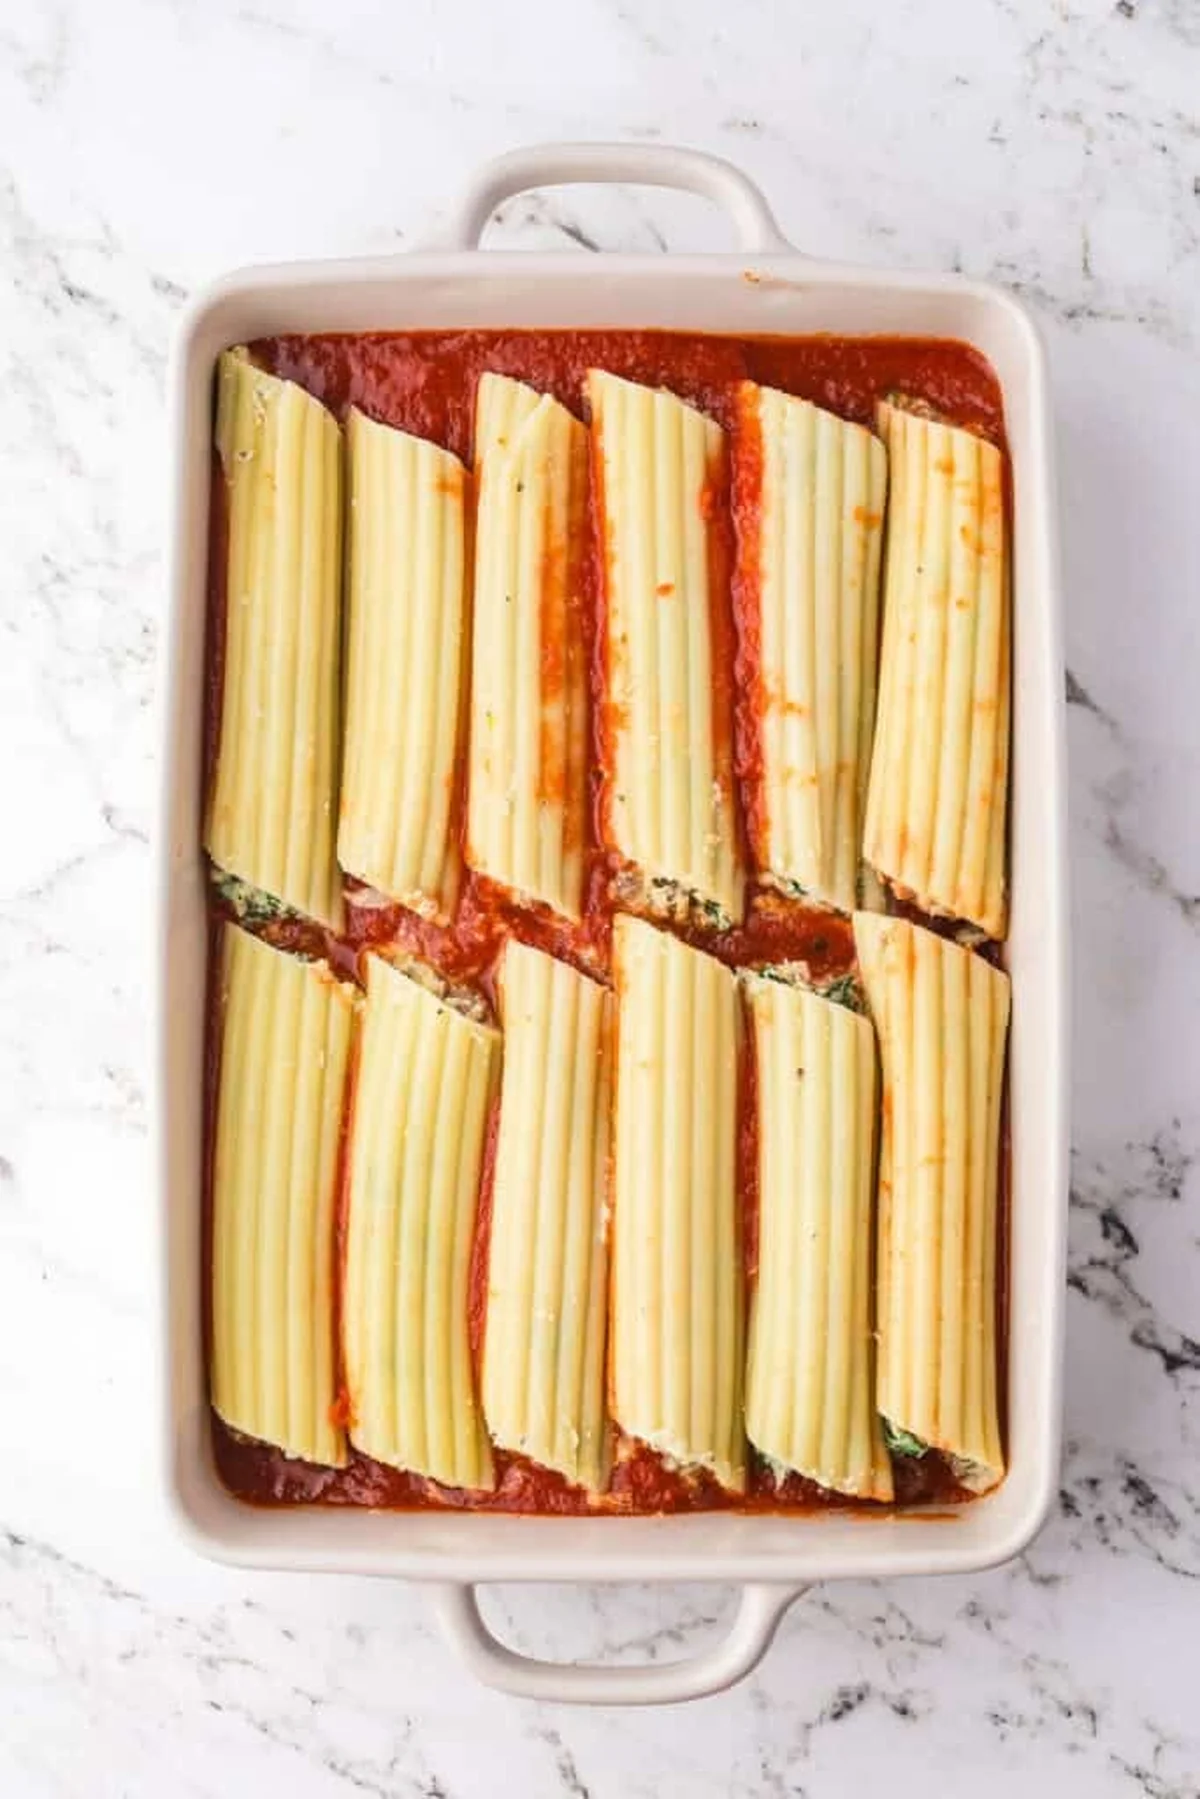
    Manicotti shells in a white casserole dish before baking

    6. Assemble. Line the sauce-lined dish with the filled shells in rows, top with the remaining marinara and mozzarella, and you’re done for the night.

    7. Bake. Cover the dish with foil that you’ve lightly sprayed, bake on the center rack for 20 minutes. Uncover and bake another 8–10 minutes, until the cheese is melted and the sauce is bubbling. Let it sit a few minutes before you dig in.

    Baked manicotti casserole plated with melted cheese

    FAQs

    Can you make this ahead? Yes — and I’d say it’s easier. Fill the manicotti up to 24 hours ahead, stop before baking, cover, and refrigerate. From the fridge, expect it to take 5–10 minutes longer, because everything starts cold.

    Can you freeze manicotti? You can, before it goes in the oven. Baking from frozen adds roughly 10–15 minutes. One thing I change: I pour the sauce over the tops of the shells, not just down the center, when I’m freezing. It keeps the noodles from drying out while the dish thaws and finishes cooking — and make sure you have a good layer of sauce on the bottom of the pan, too.

    How long does it last? Three days, in a covered container in the refrigerator. Reheat in the oven covered with foil, or nuke individual plates in the microwave.

    Helpful notes

    • Manicotti packages usually come with 14 noodles, and you’ll probably split a noodle or two. That’s normal, and it’s why the recipe is written for 12.
    • Split down one side only? You can still use it. Lay it open, pipe the filling onto one side, fold the other side over, and put the broken seam on the bottom of the pan. Nobody will ever know it split.
    • Any shells that break into more than one piece, I just hand to my husband as a pre-dinner snack.
    • Not sure if a shell is full? Gently poke it. If it feels soft, add a little more filling.
    • Serve with a salad and garlic bread, if you’re like us and go through 2–3 manicotti each.
    • Every serving is about 281 calories: carbs 7g, protein 15g, fat 22g, sodium 810mg.

    Make it yours

    • Switch to spicy Italian sausage if you want more bite.
    • Skip the lemon zest if you don’t have it — it doesn’t make or break the dish.
    • Add a handful of thinly sliced mushrooms or diced bell pepper to the filling the same way you fold in the sausage.

    Happy cooking,
    Maya
    Keep Reading

  • Tahini Hot Chocolate: Creamy, Frothy, and Packed with Protein

    Tahini Hot Chocolate: Creamy, Frothy, and Packed with Protein

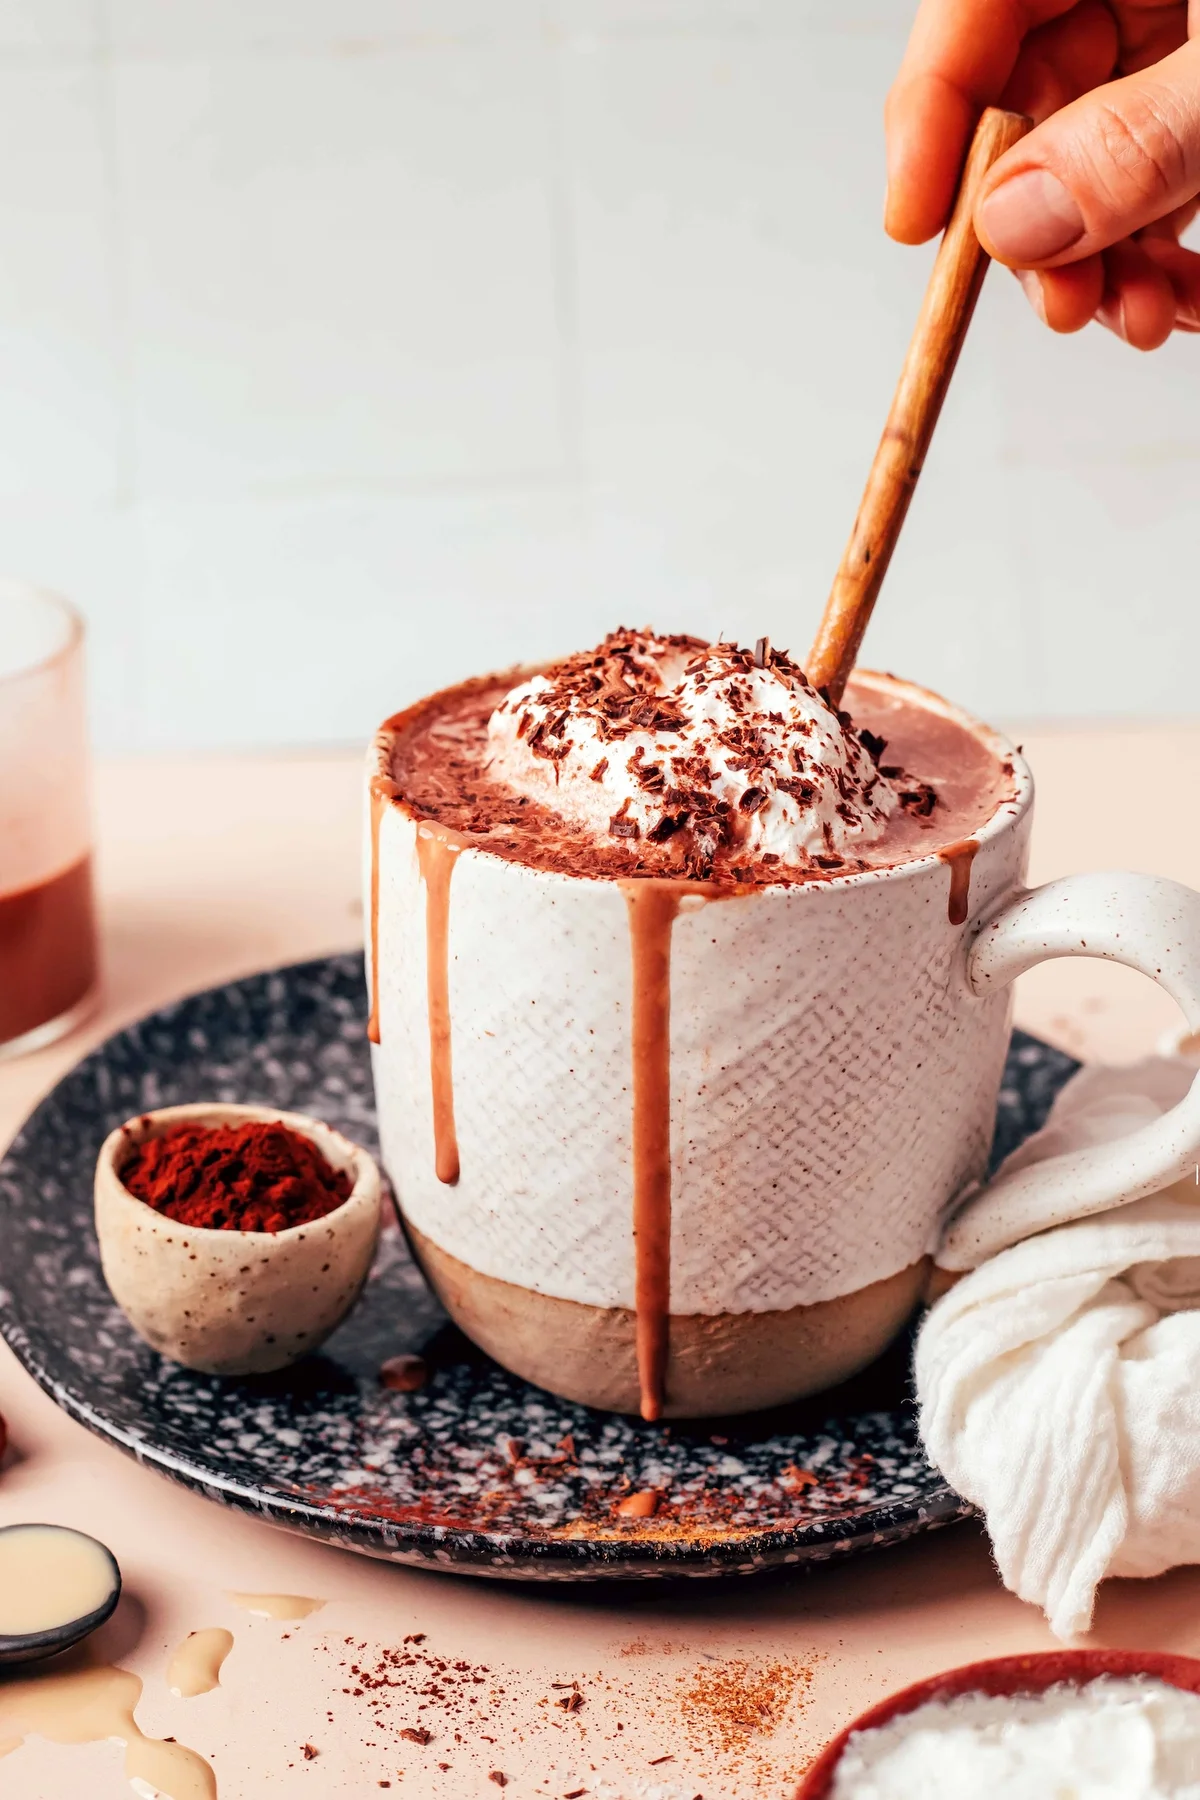
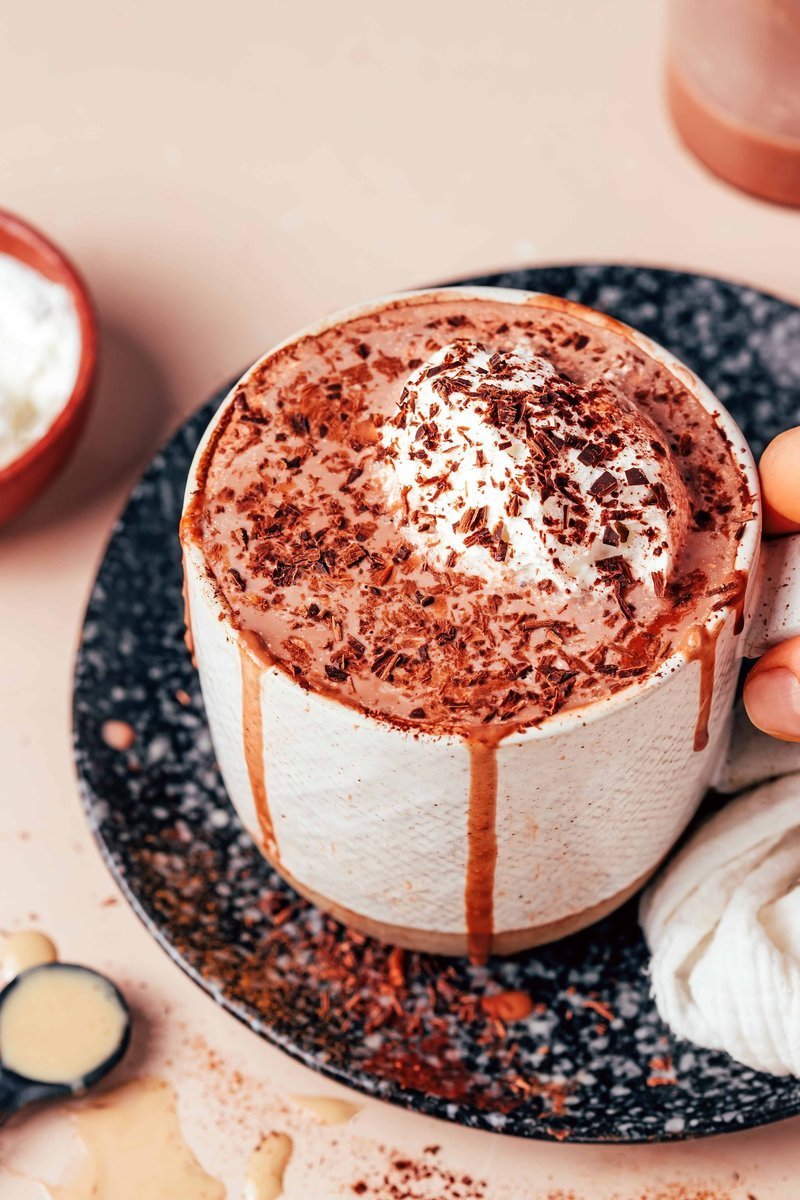
    Mug of creamy tahini hot chocolate topped with whipped cream

    The kitchen clock said 9:45 and I still hadn’t put dinner plates away, but my hands were already reaching for cocoa powder. Some nights the family just needs something warm and low-effort, and this is the one I keep in rotation. It took me three tries before the balance worked. The first batch was bitter, the second was flat, the third finally hit that sweet, thick, almost-drinking-chocolate spot I was after.

    Once it clicked, this became my go-to for cold evenings. It’s naturally sweetened with a medjool date and a splash of maple syrup, blended with hot water until it’s frothy. And here’s the part I love: the tahini and a scoop of collagen quietly put about 15 grams of protein into one mug, so it feels like a treat but lands somewhere closer to a meal. No one needs to know. They just need to be warm.

    Real time: 5 minutes. Hands-on: 5 minutes. One blender, one mug, done.

    What goes in

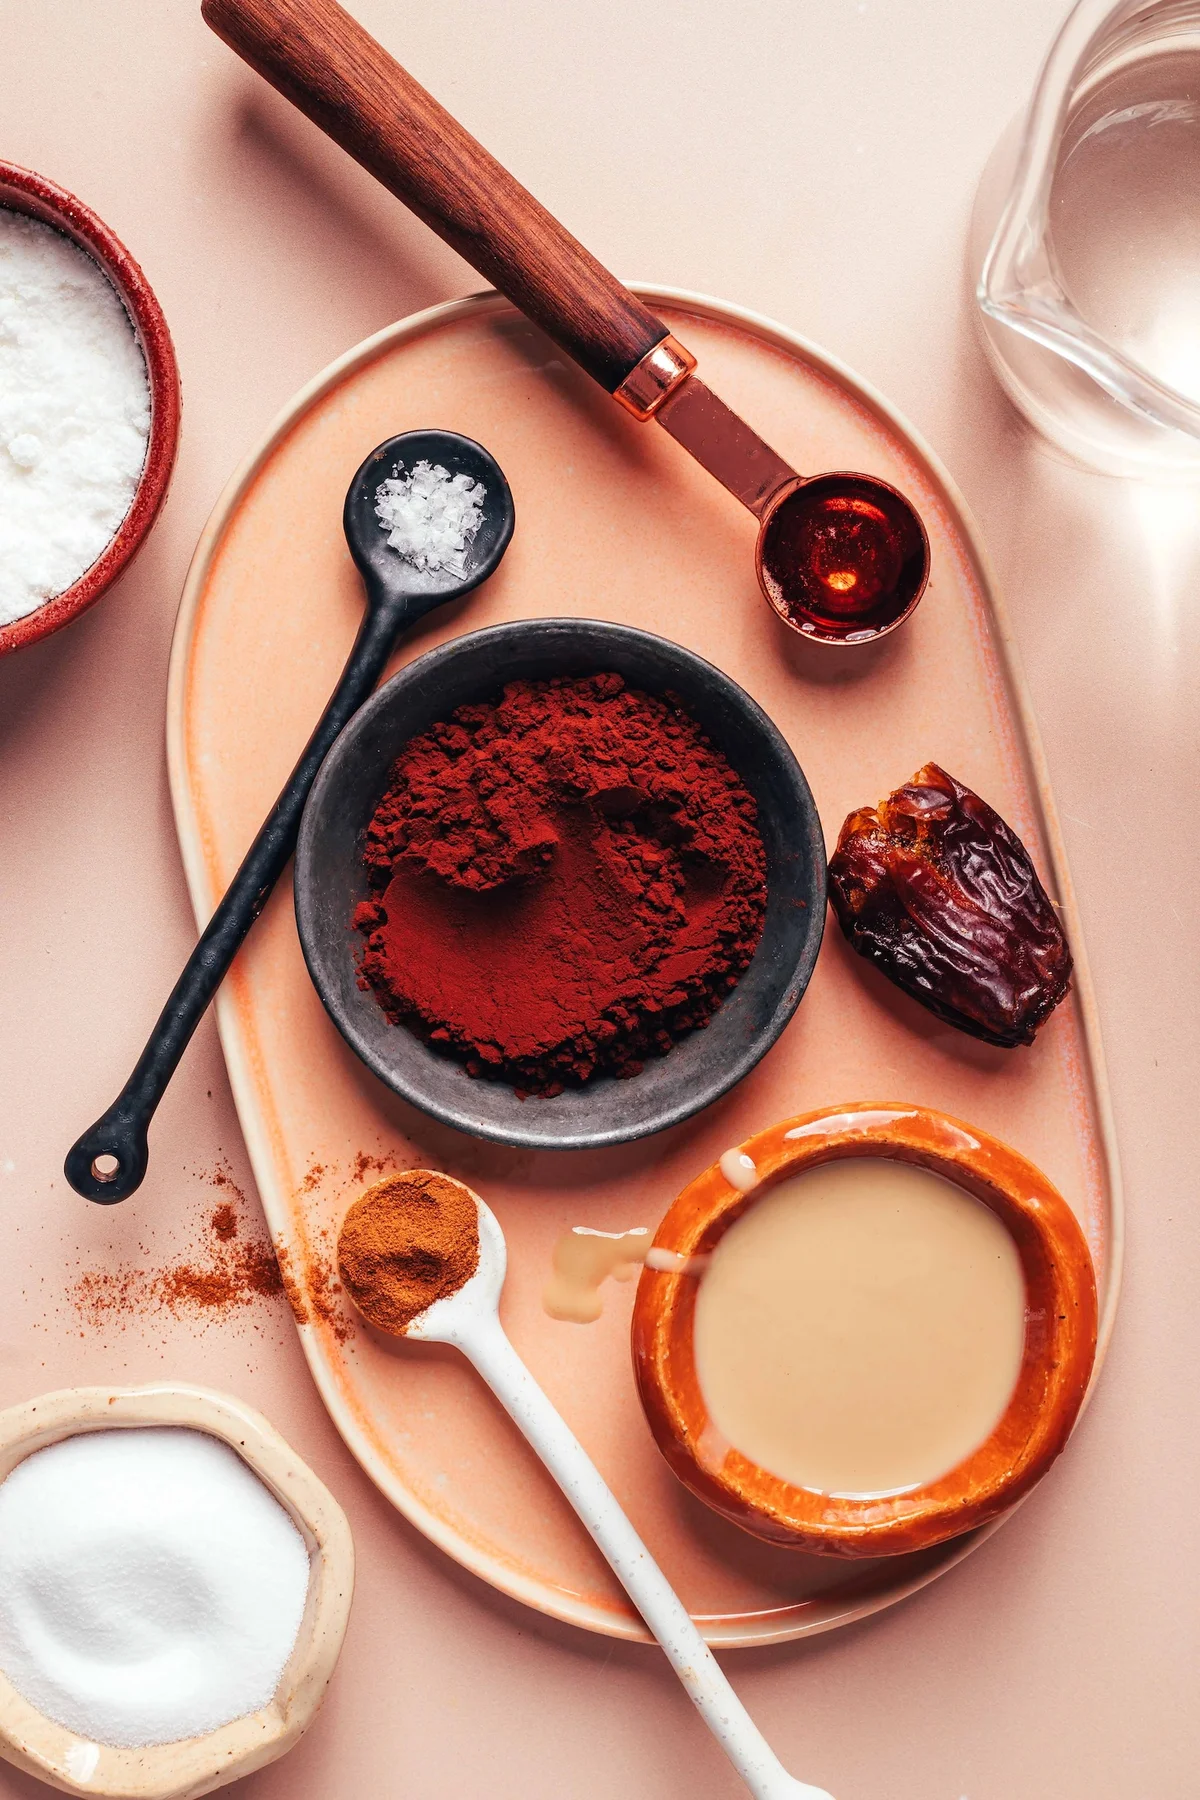
    You need a generous amount of cocoa powder. This is a drinking-chocolate-level of cocoa, not the dusty pinch you’d use for baking. The more you use, the deeper the chocolate flavor gets.

    Tahini is the star. It’s one of my favorite pantry ingredients for its vitamins, minerals, and healthy fats, but here it earns its spot for a different reason. It gives the drink a gorgeous thickness, a nutty depth, and a richness that cocoa powder alone can’t do.

    For sweetness I use a combination of maple syrup (or honey if you’re not vegan) and a pitted medjool date. You can swap in nearly any sweetener, but the date is doing real work. It adds a caramel-like note and makes the whole thing even creamier. I keep a small bag of pitted medjools in the freezer for exactly this kind of thing.

    A tiny pinch of sea salt. That’s all. Salt, tahini, and maple together make everything taste more like itself.

    Cinnamon rounds out the warmth and adds a little extra sweetness. And if you’re into protein drinks, add collagen. Omit it and the hot chocolate is still great, just with less protein. Vegan? Leave it out and you’re set.

    For the liquid base, I blend coconut milk powder with very hot water to make a creamy, dairy-free milk. You can swap in coconut milk, or use whatever milk you drink. Almond, oat, and cashew all work beautifully. I just find the powder version makes the drink richer.

    Tahini hot chocolate ingredients: cocoa, date, spices, syrup

    How to make it

    This is a blender drink, and the blender is doing two jobs at once. It froths the drink so it’s extra creamy, and it breaks the date down completely so you don’t get any chewy bits in your mug.

    Use a heat-safe blender, the kind with a vent in the lid so steam can escape. My Vitamix handles hot liquids without a fuss. If you blend hot liquid in a sealed container, the pressure builds and the lid can pop off. I learned that the hard way, and I don’t recommend it.

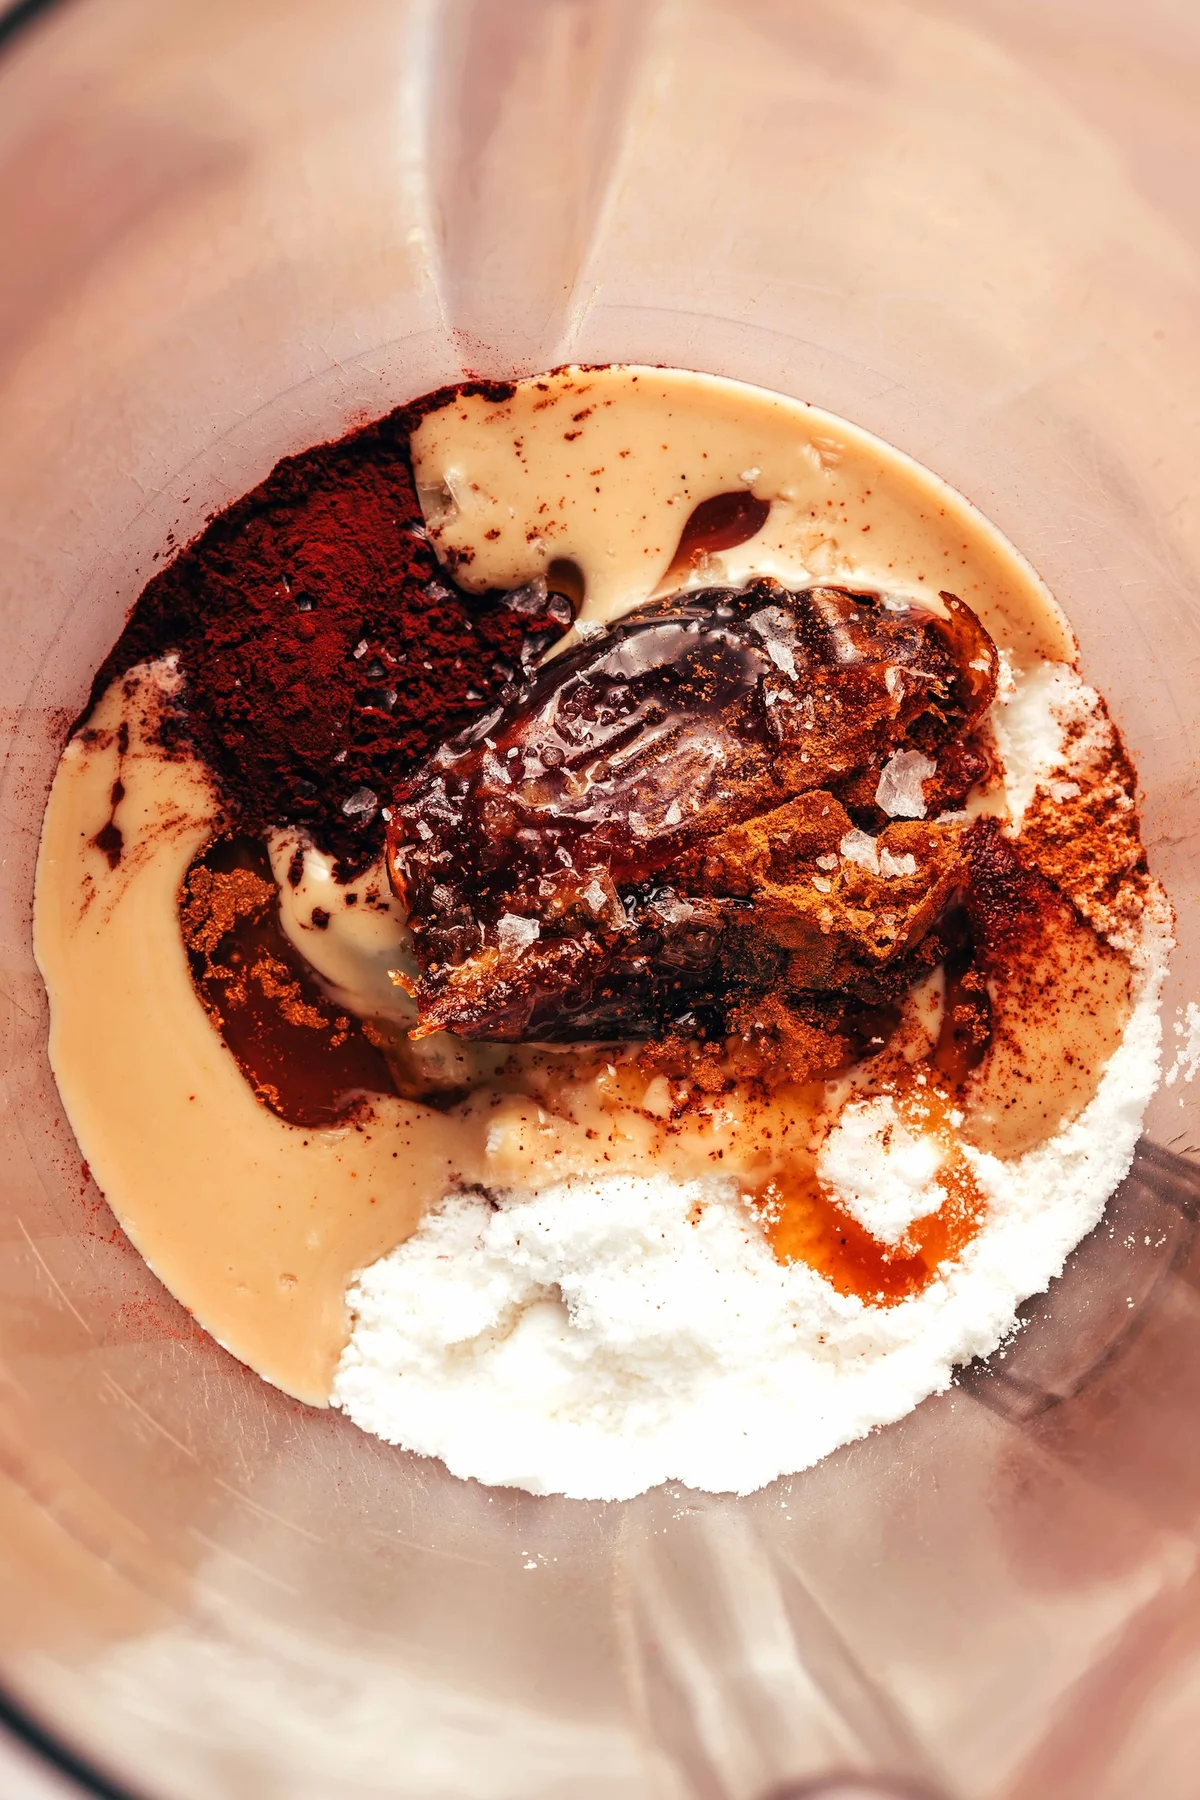
    1. Put the cocoa powder, tahini, pitted medjool date, maple syrup or honey, sea salt, cinnamon, collagen, and coconut milk powder into the blender.
    2. Add the very hot water and blend until it’s creamy and completely smooth.
    3. Taste. Add more maple syrup or honey if you want it sweeter, more cinnamon for warmth, more cocoa powder for a deeper chocolate flavor, or a little more coconut milk powder or tahini if you want it thicker.
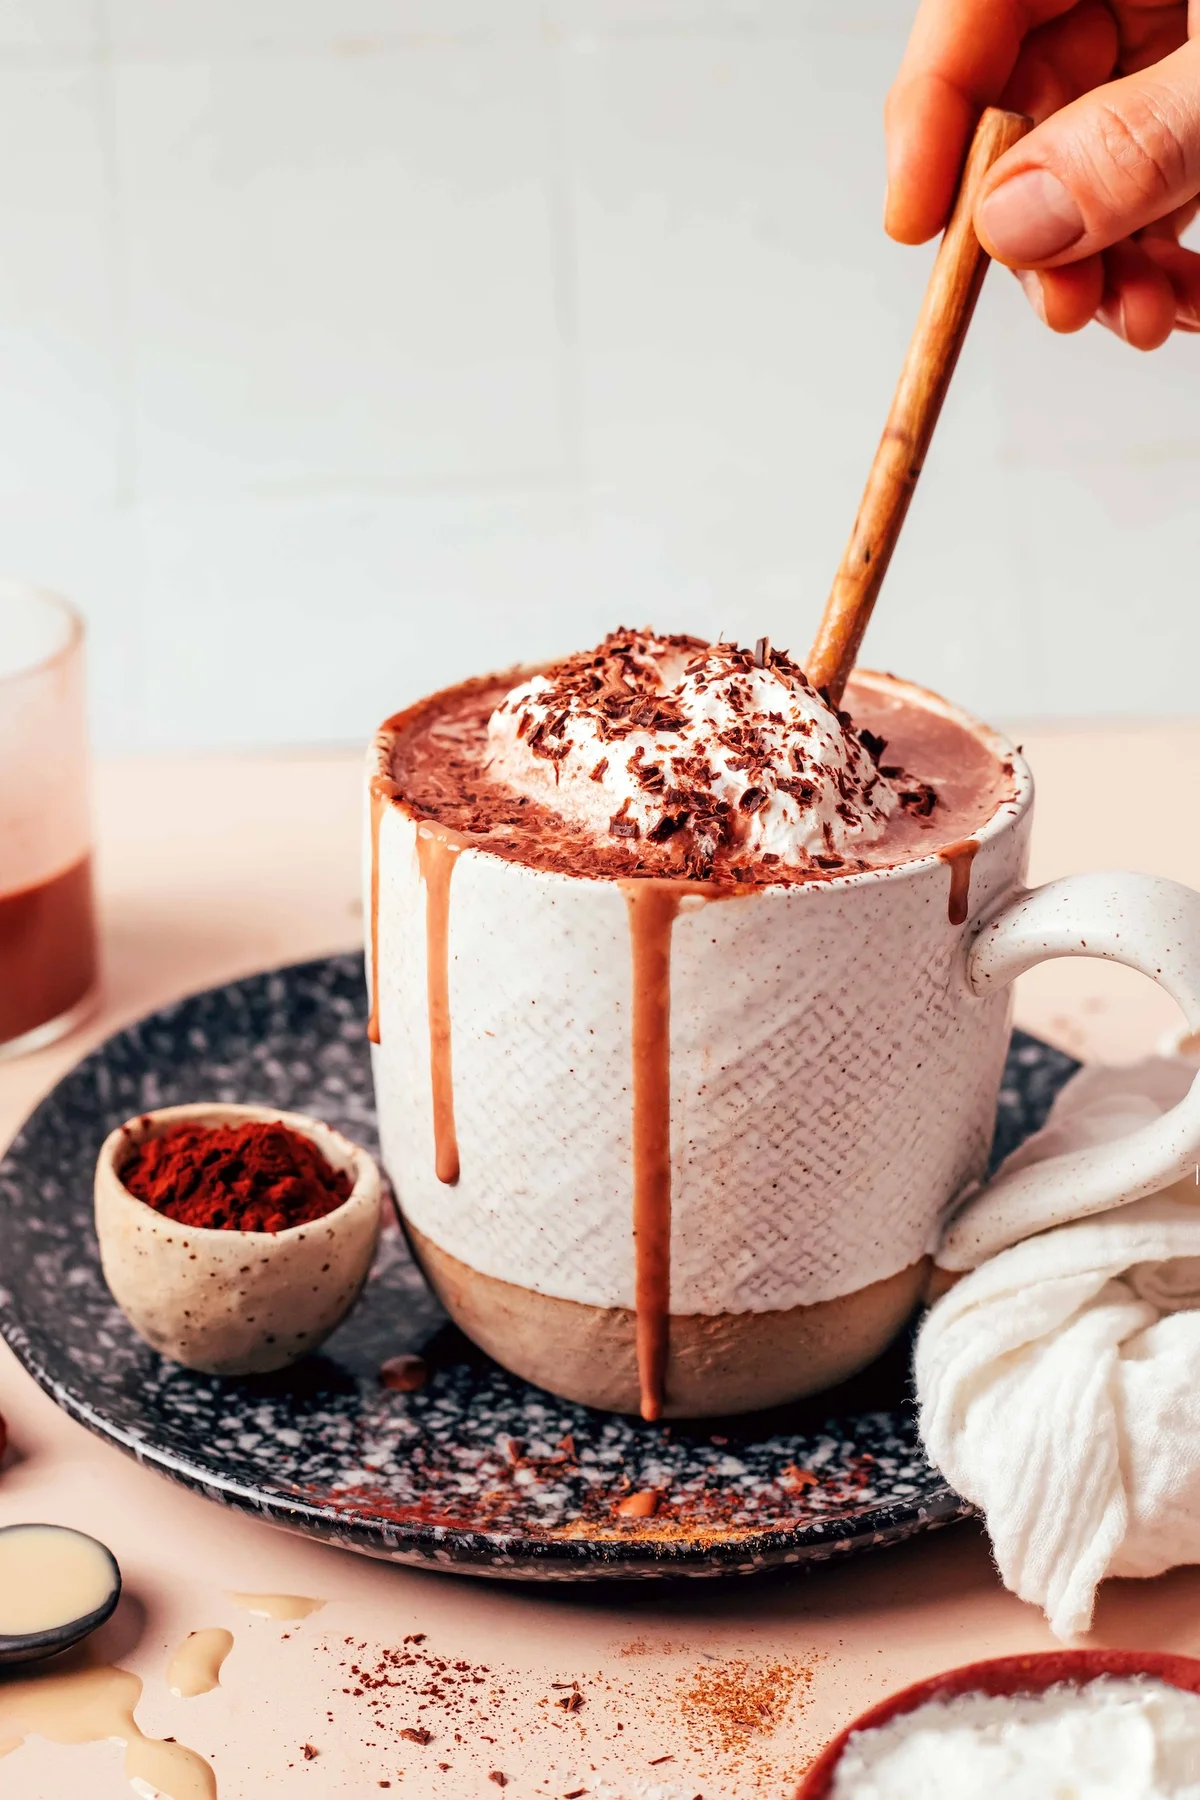
    4. Pour into a mug. Enjoy it plain, or top with whipped cream (coconut works well), a drizzle of tahini, a dusting of cocoa, or shaved dark chocolate from your favorite bar.
    Hot chocolate ingredients layered inside a heat-safe blender

    If you don’t have a heat-safe blender

    Make it in a saucepan on the stovetop instead. Skip the date and use coconut sugar or another liquid or granulated sweetener, since a date won’t break down as easily without a blender. Give it a stir until it’s smooth and warm, and if you have a handheld frother, use it to get that creamy, frothy texture.

    It’s best fresh. Leftovers keep in a sealed container in the fridge for up to 3 days. Reheat on the stovetop before serving.

    Make it yours

    This is a good base to push on. Add a pinch of cayenne for heat. Swap the cinnamon for a little nutmeg. Top it with a dollop of coconut whipped cream and a drizzle of tahini for something that looks like it took all afternoon. It’s genuinely the perfect cozy drink for the holiday season, for coming in after time outside in the cold, or for any evening when you want something decadent but still feels honest.

    I keep a box of chocolate cookies nearby for this, and they disappear together. If you’ve made something like this and it flopped the first few times, that’s normal. This one did too. Keep adjusting the cocoa and the sweetness until it’s yours.

    Finished tahini hot chocolate with whipped cream and chocolate shavings

    Happy cooking, Maya.

    Keep Reading

  • Hawaiian Macaroni Salad

    Hawaiian Macaroni Salad

    The first time I had this, it was not in a kitchen at all. It was on a paper tray at a plate lunch counter, next to white rice and a slab of grilled meat, and the only thing I was thinking was why have I never made this myself. Eight ounces of elbow macaroni and a handful of other things is all it takes, and the whole thing comes together before your grill cools down.

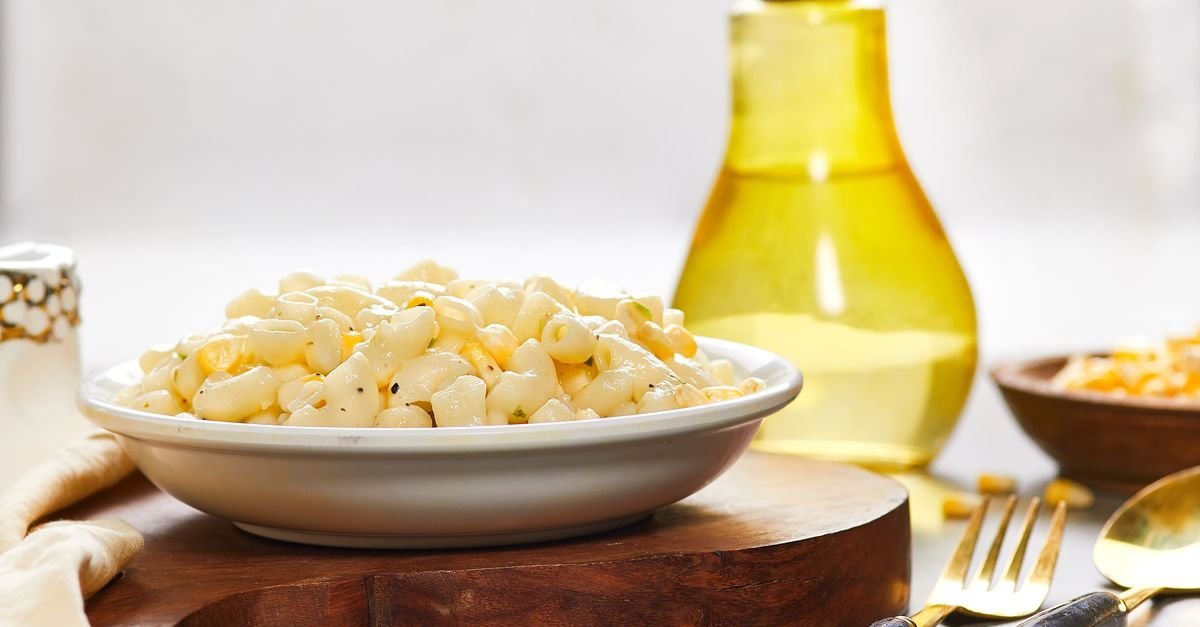
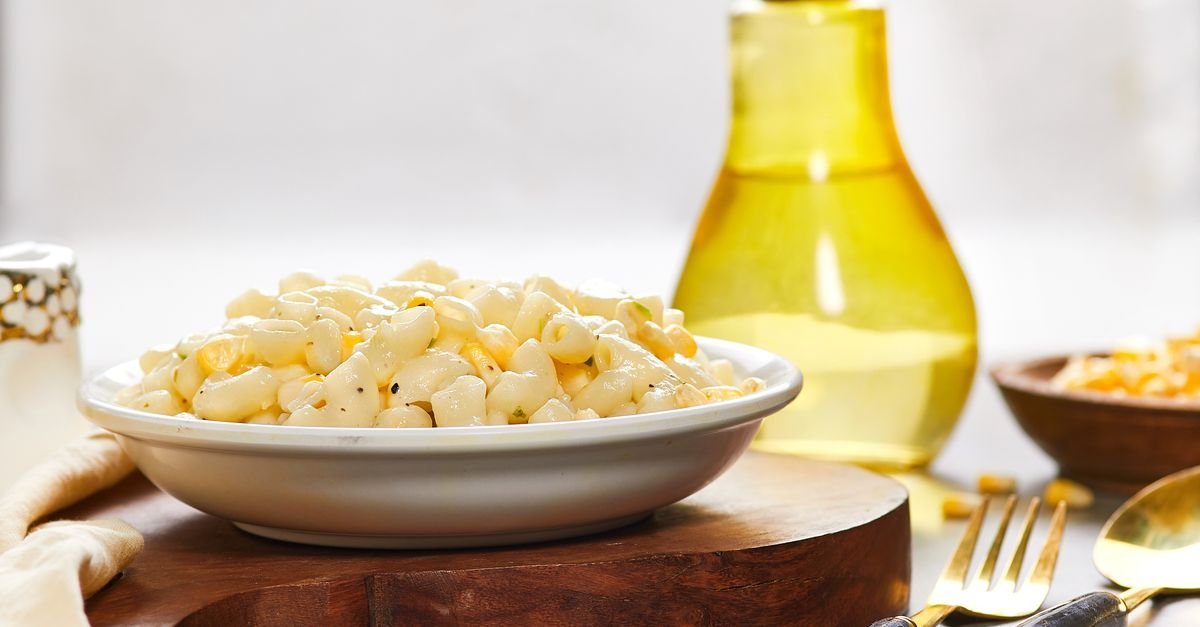
    Creamy macaroni salad in a bowl on a wooden board

    What I love most is how little has to go right. The noodles are soft — deliberately soft. The carrots and onion are shredded, not diced, so they melt into the salad instead of standing out in chunks. And the secret is the vinegar: it goes on the pasta while the noodles are still warm, so they soak up that tang before the dressing ever touches it. Real time: about an hour, mostly chilling. Hands-on: 10 minutes. It makes 8 to 12 servings, which is exactly how much of a crowd you need to get through it.

    What you need

    Nothing you don’t already keep in the pantry or the produce drawer:

    • 8 oz elbow macaroni noodles
    • 1 tbsp apple cider vinegar
    • 2 medium carrots, shredded
    • ½ yellow onion, shredded
    • 1 cup mayonnaise
    • 3 tbsp milk
    • 1 ½ tbsp sugar
    • Salt and pepper to taste

    For the method you’ll need a large pot, a colander, a large bowl, a small bowl, measuring cups and spoons, and spoons. That’s the entire equipment list, and it’s the kind of list that stays in your head.

    How it comes together

    Step 1. Shred the carrots and onion. Shredding is not a shortcut — it’s the point. Fine strands blend into the dressing and give the salad its soft, uniform texture.

    Step 2. Boil the pasta for a few minutes longer than the package calls for, until soft. This is the one pasta salad where overcooked is correct. The noodles need to absorb flavor while they sit.

    Step 3. Drain the water, then add the pasta to a large bowl with the apple cider vinegar, the carrots, and the onion. Refrigerate for about an hour until chilled. The vinegar soaks in while the noodles are still warm — that’s the whole flavor move.

    Step 4. In a small bowl, mix the mayonnaise, milk, sugar, salt, and pepper, then fold it into the pasta.

    Step 5. Chill until you’re ready to serve. If it looks thick or dry by then, stir in a little more milk and mayo.

    Make it yours

    There are a lot of legitimate ways to take this further. Diced hard boiled eggs make it more filling. A can of drained tuna stirred in turns the side into a meal. Finely diced celery adds a little crunch against the soft noodles, and small cubed potatoes make it heartier. A sprinkle of sliced green onions right before serving is the one I’d add every single time. If you don’t have apple cider vinegar, seasoned rice vinegar works, with a slightly milder tang.

    Storing it

    Keep it in an airtight container in the refrigerator for up to 3 to 4 days. Honestly, it gets better as it sits — the soft noodles keep absorbing the dressing. If it thickens up, stir in a splash of milk and a spoonful of mayo to loosen it back down.

    The details that matter

    Overcook the pasta on purpose. Al dente is for pasta dishes, not this one. And chill the noodles and vegetables before the dressing goes in — mayo on warm pasta turns soupy.

    A few questions I get asked about this:

    How is it different from regular macaroni salad? Three things. The pasta is soft on purpose. The vinegar goes on the warm noodles. And the dressing is plain mayo, milk, and sugar — no mustard, no relish, no crunchy vegetables.

    Can I make it ahead? Yes, and I’d rather you did. Making it the night before lets the flavors settle. Give it a good stir before serving.

    Does it dry out in the fridge? It can. The overcooked pasta keeps drinking the dressing as it sits. A little more mayo and milk fixes it.

    What do you serve it with? The classic answer is a plate lunch — rice and something like teriyaki chicken, kalua pork, or grilled meat. But it’s equally good alongside burgers, hot dogs, ribs, or anything off the grill.

    This is the kind of side dish that earns its spot in the rotation because it asks almost nothing of you. A pot of pasta doing its thing on the stove, a bowl chilling in the fridge, and you’re out of it for an hour. That’s a good weeknight side dish. Happy cooking, Maya.

    Keep Reading