Author: Maya Collins

  • Quick Pickled Red Cabbage (Ready in 10 Minutes)

    Quick Pickled Red Cabbage (Ready in 10 Minutes)

    Here’s a confession: pickling used to intimidate me. It sounded like a whole weekend project — jars, lids, sterilizing everything twice. Then one Tuesday I had a half-head of red cabbage going soft in the crisper drawer and a bottle of apple cider vinegar doing nothing, and I just threw them together with water, salt, and sugar.

    Twenty minutes later I was eating pickled cabbage off a spoon and quietly rewriting how I cook. It’s brine-y, tangy, a little sweet, and still slightly crunchy. The cabbage turns this gorgeous pink that makes any taco, sandwich, or rice bowl look like a lot more work than it was.

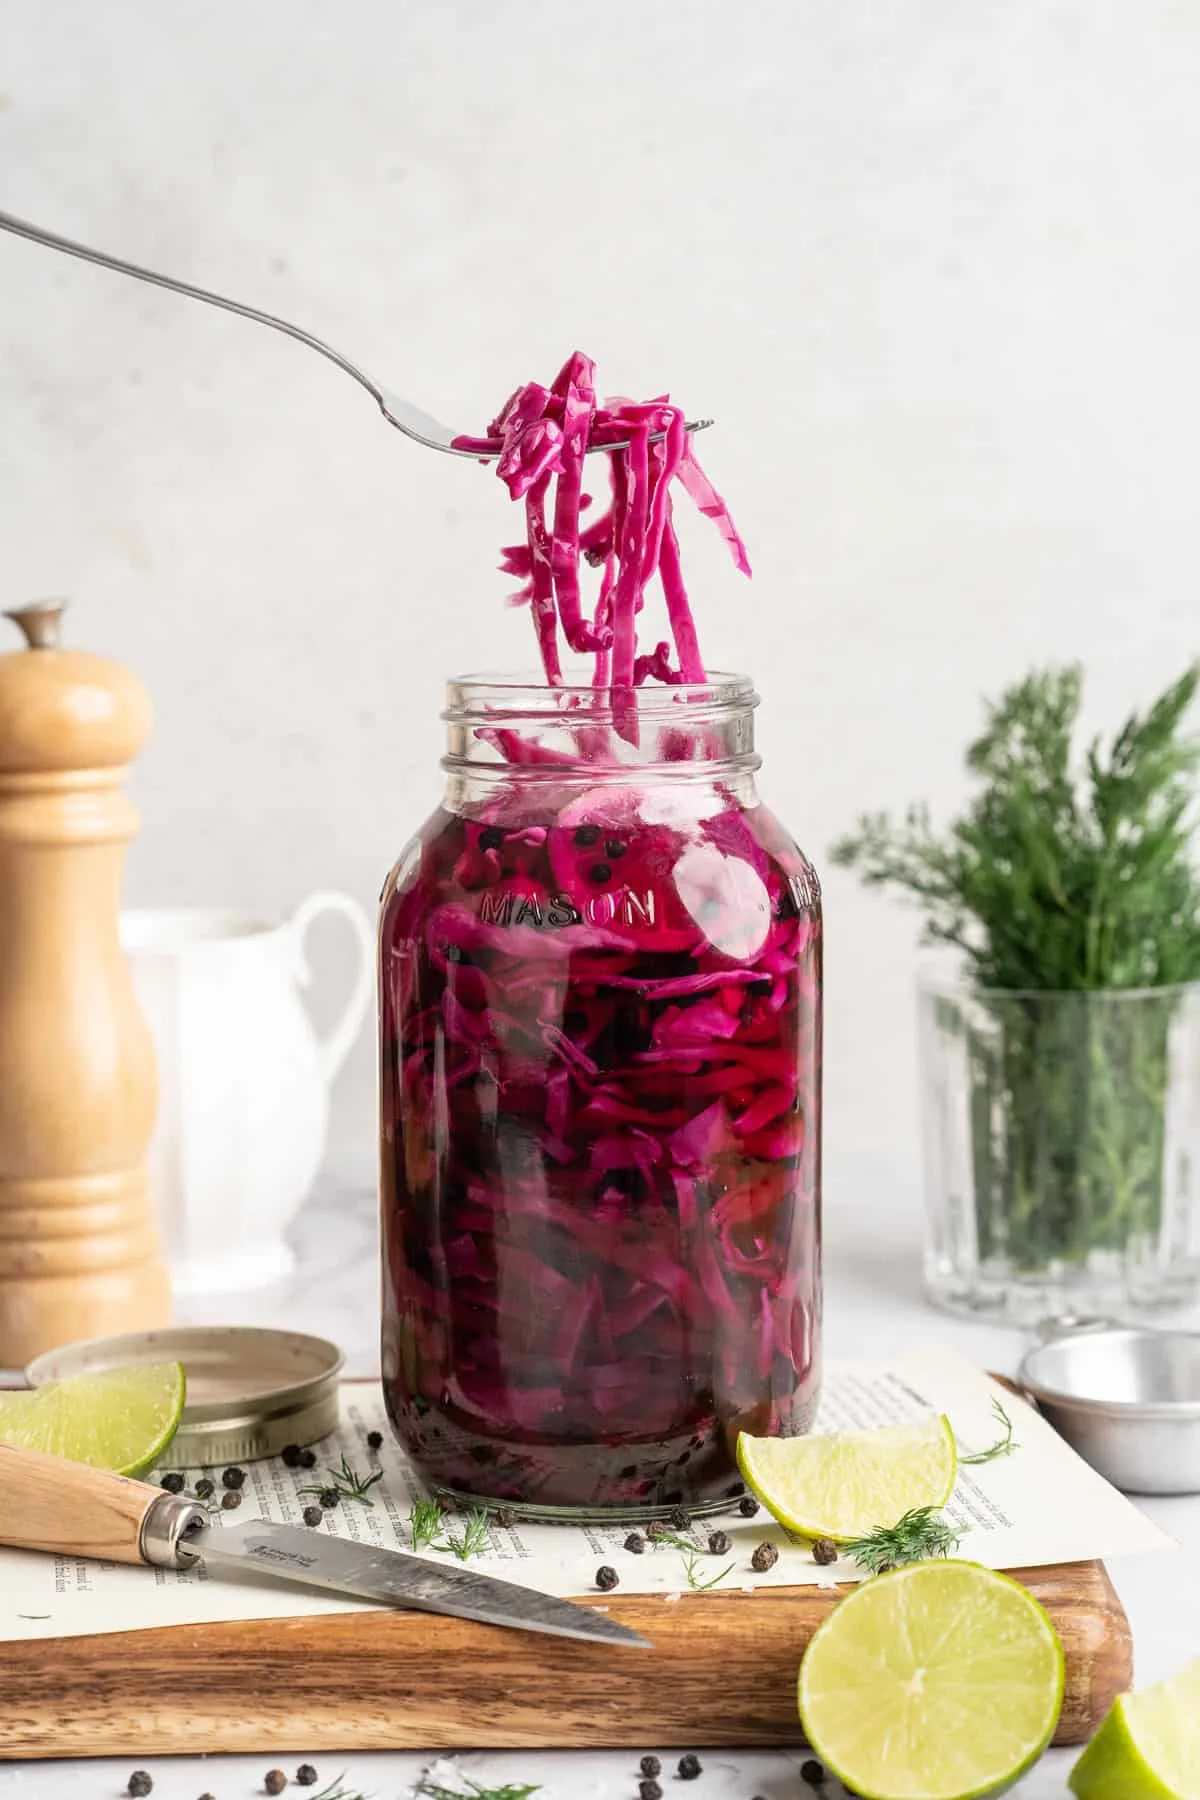
    Jar of bright pink quick pickled red cabbage with lime

    Real time: 10 minutes, plus a day or two in the fridge for the best flavour. Hands-on: about 10 minutes. Total effort: one pot and one mason jar.

    Why this quick pickle recipe works

    I’ve made this more times than I can count, and it earns its spot in my kitchen for three reasons:

    It’s stupidly easy. A handful of ingredients, about 10 minutes of active kitchen time, and no special equipment beyond a pot and a jar.

    It gets better with time. The flavours keep melding in the fridge, so it’s a perfect meal-prep project. Make a jar on Sunday, and you’ve got a bright, zingy topping for everything you eat all week. It keeps for up to a month in the fridge (and up to 3 months in the freezer, though it loses a little crunch).

    It works with almost any vegetable. Cabbage here, but the same brine handles cucumbers, radishes, red onions, and cauliflower. More on that below.

    Labeled ingredients for quick pickled cabbage on a counter

    Ingredients, and honest swaps

    • ½ head red cabbage, chopped (about 550g, roughly 2 cups) — sliced or chopped into smaller pieces. Cucumber works too, if you want to make pickles (see the note in the method).
    • 1 cup apple cider vinegar (240ml) — white wine vinegar works in a pinch, but I like the taste of the apple cider best.
    • 1 cup filtered water (240ml) — the cabbage soaks up this brine, so if your tap water tastes like tap water, use filtered or bottled.
    • 2 teaspoons sea salt (about 11g) — or kosher salt.
    • 1 tablespoon sugar (12g) — cane, coconut, or brown sugar all work. Brown adds a slight molasses note. Some people love it, some don’t — taste and decide.
    • A handful of peppercorns — the peppery bite rounds out the whole jar. Feel free to add cumin seeds or a sliced jalapeño.
    • Lime slices, optional — lemon works just as well for a bright, citrusy twist.

    How to make quick pickled red cabbage

    Numbered, because you can do this while dinner does its quiet thing on the stove.

    1. Bring the brine to a boil. In a small pot, combine the vinegar, water, salt, sugar, and peppercorns (plus any extras you’re adding). Bring to a boil for 2 minutes.
    2. Add the cabbage. Toss in the chopped red cabbage and boil for another 2 minutes. It’ll soften just enough while keeping that subtle crunch.
    3. Cool for 1 minute. Pull the pot off the heat and let everything sit for 1 minute.
    4. Pack the jar. Pour everything into a mason jar large enough to hold it all (you may need two smaller jars), making sure the cabbage sits completely submerged in the liquid. Add the lime slices if you’re using them and give the jar a swirl.
    5. Cool to room temperature. This step matters — see the tips below. Once it’s at room temp, screw the lid on tight and refrigerate.
    6. Serve. You can eat it right away, but I let the jar sit in the fridge for a few days. I tried mine three days in and it was perfect. A week is even better.

    Cucumber note: if you’re making pickles instead, skip the boil for the cucumbers. Wash, dry, and slice them, then pack them tightly into a jar — you may need two. Bring your brine to a boil for 4 minutes, cool for 1 minute, then pour it over the cucumbers so they’re completely covered.

    Finished jar of quick pickled red cabbage ready to refrigerate

    Tips for a good jar

    • Submerge it fully. Whatever the vegetable, it needs to sit completely under the brine or the dry bits won’t pickle. Use a jar big enough (or two smaller ones).
    • Don’t skip the cooling step. If you stick the jar in the fridge while it’s still hot, the vegetables end up softer than they should be. Let it come to room temperature first.
    • Give it time. It’s edible the moment it’s cool, but a couple of days in the fridge is the difference between fine and genuinely great.

    What to do with it

    I’ll admit it — I’ve been known to eat these straight out of the jar with a spoon. But they’re best as a topping: tacos, sandwiches, rice bowls, salads. The pink colour makes everything look intentional.

    My usual moves: piled onto a grinder-style sandwich, tucked into a smashed chickpea and avocado sandwich, or scattered over fish or cauliflower tacos with a little crema on the side. Once you’ve put this on your favourite recipe, it’s hard to go back to the version without it.

    Storage

    Fridge: sealed in a mason jar, these keep for several weeks — up to a month. They taste their best after about a week.

    Freezer: need more time? Freeze the jar for up to 3 months and thaw in the fridge. Just know the cabbage will lose some of that subtle crunch.

    Make it yours

    The brine is a template. Swap the red cabbage for pickled red onions (slice them thin, they’re incredible on eggs), radishes, or cauliflower — it softens nicely and soaks up the flavour. Baby carrots in sticks pickle well too. If you’re after classic pickles, use 4 small cucumbers or 2 medium-large ones, sliced, and follow the cucumber note in the method. Tell me what you end up putting in the jar — I genuinely want to know.

    Happy cooking, Maya
    Keep Reading

  • Blueberry Banana Muffins

    Blueberry Banana Muffins

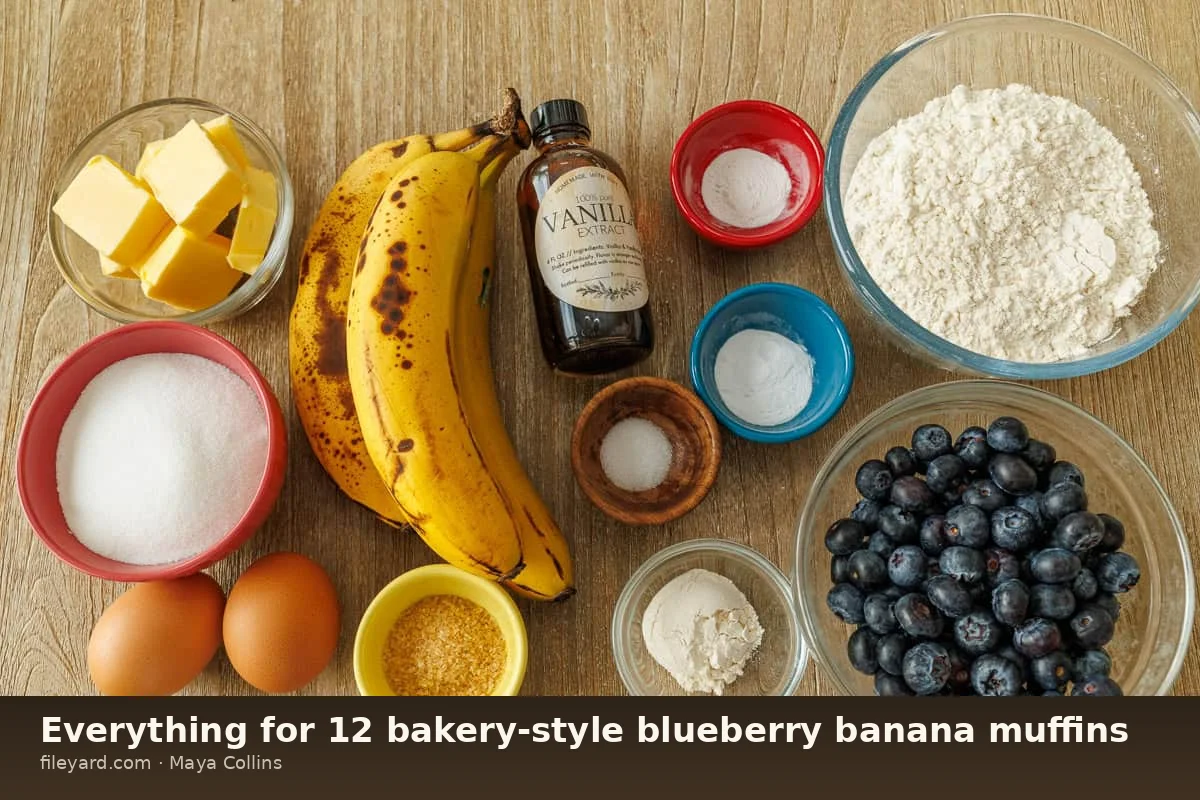
    There was a pile of bananas on the counter that had given up on being yellow. Two of them, brown-spotted and soft in the middle, next to a pint of blueberries I’d already forgotten were in the fruit drawer. My husband walked past, saw the pandas, and said, What are we doing?

    That’s when the dessert idea hit: soft, banana-sweet muffins with a burst of blueberry in every bite. I’ve made this one more times than I can count, and the first three times, it flopped — dense, flat, a little sad on the plate. The fix was two small things: high heat for the first few minutes to get a real dome, and folding the berries in last. Once I figured that out, they became the muffin I reach for when the good fruit goes soft and the weekend hasn’t started yet.

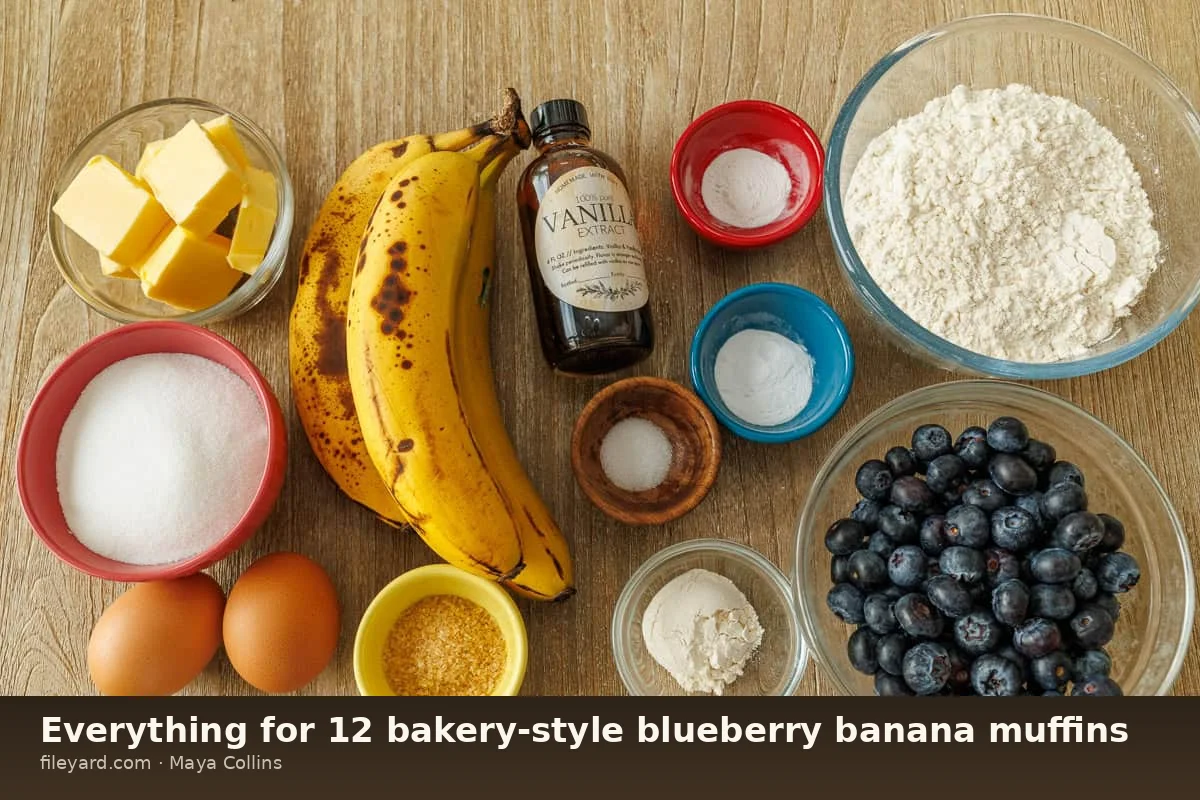
    Flat-lay of blueberry banana muffin ingredients on wood

    What you get: a soft, moist crumb packed with ripe banana flavor, with pockets of pulpy sweet blueberry scattered throughout. Bakery-style domed tops, a little crunch from course sugar on top if you use it, and a normal handful of pantry staples as ingredients. Breakfast, lunchbox, or afternoon refresher — they do all three.

    Real time: about 40 minutes (mostly baking). Hands-on: about 10 minutes.

    What You’ll Need

    The list is short and normal. Most of it should already be in your kitchen.

    • Bananas: about 1 cup (230 g) mashed, from 3 medium or 2 large very ripe bananas. Brown spots are your friend — the sweeter, the better.
    • Butter: 1/2 cup (120 g) unsalted, softened.
    • Sugar: 2/3 cup (165 g) granulated.
    • Eggs: 2 large, room temperature, lightly beaten. Room-temperature eggs cut more evenly, which keeps the crumb tender.
    • Vanilla: 1 tsp (5 ml) extract.
    • Flour: 1 3/4 cups (235 g) all-purpose, spooned and leveled. Weigh it if you can — over-measured flour is the #1 cause of a dense muffin.
    • Baking soda: 1 tsp.
    • Baking powder: 1/2 tsp.
    • Salt: 1/2 tsp.
    • Blueberries: 1 1/2 cups (300 g) fresh or frozen. See below on which to use.
    • Extra flour: 1 tbsp, for dusting the berries.
    • Optional top: 1–2 tbsp coarse sugar for a little extra crunch on the dome.

    Fresh or Frozen?

    Fresh gives you the most beautiful color and texture. Frozen works completely the same way, as long as you don’t defrost first. Frozen berries straight from the freezer keep their juices in place; once thawed, they bleed a grey-blue into the batter and you get speckled spots instead of clean bursts. Fresh berries go in after a quick rinse and dry.

    How to Make Them

    1. Preheat and line. Get the oven to 425°F and line the cups of a 12-cup muffin tin with paper liners or coconut oil. Parchment liners make the cleanest presentation and pull out easily.
    2. Cream the butter and sugar. In a large bowl, beat the softened butter and sugar until it looks a little lighter. Add the beaten eggs and beat on medium until well combined.
    3. Mix in banana and vanilla. Stir in the mashed banana and vanilla until it comes together. The batter might look a little curdled at this point — mine does. It’s normal, don’t overwork it.
    4. Combine the dry ingredients. In a separate bowl, whisk together the flour, baking soda, baking powder, and salt. Add it to the wet and mix only until damp. Stop the moment the last flour streak disappears. This is where most muffins get ruined.
    5. Fold in the berries. Toss the blueberries with the extra tablespoon of flour — the dust coat stops them from sinking to the bottom. Then gently fold into the batter with a spatula. Gently. The berries squish as you mix, so treat them like you’d treat a secret.
    6. Fill the cups. Divide the batter between the 12 cups, filling them almost to the top. A trigger-style ice cream scoop makes this faster and prettier. Sprinkle on a few more berries and the coarse sugar, if you’re doing that.
    7. Bake in two stages. Bake at 425°F for 5 minutes, then reduce to 350°F without opening the oven door, and bake 18–22 more minutes. The first high-heat window is what lifts the top into a proper dome. Done is when the tops are lightly browned and a toothpick comes out of the center clean.
    8. Cool. Let them sit in the pan for 5 minutes, then move to a wire rack. Skipping the rack = steamed bottoms, and these are a good muffin.

    Four Things That Actually Matter

    • Use really ripe bananas. Brown-spotted = sweeter and moister crumb. If your bananas are still green, see my speed-ripening notes in the banana bread post I linked above.
    • Stop mixing early. The batter will look a little uneven before the berries go in. That’s the muffin, not the mistake. Overmixing is how you get a dense, gummy interior.
    • Fill the cups high. Almost to the top. The tall fill is what gives you the dome, and if you’re divide between 12 cups, you’ll end up using all the batter.
    • High heat, then low. The 425°F start for the first 5 minutes is the difference between a bakery-style top and a sad flat one. It’s the only “trick” here, and it really works.

    After the Oven

    Fresh out, the top is crisp and the inside is springy. They trade off fast.

    • Keep: at room temperature, covered, up to 3 days. In a sealed container in the fridge, up to 4 days.
    • Freeze: once completely cool, into a freezer-safe container or bag. Up to 3 months. Defrost at room temperature or in the fridge.
    • Serve warm: an air fryer, toaster oven, or a hot oven for 3–5 minutes brings a frozen one back to almost-fresh. No wrapper.

    Nutrition Per Serving

    • 218 kcal
    • 9 g fat (5 g saturated) · 48 mg cholesterol · 201 mg sodium
    • 33 g carbs · 1 g fiber · 15 g sugar
    • 3 g protein

    Want Another Version?

    Skip the blueberries and use a handful of chocolate chips, or half berries, half cinnamon. Swap the all-purpose flour for a little whole-wheat — just don’t go all the way, or the crumb gets tough. If you’ve made these and they disappeared that fast, ours probably did too. There’s a whole lineup of my muffin posts — zucchini, apple, plain blueberry, cinnamon, chocolate chip, mixed berry — worth a look if you’re in a pie-chart mood.

    Happy cooking,

    Maya

    Keep Reading

  • Creamy Curried Black Eyed Pea Soup (1 Pot)

    Creamy Curried Black Eyed Pea Soup (1 Pot)

    My kitchen on New Year’s Eve was a mess — one pan on the burner, a half-peeled sweet potato on the counter, and the clock already at seven. I wasn’t about to let a lazy evening end with takeout, so I made one pot of soup that does half the work for you.

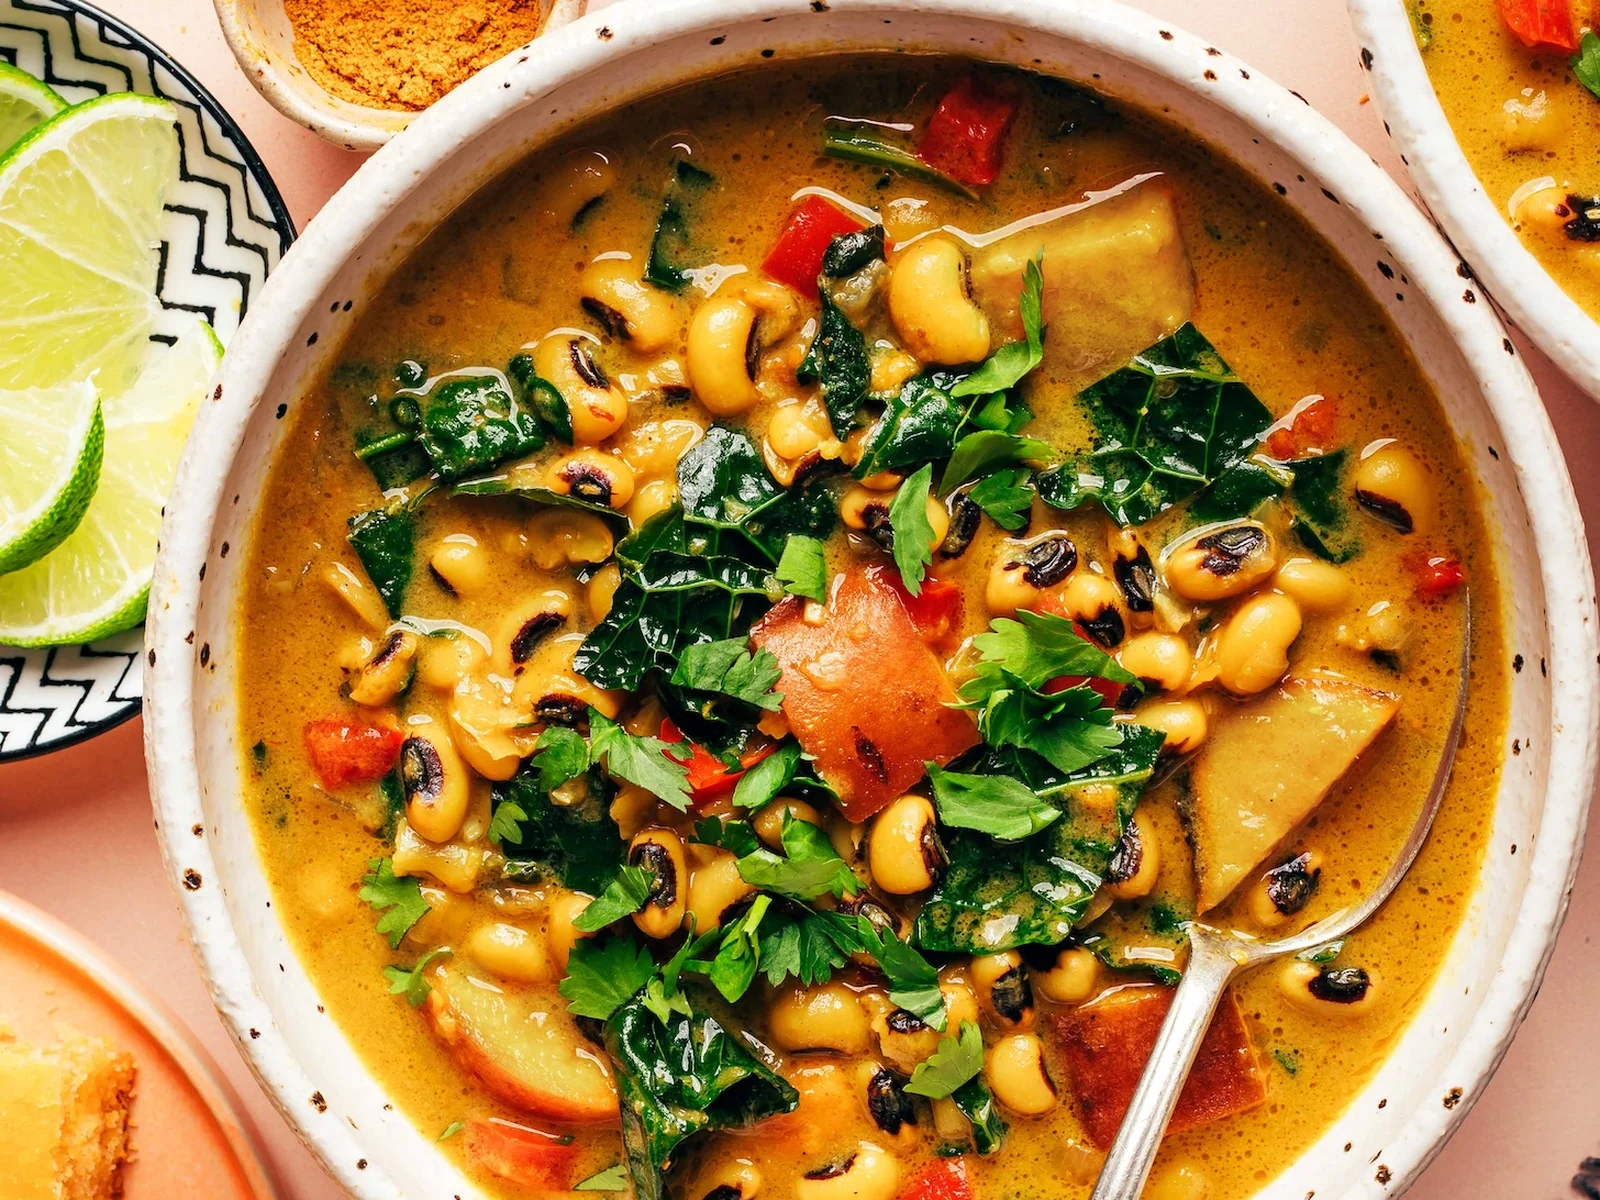
    Creamy curried black eyed pea soup in a bowl with kale

    It’s creamy, it’s curried, and it’s built on black eyed peas — the small legume that, in the American South, people eat on New Year’s Day for luck and prosperity. If that tradition doesn’t ring a bell, no problem. Eat it because it makes a pot of soup that tastes like a warm day in January, which honestly covers most of the luck you need.

    Real time: about 1 hour. Hands-on: about 15 minutes. The rest is a low simmer while you do dishes or stare out the window. One pot. Freezes well. Serves 4.

    Why this one

    I’ve been a black eyed pea person since I made a smoky Instant Pot version years ago. Then a friend of mine — Todd, who runs Turnip Vegan — posted a curry black-eyed pea bowl, and I knew I had to put a spin on it. Mine came out brothier, more Indian-inspired, and a lot easier on a busy night.

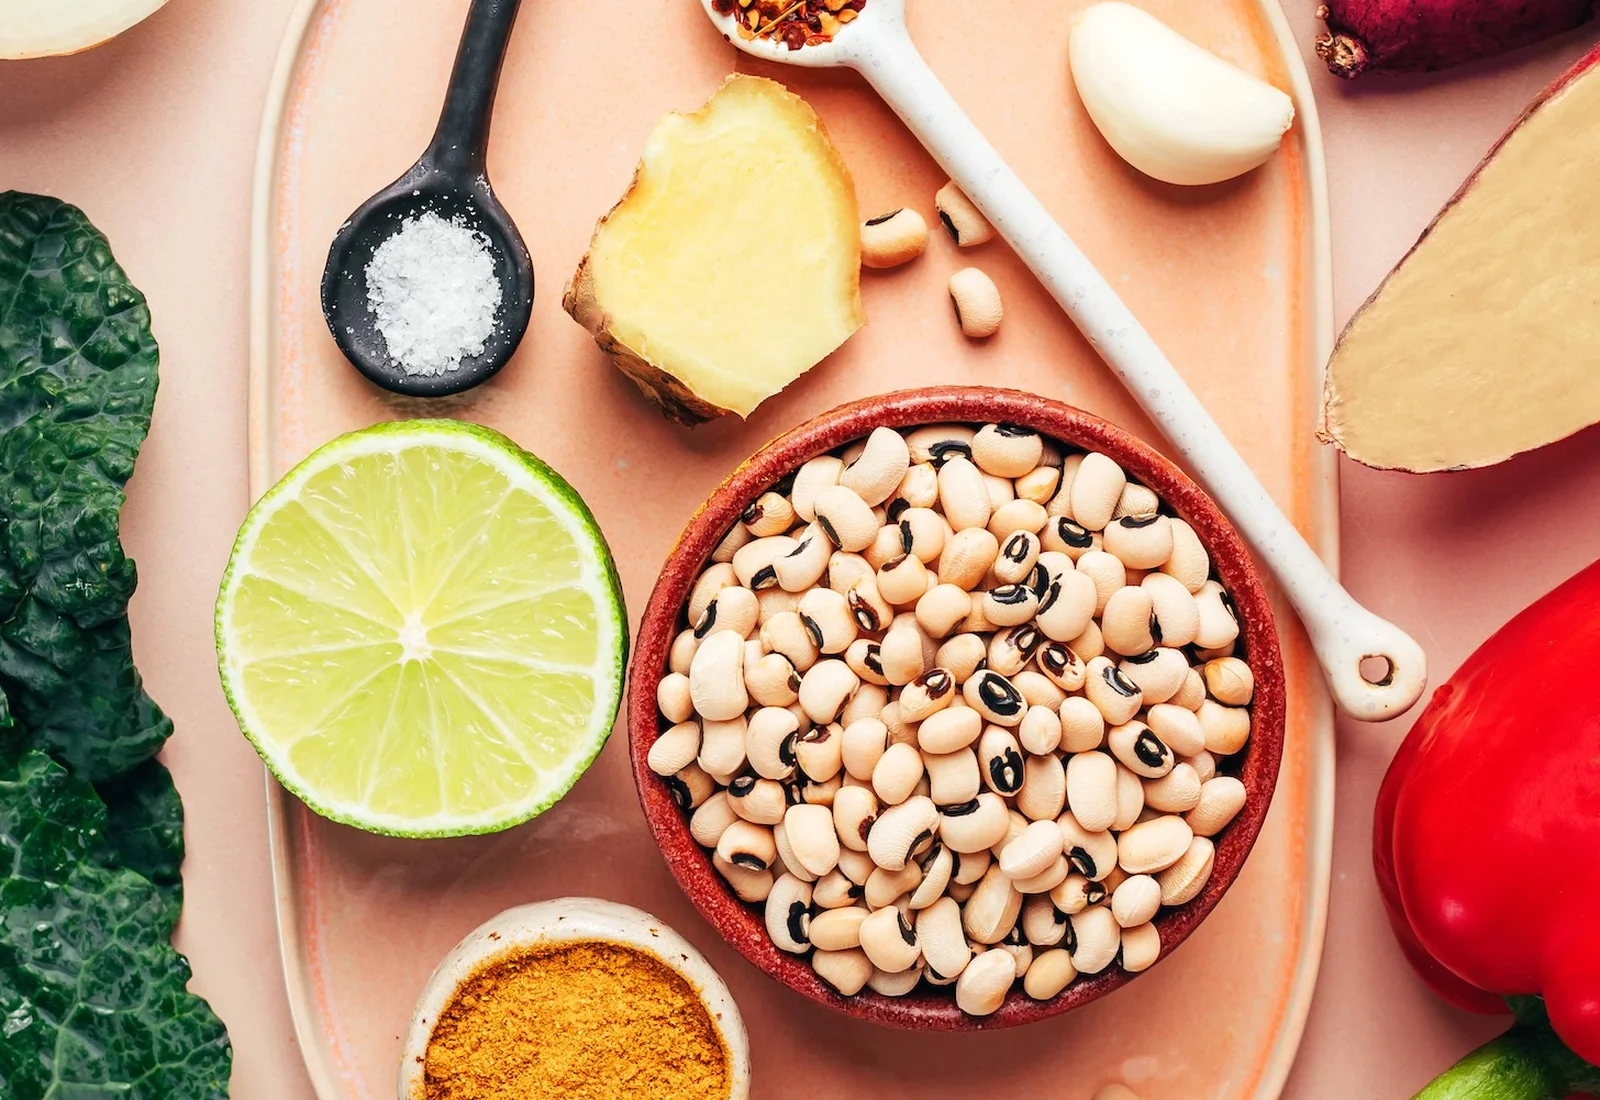
    Black eyed peas, sweet potato, and spices laid out

    What you’ll need

    • 1 Tbsp olive, coconut, or avocado oil
    • 1 large onion (white or yellow), diced (about 2 1/2 cups / 300 g)
    • 1 large white (Japanese) sweet potato, cut into 1-inch cubes (about 1 lb / 460 g)
    • 1 large red bell pepper, diced into 1/4-inch pieces
    • 4 medium cloves garlic, minced (about 2 Tbsp / 18 g)
    • 1 Tbsp freshly grated ginger
    • 2 Tbsp curry powder — a homemade blend if you have one, store-bought absolutely fine
    • 1/2 tsp crushed red pepper flakes
    • 1/2 to 3/4 tsp sea salt, more to taste
    • 1 Tbsp coconut aminos
    • 4 cups vegetable broth
    • 1 (14-ounce / 400 g) can light coconut milk
    • 1 cup dried black eyed peas (or two 15-ounce cans, drained and rinsed)
    • 3 cups chopped kale, stems removed
    • 1-2 Tbsp freshly squeezed lime juice (half a lime)

    For serving, if you want it: rice, quinoa, or cauliflower rice; cornbread; toasted crusty bread; fresh cilantro.

    Method

    1. Heat the oil in a large pot over medium. Add the onion, sweet potato, and bell pepper. Sauté until slightly softened, about 4-5 minutes.
    2. Add the garlic, ginger, curry powder, red pepper flakes, and salt. Cook 1 minute, stirring until fragrant.
    3. Stir in the coconut aminos, broth, and coconut milk. Scrape up any browned bits. Add the black eyed peas, bring to a boil, then drop the heat to a low simmer. Cook uncovered, stirring occasionally, until the peas are tender, about 30-40 minutes.
    4. Stir in the kale and cook until wilted, about 5-10 minutes. Add the lime juice and taste. More salt, more aminos, or more pepper flakes — whatever the pot is asking for.
    5. Serve with rice or cornbread if you like, and a scatter of cilantro if you’ve got it.

    Vegetables and curry simmering in a large pot

    Dried black eyed peas don’t need soaking, which is the whole reason I reach for them on weeknights. If you do soak them, use 3/4 of the broth and simmer about 20-25 minutes instead. Canned works too — use half the broth and give it 15-20 minutes so the flavors can settle.

    Finished curried pea soup bowl garnished with kale

    Notes from my counter

    • Japanese sweet potato holds its shape best in this soup. Using a different variety? Add it about 10 minutes after the peas so it doesn’t turn to mush.
    • Grate your ginger instead of mincing it — it disperses evenly and the broth gets a real ginger backbone. If you must mince, use at least double.
    • Not keeping it vegan? Chicken broth works fine.
    • I tested collard greens and stuck with kale. Better texture, better color.

    Make it yours

    This soup freezes beautifully — up to a month, maybe longer. Reheat in a saucepan over medium until warmed through. I make a double batch when the weather turns and pull one out on nights when the week has already taken everything it can. It also keeps 3-4 days in the fridge, so it’s a genuine meal-prep answer, not a promise.

    If you try it, leave a comment and tell me what you served it with.

    Happy cooking,
    Maya

    Keep Reading

  • Juicy Grilled Chicken Marinade

    Juicy Grilled Chicken Marinade

    There was a stack of chicken breasts on the counter, the grill was already firing up, and I had exactly ten minutes to figure something out. I reached for the same bowl I always reach for: balsamic vinegar, Worcestershire sauce, honey, Dijon, lemon, garlic. Ten minutes later the marinade was mixed, and by dinner the whole house smelled like a backyard cookout.

    That’s the whole trick. This marinade is simple enough to mix while you’re doing dishes, forgiving enough to save a last-minute dinner, and good enough that I make it at least once a week through grilling season. It works on breasts, thighs, drumsticks, and wings — whatever’s on the menu.

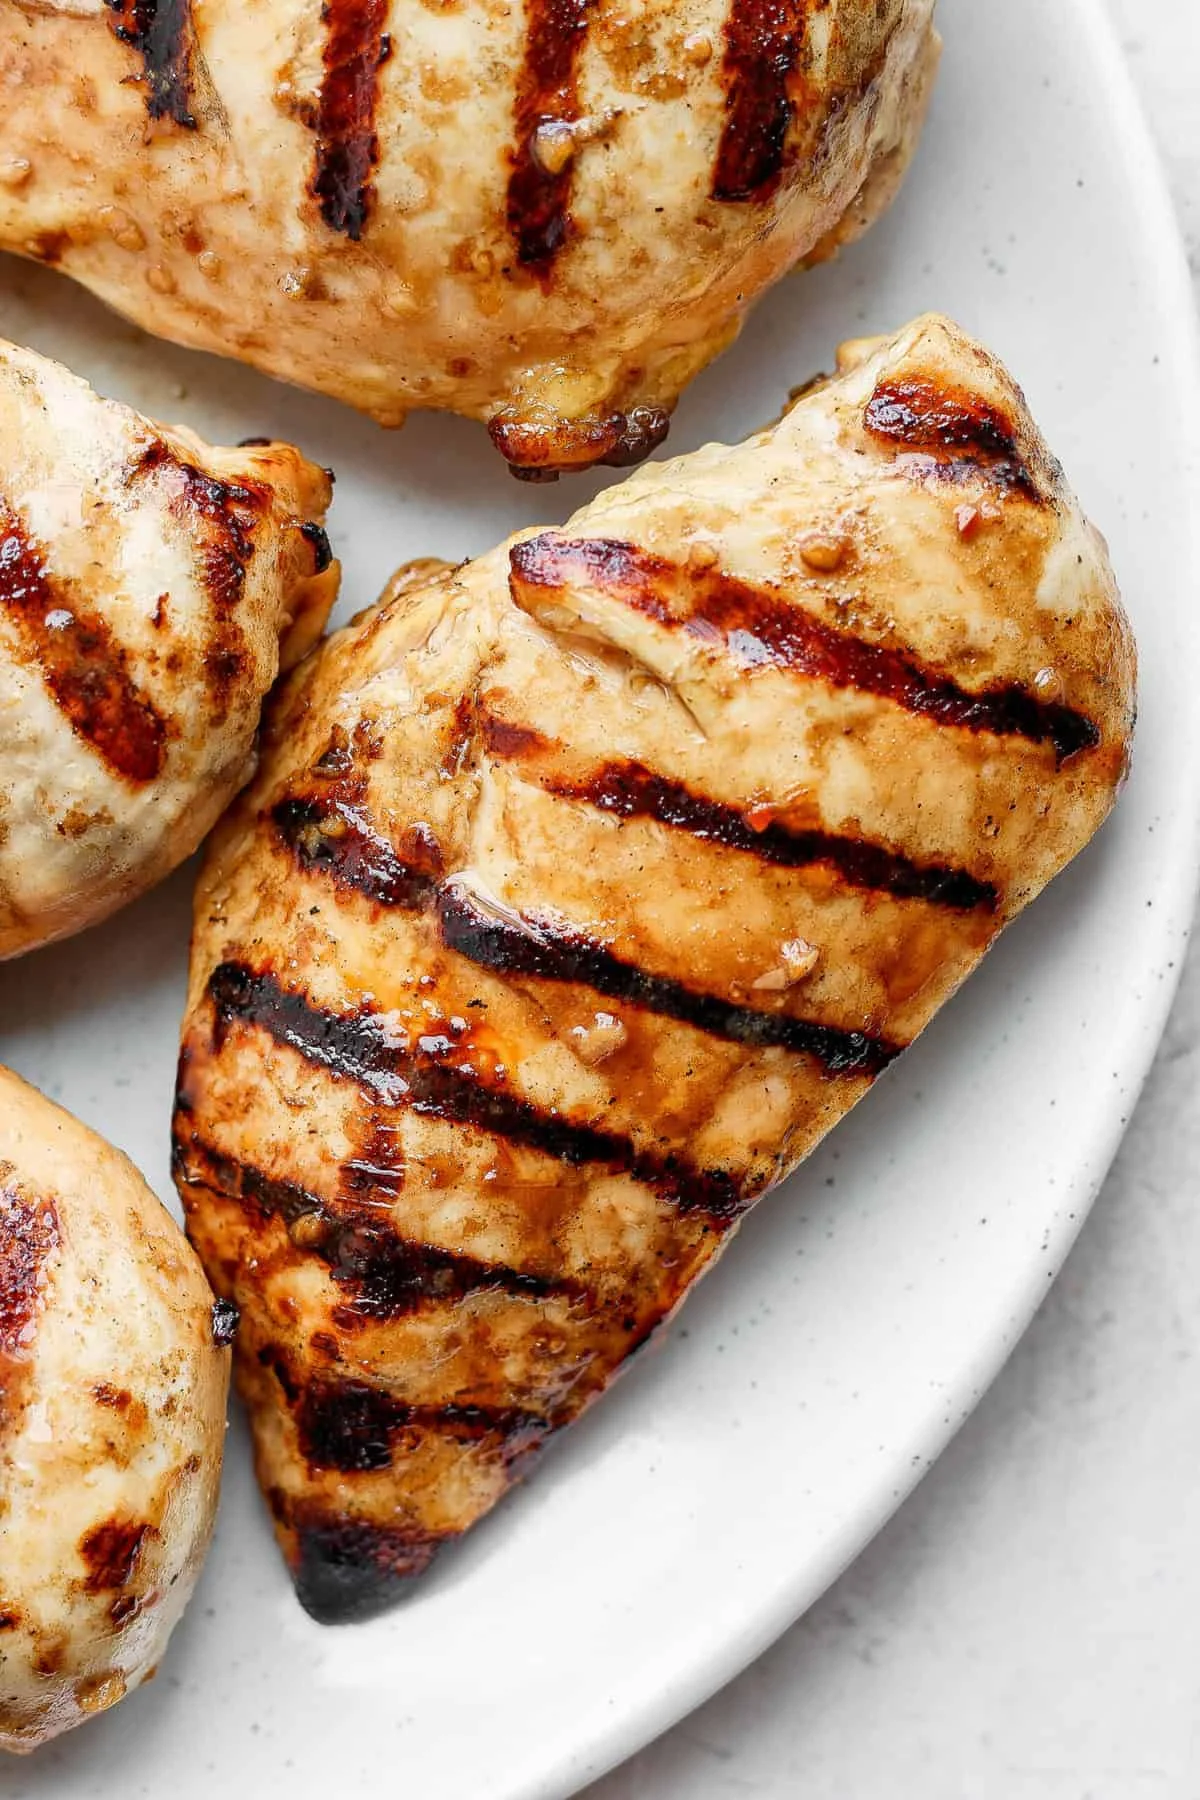
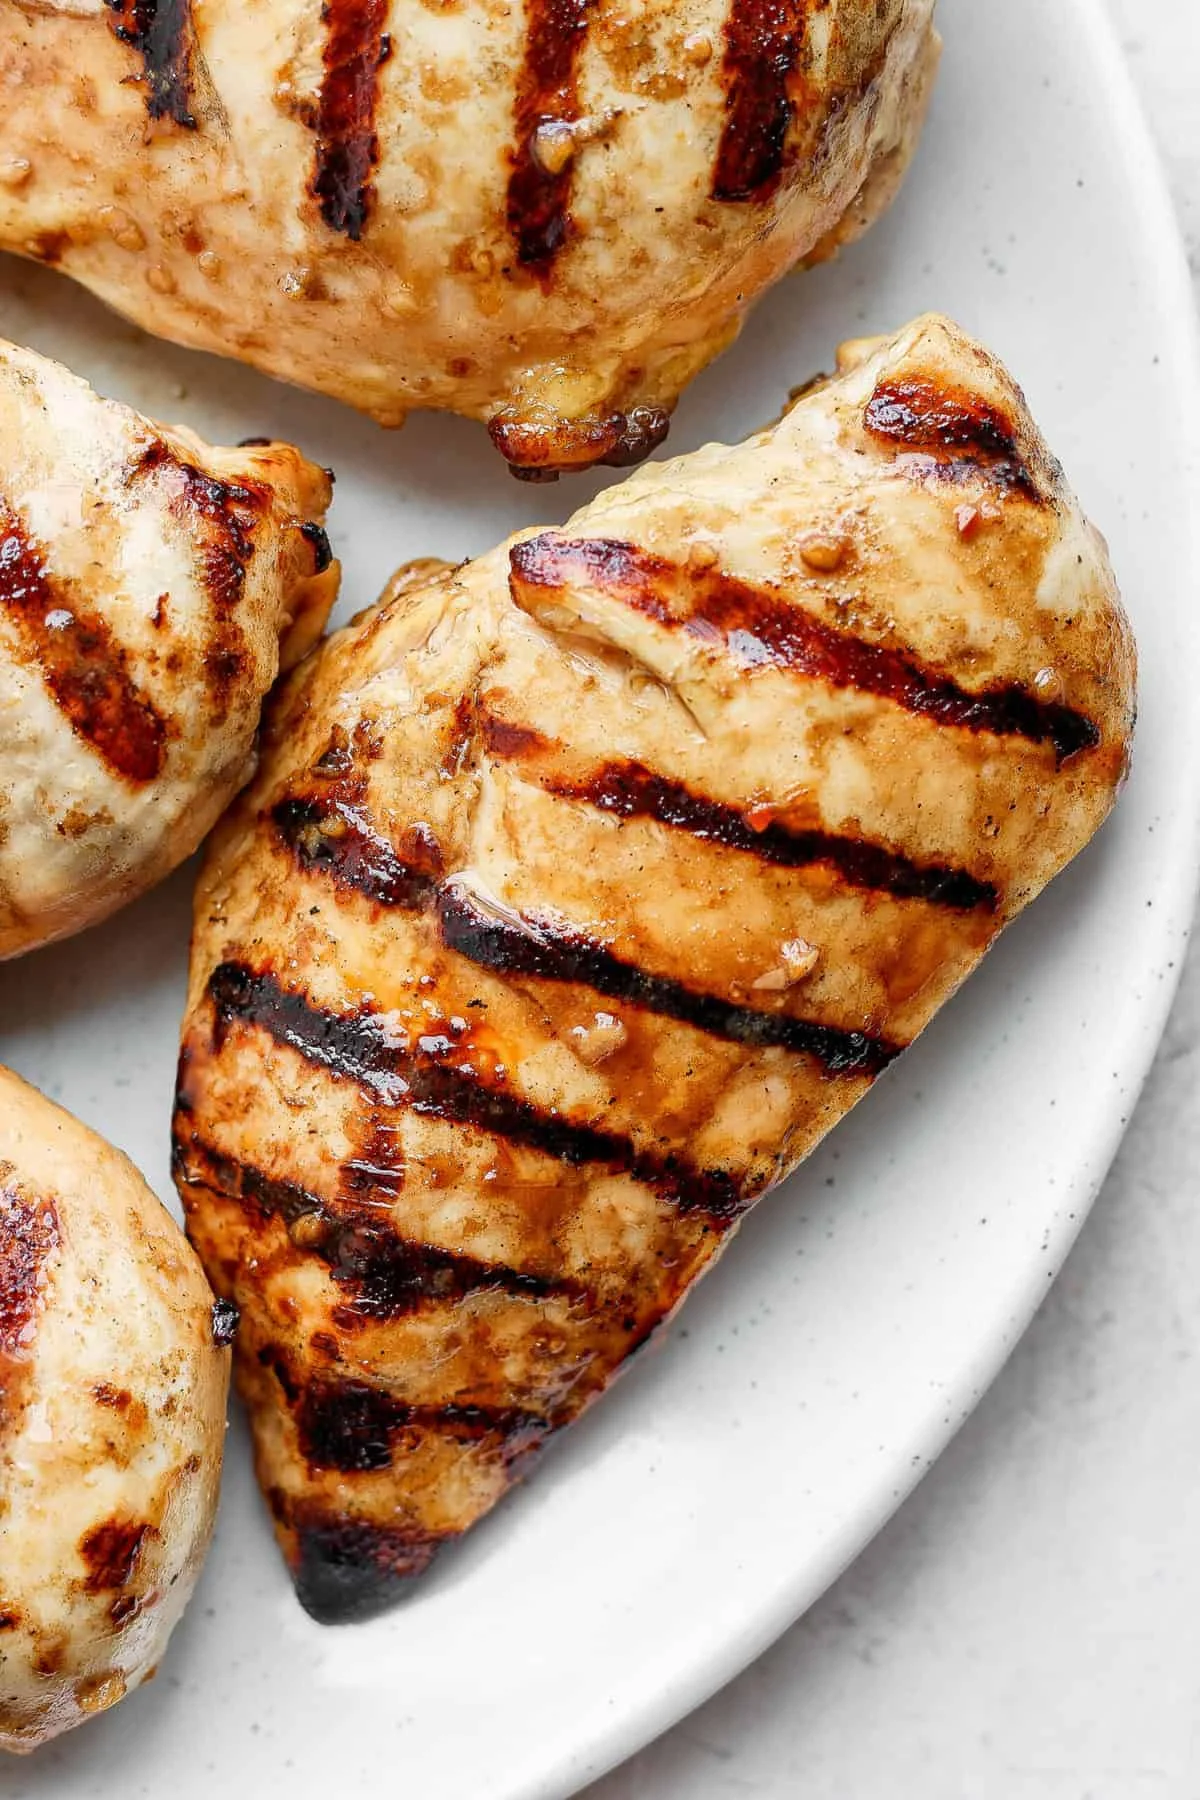
    Grilled chicken breasts with dark grill marks on a plate

    The honest details

    Real time: 12–18 hours in the fridge if you’re planning ahead (2 hours minimum if you’re not). Hands-on: about 10 minutes. Serves 6.

    Here’s why I keep it on repeat all summer:

    • Sweet, tangy, savory. Balsamic vinegar, honey, Dijon mustard, Worcestershire sauce, lemon, and garlic balance out into something that glazes beautifully on the grill.
    • Keeps chicken juicy. This is the marinade I reach for whenever I want grilled chicken that’s tender and never, ever dry.
    • Works with almost any cut. Breasts, thighs, drumsticks, wings — it doesn’t care.
    • Meal-prep and freezer-friendly. Marinate ahead on busy nights, or freeze the chicken right in the marinade for a ready-to-grill meal later.

    One reader told me her kid, who claims to dislike chicken, “LOVES this chicken marinade” — and that he loved it even after just 2 hours in. I don’t do better than that.

    What you’ll need

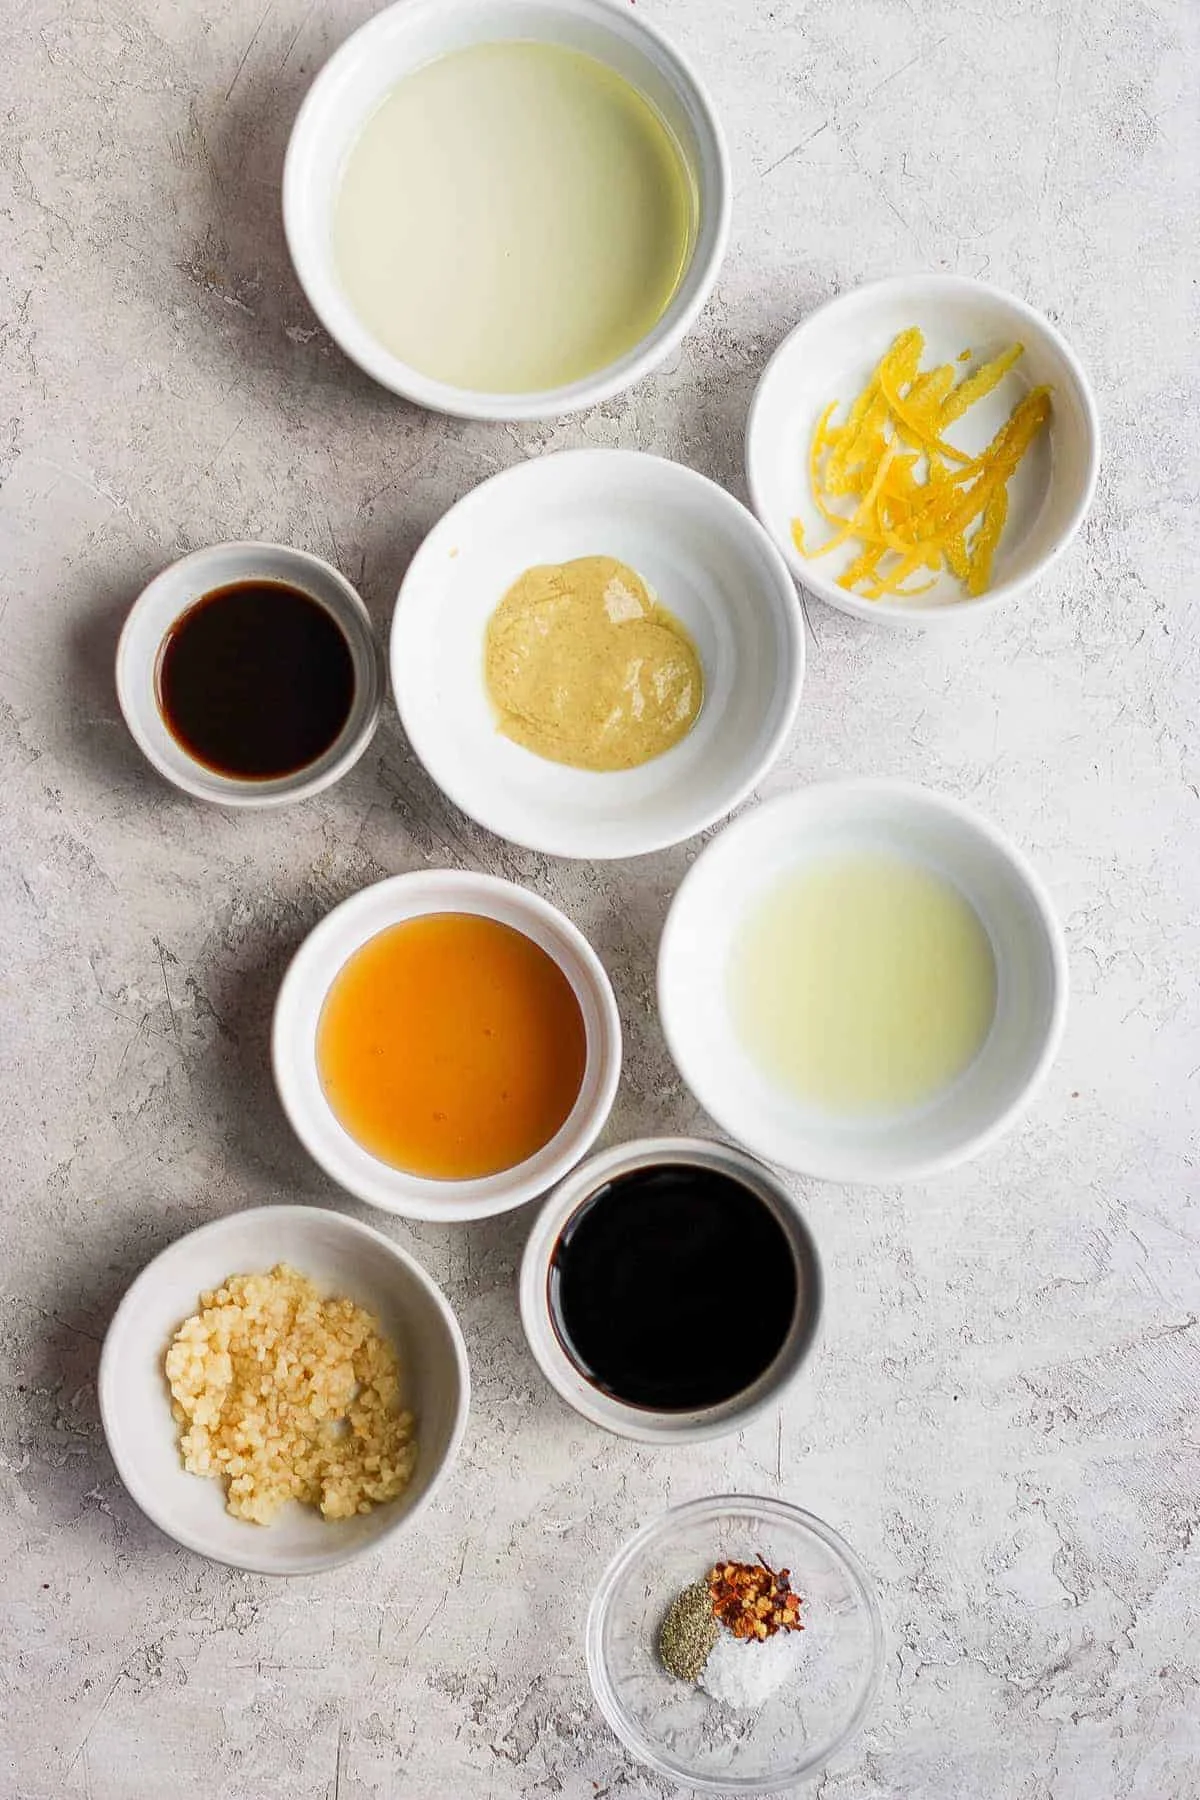
    Marinade ingredients in small bowls on a gray surface

    Everything lives in your pantry or the produce section. No shopping list drama.

    • Balsamic vinegar — the base, tangy with just a hint of sweetness. Red wine vinegar works in a pinch, though it’s a little sharper.
    • Extra-virgin olive oil — coats the chicken and helps lock in moisture. Avocado oil works just as well.
    • Worcestershire sauce — rich, savory depth. For a gluten-free version, use a GF Worcestershire, tamari, gluten-free soy sauce, or coconut aminos with a splash of apple cider vinegar.
    • Honey — a little sweetness to balance the acid, and it’s what makes the surface caramelize on the grill. Maple syrup is an easy swap.
    • Dijon mustard — subtle tang. Spicy brown mustard works in a pinch; yellow might be too mild.
    • Fresh lemon juice — brightens everything and helps tenderize. Bottled will do, but fresh is better.
    • Lemon zest — fresh citrus flavor without the extra acidity. I never skip it.
    • Minced garlic — the bold savory backbone. Jarred minced garlic is a fine substitute.
    • Red pepper flakes — just a pinch for gentle heat. Leave them out, or add more for a kick.
    • Salt and ground black pepper — the quiet things that make it all taste like it should.
    • Chicken — I usually go boneless, skinless breasts, but thighs, drumsticks, wings, and even bone-in all work great.

    The recipe

    Yields: 1.5–2 lbs (700–900 g) of chicken, about 6 servings.

    Marinade:

    • 1.5–2 lbs (700–900 g) boneless, skinless chicken breasts
    • 1/4 cup (60 ml) balsamic vinegar
    • 2 tbsp (30 ml) olive oil
    • 2 tbsp (30 ml) Worcestershire sauce
    • 2 tbsp (30 ml) honey
    • 1 tbsp (15 ml) Dijon mustard
    • 1/4 cup (60 ml) fresh lemon juice
    • 1 tsp (5 g) lemon zest
    • 1.5 tbsp (20 g) minced garlic
    • 1/8 tsp red pepper flakes
    • 1/4 tsp salt
    • 1/4 tsp ground black pepper

    Method:

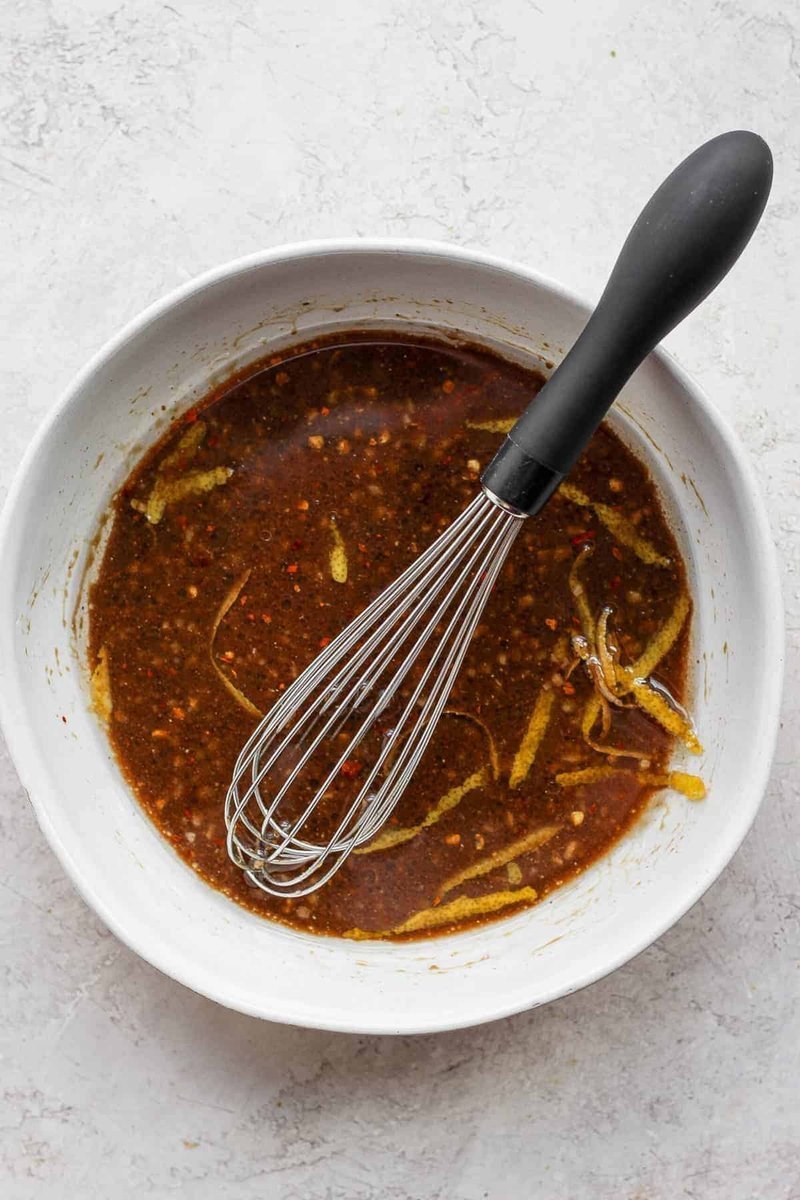
    1. Whisk the balsamic vinegar, olive oil, Worcestershire sauce, honey, Dijon mustard, lemon juice, lemon zest, garlic, red pepper flakes, salt, and pepper together in a medium bowl until combined.
    2. Transfer the marinade to a large baking dish or a gallon-size zip-top bag and add the chicken. Turn the chicken a few times until every piece is fully coated.
    3. Cover and refrigerate for 12–18 hours for best results — never less than 2 hours. I don’t go past 24 hours: the lemon juice and balsamic start to break the meat down and the texture turns rough.
    4. Preheat your grill to 400°F (200°C) and make sure the grates are clean and lightly oiled.
    5. Remove the chicken from the marinade and let the excess drip off — this keeps the flare-ups manageable while the flavor stays on the meat.
    6. Grill over direct heat: 7–8 minutes on the first side, flip once, then 8–10 minutes more depending on thickness. Don’t keep flipping — you want those grill marks.
    7. Check with an instant-read thermometer, not the clock. Pull it off the grill when the thickest part hits 165°F (74°C), then rest 5 minutes before slicing so the juices redistribute.
    Whisked balsamic chicken marinade in a white bowl

    Tips that actually matter

    • Even thickness cooks evenly. If a breast is thick in one spot, pound it to an even thickness before marinating. It’s the single biggest reason breasts come off the grill half done in the middle.
    • Marinate in the fridge, always. If the chicken is sitting in a dish, flip it halfway through so both sides soak.
    • The 24-hour ceiling. This one’s for real. Acid is your friend until it’s not.
    • Freezer bags are a life hack. Zip the chicken and marinade into a freezer-safe bag, press it flat, and freeze until solid. Thaw overnight in the fridge — it keeps marinating while it thaws, so it’s ready to grill the next day. Use within 24 hours of thawing for the best texture.

    What to serve with it

    Grilled vegetables — peppers and onions, cauliflower, broccoli, or a simple veggie foil packet. Fresh salads — a crisp green one, a fruit salad, or cucumber and tomato. The classic barbecue stuff: corn on the cob, potato salad, coleslaw, baked beans. And when the week catches up: slice the leftovers into rice bowls, quinoa bowls, or meal prep containers with roasted vegetables, or tuck them into wraps and sandwiches.

    Cooked and not finished with it? Store it in an airtight container in the fridge for 3–4 days. I slice it ahead so it’s ready to drop into a salad or a quick lunch.

    A note on nutrition: the recipe card on the source site lists roughly 77 kcal per serving (8 g carbs, 5 g fat) — automatically calculated, so treat it as a rough guide, not gospel.

    Make it yours

    Want it smokier? A tablespoon of smoked paprika disappears right in. A little brown sugar and dried oregano turns it into a dry-rub hybrid that’s great on wings. And if you’ve never tried a steak marinade with the same sweet-tangy backbone, that’s a fun one to cross off your list — same pantry, different protein.

    Happy cooking, Maya.

    Keep Reading

  • How to Make Crepes That Don’t Rip (Honest, Foolproof Method)

    How to Make Crepes That Don’t Rip (Honest, Foolproof Method)

    Here’s the thing nobody tells you about crepes: the batter is the easy part. What broke my crepes for the first three tries was the resting, and I kept skipping it because I was hungry. Once the batter spends thirty minutes in the fridge, they stop tearing, they fold clean, and the edges get that thin, buttery crisp I kept seeing at the restaurant crepe station. My husband still asks for them on Saturday mornings, and I’m fine with that.

    This is the whole process: what crepes actually are, the 8 ingredients and why each one earns its spot, a blender batter that takes minutes, and honest timing up front.

    Stack of thin golden crepes ready to be filled

    Real time: about 1 hour and 10 minutes, but most of that is the batter chilling. Hands-on: about 30 minutes, and the last third of it is standing at the stove cooking them one at a time. This batch makes about 14 crepes.

    What crepes are (and why they’re not pancakes)

    Crepes are thin, delicate French-style pancakes made without any leavener. No baking powder, no baking soda, no puff. They stay thin, tender, and flexible while they cook, which is exactly what you want when you’re folding or rolling them around a filling. Done right, they’re as thin as lace with lightly crisp, buttery edges.

    Their flavor is deliberately neutral, which is the whole point. A crepe is a blank canvas: whipped cream and berries one night, ham and gruyère the next, scrambled eggs and avocado for brunch. Breakfast, dessert, dinner, snack — they don’t care. That’s why I keep this recipe on rotation instead of a second pancake recipe.

    The 8 ingredients, and why each one matters

    This is a delicate batter, so I don’t recommend swapping things out. Here’s what goes in and what it’s doing:

    • Unsalted butter — the flavor, the richness, and those crisp edges. Keep extra on hand for the pan.
    • All-purpose flour — structure, without toughness. I haven’t tested a gluten-free swap yet.
    • Granulated sugar — just 1 tablespoon for the whole batch. These are barely sweet; that’s intentional.
    • Salt — a pinch, for flavor.
    • Milk and water — the mix is the trick. Water keeps the batter extra light so it spreads thin; whole milk adds richness and the browning. Lower-fat or nondairy milks work, but whole milk gives the best crepe.
    • Eggs — the flexibility that lets a crepe fold without tearing.
    • Vanilla extract — you’ll smell it the moment it hits the pan. Leave it out for savory versions.

    On its own, a crepe is barely flavored. That’s why texture is everything — thin wins every time.

    The method, step by step

    1. Melt the butter and cool it. Melt 3 tablespoons in the microwave or on the stove, then cool it for about 5 minutes so it doesn’t scramble the eggs. Set the remaining 3–4 tablespoons aside — that’s your pan butter.
    2. Blend everything. Combine the cooled butter, flour, sugar, salt, milk, water, eggs, and vanilla in a blender. Blend on medium-high for 20–30 seconds until silky-smooth and the consistency of cream. A whisk and a large bowl work in a pinch, but the blender cuts the flour into the wet ingredients in a way a whisk never quite matches.
    3. Chill the batter. Cover it tightly and refrigerate for 30–60 minutes, or up to 1 day if you’re making them for a weekend brunch. This rest is not optional — it lets the flour fully hydrate and the air bubbles settle, and it’s the difference between crepes that rip and crepes that fold. Use the wait to clean up and get the skillet ready.
    4. Butter and heat a small skillet. An 8-inch skillet is perfect at home; a specialty crepe pan works too. Generously butter the pan before you start, and keep that stick of butter within arm’s reach — you’ll re-butter between every crepe.
    5. Cook one at a time over medium heat. Pour 3–4 tablespoons of batter (I use 3) into the center of the hot pan, then lift and twirl so the batter stretches as far as it will go. The less batter and the wider the stretch, the thinner the crepe. Skip the twirl and you’ll get something thick that tastes like a tortilla — still fine, just a different thing. Cook 1–2 minutes on the first side, flip as soon as the bottom is set, and cook the other side for about 30 seconds. Wait too long and they turn rubbery. Transfer to a plate and repeat, buttering between each one. A small offset spatula helps with the flip, and you can separate the stack with parchment if you want, though with enough butter they won’t stick.
    6. Fill them. A few spoonfuls of filling in the center, fold both sides over. They’re great warm, but honestly also great at room temperature.

    The three things that actually fix broken crepes

    These are the questions I kept seeing asked, so here’s the straight answer to each:

    • Why are mine rubbery? Overcooked. Crepes need about 1–2 minutes on the first side and 30 seconds after the flip. That’s it.
    • Why do mine tear? The batter didn’t rest long enough, or you flipped before the first side set. Chill for at least 30 minutes — it makes a visible difference.
    • Why are mine thick like tortillas? Too much batter, or not enough twirling. Use 3–4 tablespoons and swirl it across the whole pan immediately.
    • Why is my batter lumpy? A blender fixes it in seconds. If you’re whisking by hand, strain it through a sieve before chilling.

    And the tip I wish someone had given me: the stack keeps itself warm. Each crepe piled on top of the last holds heat for the rest of the batch. If the early ones get cold, set a damp paper towel over the plate and nudge them in the microwave for 30 seconds. I tried keeping them in a warm oven and it just dried them out.

    Fillings that actually get eaten

    The crepes are the vessel, so the fun is what goes inside. These are the ones that clear the counter in my house:

    Sweet: whipped cream and fresh berries; peanut butter with sliced banana; lemon curd; fruit preserves; strawberry, raspberry, or blueberry sauce; chocolate ganache; pastry cream; salted caramel with sautéed cinnamon apples; cinnamon butter with roasted pears and a drizzle of maple syrup.

    Savory: ham and gruyère with a swipe of Dijon; scrambled eggs, avocado, and sharp white cheddar under a little hollandaise; smoked salmon, cream cheese, and chives; bacon, eggs, and green onions; rotisserie chicken, steamed broccoli, and cheddar; fresh mozzarella, basil, and tomato with balsamic glaze; prosciutto, asparagus, and goat cheese; pesto with sautéed mushrooms, spinach, peppers, or zucchini; soft goat cheese, fig jam, and caramelized onions with a sprinkle of walnuts.

    Make ahead, store, reheat

    • Batter: make it up to 1 day ahead. Cover it tightly in the blender or in a bowl, chill it, and cook the next day. If it looks separated after the fridge, give it a quick stir first.
    • Unfilled crepes: keep them in an airtight container in the fridge for 1 day, or freeze for 1 month. Layer them with parchment so they don’t fuse, thaw at room temperature, then fill.
    • Reheat: microwave, or arrange them on a lined baking sheet (overlapping is fine), cover with foil, and warm in a 275°F (135°C) oven for 10 minutes.

    Make it yours

    For savory crepes, I drop the vanilla and add a pinch of black pepper to the batter — sometimes a tablespoon of dried herbs too. For a richer batter, swap in half-and-half or heavy cream; 2% milk is okay, but I don’t go lower. And if you’re serving them the classic way, a squeeze of fresh lemon and a dust of sugar is all they need. The crepe does the rest.

    Happy cooking, Maya
    Keep Reading

  • Homemade Pita Bread (That Actually Puffs)

    Homemade Pita Bread (That Actually Puffs)

    The first three batches of pita I made never puffed. They came out flat, dense, and about as exciting as day-old store bread, and I genuinely considered buying the packaged kind forever.

    Then one Sunday I finally let the oven get properly hot before sliding the rounds in. Every single pita ballooned into a pillow, and my husband and I stood at the counter watching them go. That’s the whole secret. Hot oven, thin dough, and a little patience with the rise.

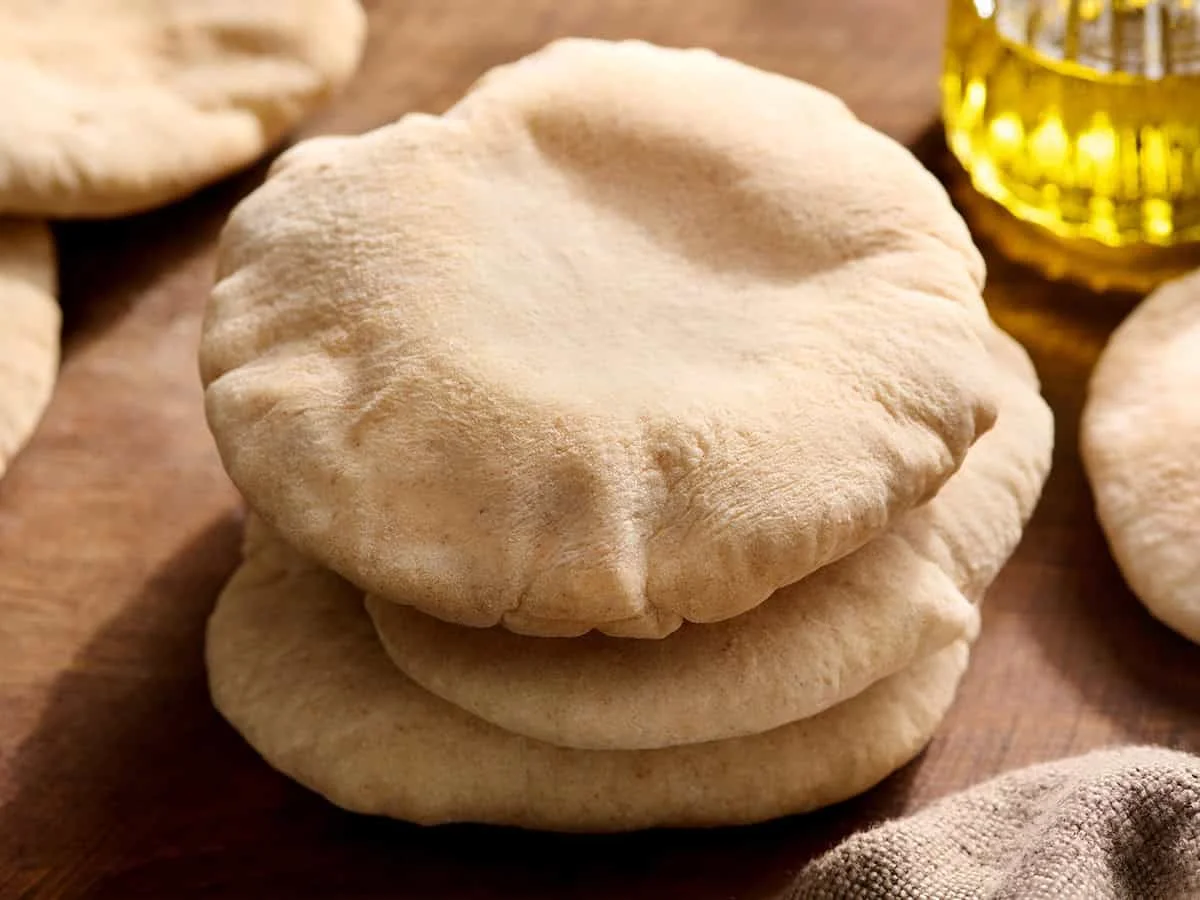
    Stack of freshly baked pita bread on a wooden board

    Pita is a round, leavened flatbread from the Middle East and Mediterranean, and it’s one of the most forgiving breads you can bake at home. You don’t need a stand mixer, a pizza stone, or any special bread equipment. The dough comes together from seven basic pantry ingredients, it needs a hands-off rise while you do the rest of your evening, and the best part is watching each pita puff into two soft, separate layers.

    Here’s the honest timing before we get into it:

    • Real time: 1 hour 35 minutes (most of it hands-off rising)
    • Hands-on: about 20 minutes
    • Yield: 8 small thin pitas, or 6 larger ones with bigger pockets

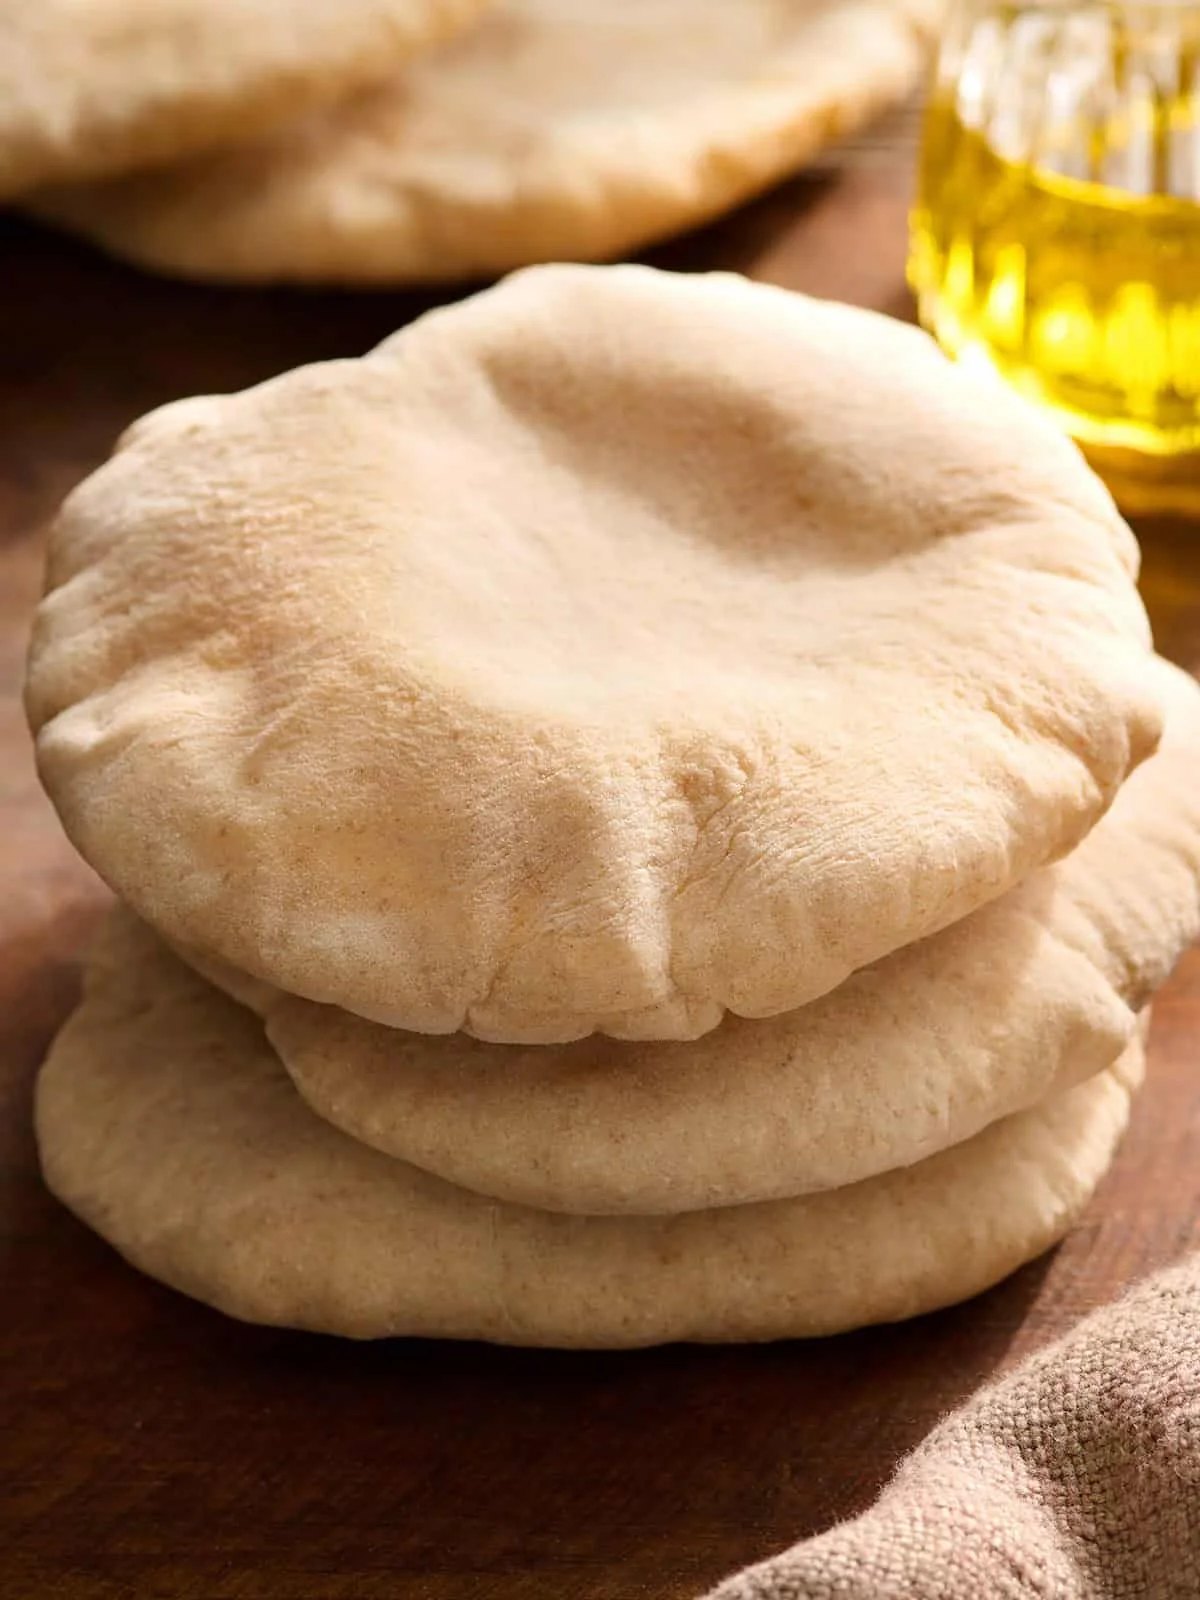
    Tall stack of soft homemade pita breads

    Why this pita works

    The dough uses warm water, yeast, sugar, olive oil, a little whole wheat flour, all-purpose flour, and salt. The whole wheat gives it a slightly nuttier flavor and a bit more color, but if you only have all-purpose, that’s totally fine — just use the full amount of that instead.

    What makes the pockets is heat. In a super-hot 500°F (260°C) oven, the moisture in the dough turns to steam almost instantly, and each evenly rolled round puffs up and separates into two tender layers. I pull them out once they’re fully inflated but still pale, so they stay soft and lightly chewy instead of drying out crisp.

    Ingredients

    Everything is pantry stuff. The whole batch costs about $0.94, or roughly $0.12 a serving. You can use instant or active dry yeast here without changing anything.

    • 1⅛ cups warm water (about 270 ml)
    • 1½ teaspoons instant yeast (5 g)
    • 1½ teaspoons granulated sugar (6 g)
    • 1 tablespoon olive oil (15 ml)
    • ½ cup whole wheat flour (60 g) — or more all-purpose
    • 2½ cups all-purpose flour (300 g) — you may use a little more or less
    • 1 teaspoon salt (5 g)

    Pita dough ingredients laid out in labeled bowls

    How to make it

    1. Wake up the yeast. In a small bowl, stir together the warm water, sugar, and yeast. Let it sit for about 5 minutes until it gets foamy on top, then stir in the olive oil.

    Hand dipping a pita wedge into hummus

    2. Start the dough. In a large bowl, combine the whole wheat flour, ½ cup of the all-purpose flour, and the salt. Pour in the yeast mixture and stir to combine.

    3. Knead it in. Gradually add the remaining all-purpose flour until the dough forms a loose ball that won’t stir with a spoon anymore. Turn it out onto a lightly floured surface and knead for at least 3 minutes, adding flour only as needed. The finished dough should be soft, smooth, and pliable — not dry or stiff. You’ll end up using around 3 cups of flour total, but humidity and how you scoop your flour change that, so trust what the dough feels like more than the measuring cup.

    4. Let it rise. Set the dough ball in a lightly oiled bowl, cover it loosely, and leave it somewhere warm and draft-free for about 1 hour, or until doubled in size. Chilly kitchen? Park the covered bowl in the oven with the light on and the oven off.

    5. Divide and roll. Punch the risen dough down and turn it out onto a floured surface. Shape it into a log, then cut it into 8 equal pieces (or 6 for bigger pockets). Roll each piece into a smooth ball, then into a flat, even 6-inch circle. This step is the make-or-break one: pita that’s too thick won’t puff, and uneven spots keep the pocket from forming. Roll thin and even from the center to the edges, and keep the surface smooth so the steam stays trapped inside.

    6. Bake. Preheat the oven to 500°F (260°C) and let the oven come fully up while the rolled rounds rest under a damp cloth so the edges don’t dry out. Slide a couple of rounds onto an oven-safe wire rack at a time and bake until each one has fully inflated but is still pale. If you bake them until golden, they turn crispier and drier — great for chips, not for fresh pita.

    7. Steam them soft. As they come out, stack them on a plate and cover with a damp cloth. The trapped steam keeps them tender and chewy as they cool.

    The rules that keep them from flopping

    • Don’t rush the rise. One rise, about an hour, until doubled. That’s where the airiness and the stretch for the pockets come from.
    • Roll thin and even. 6-inch circles, no thick spots. This is the number one reason pitas fail to puff.
    • Let the oven get really hot. The immediate blast of heat is what sets the outside while the inside steams and puffs. No shortcuts here.
    • Keep the rounds covered. A damp cloth during the preheat rest keeps surfaces from cracking.

    How I actually eat it

    Torn into wedges and dipped straight into homemade hummus is my go-to. Add olives and some fresh vegetables and you’ve got a proper mezze-style spread for a weekend night — the kind of thing you can throw together with whatever’s on hand.

    Close-up of stacked soft homemade pita breads

    For something with a crunch, brush the pitas with olive oil and bake them into chips. I’ve tossed them with cinnamon sugar for a sweet snack and they’re dangerously good.

    And of course, the pockets exist to be stuffed. Each pita is a perfectly portioned sandwich — slice it in half, gently pry the pocket open, fill it, done. Right now my favorite is leftover chicken shawarma with some salad and a spoonful of tzatziki. The filling options are basically endless:

    • Quinoa tabbouleh with leftover grilled chicken — filling, protein-packed, and fresh
    • Homemade falafel with lettuce, tomato, cucumber, and tahini for a plant-based pocket
    • Deli ham and cheese, toasted until the cheese goes gooey
    • Traditional chicken salad with crisp lettuce or sliced cucumber
    • A pizza pocket: pepperoni, pizza sauce, mozzarella, and whatever toppings you have on hand
    • Scrambled eggs, cheese, and leftover roasted vegetables for breakfast
    • Curry chickpea salad with spinach or crunchy cucumber for a creamy meatless fill

    They’re great for meal prep too — bake a batch, and your weeknight lunches take ten flat.

    Storage and reheating

    • Counter: once completely cool, keep them in an airtight container or zip-top bag for up to 2 days. Seal it well so they stay soft.
    • Fridge: up to 4 days, same airtight storage.
    • Freezer: lay parchment paper between each pita, bag them, and freeze for up to 3 months. Thaw at room temperature, then reheat.
    • Reheating: a brief warm in the microwave, oven, or a dry skillet until soft and warm through. Best at room temperature or warm, never cold.

    Make it yours

    Divide into 6 pieces instead of 8 and you get bigger, slightly thicker pockets for really loaded sandwiches. Skip the whole wheat for an all-white version, bake a few extra long until golden for pita crisps, or keep a batch frozen for the nights you want fresh bread without the hour and a half. Happy cooking, Maya.

    Keep Reading

  • Greek Yogurt Zucchini Bread

    Greek Yogurt Zucchini Bread

    There were nine zucchinis on the counter last weekend. Nine. By Tuesday, the garden had added four more, and I was starting to feel the particular dread of a kitchen that has run out of ideas. This is the bread that saves me every single summer.

    It’s been in my rotation since 2015, and I’ve since re-shot it and added the success tips below. It’s my go-to, healthier version of classic zucchini bread: naturally sweetened with honey, soft and moist from the Greek yogurt, and made with just two bowls and no mixer.

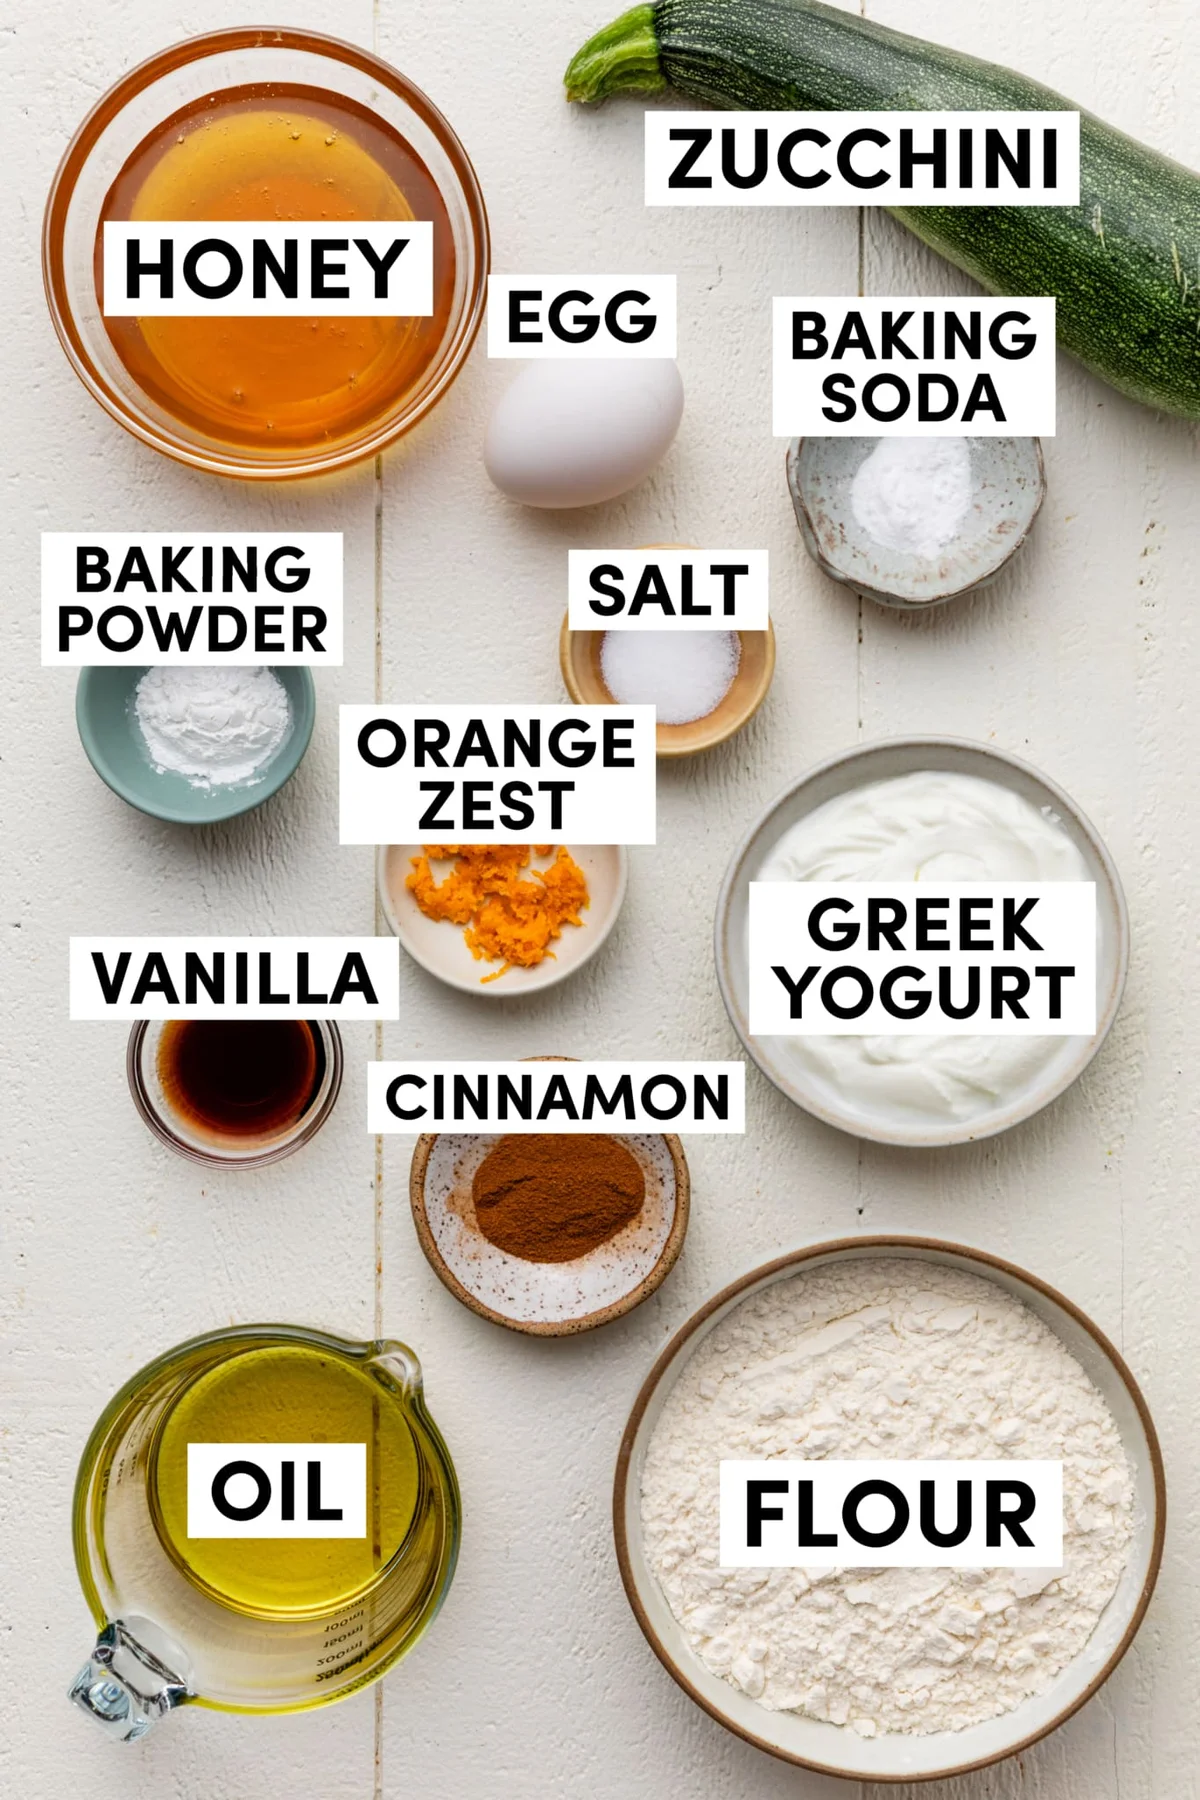
    Labeled baking ingredients for Greek yogurt zucchini bread in a flat lay

    The loaf bakes up wonderfully moist with a tender crumb and a lightly spiced flavor. Enjoy it plain, fold in chopped walnuts for crunch, add dried cranberries or fresh blueberries for fruit, or stir in chocolate chips if you’re feeling greedy. And if the pan is the problem, the same batter bakes into Greek yogurt zucchini muffins. However you make it, it’s simple, versatile, and reliably delicious.

    A couple of notes from readers who tried it:

    “These are excellent! Made the muffins last night and they’re already almost all gone. I peeled the zucchini before I grated it and it’s the first time my vegetable-hesitant preschooler has eaten zucchini bread (and he asked for thirds).” — Ashley

    “Best healthier zucchini bread I’ve made yet.” — Val

    Why this bread works

    • Naturally sweetened with honey — no refined sugar (coarse sugar on top is optional!)
    • Wonderfully moist from Greek yogurt, avocado oil, and zucchini
    • Made with simple, wholesome ingredients
    • Easy to customize with nuts, berries, or chocolate chips
    • Lightly flavored with cinnamon, vanilla, and fresh orange zest
    • No mixer required
    • Bakes as a loaf or muffins
    • Freezes beautifully

    Real time: about 4 hours if you count cooling — but hands-on time is around 10 minutes, plus 50–55 minutes in the oven. Most of it, the oven does its quiet thing.

    The ingredients, honestly

    Everything here is pantry or grocery-store standard. Nothing obscure, nothing you’ll buy once and never use again.

    • Greek yogurt. Plain 2% or nonfat. It adds moisture and a wonderfully soft texture without making the bread heavy. This is the ingredient that separates this loaf from a dry, crumbly quick bread — I’ve learned that the hard way.
    • Honey. It complements the zucchini and warm spices so well, and it helps keep the bread moist for days. Pure maple syrup works too — readers report excellent results.
    • Oil. Avocado oil is my go-to, but melted coconut oil, melted butter, olive oil, canola, or vegetable oil all work.
    • Zucchini. No need to peel it, though you can. Grate it and lightly blot away excess moisture if it seems particularly wet — that’s the step I used to skip and pay for.
    • Orange zest. Optional, but I never skip it. A little brightens all the flavors and pairs beautifully with the honey and cinnamon.
    Flat lay of zucchini bread ingredients including honey, yogurt, zucchini, flour

    Ingredients

    • 1/3 cup (76g/80ml) avocado oil, olive oil, or melted coconut oil
    • 1/2 cup (180g/120ml) honey
    • 1 large egg, at room temperature
    • 1/2 cup (120g) plain Greek yogurt, at room temperature
    • 1 and 1/2 teaspoons pure vanilla extract
    • 1 and 1/2 cups (188g) all-purpose flour (spooned & leveled)
    • 1 teaspoon baking powder
    • 1/2 teaspoon baking soda
    • 1/2 teaspoon salt
    • 1 teaspoon ground cinnamon
    • 1 cup (130g) shredded zucchini (see note below)
    • Optional: 2 teaspoons orange zest (so good!)
    • Optional: 3/4 cup (95g) chopped walnuts, (115g) raisins or dried cranberries, or (135g) chocolate chips
    • Optional: coarse sugar for sprinkling

    If you like a sugary top, sprinkle the batter lightly with coarse sugar before baking. Turbinado sugar (sold in the US as “Sugar In The Raw”) or demerara works perfectly here.

    One note on the pan

    Bake in an 8.5×4.5-inch (about 21×11cm) loaf pan — in the US, look for one labeled a “1-lb loaf pan.” That size bakes up taller, with a domed top and a soft, moist center. A 9×5-inch pan works, but the loaf will be shorter and take less time in the oven. I can’t tell you how many times a too-big pan has cost me a flat, sad loaf.

    Method

    1. Preheat the oven to 350°F (177°C). Grease an 8.5×4.5-inch loaf pan with butter or nonstick spray.
    2. In a medium bowl, whisk the oil, honey, egg, yogurt, and vanilla together until combined. Room-temperature ingredients combine much more easily — worth the wait.
    3. In a large bowl, whisk the flour, baking powder, baking soda, salt, and cinnamon. Pour the wet ingredients into the dry and whisk to combine. Avoid overmixing — the batter is thick, and that’s exactly what you want. Fold in the zucchini, orange zest, and any add-ins.
    4. Spread the batter evenly into the prepared pan. Sprinkle lightly with coarse sugar, if desired.
    5. Bake for 50–55 minutes, tenting loosely with foil about halfway through to keep the top from over-browning. Poke the center with a toothpick — if it comes out clean, it’s done.
    6. Cool in the pan on a cooling rack for 1 hour, then remove the bread and let it finish cooling directly on the rack. I know it’s hard. It tastes better anyway.
    7. Slice and serve. Store leftovers covered at room temperature for up to 4 days, or in the refrigerator for up to 1 week.

    Make it yours

    • Muffins: Prepare the batter as above. Grease a 12-count muffin pan or use liners, and fill all the way to the top. Bake 5 minutes at 425°F (218°C), then — leaving the muffins in the oven — lower the temperature to 350°F (177°C) and bake 13–14 minutes more, until a toothpick comes out clean. Cool in the pan for 5 minutes. Makes about 10–12 muffins.
    • Honey swap: Pure maple syrup (not “breakfast syrup”) or agave works in place of honey.
    • Yogurt flavors: I use plain 2% or nonfat, but vanilla or honey-flavored Greek yogurt works wonderfully here too.
    • Extra-wet zucchini: Blot it a bit before adding it to the batter. Trust me on this.
    • Freezing: The bread freezes well for up to 3 months. Thaw overnight in the refrigerator and let it come to room temperature before slicing.

    Nutrition (per 1 slice)

    CaloriesSugarSodiumFatCarbsProteinCholesterol
    19814.3 g191.4 mg8 g29.3 g3.5 g19 mg

    Tools I keep by the oven for this: a box grater, the 8.5×4.5-inch loaf pan, a couple of glass mixing bowls, a whisk, a silicone spatula, a citrus zester, and a cooling rack. You don’t need anything fancier.

    More zucchini on the counter? It keeps coming all summer long — this loaf or these muffins are the answer I keep coming back to.

    Happy cooking,
    Maya

    Keep Reading

  • Chicken and Broccoli Casserole with Stuffing (So Easy!)

    Chicken and Broccoli Casserole with Stuffing (So Easy!)

    My husband keeps a list of things he’ll eat on a random weeknight without being asked. Rotisserie chicken. Pizza. Mac and cheese. And this — a chicken and broccoli casserole built on a bed of herb stuffing. He doesn’t even ask what’s in it. He just eats, and then he asks for seconds.

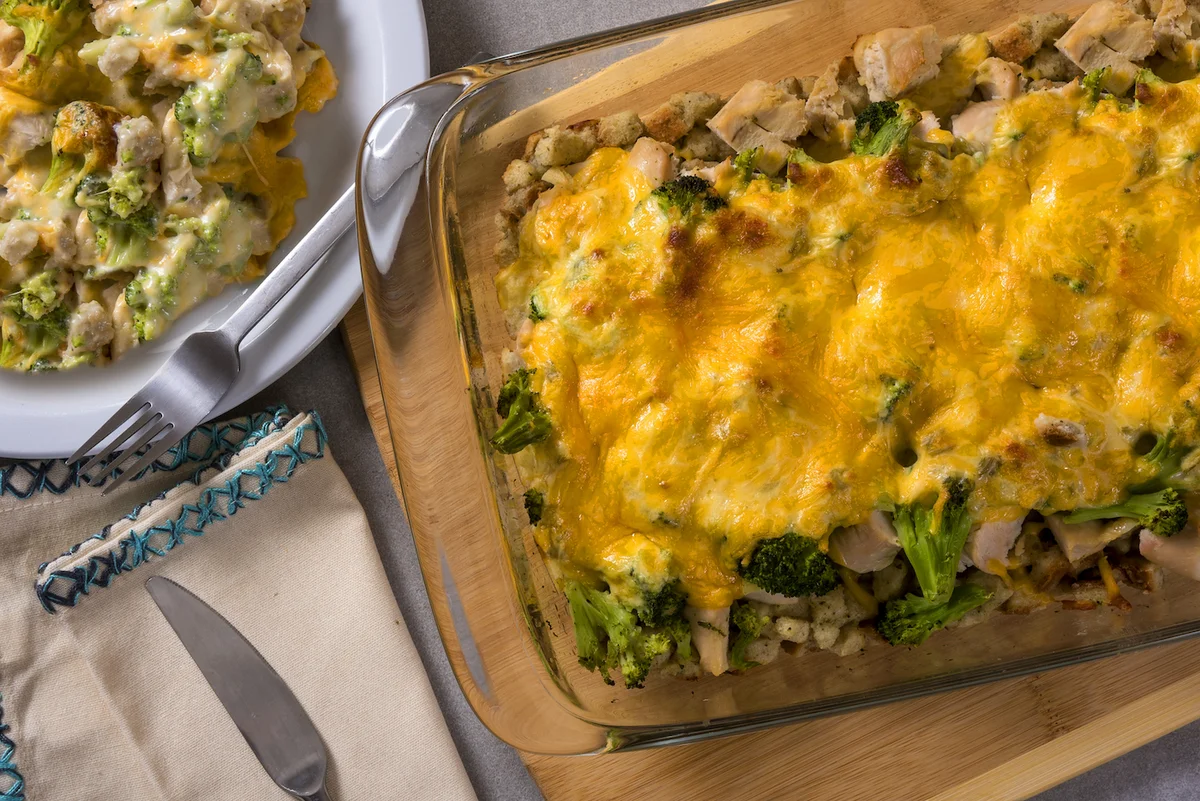
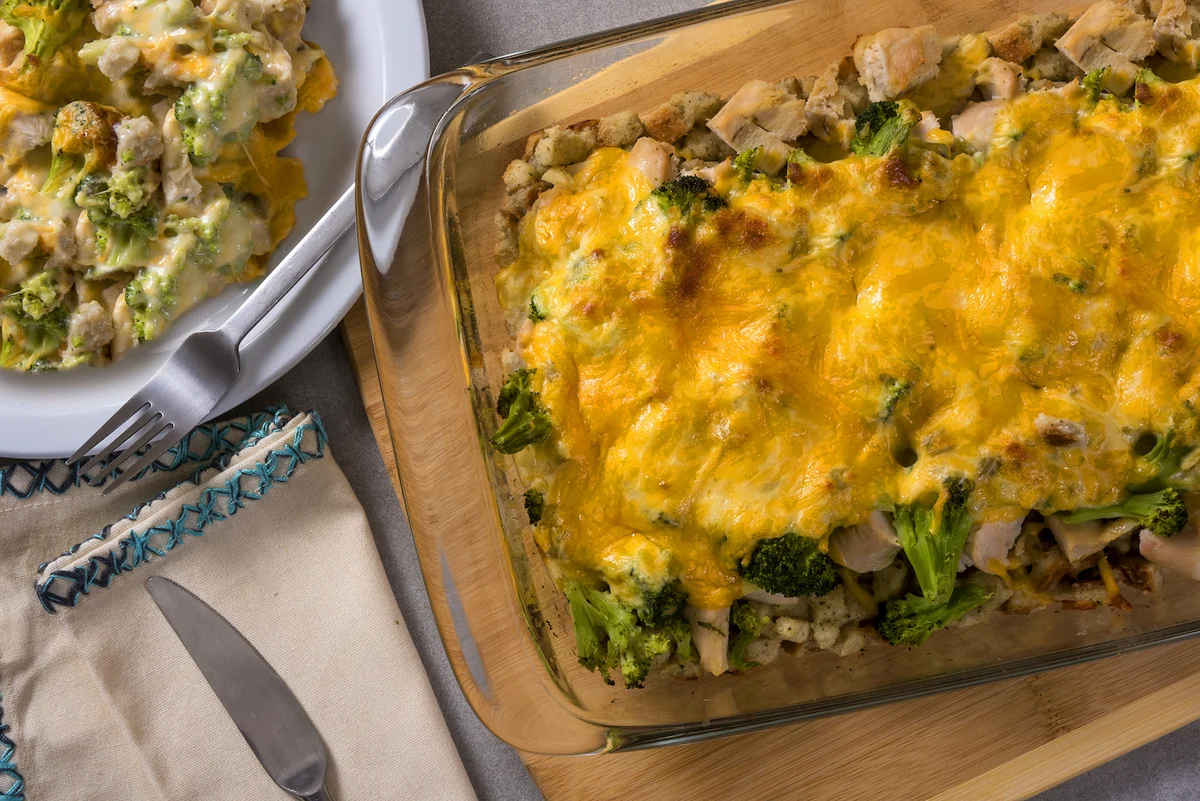
    Golden cheesy chicken and broccoli casserole with stuffing in a baking dish

    That’s the whole trick here. The broccoli is real, the cheese is real, but nobody at the table is thinking about vegetables. They’re thinking about the golden, crispy, cheesy top they can scoop up with a spoon. I grew up in a house with four brothers, and no one ever complained about the greens in this dish, because it was just too tasty to care.

    Real time: 40 minutes · Hands-on: 10 minutes

    You prep this in ten minutes if you have cooked chicken on hand. Bake time is 30 minutes at 350°F, plus a ten-minute rest before serving. It fills a 9 x 13 inch dish and serves six — and it costs pennies, the kind of cheap that makes you feel smart when you’re grocery shopping.

    Why this dish works

    Casseroles get a bad reputation for being fussy. This one isn’t. Stuffing is my favorite ingredient outside of the holidays, and here it does the heavy lifting: it holds the sauce, soaks up the broth, and turns into the crispy edge you end up fighting your family over. The chicken and broccoli ride on top, and a cup of melted cheddar seals the whole thing into one golden slab.

    It’s also the perfect vehicle for whatever broccoli you have in the freezer. I keep frozen florets on hand constantly. I like fresh broccoli too, but weeknights don’t always cooperate. If you do buy frozen, look for flash-frozen — that means it was frozen soon after being picked, so more of the nutrients made it through.

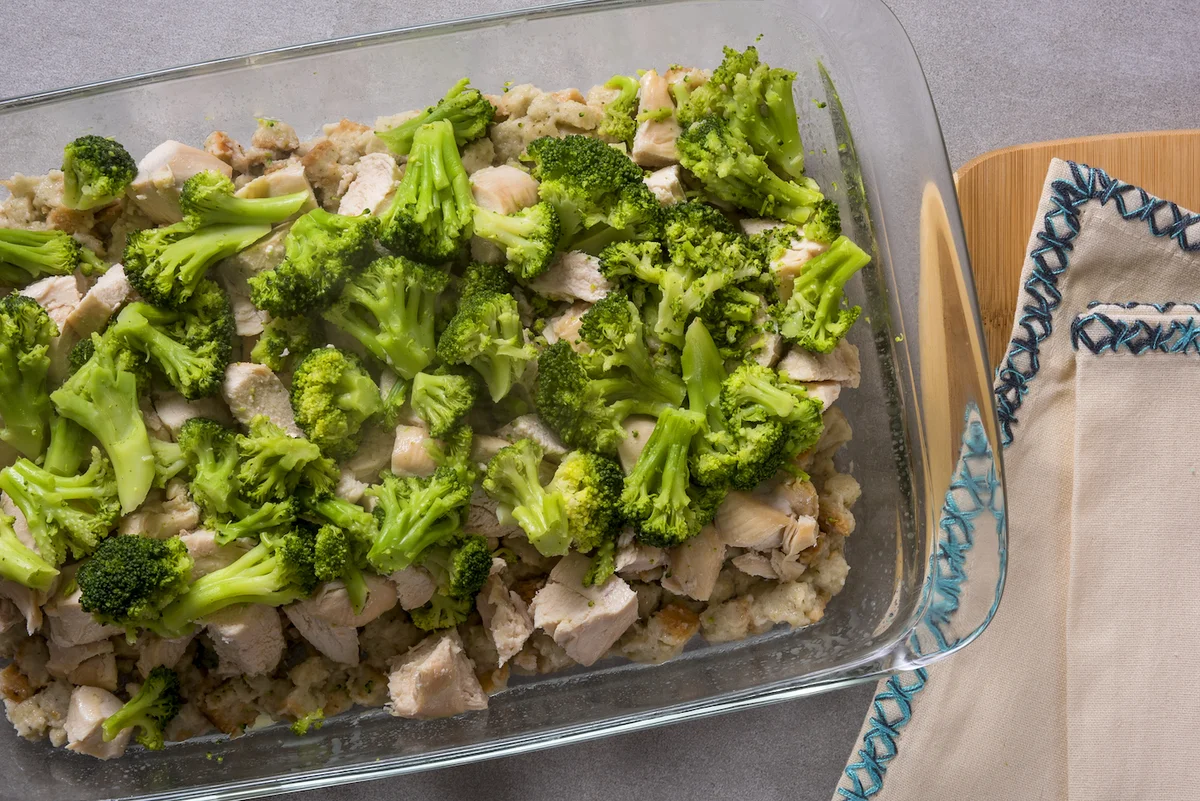
    Broccoli florets and cubed chicken arranged over stuffing in a casserole dish

    Ingredients

    • 4 cups herb seasoned stuffing (prepared per package directions)
    • 1 1/4 cups water
    • 4 tablespoons butter
    • 10 ounces frozen broccoli florets (1 package)
    • 2 cups cubed cooked chicken
    • 1 can Campbell’s Cream of Celery Soup (Cream of Chicken works too)
    • 1/2 cup milk
    • 1 cup shredded cheddar cheese
    • Salt and pepper to taste

    Tools: a 9 x 13 inch casserole dish and cooking spray. Some people cover the dish with foil to keep the top from browning too hard. I didn’t, but if you think your oven runs hot, toss foil over it for part of the bake, or slide the dish onto a lower rack.

    How to make it

    1. If you’re starting with raw chicken, bake it on a non-stick tray in a 400°F oven for 10 minutes, flip, and bake 15 more minutes until the juices run clear. Let it cool and cube it.
    2. Preheat the oven to 350°F. Spray the 9 x 13 inch dish with cooking spray.
    3. Prepare the stuffing with butter and water per the package directions, then press it evenly across the bottom of the dish.
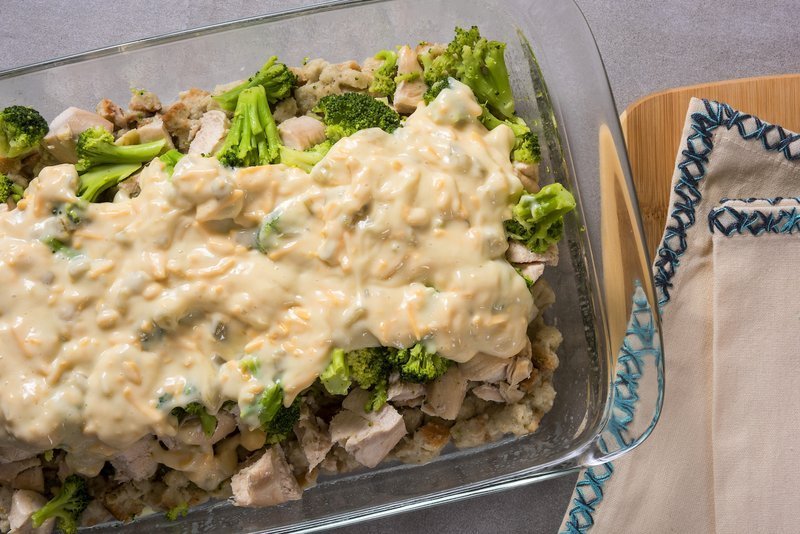
    4. Chicken and broccoli casserole layered with sauce and cheese before baking
    5. Spread the broccoli and cubed chicken over the stuffing.
    6. In a small bowl, stir together the soup, milk, and 1/2 cup of the cheese until smooth. Pour it over the chicken and broccoli.
    7. Scatter the remaining cheese across the top, spreading it out evenly.
    8. Bake for 30 minutes, until hot and bubbling. Let it rest for ten minutes, then serve.

    Each serving comes in around 502 calories, with 22 grams of protein and 37 grams of carbohydrates.

    Two questions I get about this

    Can you put raw chicken in a casserole? Technically yes — as long as the center of the dish hits 160°F, where the bacteria die. But you’d be baking it longer, and I’m not crazy about raw chicken touching vegetables while they share a pan. Cook it first. It takes no extra effort if you’re already in the oven for the chicken.

    Do you have to cook the broccoli first? Not strictly, but I recommend it. Raw broccoli bakes down and turns that unlovely brown — the cell walls break down and the chlorophyll escapes. Frozen broccoli is already blanched, so it cooks right alongside everything else and stays bright. That’s the main reason I default to it.

    Make it yours

    Swap in whatever soup you already have — cream of chicken makes it even more mellow. Load the top with extra cheese if you’re feeding a crowd. Or double the recipe, since it reheats beautifully for the next two nights.

    Happy cooking,
    Maya
    Keep Reading

  • Sourdough S’mores Cookies With Discard

    Sourdough S’mores Cookies With Discard

    Every Saturday morning I open the fridge, see the jar of sourdough discard, and feel that little pang of waste. This Saturday it finally got to stay. My husband saw me pulling it out and said the quiet part loud: make the s’mores cookies again. So I did. By the time the second batch came out of the oven, we’d eaten half of them, and I already knew there’d be leftovers. There weren’t.

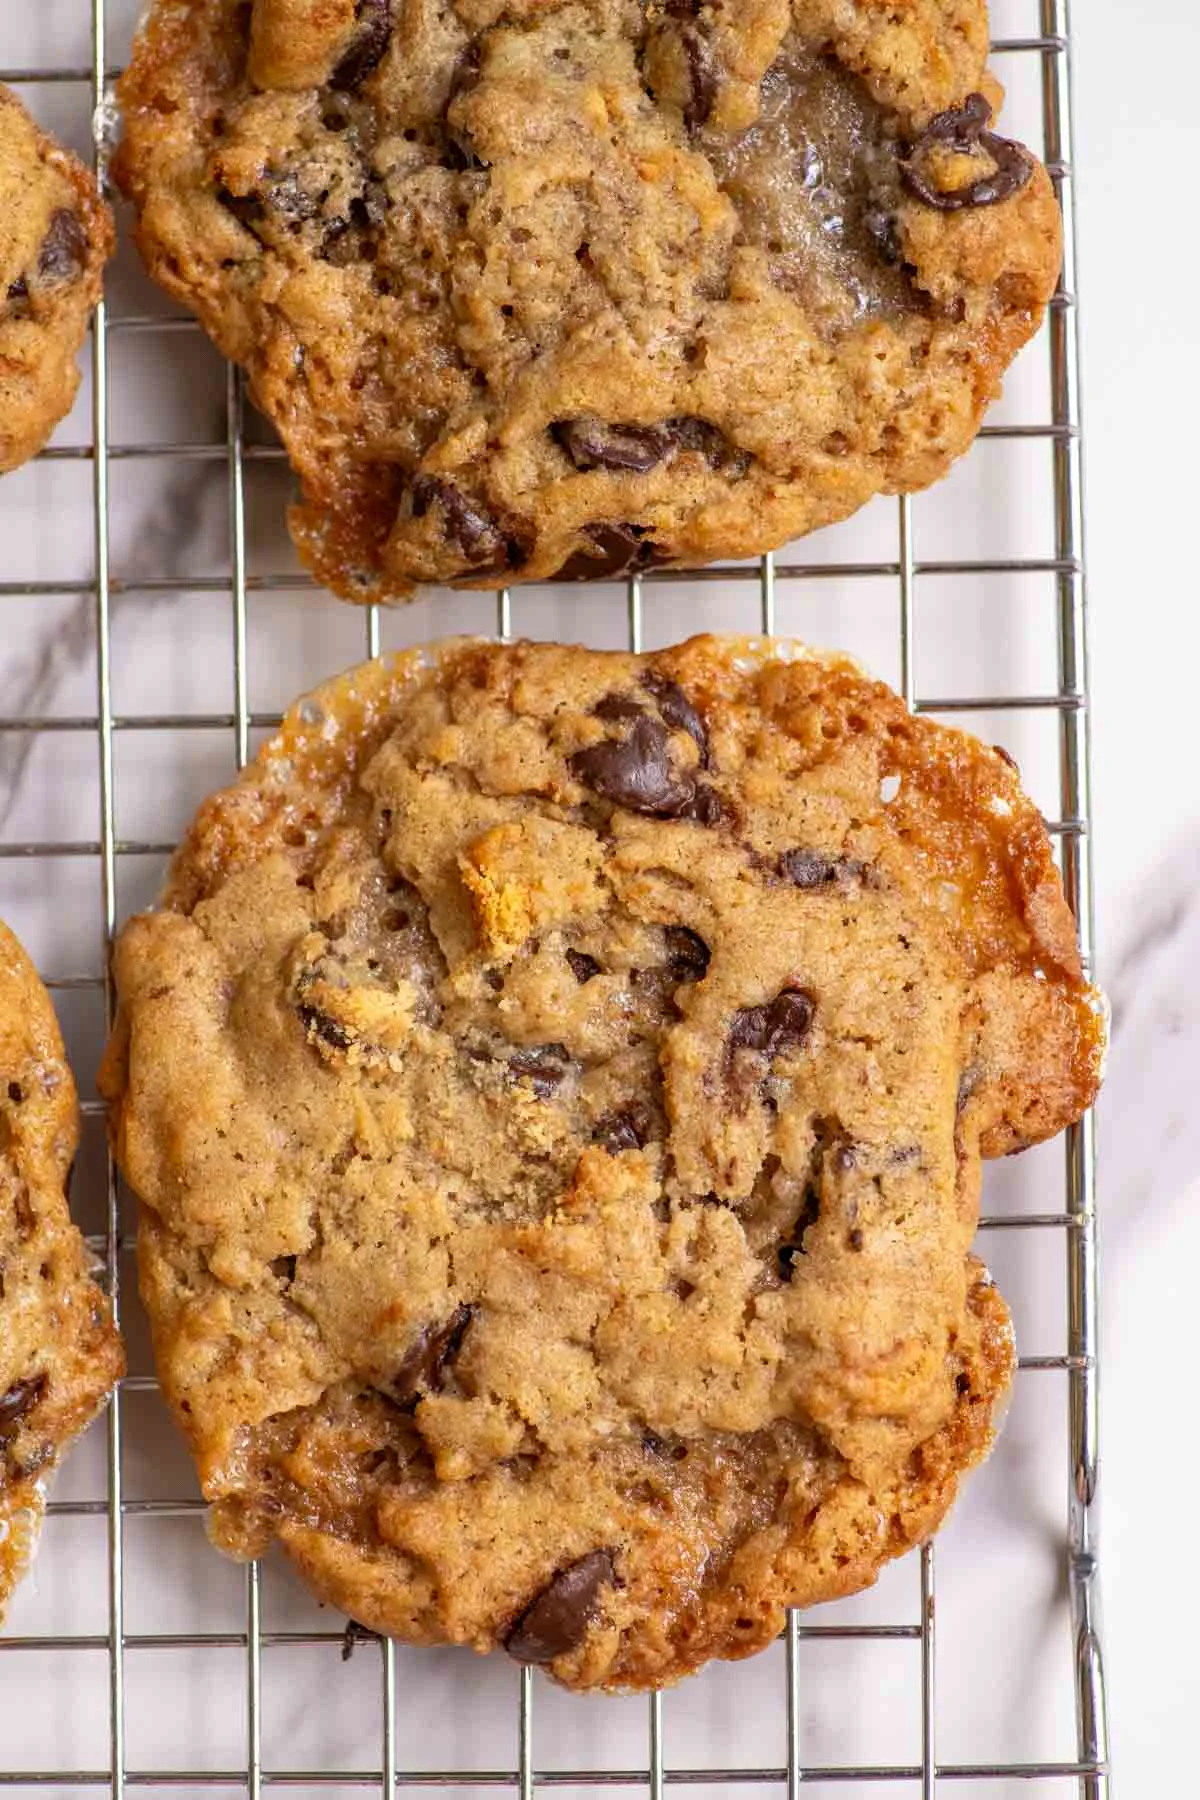
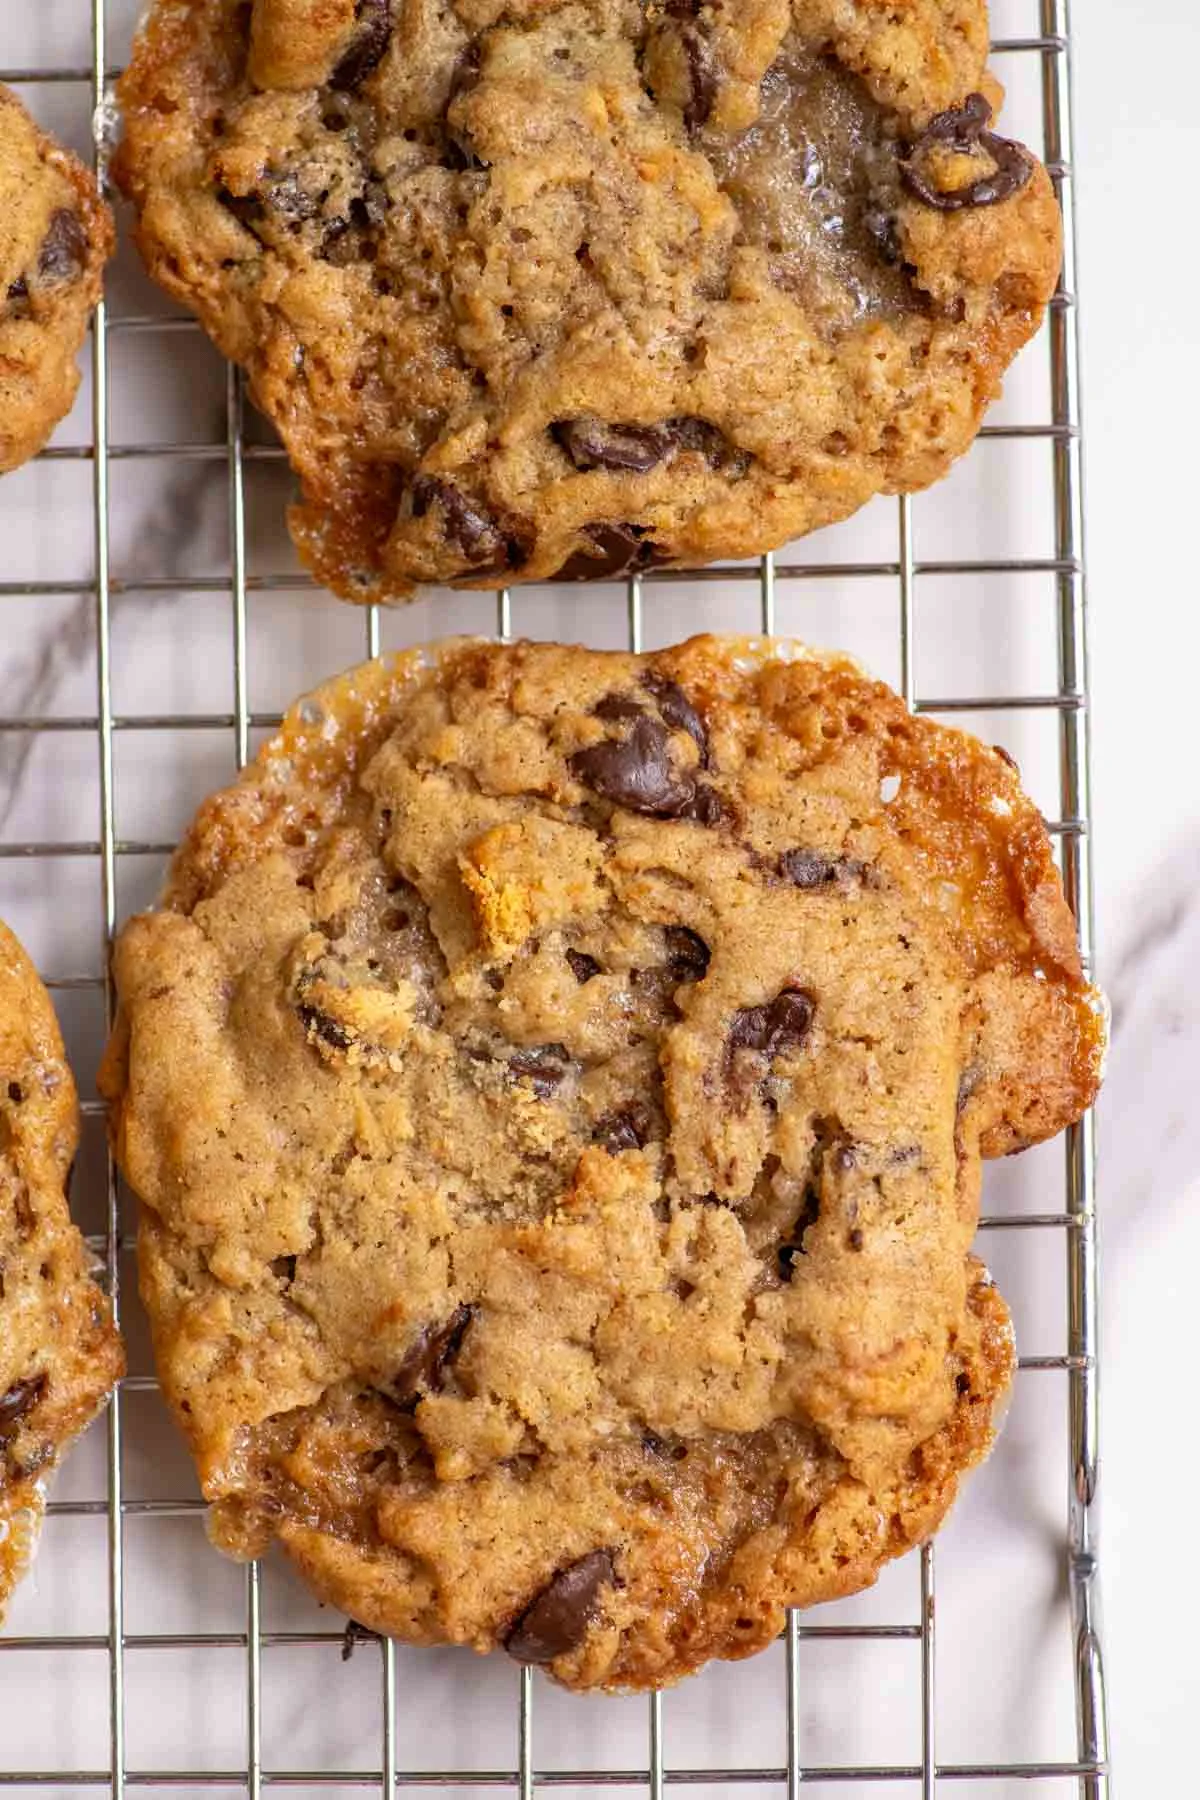
    Sourdough s'mores cookies with chocolate chips and caramelized marshmallows

    These cookies have the same soft, chewy texture as a good chocolate chip cookie, with crushed graham crackers and marshmallows folded in. In the oven, the marshmallows caramelize — crunchy around the edges, gooey in the middle. It tastes exactly like a summer campfire, minus the mosquito bites.

    What you’re getting, and what it takes

    Real time: about 15 minutes of hands-on work, plus chilling the dough. Bake time: 10 to 12 minutes for regular-sized cookies, 18 to 20 minutes for the big bakery-style ones I like to make. Yields 24 cookies.

    The only commitment is the chill time. Refrigerate the dough for at least 2 hours before baking. I’m usually not patient, but trust me — it’s worth it. If you have the time, refrigerate for up to 3 days. The flavor gets even better.

    Ingredients

    • 1 cup unsalted butter, softened
    • 1 cup white sugar
    • ¾ cup brown sugar
    • ½ cup sourdough starter discard (active starter works too)
    • 2 teaspoons vanilla extract
    • 1 large egg
    • 2 ½ cups all-purpose flour
    • 2 teaspoons cornstarch
    • 1 teaspoon baking soda
    • ½ teaspoon baking powder
    • 1 teaspoon salt — don’t skip this, it makes the difference
    • 2 cups chocolate chips (a 12 oz bag)
    • 2 cups marshmallows
    • 1 cup graham crackers, crushed

    Two honest notes. Both sugars together are what give the dough its chew, so don’t swap one out for the other. And if you’re using discard straight from the fridge, no need to warm it up — cold works perfectly.

    How to make them

    Scoops of cookie dough on a parchment-lined baking sheet
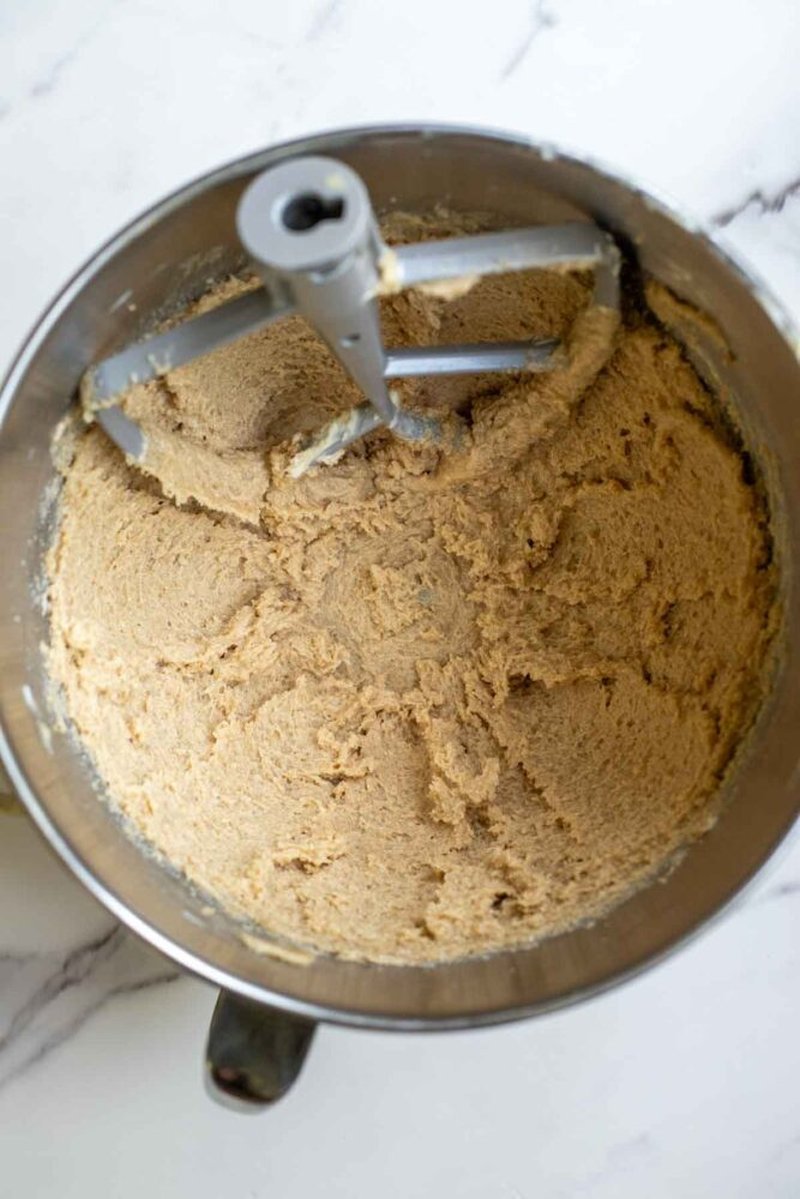
    1. Cream the softened butter, white sugar, and brown sugar in a stand mixer (or with a hand mixer) until light and fluffy.
    2. Add the egg, vanilla, and sourdough discard. Mix until fully combined, scraping down the bowl as you go.
    3. In a separate bowl, whisk together the flour, cornstarch, baking soda, baking powder, and salt.
    4. With the mixer on low, add the dry ingredients in batches until a dough forms. Stop mixing the moment it comes together — overmixing makes for tough cookies.
    5. Fold in the chocolate chips, crushed graham crackers, and marshmallows.
    6. Cover the dough and refrigerate for at least 2 hours, or up to 3 days for deeper flavor.
    7. Preheat the oven to 350°F. Line a baking sheet with parchment paper.
    8. Scoop the dough onto the sheet. I go big — about 70 grams per cookie, roughly two scoops each — but regular-sized scoops work fine too.
    9. Bake 10 to 12 minutes for regular cookies, or 18 to 20 minutes for the bakery-size ones, until the edges just start turning golden. They keep setting as they cool, so don’t overbake.
    10. Let them cool on the baking sheet for a few minutes before moving them to a wire rack.

    Storage

    Kept in an airtight container at room temperature, the cookies stay good for up to 4 days. For longer, freeze the baked cookies for up to 3 months — or freeze the dough balls and bake fresh whenever the craving hits. That’s the part I live for: pulling a handful of dough from the freezer on a random Tuesday and having cookies by the time the kettle boils.

    Questions I actually get asked

    Can I use cold discard straight from the fridge? Yes, it works perfectly.

    Can I long-ferment the dough? Absolutely — up to 3 days in the fridge before baking.

    Why did some of my marshmallows disappear? Some of them melt into the dough while baking. That’s normal, and it’s what gives you the little caramelized bits throughout the cookie.

    Can I use mini marshmallows? Yes, and they distribute more evenly.

    Can I make these ahead? The dough holds in the fridge for several days, and dough balls freeze for up to 3 months.

    Make it yours

    Reserve a few extra chocolate chips and marshmallows and press them into the tops before baking — that’s what gives them the bakery-style look. Swap in white chocolate chips and you’ve got a s’mores take that leans sweeter. And if your crumbler crackers are running low, a handful of crushed vanilla wafers work in a pinch, though you lose the classic flavor.

    Happy cooking, Maya
    Keep Reading

  • Gluten-Free Cottage Cheese Bagels (High Protein, Yeast-Free, 35 Minutes)

    Gluten-Free Cottage Cheese Bagels (High Protein, Yeast-Free, 35 Minutes)

    Here’s the thing nobody tells you about from-scratch bagels: the yeast waits for no one. My hunger, on the other hand, does. So when I started hunting for a gluten-free bagel that didn’t need a two-hour rise, I ended up in a place I’d never tried before — a blender, a bowl of 4% cottage cheese, and a recipe with no yeast at all. The first batch was a little dense. By the third, we were pulling golden, hole-in-the-middle bagels off the rack while the house still smelled like the oven.

    Glazed golden high-protein gluten-free bagels on a cooling rack

    These gluten-free cottage cheese bagels clock in at about 35 minutes, start to finish, and each one packs 14 grams of protein. For comparison, a regular bagel sits around 4 grams. If you’re eating gluten-free and tired of the dry, crumbly stuff from the grocery aisle, this is the version that’s chewier, more filling, and actually yours to flavor however you like.

    Why these bagels work

    Store-bought gluten-free bagels get by. That’s the problem — they get by. The cottage cheese is doing real work here: it’s what gives the crumb its chew and most of the protein, and it disappears into the flavor so well that nobody at the table has ever asked where the cheese went. They’re also the easiest meal prep I’ve made all winter. Bake a batch, split them, freeze half, and you’ve got weekend breakfasts sorted before the coffee’s done brewing.

    What you’ll need

    • 4% fat cottage cheese, 16 oz — I like Good Culture, but honestly any 4% will do. I use it straight from the container, no draining. The moisture is part of what makes the dough come together.
    • Gluten-free bread flour, 2 cups — I bake with King Arthur’s gluten-free bread flour. Other brands work fine too, just make sure the label says bread flour and gluten-free.
    • Baking powder, 4 tsp — check the label. Not all baking powder is gluten-free.
    • 3 eggs — you’ll use two in the dough and whisk the third into an egg wash.
    • 1 tsp garlic powder (optional), 2 tsp kosher salt, and a good handful of Everything but the Bagel seasoning, or whatever topping you’re into — cinnamon sugar works on the weird ones.

    Real time: 35 minutes. Hands-on: about 15. Equipment: a blender and a baking sheet. That’s the whole kitchen.

    How to make them

    1. Preheat and line. Oven to 375°F. Line a baking sheet with parchment.

    2. Blend the cheese. Put the cottage cheese in the blender and run it until completely smooth. Dump it into a bowl.

    3. Make the dough. Add the flour, baking powder, eggs, garlic powder, and salt. Mix with a rubber spatula until a dough forms, then turn it out onto a lightly floured surface and work it into a ball. Sticky? Add a little extra flour, a sprinkle at a time, until it stops clinging to your hands. Humid kitchen, stickier dough — that’s normal.

    4. Shape six bagels. Divide the dough into 6 equal pieces and roll each into a ball. Press a finger through the center of each and shape it into a ring.

    5. Bake. Into the oven at 375°F for 25 minutes.

    6. Glaze while warm. Let them cool for 5 minutes. Whisk the reserved egg with 2 tablespoons of water, brush the tops, and shower them with your topping.

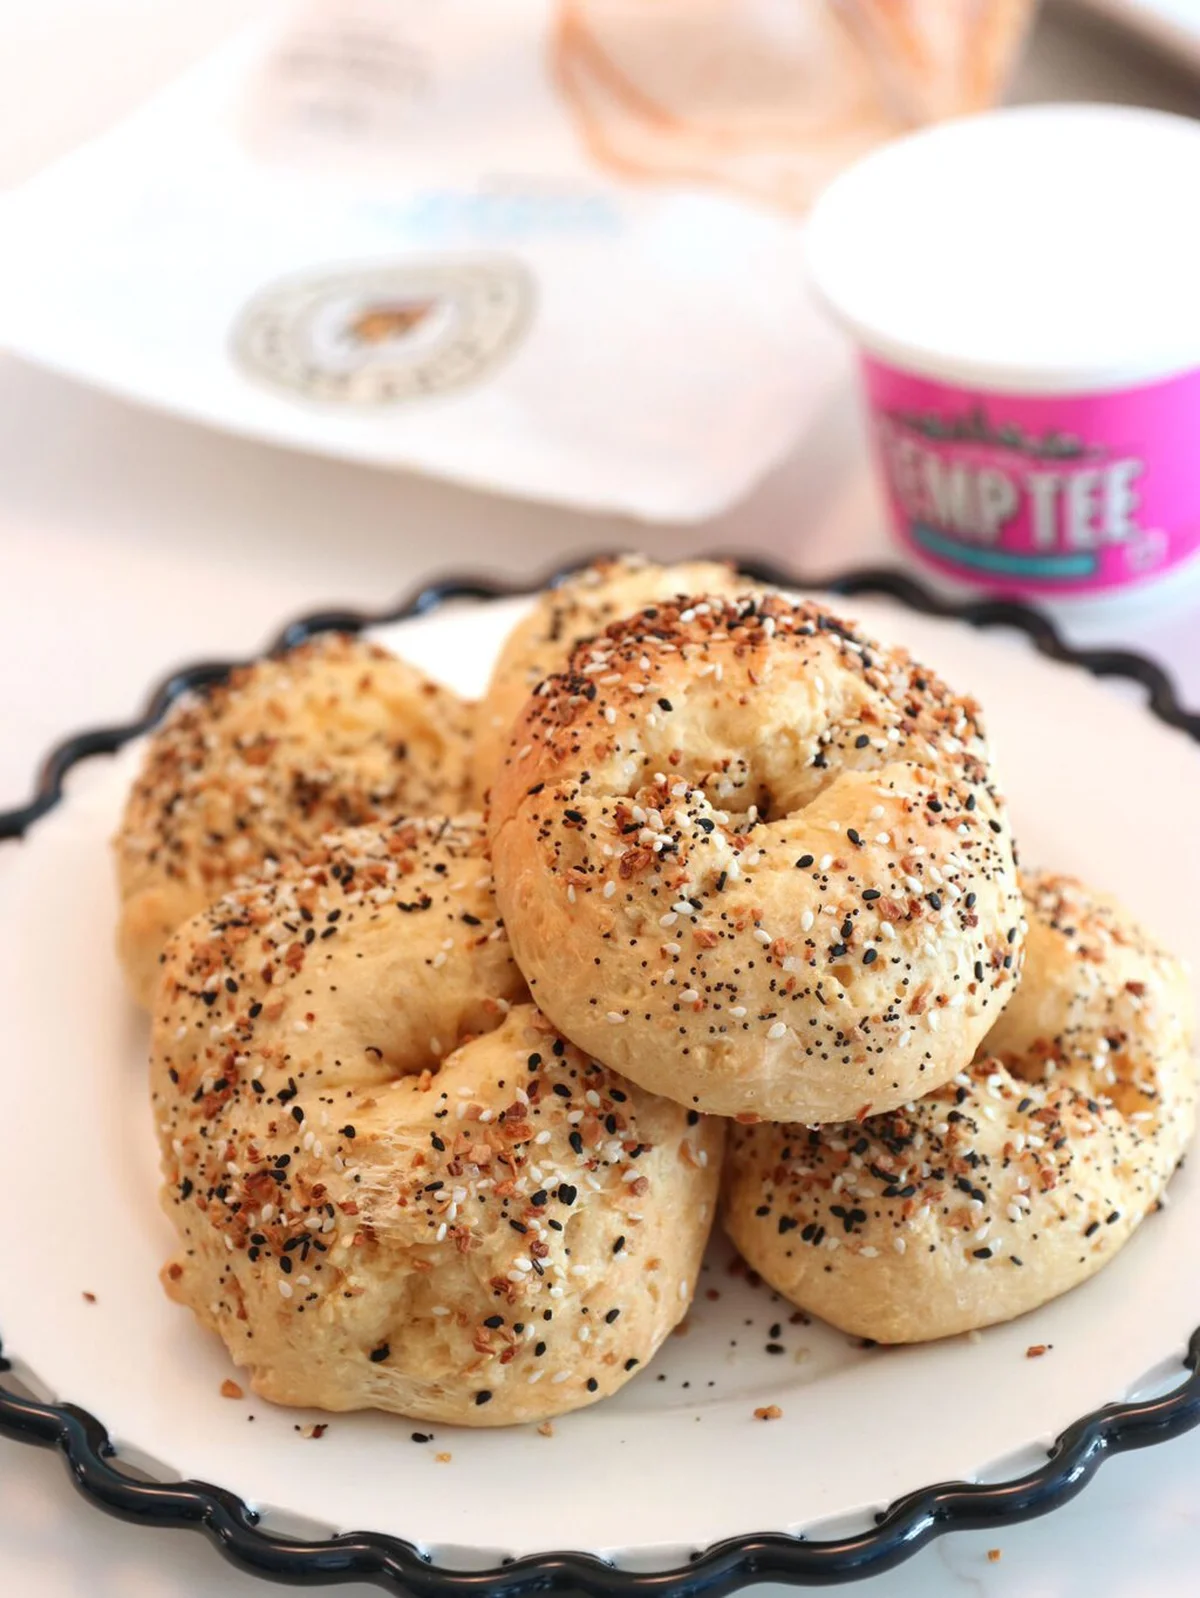
    Topped gluten-free cottage cheese bagels ready to serve

    Are they actually healthy?

    I ran the numbers through MyFitnessPal, so you don’t have to: 235 calories, 5 g fat, 37 g carbs, and 13.5 g protein per bagel. I won’t pretend these are low-carb — they’re not. But they carry about three times the protein of most store-bought gluten-free bagels, which is why they’ve earned a spot on my breakfast rotation and in the freezer for midweek.

    Storing and reheating

    These prep beautifully. Leftovers go in a zip-top bag and keep fine for 2 days on the counter. For longer, straight to the freezer. When you’re ready, wrap them in foil and reheat in the oven or air fryer until they’re warm all the way through.

    The questions everyone asks

    Can you taste the cottage cheese? Barely. It adds flavor and protein without tasting like a spoonful of curds. Your brand may nudge the flavor a little, but it won’t be “cottage cheesy” in the way you’re probably imagining.

    Can I make them dairy-free? Not tested. The cheese is the backbone of this dough, so swapping it out is a real project, not a quick swap. I’d leave that one for a rainy weekend.

    Keto or low-carb? No. 37 g of carbs per bagel rules that out.

    What about Greek yogurt? I’d do it. Use 5% fat or higher to keep the fat content close, and it should behave just like the cheese does.

    Why is my dough sticky? Humidity. Sprinkle in a bit more flour at a time and keep working until it comes together and stops sticking.

    Make it yours

    Cinnamon sugar and a pat of cold butter for the sweet crowd. Sesame and a heavy hand of everything seasoning for the savory ones. And if you’ve got a blender but no pastry cutter, a knife divides the dough just fine.

    Happy cooking, Maya
    Keep Reading