作者: Maya Collins

  • Mexican Picadillo With Ground Beef and Potatoes

    Mexican Picadillo With Ground Beef and Potatoes

    There’s a pot of rice doing its quiet thing in the corner of the kitchen, and the clock says 5:40. By the time everyone’s home, there’s a skillet of picadillo on the table, and nobody’s stressed. That’s the version of this dish I’m after.

    Full honesty: the first three times I made picadillo, it was a mess. Burnt garlic, a pan too small, and a ‘sauce’ that was basically soup. It took a few tries and a lot of patience to get it right. Now it’s one of the most reliable things in my rotation, because it does a lot of heavy lifting for a very small amount of effort.
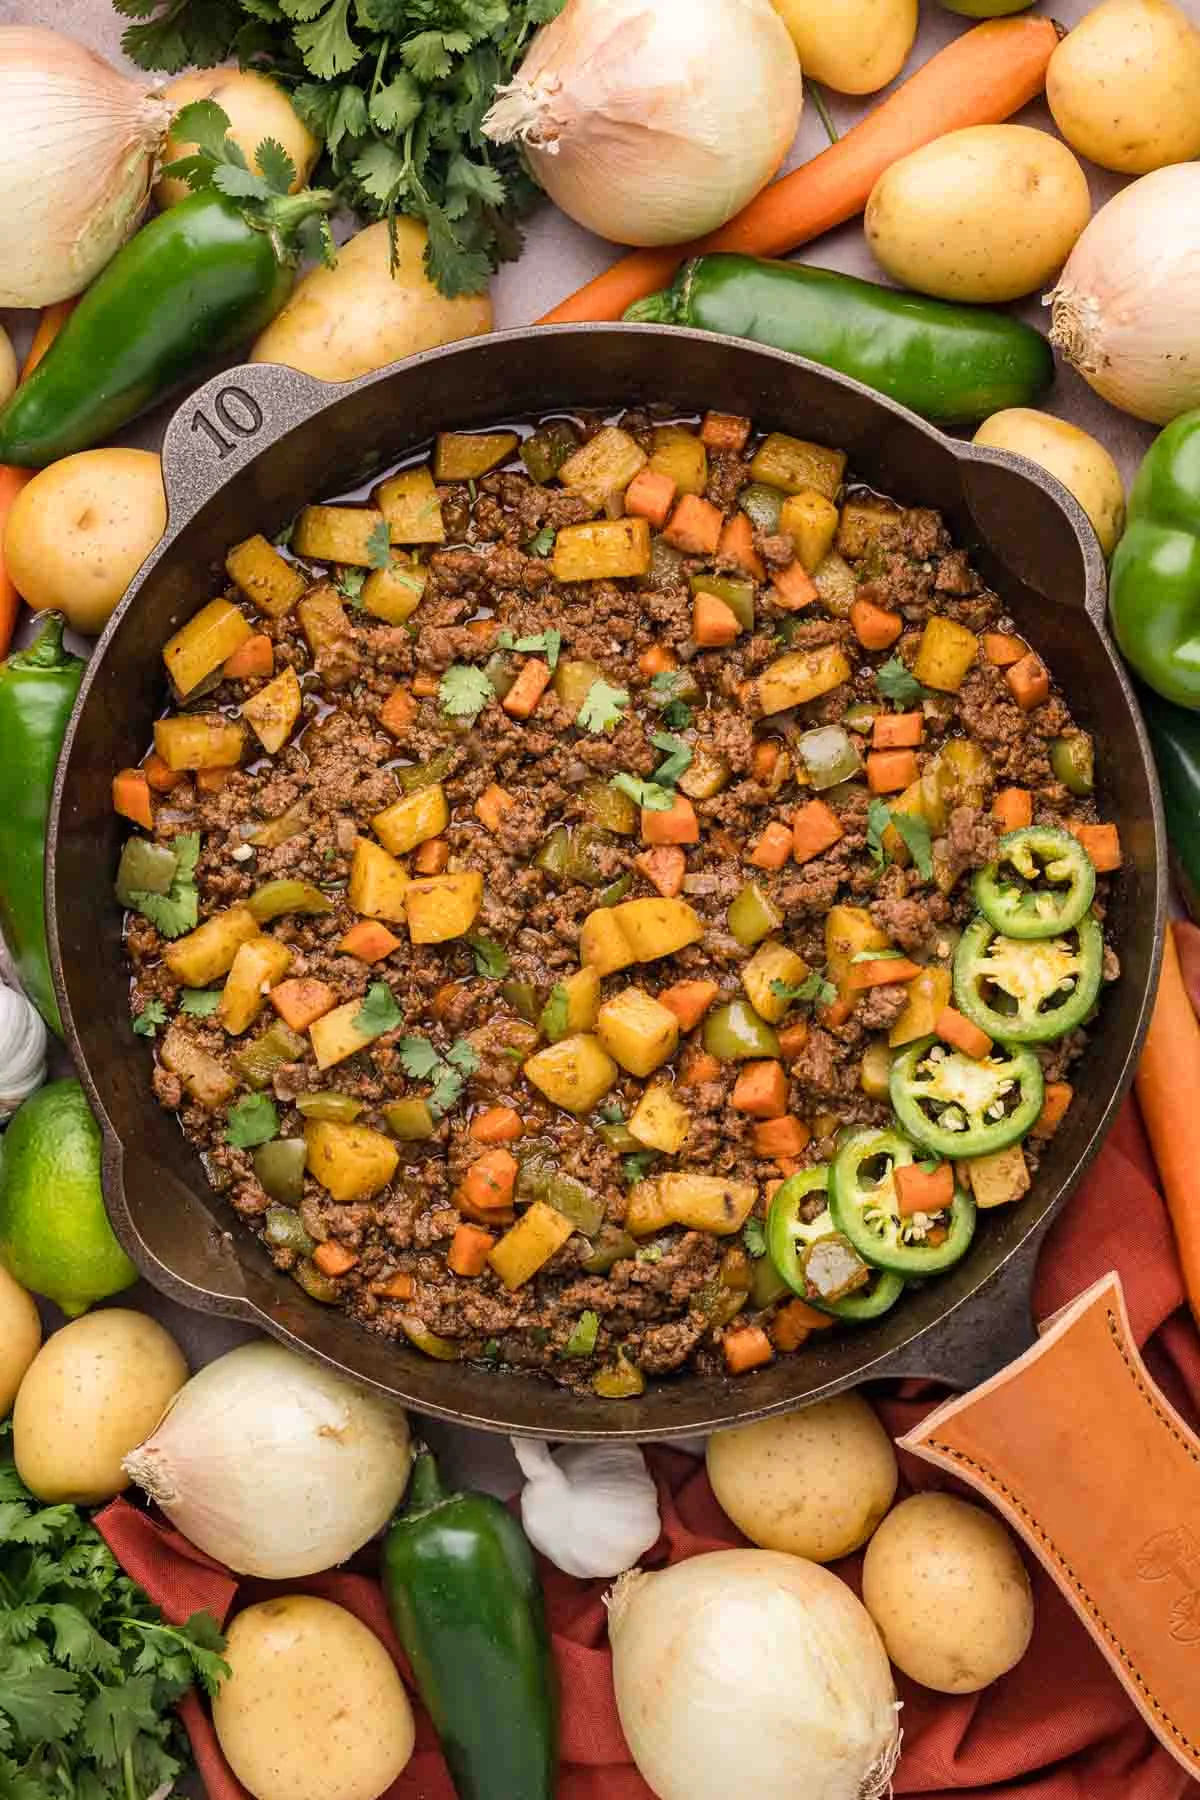
    Cast-iron skillet of Mexican picadillo with beef and potatoes surrounded by fresh ingredients

    What you’re getting, and how long it really takes

    Real time: about 65 minutes. Hands-on: about 15 minutes. The rest is the pot doing its job while you do dishes, fold laundry, or just stand there staring at the stove like a normal human being.

    It’s a complete skillet meal. Beef, potatoes, and vegetables all cook together into something that’s equally good over rice or tucked into a warm tortilla. The ingredients are all pantry staples, nothing needs a specialty run, and it stretches a pound of beef further than you’d think. And here’s the part I love most: it reheats beautifully. Leftover picadillo the next day is honestly the best day of its life.

    Picadillo isn’t one single standardized recipe. It shows up all over Latin America, the Caribbean, Spain, and the Philippines, and the list of ingredients changes from one region to the next, and from one kitchen to the next. Grandmas rarely write their versions down, so every family has its own. This one leans toward the Mexican/Tex-Mex side, with tomatoes, cumin, chili powder, and a whisper of cinnamon.

    Ingredients

    Diced potatoes, bell pepper, carrots, and onions prepped for picadillo

    Lay it all out before you start. The restaurant word for this is mise en place, which just means everything in its place. It’s the difference between a calm cook and a panicked one, and it takes five minutes.

    • 1 tablespoon olive oil
    • 1 cup potato, peeled and diced
    • 1 cup sweet onion, diced
    • 1 large green bell pepper, diced
    • 1 large carrot, diced
    • 1 tablespoon fresh garlic, minced
    • 1 pound ground beef (80/20)
    • 2 teaspoons chili powder
    • 1 teaspoon sea salt
    • 1 teaspoon dried oregano
    • 1 teaspoon cumin
    • ¼ teaspoon cinnamon
    • 2 tablespoons tomato paste
    • 1 cup chicken broth (add more if needed)
    • Chopped fresh cilantro, for garnish
    • Sliced pickled jalapeños, for garnish

    Yields 4 servings. About 400 kcal per serving.

    Honest substitutions

    • Ground turkey or chicken works in place of the beef. Add a little extra olive oil, because lean poultry doesn’t carry the same fat.
    • Red or yellow bell pepper for a sweeter note instead of green.
    • Beef broth instead of chicken, for a beefier finish.
    • Yukon Gold potatoes are my pick. They hold their shape while going creamy inside. Red potatoes work too.
    • Poblano in place of some or all of the bell pepper, for a mild, earthy chile flavor.

    How to make it

    The whole thing lives in one skillet. Here’s the order of operations, and why it matters.

    1. Vegetables first. Heat the olive oil in a large skillet over medium heat. Add the potatoes, onion, bell pepper, and carrots, and cook for 4-5 minutes. They need a head start on the beef, or nothing finishes at the same time.
    2. Garlic, briefly. Add the garlic and cook for 30-60 seconds, just until it smells like garlic, not like burnt garlic. There’s no trick that fixes burned garlic.
    3. Brown the beef. Add the ground beef and stir to break it up. Brown for about 5 minutes. It doesn’t need to be cooked all the way through, just properly browned. A crowded pan traps steam, and steamed beef never gets that savory flavor.
    4. Build the sauce. Add the salt, chili powder, oregano, cumin, and tomato paste, and stir to combine. Let the tomato paste hit the hot pan for a minute before any liquid goes in. That takes away its raw taste.
    5. Simmer it down. Pour in the chicken broth and stir. Bring it to a simmer over high heat, then drop to medium-low. Cook, stirring occasionally, for about 20 minutes, until the potatoes are fork-tender and the sauce has thickened to coat everything. Add more broth if it starts to look dry.
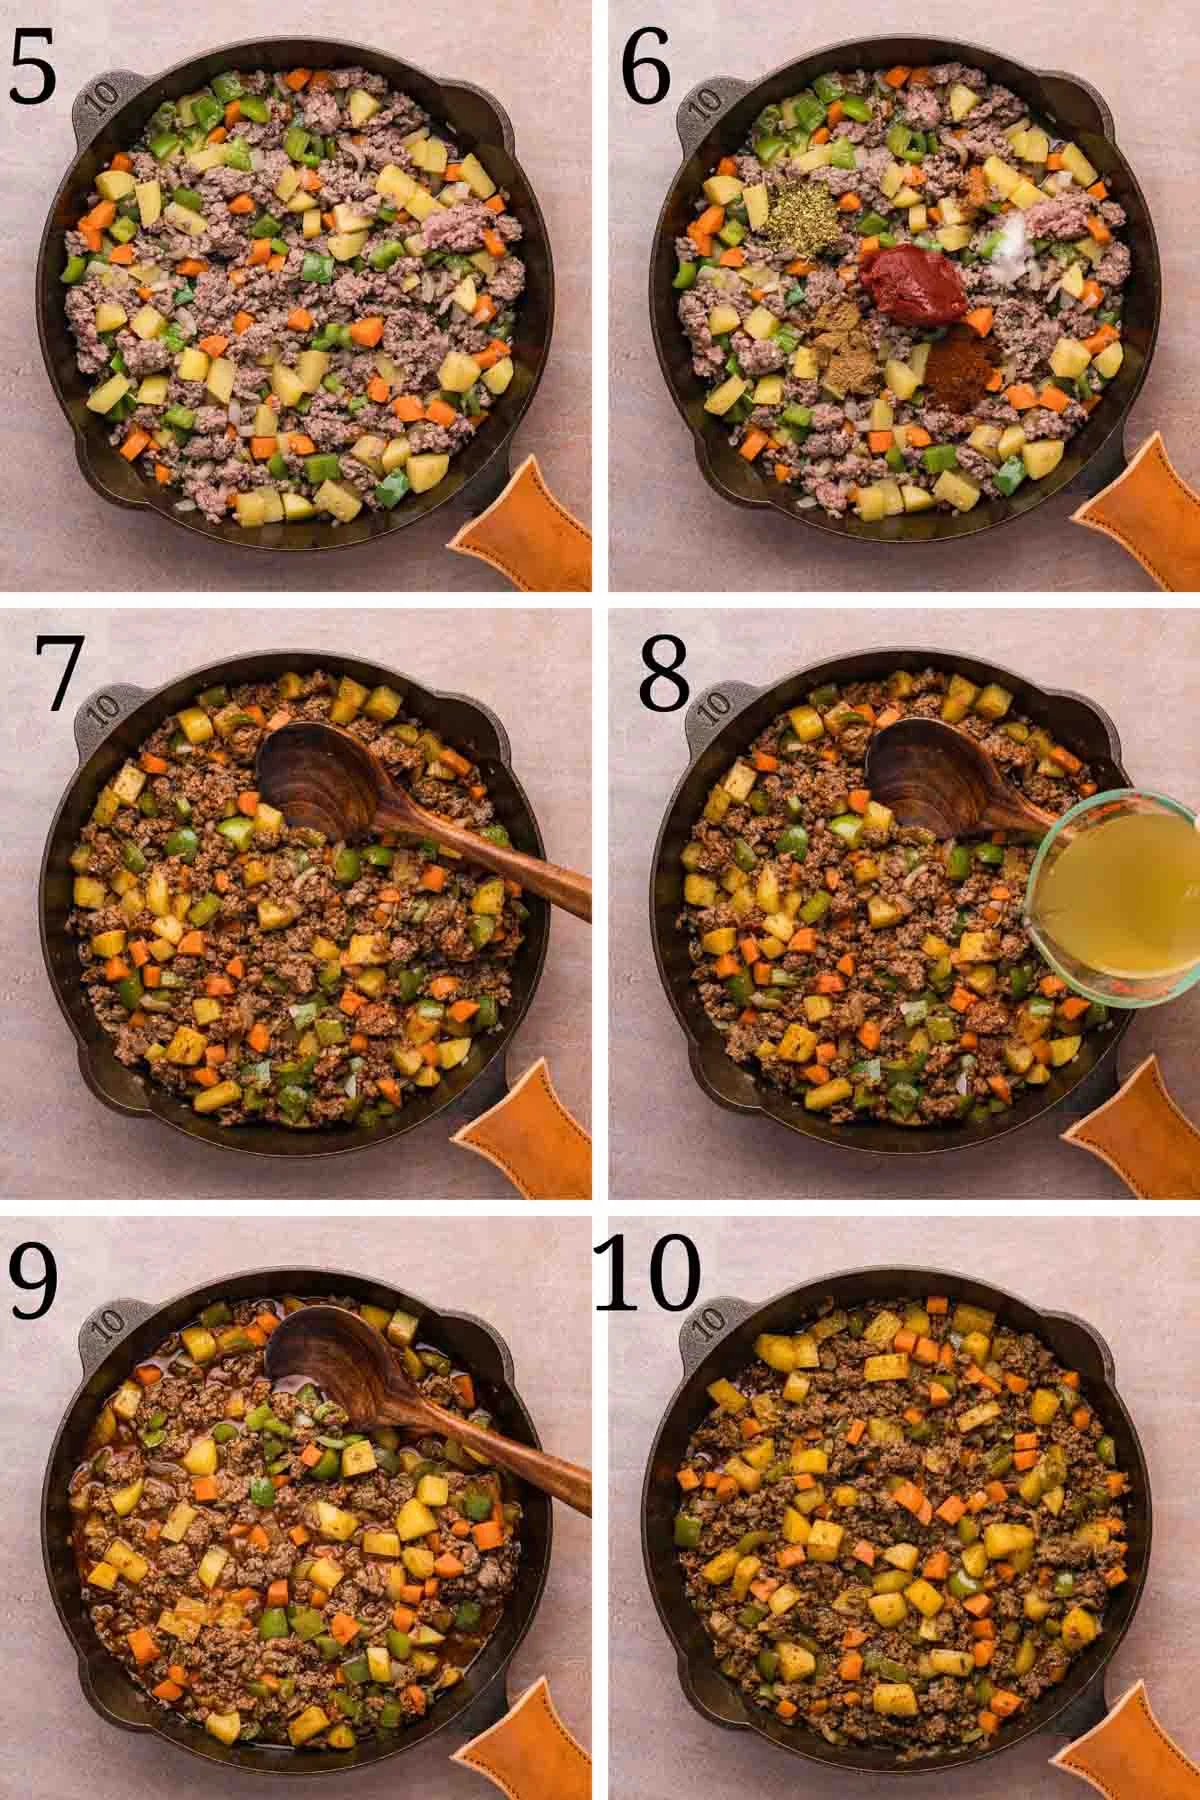
    Ground beef browning in a skillet with diced vegetables

    How to know it’s done

    Don’t trust the clock. Trust your fork. Picadillo is finished when the potatoes are tender but still hold their shape, and the liquid has reduced into a sauce that coats the beef and vegetables, with little or no watery broth pooling at the bottom of the pan. If it still looks watery after the 20 minutes, turn the heat up slightly and simmer uncovered for a few more minutes.
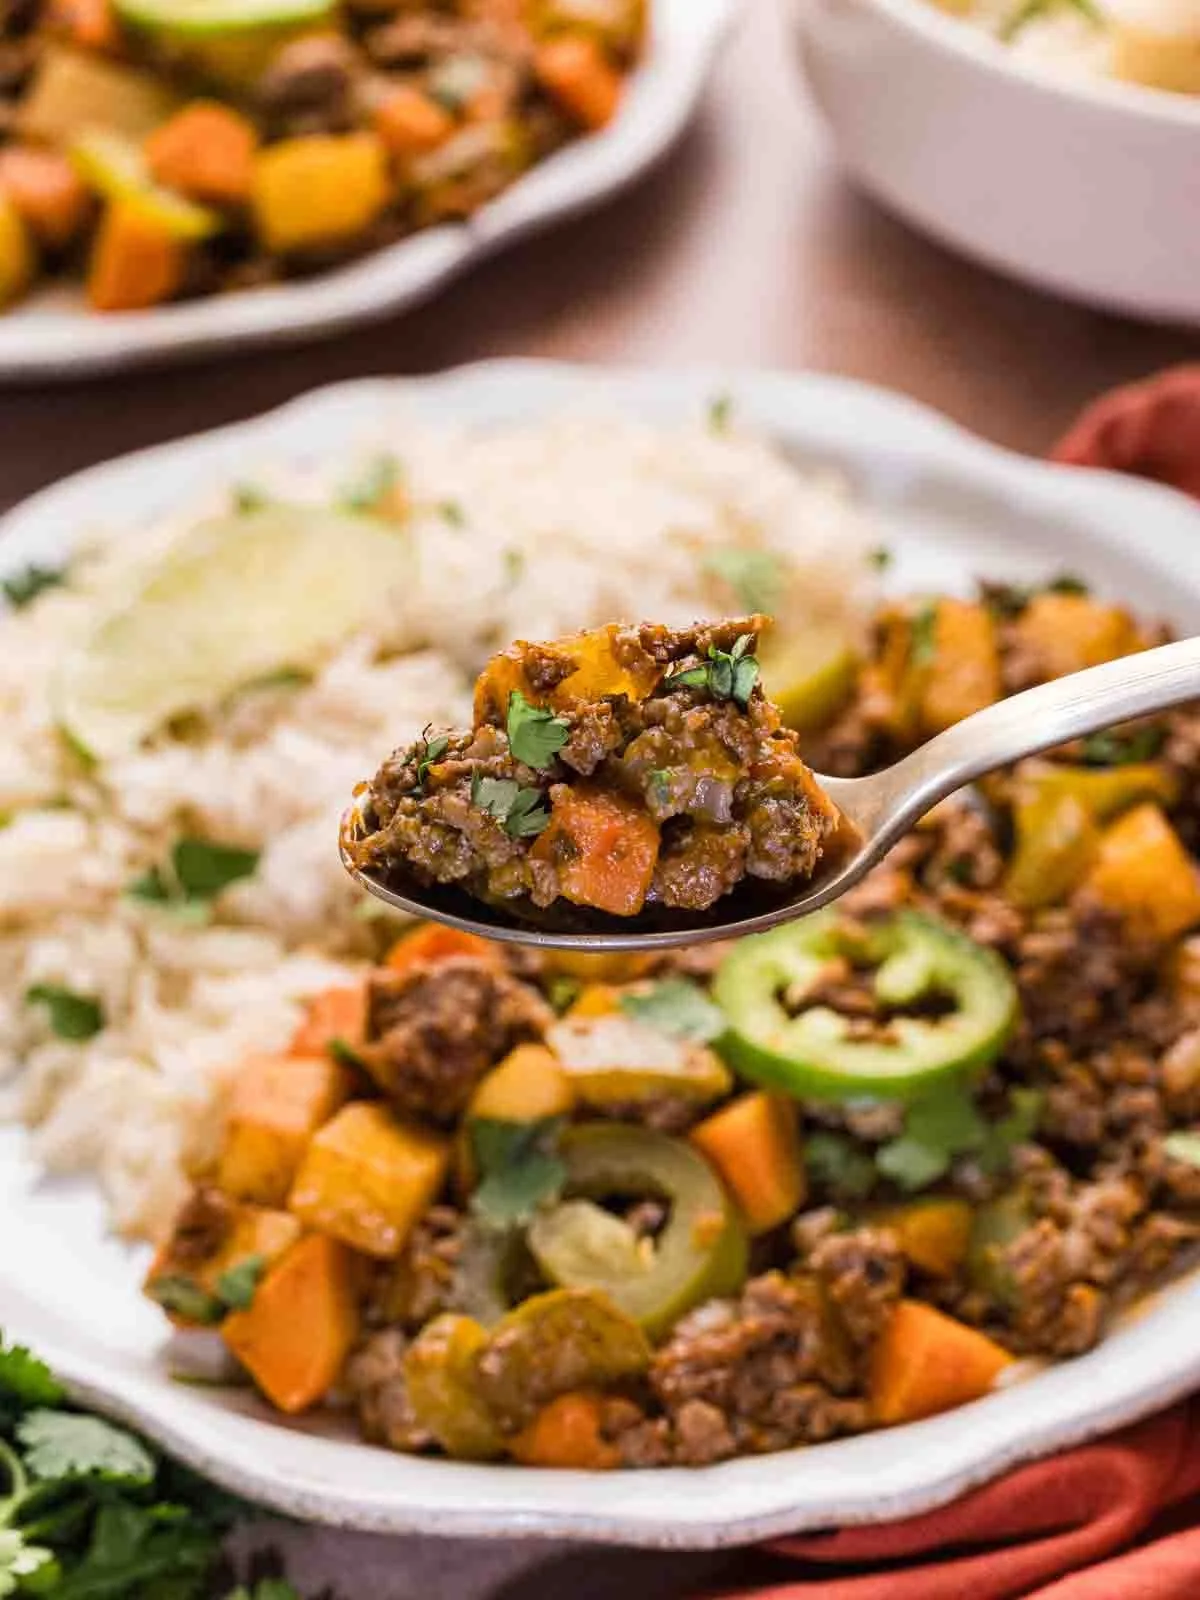
    Spoonful of finished picadillo over rice garnished with cilantro and jalapeño

    Why it gets better as it simmers

    A few things are happening in that skillet at once. Browning the beef builds savory, deeper flavors. The heat softens the vegetables, and the starch in the potatoes turns tender as it absorbs the liquid. And as the sauce reduces, everything concentrates, which is why the flavor is noticeably better after an hour of sitting in the fridge. That’s also why the leftovers win.

    Serving

    It’s hearty enough to be the whole dinner. Serve it with Mexican rice, pinto beans, warm flour or corn tortillas, and a pile of fresh toppings. It also plays well with refried beans, black beans, grilled corn, guacamole, pico de gallo, salsa verde, pickled onions, and queso fresco. If you’re pairing it with something to drink, a crisp Mexican lager keeps things light, a fruit-forward red like a Malbec handles the beef and the warm spices, and a non-alcoholic lime agua fresca is a perfect match if you’re skipping the alcohol.

    Plates of picadillo with rice and warm tortillas from the cast-iron skillet

    Make it ahead and store it

    Make a full batch on a weekend and you’ve got four dinners covered. Cook it completely, let it cool, and refrigerate it in a covered container for 3-4 days. Reheat it gently on the stovetop, adding a splash of broth if the sauce has tightened up. You can also freeze it in meal-size portions, though the potatoes soften a little after thawing. If you’re prepping the day before, dice the vegetables ahead of time and keep the potatoes submerged in cold water in the fridge so they don’t discolor. Add the fresh cilantro, lime, and jalapeños right before serving, so they still taste like fresh things.

    Make it yours

    • Spicy: Sauté a diced jalapeño or serrano with the onion and pepper. A little chipotle in adobo adds smoke without turning the whole thing into a fire alarm.
    • Cuban-style: Stir in sliced green olives, capers, and a handful of raisins for that salty-sweet contrast.
    • With corn: Fold in corn during the final 5-10 minutes. Its sweetness works surprisingly well against the cumin and chile.
    • Taco night: Simmer the finished picadillo a few minutes longer until it’s a bit drier, then pile it into tortillas. You want it moist and flavorful, but not so loose that it runs out the bottom.
    • Low-carb: Swap the potatoes for zucchini, cauliflower, or extra peppers, and cut back on the broth.
    • Empanada filling: Cook it down until most of the moisture is gone. A wet filling and pastry dough are not friends.

    Quick FAQ

    Can I leave out the potatoes? Yes. Swap in extra peppers, zucchini, or cauliflower. The texture will change, but it still works.

    How do I know when it’s done? The potatoes are tender and the liquid has reduced into a sauce that coats everything.

    Why is mine dry? Too much liquid evaporated. Add broth a few tablespoons at a time until it loosens up.

    Happy cooking,
    Maya
    Keep Reading

  • Crock Pot Pulled Chicken (Easy Slow Cooker BBQ Recipe)

    Crock Pot Pulled Chicken (Easy Slow Cooker BBQ Recipe)

    My husband and I used to argue about who was on BBQ duty every July. Then one Saturday I was already in the kitchen for pancakes, and the crock pot just… sat there, waiting. I seasoned some chicken, poured in sauce, set a timer for the laundry, and came back to the smell of BBQ filling the whole house. That was the end of the argument. Ever since, that crock pot has been my summer.

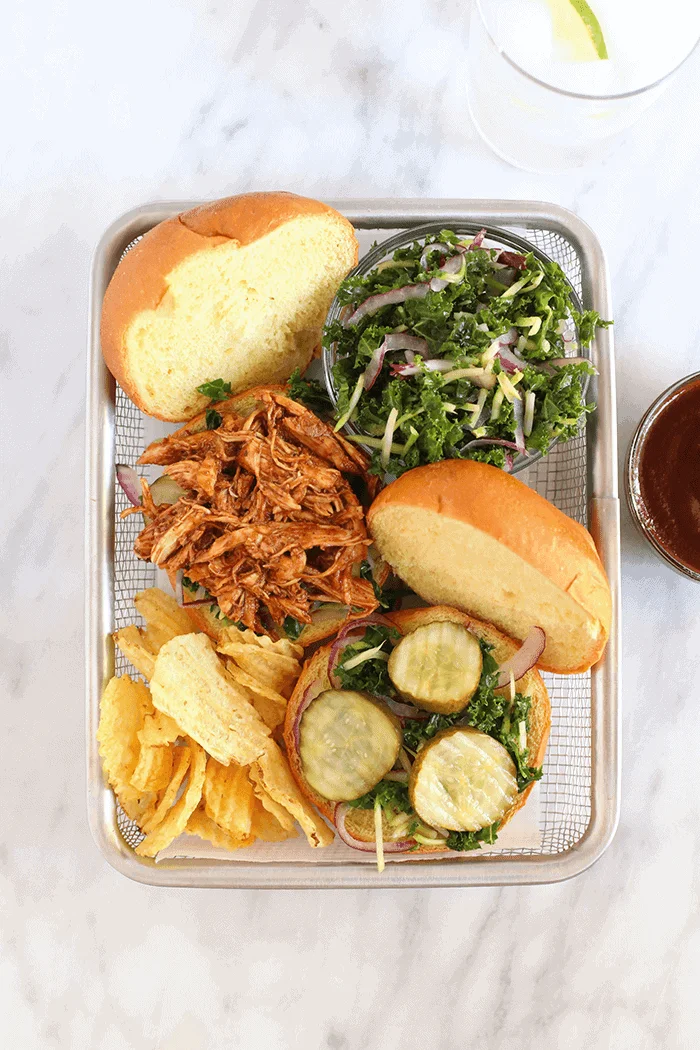
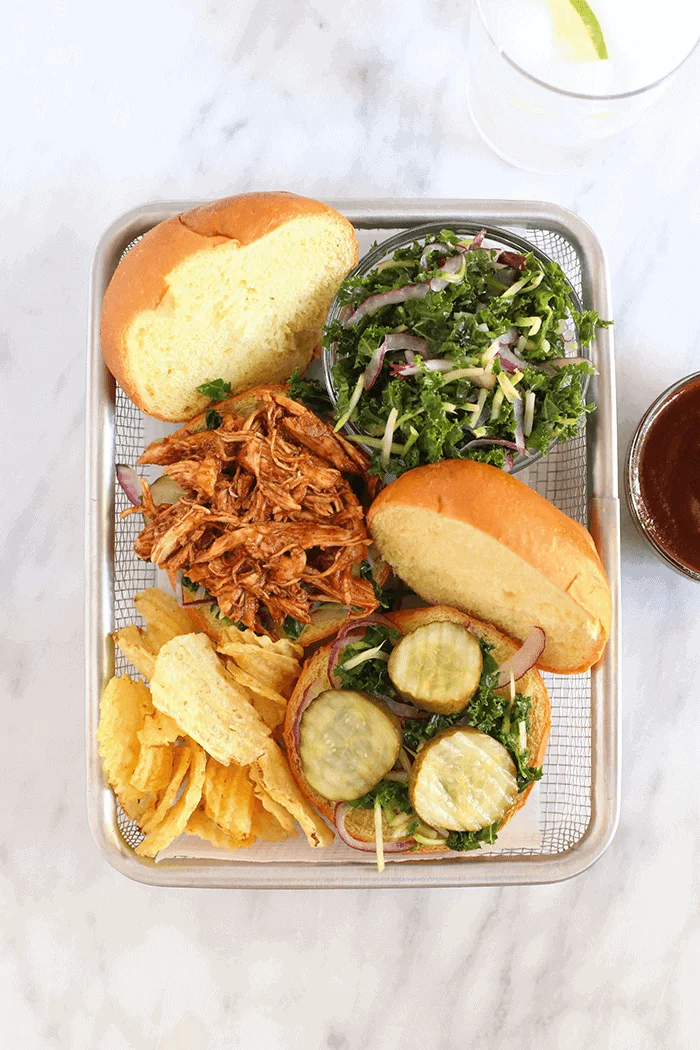
    BBQ pulled chicken sandwich with slaw, pickles, and chips on a tray

    Here’s the honest math on it: total time is 2 hours 15 minutes, and your actual hands-on time is about 10 minutes. You season, you dump, you walk away. By the time the sun gets low, dinner is basically done.

    Why This Recipe Earns a Spot in Your Rotation

    • Hands-off. Season, sauce, lid, done. No browning, no babysitting.
    • Lean and satisfying. Chicken breast in a spiced sauce — high protein, low fat, and nothing about it feels like a diet.
    • Prep ahead without drama. Start it in the morning, host the cookout in the afternoon, and actually be at the party instead of stuck at the stove.
    • One batch, a week of dinners. Sandwiches on day one, bowls and tacos after. It keeps, it freezes, and it reheats better than most chicken I’ve made.

    What You Need

    The list is short, and that’s exactly why it works: chicken breasts, a simple spice rub (chili powder, garlic powder, paprika, Italian seasoning, a little salt and pepper), your favorite BBQ sauce, and a splash of water or broth so nothing dries out.

    Want control over the sugar and sodium? Swap in a lower-sugar or homemade BBQ sauce. The method doesn’t change at all.

    Raw chicken breasts in a pot being seasoned with spice rub

    How to Make It

    Four moves. Season the chicken, dump it in the pot with sauce and a little water, cook it low and slow until it falls apart, then toss the shreds with more sauce before serving. Here’s the recipe card with exact measurements:

    Pulled Chicken Crock Pot

    Prep: 15 minutes · Cook: 2 hours · Total: 2 hours 15 minutes · Servings: 4 (easily doubled)

    Ingredients

    Crock pot BBQ chicken

    • 1–1.5 lb boneless, skinless chicken breast
    • 1 teaspoon chili powder
    • 1 teaspoon garlic powder
    • 1/8 teaspoon ground paprika
    • 1 teaspoon Italian seasoning
    • 1/8 teaspoon salt
    • 1/8 teaspoon pepper
    • 2/3 cup BBQ sauce, divided
    • 3 tablespoons water or chicken broth
    • 1 teaspoon apple cider vinegar

    Slaw

    • 2 cups slaw mix
    • 1/4 medium red onion, thinly sliced
    • 1 tablespoon pickle juice
    • 1/2 tablespoon lime juice
    • Salt to taste

    For the sandwiches

    • 4 hamburger buns
    • 1/4 cup BBQ sauce, or more to taste
    • Pickles to taste

    Instructions

    1. Mix the chili powder, garlic powder, paprika, Italian seasoning, salt, and pepper. Season both sides of the chicken.
    2. Spray the crock pot with nonstick spray and add the chicken.
    3. Pour about 1/3 cup of BBQ sauce over the top (save the rest) and add 3 tablespoons water. Cover.
    4. Cook on high for 2–3 hours or on low for 4–6 hours, until the chicken reaches 165°F (74°C) and shreds easily.
    5. Shred right in the pot with two forks. Keep the liquid in, stir in the remaining 1/3 cup BBQ sauce and the apple cider vinegar, and mix until everything is coated.
    6. For the slaw, mix together the slaw ingredients.
    7. Build the sandwiches: slaw on the bottom bun, about 1/4 lb shredded chicken, another tablespoon of BBQ sauce if you like, a few pickles, top bun. Eat.

    Nutrition (slow cooker chicken only): 162 kcal, 9 g carbs, 22 g protein, 4 g fat, 0 g fiber, 6 g sugar per serving. Rough approximation.

    Close-up of saucy pulled chicken sandwich with pickles and slaw

    Two Things That Actually Matter

    First, don’t skip the dry rub. Most of the flavor in this dish comes from the rub, not the sauce — the sauce thins out as the chicken releases its juices. Second, check doneness with a meat thermometer at 165°F (74°C), not by the clock. Every slow cooker runs a little differently.

    The one complaint I keep seeing with crock pot pulled chicken is watery sauce. Here’s the fix, and I’ve tested both parts: shred the chicken directly in the cooking liquid instead of draining it onto a board, so it reabsorbs the sauce as it sits. If it’s still thinner than you’d like, stir in a cornstarch slurry (1 tablespoon cornstarch whisked with 1 tablespoon cold water), or let it simmer uncovered on low for 10–15 minutes to thicken back up. Works every time.

    Hands shredding saucy slow-cooked chicken with two forks

    Make It Yours

    • Spicy: stir a spoonful of chipotle peppers in adobo into the sauce for a smoky kick.
    • Carolina-style: swap in a tangy mustard-based BBQ sauce.
    • Hawaiian: add crushed pineapple to the pot for a sweeter, tropical spin.
    • Custom rub: use a different chicken seasoning blend if you want a different base flavor.

    How I Serve It

    Peak BBQ season food. When we’re hosting, I set up a build-your-own sandwich bar: soft buns on a platter, a big bowl of the pulled chicken, small bowls of the slaw, pickles, and chips. It looks like a spread, and I get to stand out in the yard instead of plating individual sandwiches.

    But it’s just as good spooned over rice or greens. For a full cookout table, it stands up next to loaded baked potato salad, baked beans, or a pasta salad — anything that holds up sitting out on a buffet.

    Meal Prep With Leftovers

    This is one of the proteins I portion out for the week. A container with the chicken, a starch, and a veggie is a high-protein lunch ready in seconds. And it holds up better than most chicken when reheated — the sauce keeps it moist instead of drying out in the microwave. Over rice for lunch, or turned into a BBQ chicken salad, the same batch keeps dinner from repeating all week.

    Store leftovers in an airtight container in the fridge for 3–4 days, or freeze for up to 3 months. To reheat, warm it on the stovetop with a splash of broth or extra BBQ sauce; the microwave works in short bursts too. It genuinely out-reheats plain shredded chicken.

    Quick Answers

    Can you put raw chicken in a slow cooker? Yes — raw, thawed chicken is exactly what you want here. Never start from frozen (below for why).

    How long do you cook it? High for 2–3 hours or low for 4–6 hours, until it hits 165°F (74°C) internally and shreds easily with two forks. I go by temperature, not the clock.

    Can you cook frozen chicken in a slow cooker? I don’t recommend it. Frozen chicken spends too long in the temperature danger zone before it heats through. Thaw fully in the fridge first.

    Why is my sauce watery? The chicken releases liquid as it cooks and thins the sauce. Shred directly in the liquid, don’t drain, then simmer uncovered 10–15 minutes or add a cornstarch slurry — full fix in the tips section above.

    Can you freeze it? Yes. Cool completely, freeze in an airtight container or bag with the air pressed out, for up to 3 months. Thaw overnight in the fridge before reheating.

    What’s the difference between pulled and shredded chicken? Essentially nothing. Pulled implies it’s been coated in a sauce (like BBQ); shredded is usually the plain version for soups, tacos, and salads.

    Happy cooking,
    Maya
    Keep Reading

  • How to Make Rose Sugar (Two Easy Ways)

    How to Make Rose Sugar (Two Easy Ways)

    My husband came home from work one evening and asked if I had any of the pink sugar, like the fancy kind. I had exactly one jar left, and we were going to use it on the daughter’s birthday cake that weekend. By the time we’d popped the lid, I’d already counted the days until we ran out — about nine. I’d been short on that sugar ever since I stopped buying it, so I figured there had to be a way to keep my counters stocked.

    There is, and it’s one of the laziest crafts in my whole kitchen: rose sugar. You need one cup of sugar, one cup of petals, and five minutes of hands-on time. The hard part is deciding what to put it near on Sunday mornings.

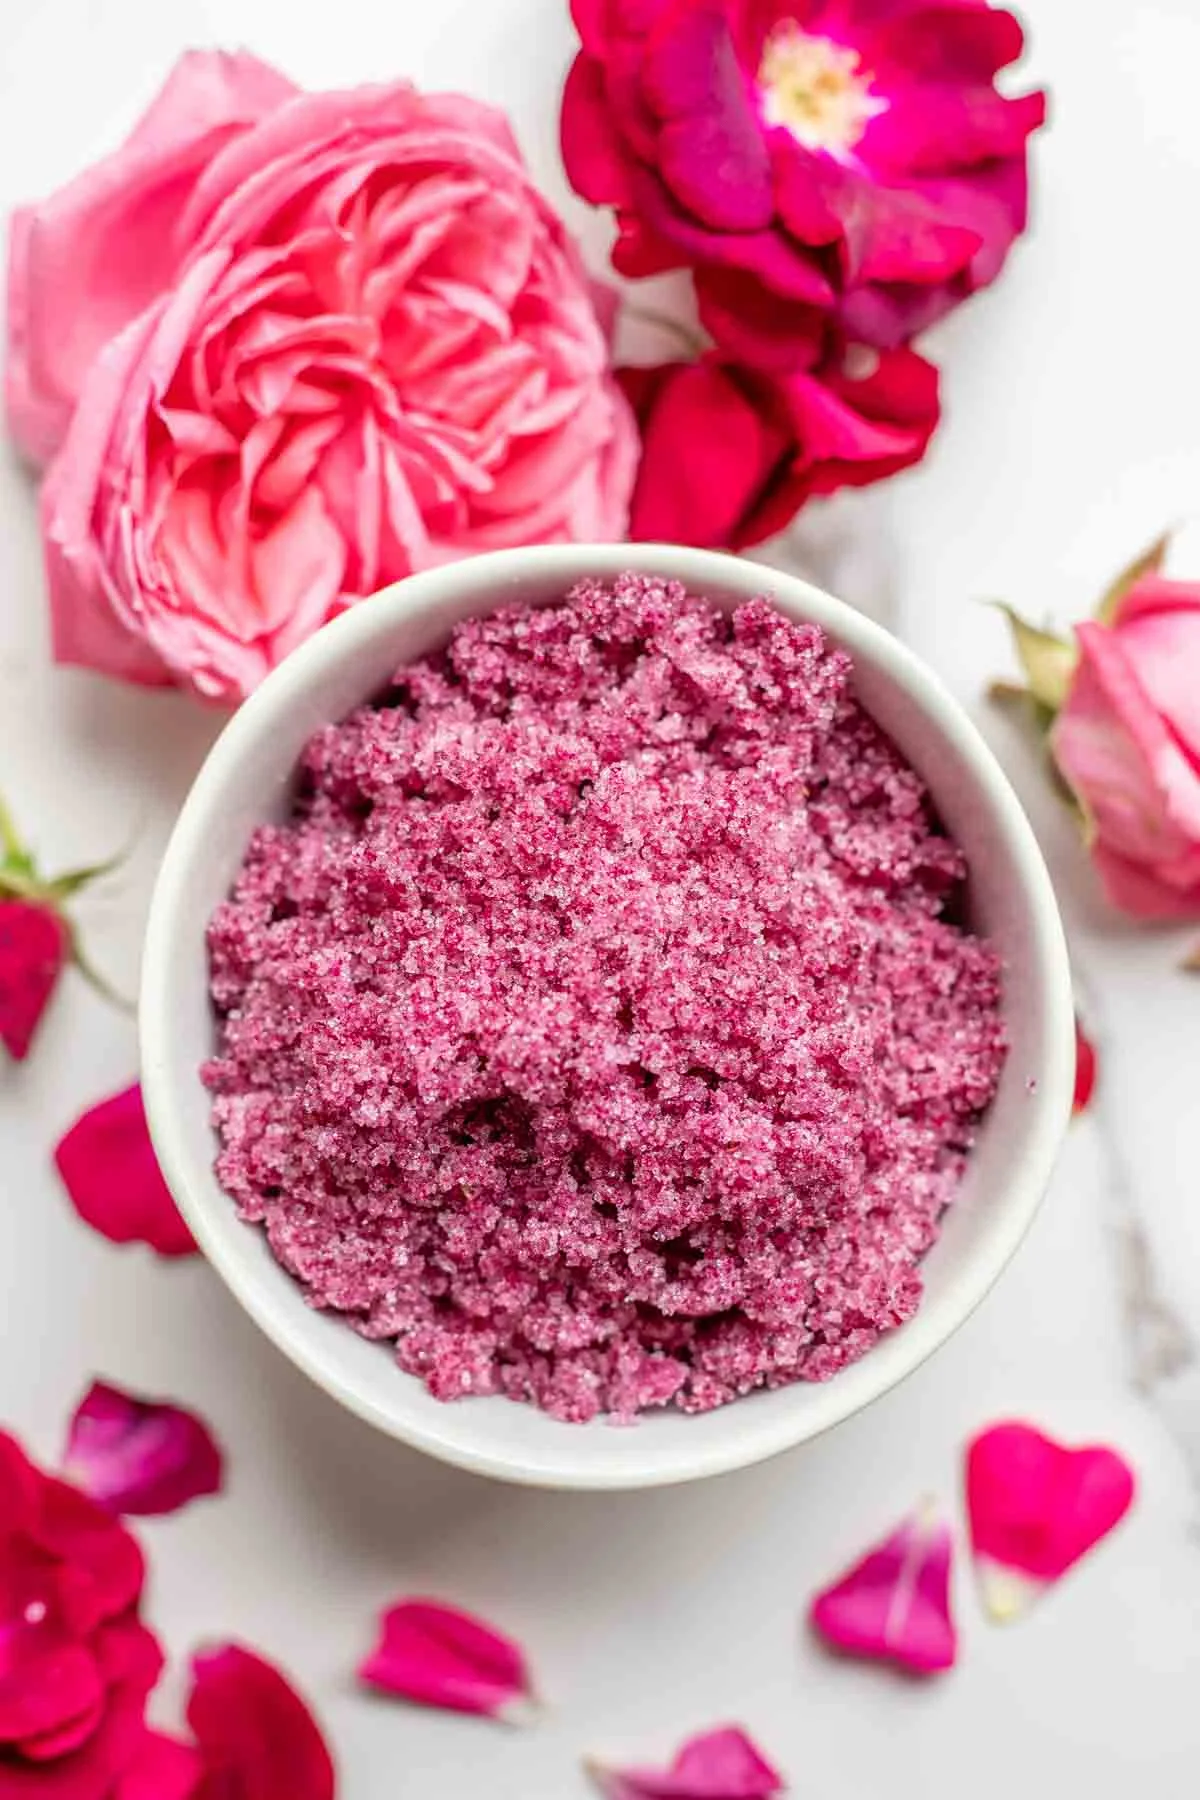
    Bowl of pink rose sugar with fresh rose petals and blooms on marble

    Why you’d want this in your pantry

    Rose sugar has no business being this good in iced tea, but it is. The same spoonful goes on top of sugar cookies, into whip, over sliced fruit on a hot afternoon, or straight into your coffee if you want a small reason to slow down. It’s the kind of thing that makes a normal Tuesday breakfast feel a little intentional.

    I never would have thought to put rose petals in sugar — I’ve mostly eaten them as a garnish on the side of a plate. But the smell you get while grinding is floral, not flowery-in-a-boulet way, and it carries into everything it touches. The history backs it up: a 16th-century English writer and gardener named Sir Hugh Platt is credited with the first known rose sugar, which makes this a 450+ year old idea hanging out in your pantry. No resources, no specialty store run.

    Real time and effort

    • Hands-on: about 5 minutes for the dry-grind method
    • Total with drying: a few days spread on a baking sheet, stirred now and then
    • Infusion method: a couple of weeks sitting in a jar, untouched
    • Shelf life: six months or longer, airtight, in the pantry or freezer

    What you need

    Two ingredients and tools you already have because you bake things on weekends.

    • 1 cup (about 200 g) sugar — I use organic cane
    • 1 cup fresh rose petals, tightly packed (about 60 g) — see the tip on fresh vs. dried
    • Tools: a food processor, blender, or coffee grinder (the grinder works great for smaller batches); a baking sheet; a glass jar with a lid; a sifter, if you have one

    The petals are the only picky part here. Go organic if you can, skip anything that’s been sprayed, and do a quick shake to make sure bugs aren’t having a party in the heads of the roses before the food processor gets there. I haven’t hit this in my garden, but I learned about it the first year I made this and I’m not doing it again. Mix color and variety — dark pink and red petals give you a much prettier result than white roses, which have a bad habit of going brown as they dry.

    Roses and a bowl of sugar, labeled ingredients for a recipe

    How to make rose sugar (the fast way)

    1. Drop the sugar and petals into a food processor or blender. Half the batch? A coffee grinder handles it fine.
    2. Pulse until the petals are ground to a fine, even consistency. You want the blend to look and feel like sugar, not sawdust.
    3. Spread it on a parchment-lined baking sheet and leave it for a few days to dry out. I drape a sheet of parchment over the top so nothing stray — dust, drips, the occasional sticky toddler hand — lands in it. Stir it now and then.
    4. Pour into a jar. Done. That’s the recipe.

    Or: the slow way (infusion)

    If you’ve got a weekend to spare — or a garden that’s producing more roses than you know what to do with — skip the blade entirely. Layer sugar and petals in a clean glass jar, alternating until you run out, and let it sit for a couple of weeks. The sugar will slowly draw the rose oil out of the petals on its own, no mechanical help needed. When it’s done, sift the petals out and you’ve got the same sugar, just gentler and slightly deeper in flavor.

    The down side: you’re committing to that jar for a couple of weeks and you have to remember it’s in the cupboard.

    Storage (don’t skip the freezer)

    The pretty pink color fades once the sugar dries out. Freezing your jars is the trick I run now — the color holds noticeably better, and honestly, an airtight jar in the freezer is no different from one on the shelf by this point. As long as the petals are fully dried out, this sugar will keep for six months or longer in the pantry or freezer.

    Tips from my counter

    • Fresh vs. dried petals. Both work. Fresh petals give stronger aroma and infuse faster; dried petals are convenient but take much, much longer, because the oils seep into the sugar at a crawl once the petals are already dry. I use fresh every time.
    • Wash if needed, dry completely. If you’re not growing your own, some petals may need a quick rinse. They have to be totally dry before you start, or you’ll be making wet sand instead of sugar.
    • Bright petals, pretty sugar. Deep pink and red roses hold their color. White roses most likely turn brown as they dry, so save the whites for your vase.

    What I actually use it on

    • Stir it into iced tea or a green tea latte — it works in hot coffee too, if you’re brave.
    • Roll it on shortbread cookies before baking, or dust it on top of freshly baked sugar cookies for a little something.
    • Sub it for white sugar in any baking recipe where you want a hint of floral behind the sweetness.
    • Sprinkle it over a bowl of fresh fruit on a hot day — berries especially.
    • Stir it into whip or homemade yogurt before serving.
    • Sixin it on top of scones or muffins while they’re still warm.
    • Use it in a sugar scrub for the body — the residual scent is surprisingly nice and it feels like a spa step without being one.
    Close-up of a spoon digging into orange sugar in a ceramic bowl

    FAQs

    What does rose sugar taste like? Sweet and delicate. It has that rose flavor of a fresh petal without getting perfumey, so you’re not tasting it as perfume.

    Fresh or dried petals? Both work. Fresh gives stronger aroma and infuses faster; dried is fuss-free but the flavor takes a lot longer to build up.

    Which roses should I use? Edible, pesticide-free rose petals only. Heirloom varieties like the Apothecary rose have stronger scent and flavor, so reach for those first.

    Can I use the whole flower or the rose hips? Just the petals. Leave the hips for tea.

    Can I do this with other edible flowers and herbs? Absolutely. Same instructions — blend and dry, or layer and infuse — and swap out whatever you have fresh in season:

    Make it yours: grind the sugar after petals so you can check the consistency and stop before it goes to powder. Or make a batch in your driest season and jar it for winter, when the counter could use something pretty. Or mix your rose sugar with a little ground vanilla and keep a jar for the year’s plum — the two flavors were made for each other.

    Happy cooking,
    Maya

    Keep Reading

  • Smoked Salmon Toast (High-Protein)

    Smoked Salmon Toast (High-Protein)

    There was a package of smoked salmon in the fridge for three days before I did anything with it. That’s my fault — I bought it with big plans and small evenings. Then one Tuesday around 7 p.m., I sliced some bread, spread a big spoonful of cottage cheese, and stacked the salmon on top. It tasted like lox and bagels. It just got a little bit smarter about it.

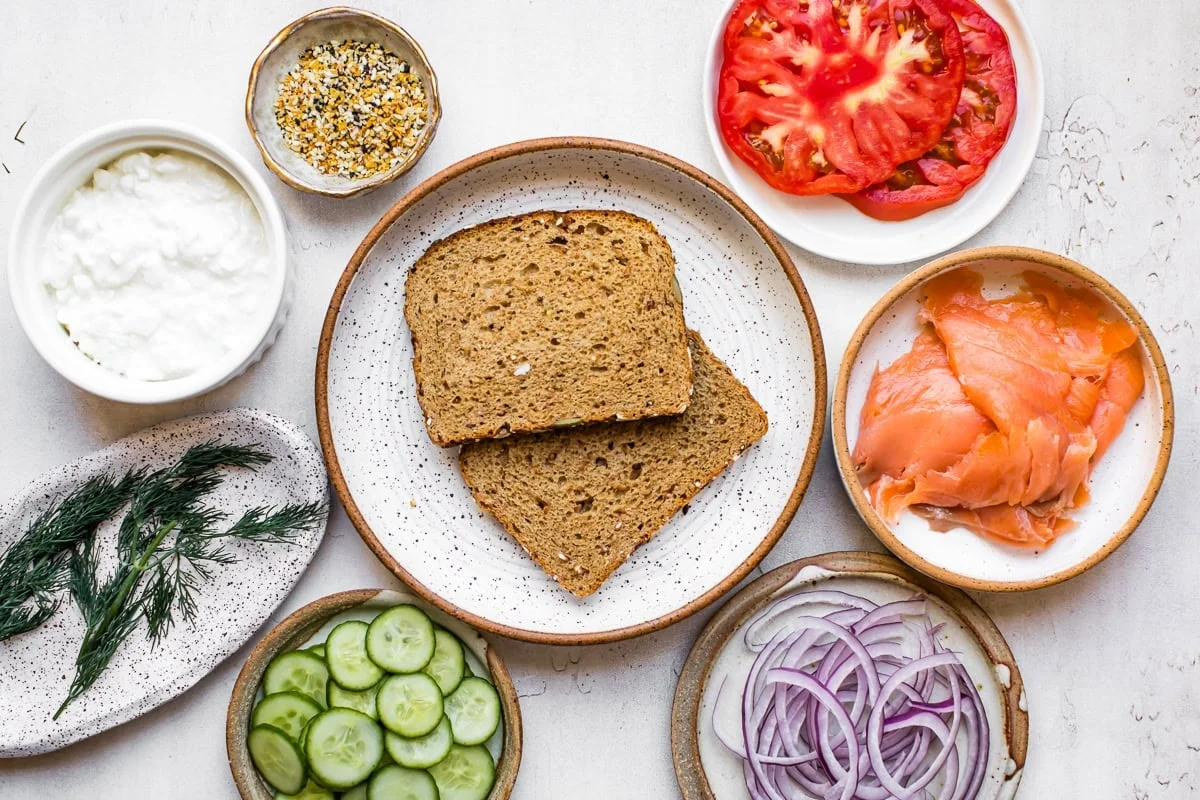
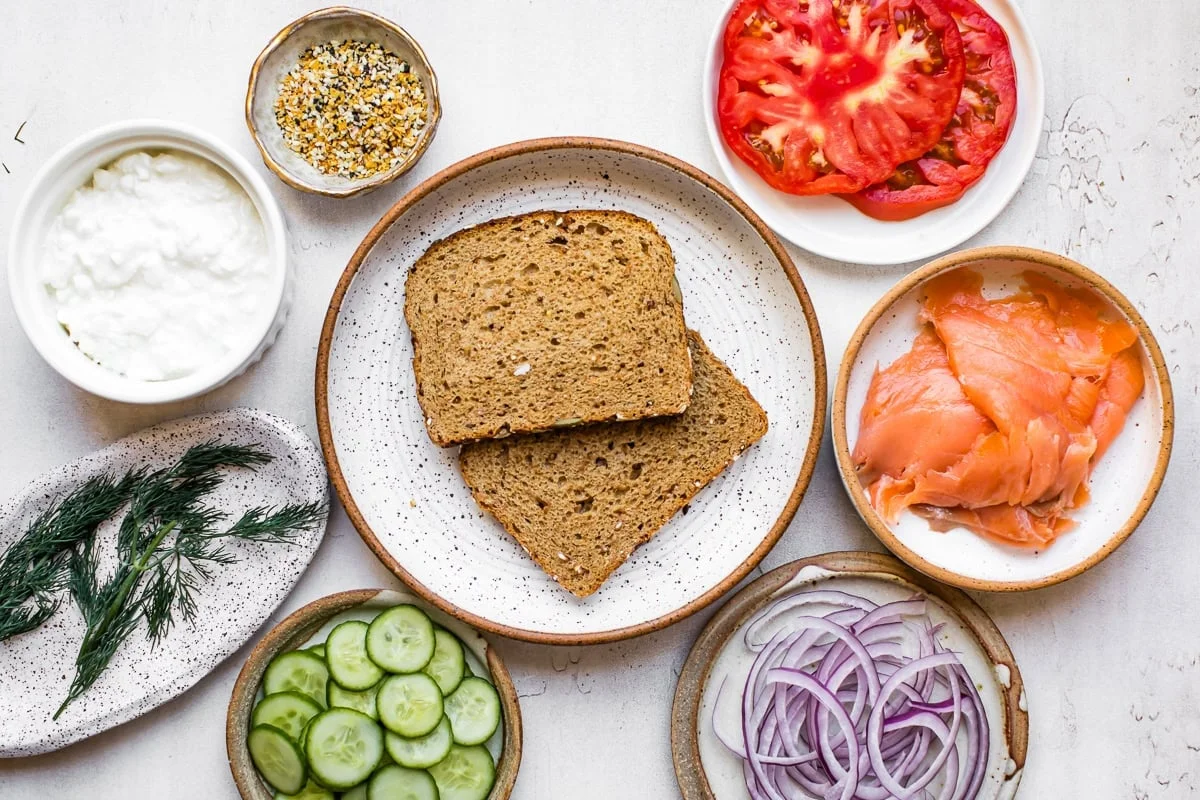
    Smoked salmon toast ingredients laid out on a light counter

    Lox and bagels will always be a classic at my house, but when I want something lighter, I make this high-protein smoked salmon toast instead. Hearty whole-grain bread instead of the bagel. Cottage cheese instead of cream cheese — same creamy, same salt, more protein. It’s 30 grams of protein and 7 grams of fiber, and it works for breakfast, lunch, or a light dinner. No cooking besides toasting the bread.

    Real time: 10 minutes. Hands-on: 10 minutes. Effort: low — you’re slicing and assembling, not cooking.

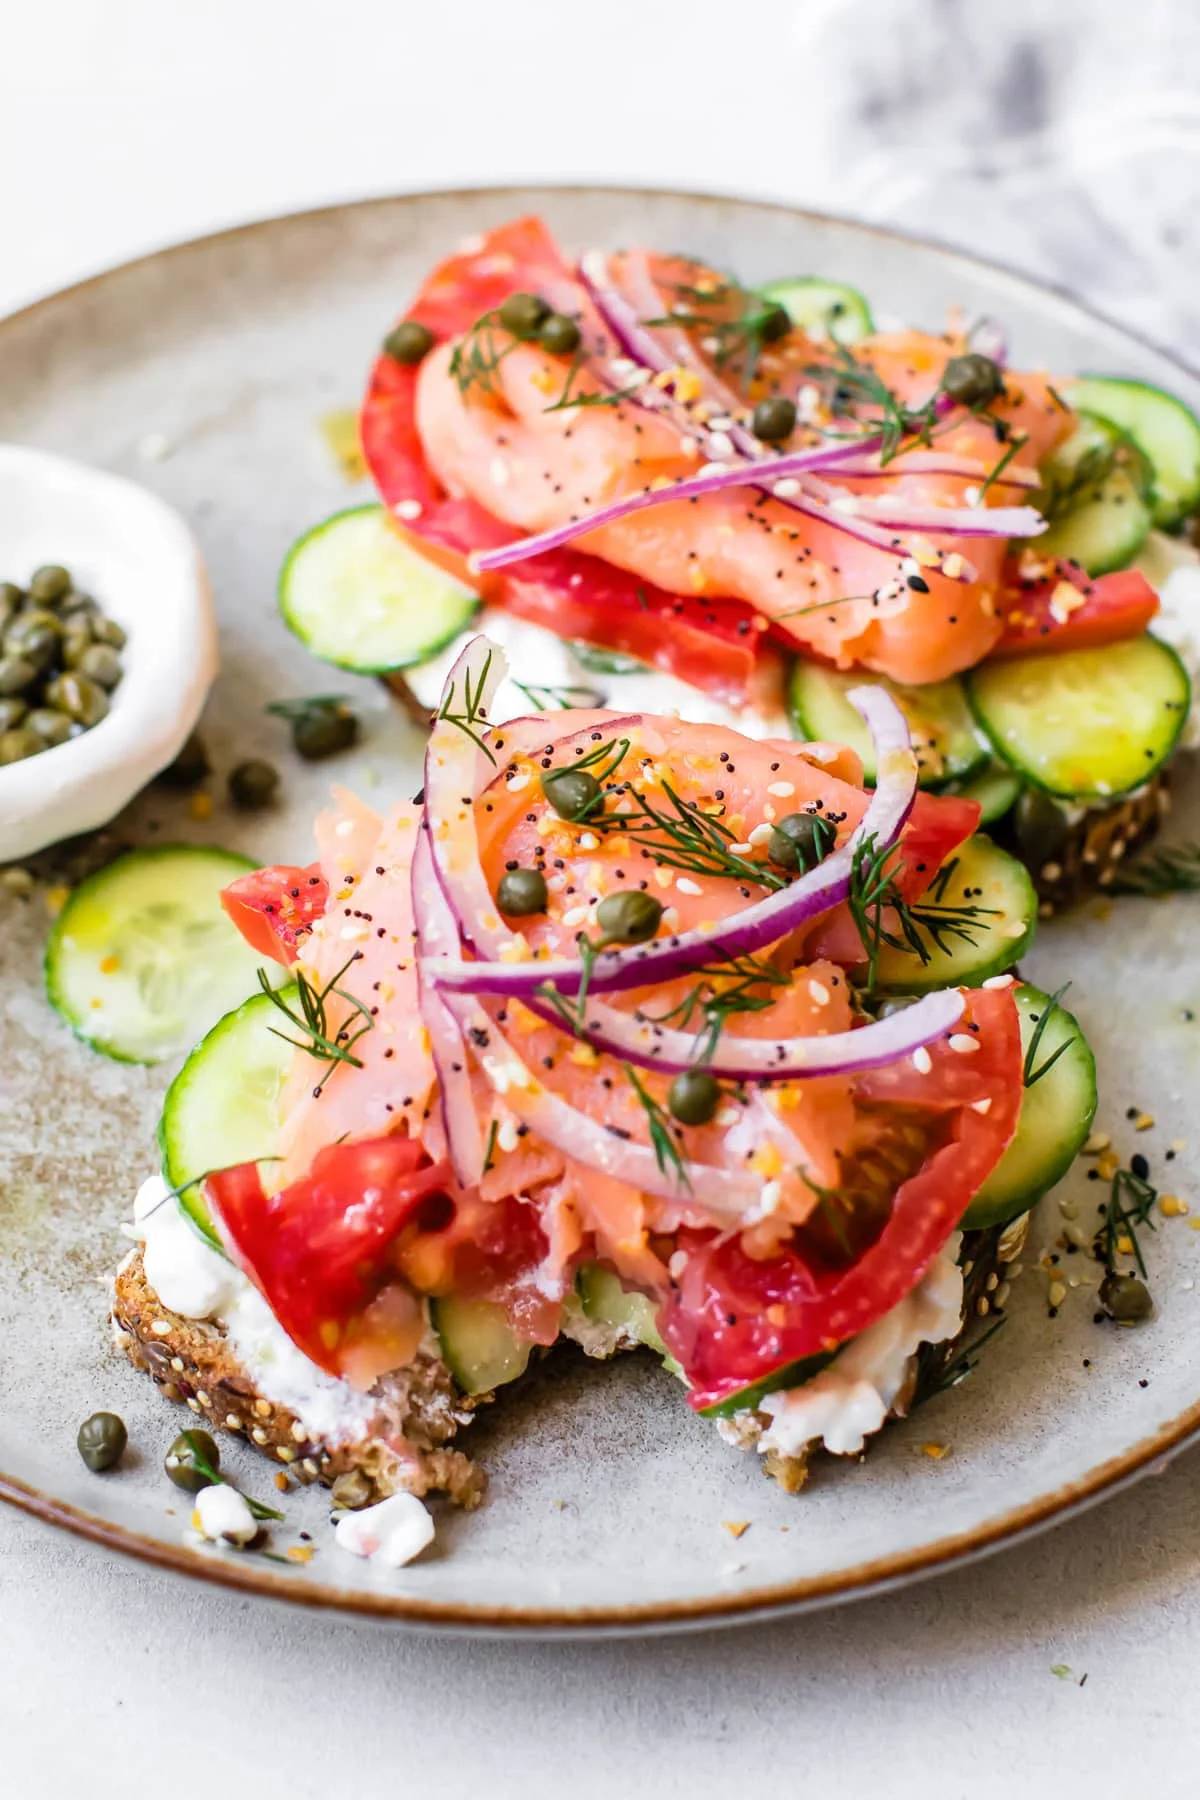
    Stacked smoked salmon toast with cucumbers and tomato on toast

    What you’ll need

    Everything here is what you’d get at a deli counter, minus the bagel. I’m honest about the brands I reach for — but anything comparable works.

    • 2 slices whole-grain bread — I use Dave’s Killer Thin-Sliced 21 Whole Grains and Seeds because it’s higher in protein and fiber (3 grams each) and lower in carbs than most loaves
    • 1/2 cup (about 115 g) 2% cottage cheese — Good Culture is my tried-and-true favorite. It gives you the same creamy texture as cream cheese with fewer calories and more protein
    • 1 1/2 oz (about 45 g) Nova lox, sliced. Nova lox is just cold-smoked salmon from Nova Scotia — buy whatever smoked salmon you can find
    • 1/2 cup (about 100 g) Persian cucumbers, thinly sliced
    • 1/2 heirloom tomato, thinly sliced
    • A few slivers of red onion
    • Everything bagel seasoning, to taste
    • 1 tablespoon fresh dill
    • Optional: a drizzle of extra-virgin olive oil and a few capers
    Assembling smoked salmon toast with toppings on whole-grain bread

    How to make it

    1. Toast the bread until it’s properly crunchy. The more it toasts, the better it holds up under all that wet topping.
    2. Spread 1/4 cup (about 60 g) of the cottage cheese on each slice.
    3. Layer on the cucumbers, then the tomato, then the salmon, the onion slivers, a shake of everything bagel seasoning, and the dill.
    4. If you want, drizzle with olive oil and add a few capers.

    That’s the whole recipe. If you’re serving guests for brunch or want to make it a full dinner, serve it alongside a salad or a bowl of soup — the toast holds up next to almost anything.

    Make it yours

    • Prefer a bagel? This works on a high-protein bagel with cottage cheese instead of toast.
    • Not a fan of cottage cheese lumps? Whisk it in a mini food processor until smooth.
    • Dairy-free? Skip the cottage cheese and spread mashed avocado on the toast instead.
    • Veggie swaps: cherry tomatoes instead of heirloom, a regular cucumber, or pickled onions instead of raw red onion.
    • Extra protein: top it with a soft-boiled or hard-boiled egg.
    • No fresh dill? Dried dill or chives both work.

    Storage

    Smoked salmon lasts 3 to 4 days in the fridge once opened. Store the toppings separately and assemble right before eating — the toast stays crisp if you don’t wet the bread ahead of time.

    Happy cooking, Maya.

    Keep Reading

  • How to Boil Corn on the Cob (Sweet, Juicy, 10 Minutes)

    How to Boil Corn on the Cob (Sweet, Juicy, 10 Minutes)

    My husband set the grill going on a Saturday afternoon, and I realized with about a quarter hour to spare that dinner had no side. There was no time for a salad that needed dressing, no time for anything that required chopping. So I did what I do every single summer: I boiled corn on the cob.

    Ears of corn boiling in a pot on the stove

    It’s one of the easiest sides I know. Five minutes to prep, about 10 minutes total, and the result is sweet, juicy, crisp-tender corn with butter melting over it. One trick makes it noticeably better, and it only takes a spoonful of sugar.

    The whole method in one number: 10 minutes

    Real time: 10 minutes. Hands-on: about 5. The entire game is not overcooking. Fresh sweet corn only needs a few minutes in boiling water — small to medium ears are done in 3 to 4 minutes, and larger ears in 5 to 6. The kernels should come out bright yellow, juicy, and crisp-tender, with a little pop when you bite in.

    What you need

    4 ears of corn on the cob, or up to 8 if your pot is big enough.

    One to two tablespoons (15 to 30 ml) of sugar, optional — this is the sweetness trick, more on that below.

    Butter and salt for serving. I salt the corn after cooking, never the water.

    Optional toppings: black pepper, garlic butter, parmesan, fresh herbs, chili-lime seasoning, or a squeeze of lime.

    On picking the corn at the farmers market: want ears that are tightly wrapped in bright green husks, with golden-brown, slightly sticky tassels. The kernels should feel firm and plump under the husks. Shuck right before you cook so the corn keeps its moisture.

    How to boil corn on the cob

    1. Shuck the corn. Strip off the husks and rub away the silk with a dry towel — it comes right off. Trim the ends if needed so the ears sit flat in the pot.
    2. Bring a large pot of water to a rolling boil. Use enough water to fully cover the corn. Stir in 1 to 2 tablespoons (15 to 30 ml) of sugar to pull out the natural sweetness. Leave the salt for later.
    3. Lower the corn into the boiling water with tongs. Start your timer the moment it goes in — you don’t need to wait for the water to come back to a boil.
    4. Boil small to medium ears for 3 to 4 minutes, large ears for 5 to 6. The corn is done when the kernels are bright yellow, juicy, and crisp-tender.
    5. Lift out with tongs, put it on a platter, and serve warm with a good amount of butter and a pinch of salt.

    The sugar trick (and why I never skip it)

    A little sugar in the boiling water sounds weird until you taste the difference. It doesn’t make the corn candy-sweet — it just makes the corn that’s already in there more present. I learned it from my late boss and friend Pearl, who was like a grandmother to me, and I’ve been boiling corn this way ever since.

    One more thing: serve it right away. Corn is at its best hot from the pot with the butter still melting. If your main isn’t done yet, there’s a trick for that below.

    Make-ahead: how to keep corn warm

    This is my favorite kitchen shortcut of the whole method. Bring a large pot of water to a rolling boil, add the corn, cover the pot, turn the heat off, and let it sit for 10 minutes. The corn will keep sitting safely in that hot, covered water for up to 30 minutes. So you can boil the corn while the grill or the oven handles the rest, and it’s still hot when the plate goes out the door.

    How long to boil corn on the cob

    Fresh corn cooks fast, so keep an eye on the timer. Start counting the moment the corn hits the water.

    Small to medium ears: 3 to 4 minutes. Large ears: 5 to 6. Very fresh, sweet corn: aim for the shorter end. Older or extra-large ears: aim for the longer end.

    What to serve it with

    Boiled corn is the perfect summer side for grilled meats, burgers, sandwiches, and anything else the cookout throws at it. It goes especially well with baked BBQ chicken thighs, instant pot ribs, grilled steak, grilled salmon, hot dogs, pulled pork, and a fresh summer salad. And don’t skip the lemonade.

    Storing leftovers

    To refrigerate: let the corn cool, then store it in an airtight container in the fridge within 2 hours. It’s good for up to 4 days.

    To reheat: drop it back in hot water for a few minutes, microwave it covered with a damp paper towel, or cut the kernels off the cob and warm them in a skillet with a little butter.

    To freeze: cool the corn quickly in ice water, pat it dry, and freeze whole cobs or cut kernels in freezer-safe bags for up to 3 months. Frozen kernels go into chowder, casseroles, salsas — the list is long.

    Make it yours

    Garlic butter and a little parmesan if you’re feeling fancy. A squeeze of lime and chili-lime seasoning if the heat is on. Plain butter and salt if you’re tired and honest about it — which, let’s be real, is most weeknights.

    Once you know how fast fresh corn actually cooks, it becomes one of the easiest sides in your summer rotation. Cookout or not, it’s the kind of thing that saves a dinner you’re running out of time for.

    Happy cooking,
    Maya

    Keep Reading

  • Easy Fresh Peach Bread Recipe with Orange Glaze

    Easy Fresh Peach Bread Recipe with Orange Glaze

    It was a Saturday in late summer, the kind where the counter is still warm from the morning sun. I’d bought too many peaches, the way I always do. They looked so good in the crate that I had to bring the whole thing home.

    I needed something with them that wasn’t another fruit salad. So I made peach bread. The first three loaves I tried were underwhelming. This one is the version I keep coming back to.

    Real time: about 2 hours. Hands-on: maybe 30 minutes. Most of that is the loaf doing its quiet thing in the oven while the kitchen smells like summer.

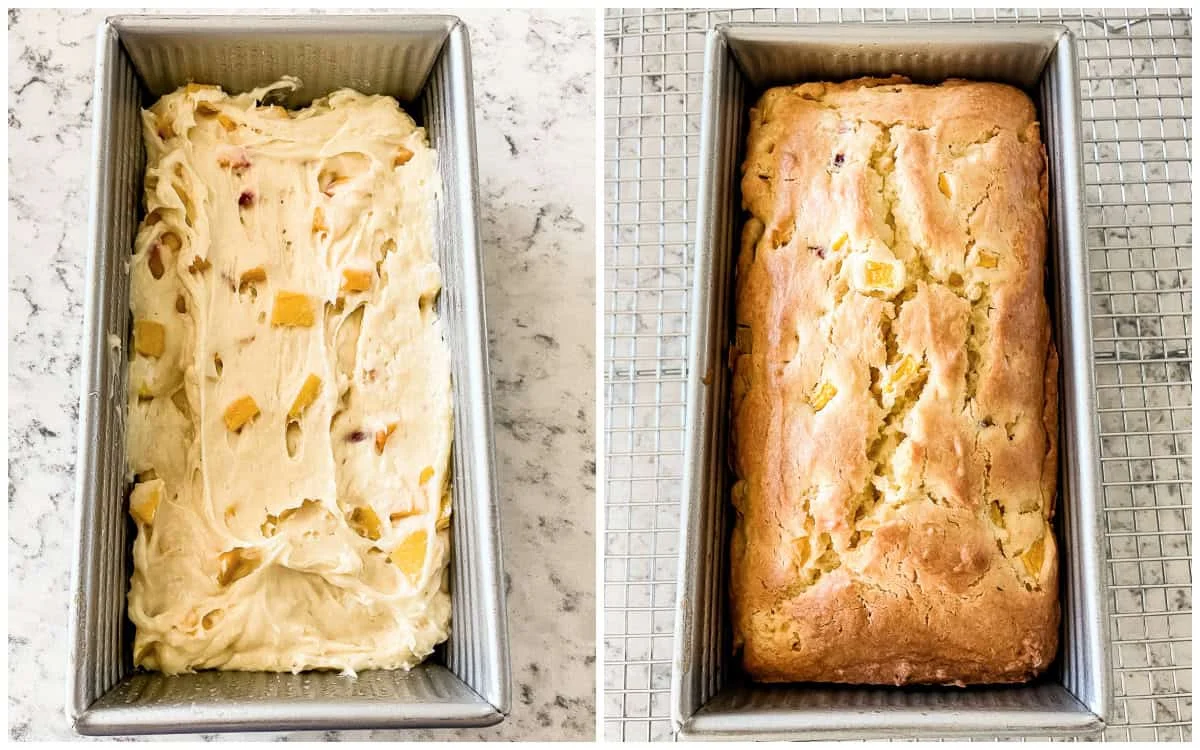
    Golden baked peach bread loaf on a wire cooling rack

    Why this recipe works

    • Soft, moist crumb with plenty of fresh peach in every slice
    • No yeast, so nothing to proof and wait on
    • A little almond extract that actually lets the peach flavor come forward
    • Good for breakfast, an afternoon snack, or a simple dessert
    • Freezes well, so you can make it on a weekend and eat it all week

    Ingredients

    For the bread:

    • 1/4 cup salted butter, softened to room temperature
    • 2 tablespoons avocado oil (or vegetable oil)
    • 4 ounces light cream cheese, softened
    • 3/4 cup sugar
    • 2 large eggs
    • 1/2 teaspoon almond extract
    • 1 1/4 cups fresh peaches, peeled and diced
    • 1 1/4 cups all-purpose flour
    • 3/4 teaspoon baking powder
    • 1/4 teaspoon salt

    For the glaze:

    • 1/2 cup powdered sugar
    • 1 pinch salt
    • 2 drops almond extract
    • 1 tablespoon orange juice, more or less as needed

    Method

    1. Preheat the oven to 350°F. Spray a 9×5-inch loaf pan with cooking spray and line the bottom with parchment.
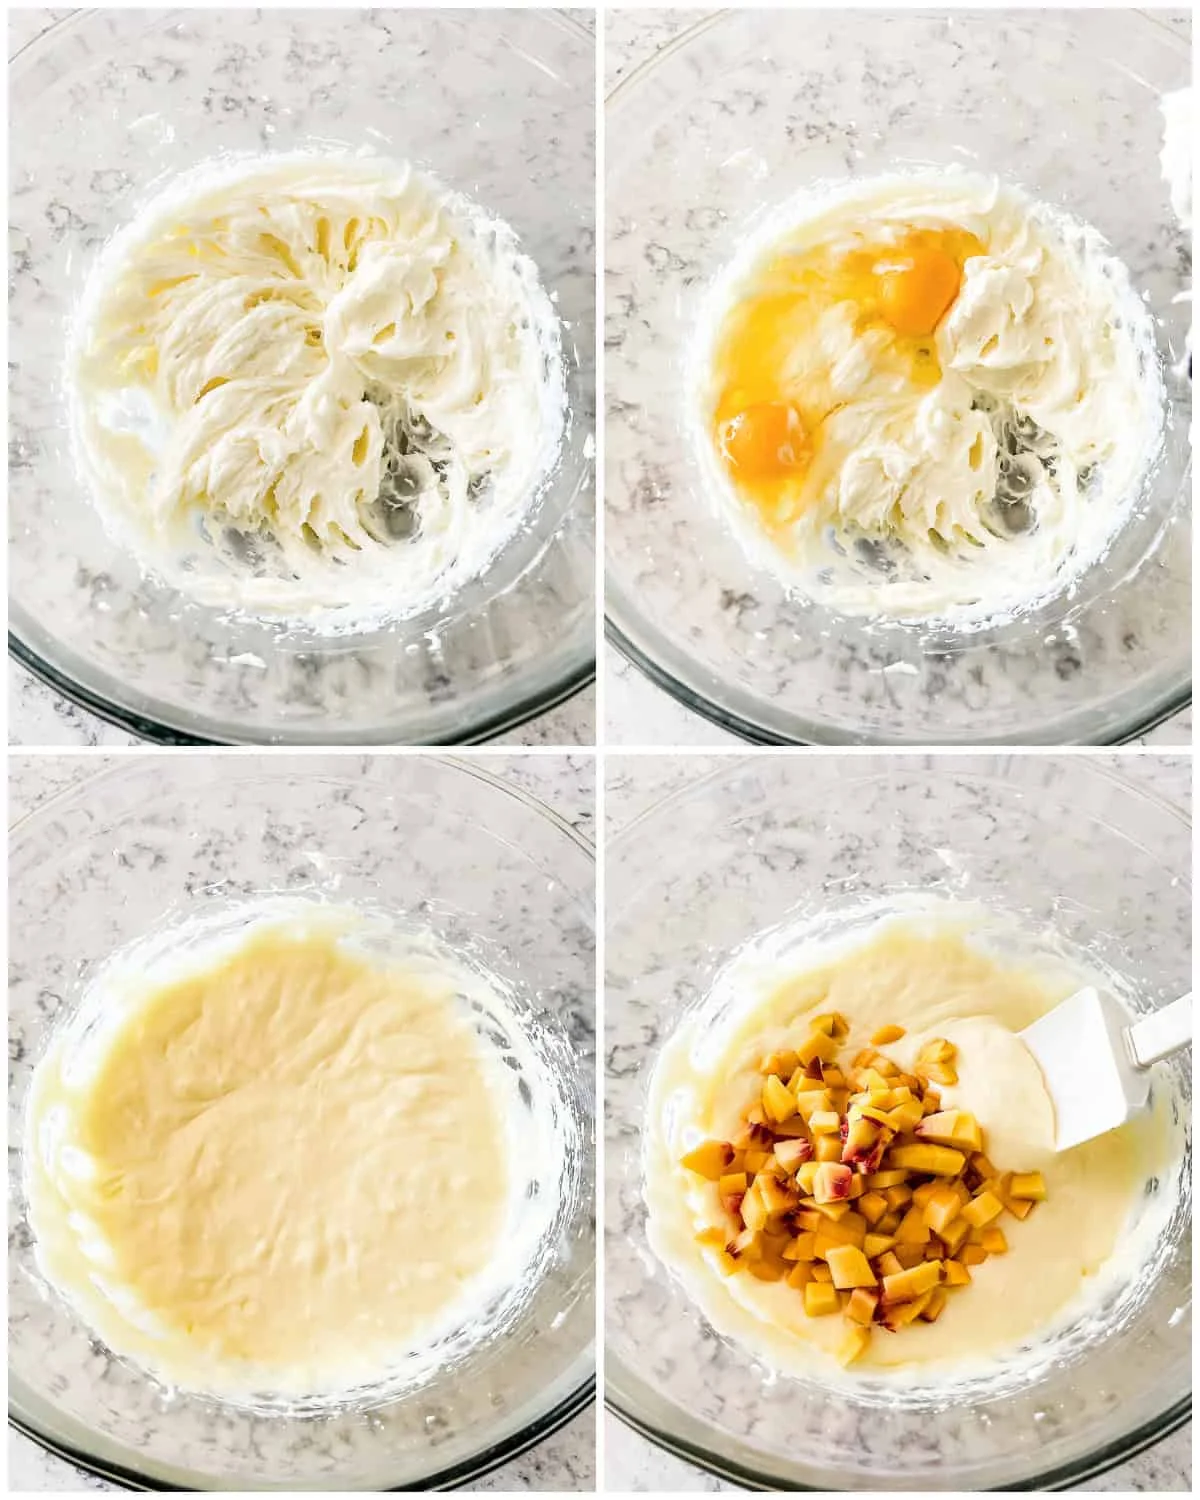
    2. In a large bowl, beat the butter, oil, cream cheese, and sugar on medium speed for 2 to 3 minutes until pale and creamy. This is the step that makes the crumb tender, so don’t rush it.
    3. Beat in the eggs and the almond extract, then stir in the diced peaches.
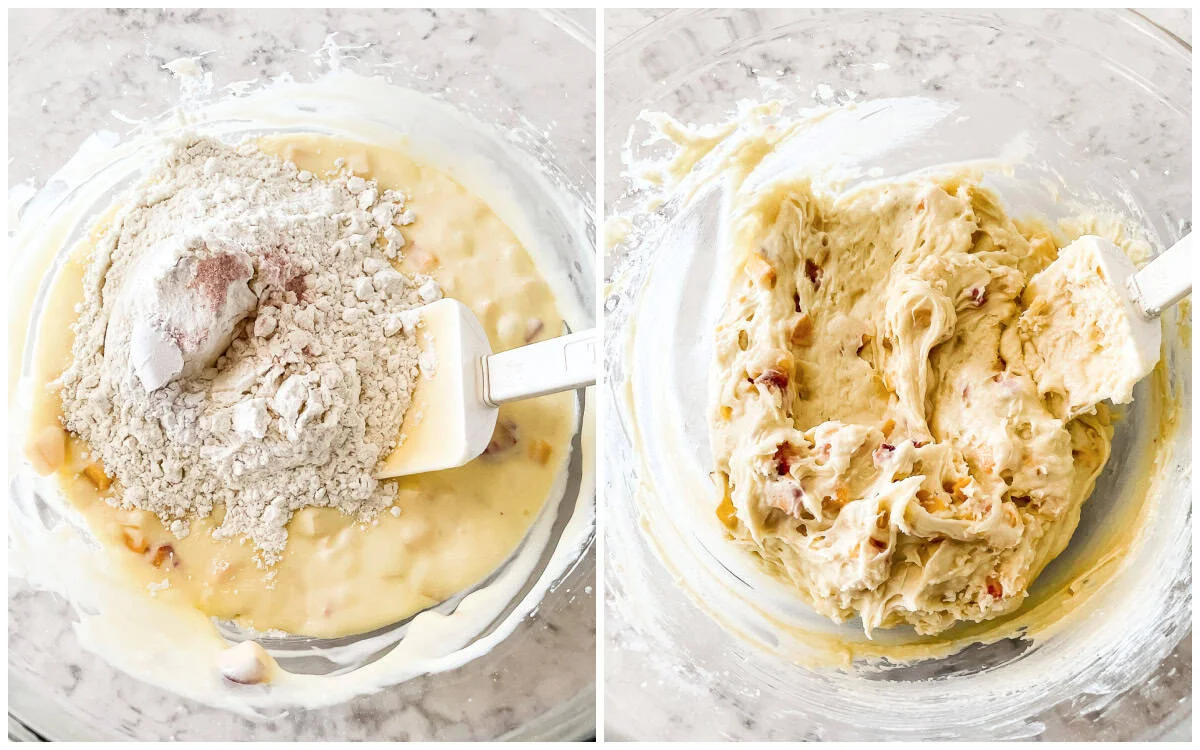
    4. Cream cheese and peach wet ingredients mixed in a bowl
    5. Gently stir in the flour, baking powder, and salt. Stop as soon as the flour disappears. Overmixing is how you get a dense loaf.
    6. Flour stirred gently into peach bread batter
    7. Spread the batter evenly in the pan. Bake at 350°F for 35 minutes.
    8. Turn the oven down to 325°F and bake another 25 to 28 minutes, or until the edges are golden and a toothpick comes out clean.
    9. Let it cool in the pan for 10 minutes, then move it to a wire rack to cool completely before glazing.
    10. Peach bread cooling on a rack, top-down view
    11. For the glaze, whisk the powdered sugar, salt, and almond extract together. Add the orange juice a little at a time until it drizzles. Pour it over the cooled loaf.
    12. Orange glaze being drizzled over a slice of peach bread

    I usually eat it before the glaze even sets. That’s the honest truth about this bread.

    Tips for the best loaf

    • Pick peaches that are fragrant but still a little firm. Overripe ones turn to mush in the oven.
    • Beat the wet ingredients for at least 2 minutes. The sugar dissolves slightly and that’s what keeps the crumb soft.
    • Stir the dry ingredients in gently. The moment the flour is gone, stop.
    • Cool the bread completely before glazing, or the icing will slide right off.

    Make it yours

    • Want a warmer, spicier loaf? Skip the almond extract and the glaze, add a teaspoon or two of cinnamon to the flour, and dust the top with cinnamon sugar before baking.
    • Add 1/2 cup chopped toasted pecans for a little crunch.
    • For a crumble topping, mix 1/4 cup flour, 1/4 cup sugar, and 2 tablespoons butter until crumbly, then sprinkle it over the batter before it goes in the oven.
    • Nectarines work just as well if that’s what you can find.
    • Top a slice with a scoop of vanilla ice cream for something that feels like dessert without being a whole thing.

    Storage

    Keep the loaf at room temperature in an airtight container for 3 to 4 days. For longer, wrap it in plastic and put it in a freezer bag. Skip the glaze until you’re ready to eat it. Let it thaw at room temperature when you get to it.

    Happy cooking, Maya
    Keep Reading

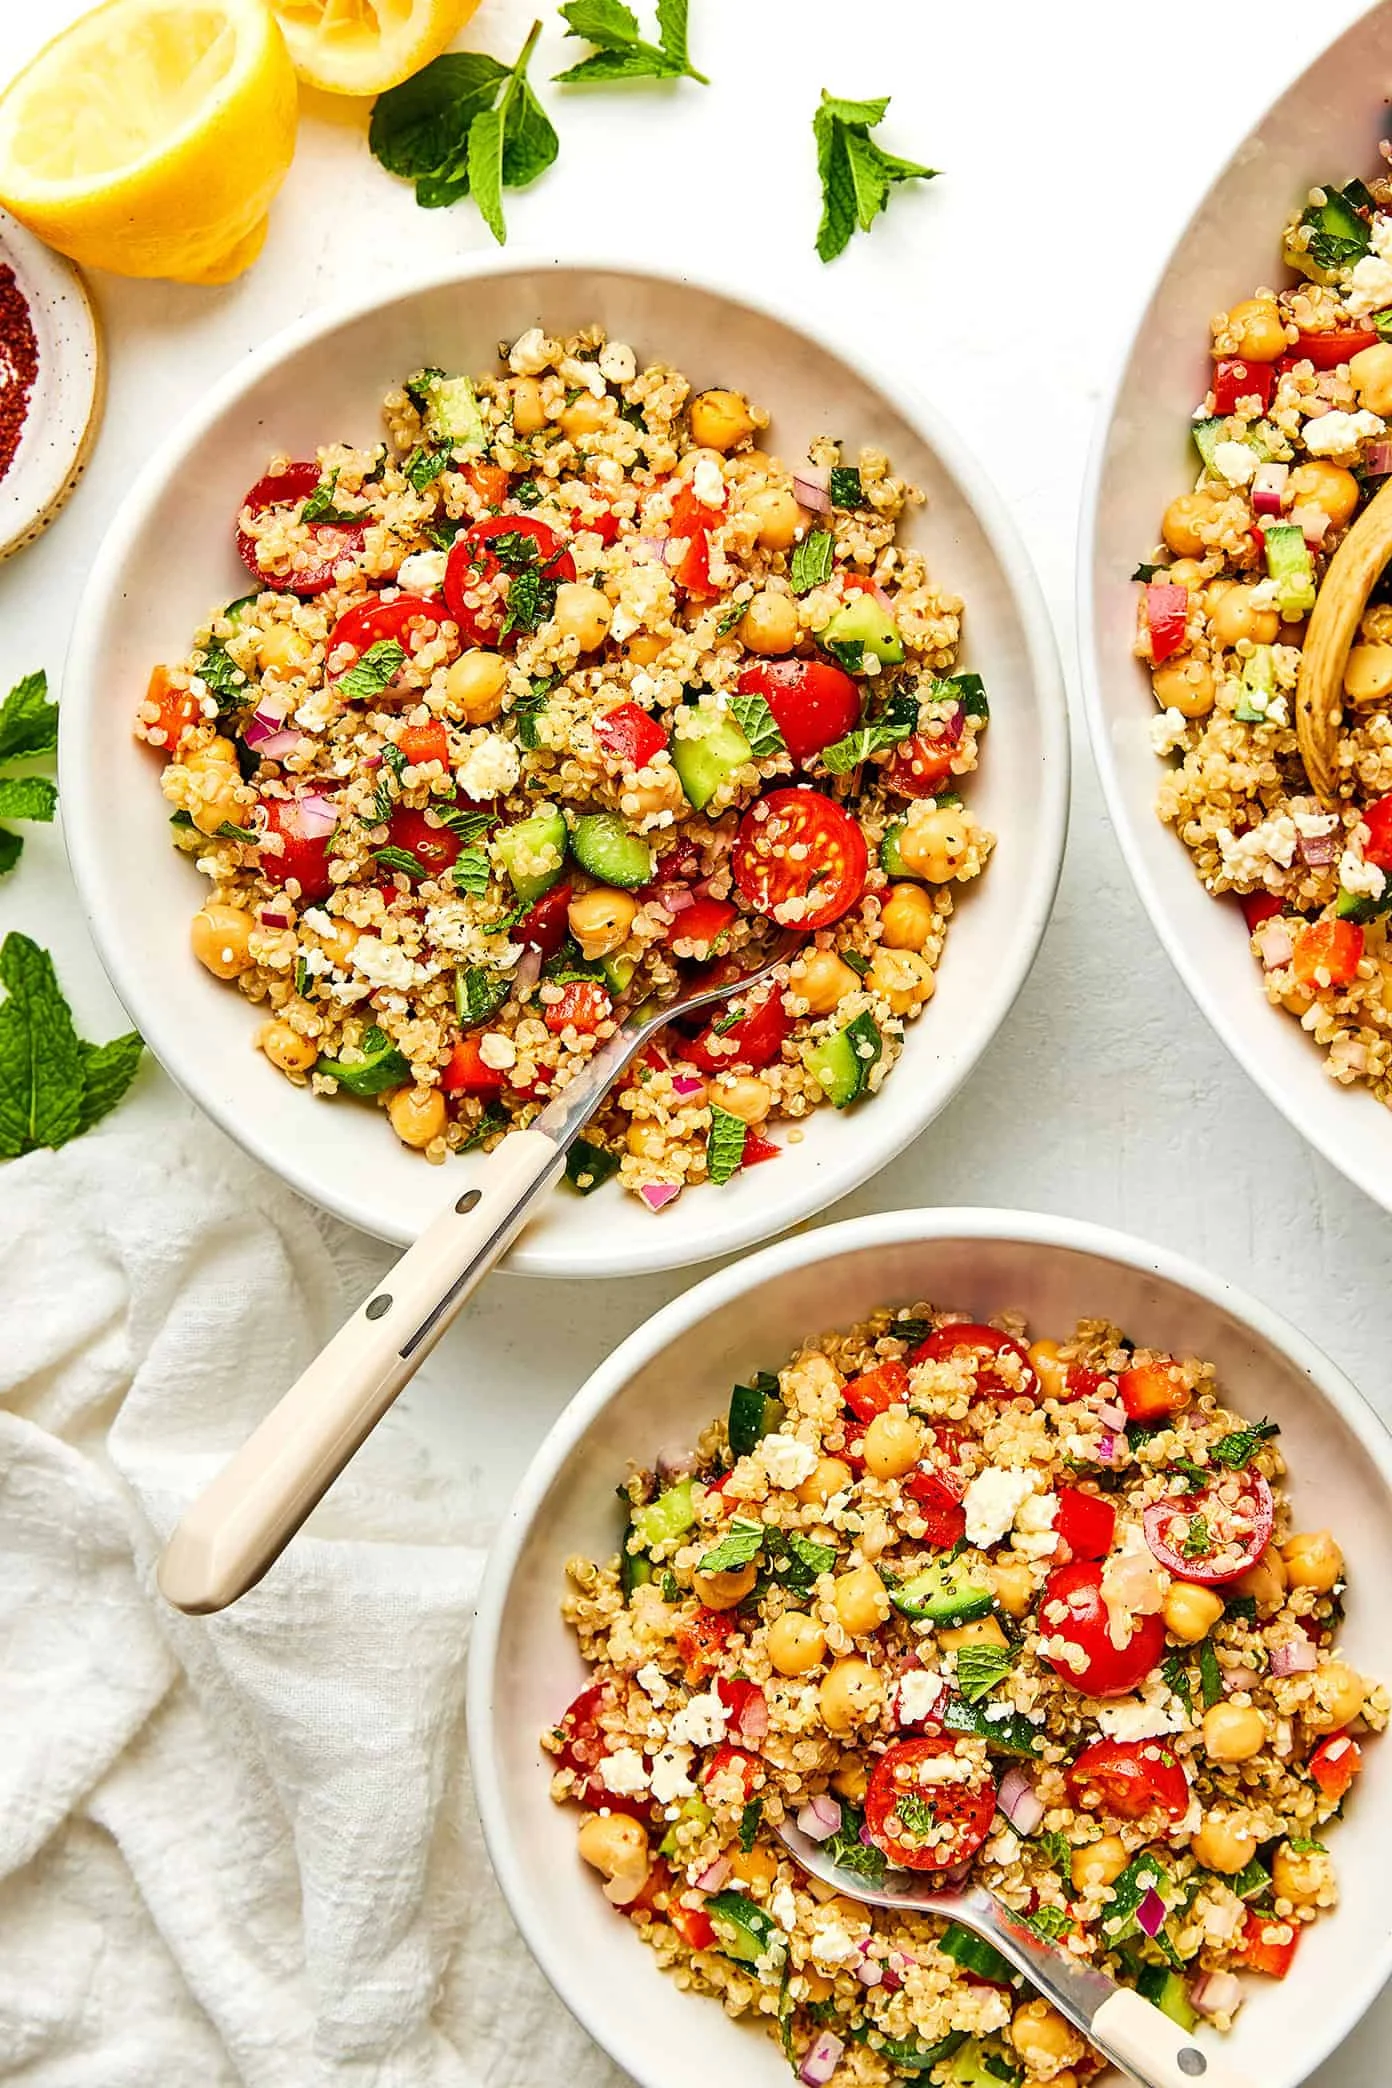
  • The Quinoa Salad That Keeps Saving My Weeknights

    The Quinoa Salad That Keeps Saving My Weeknights

    The first time I made this salad, the dressing was wrong. Too much sumac, barely any lemon, and the whole thing came out tart in a way that made my husband push his plate around the table instead of eating it. Three tries later I finally nailed the ratio, and now this is the bowl I reach for more than any other recipe in my notebook.

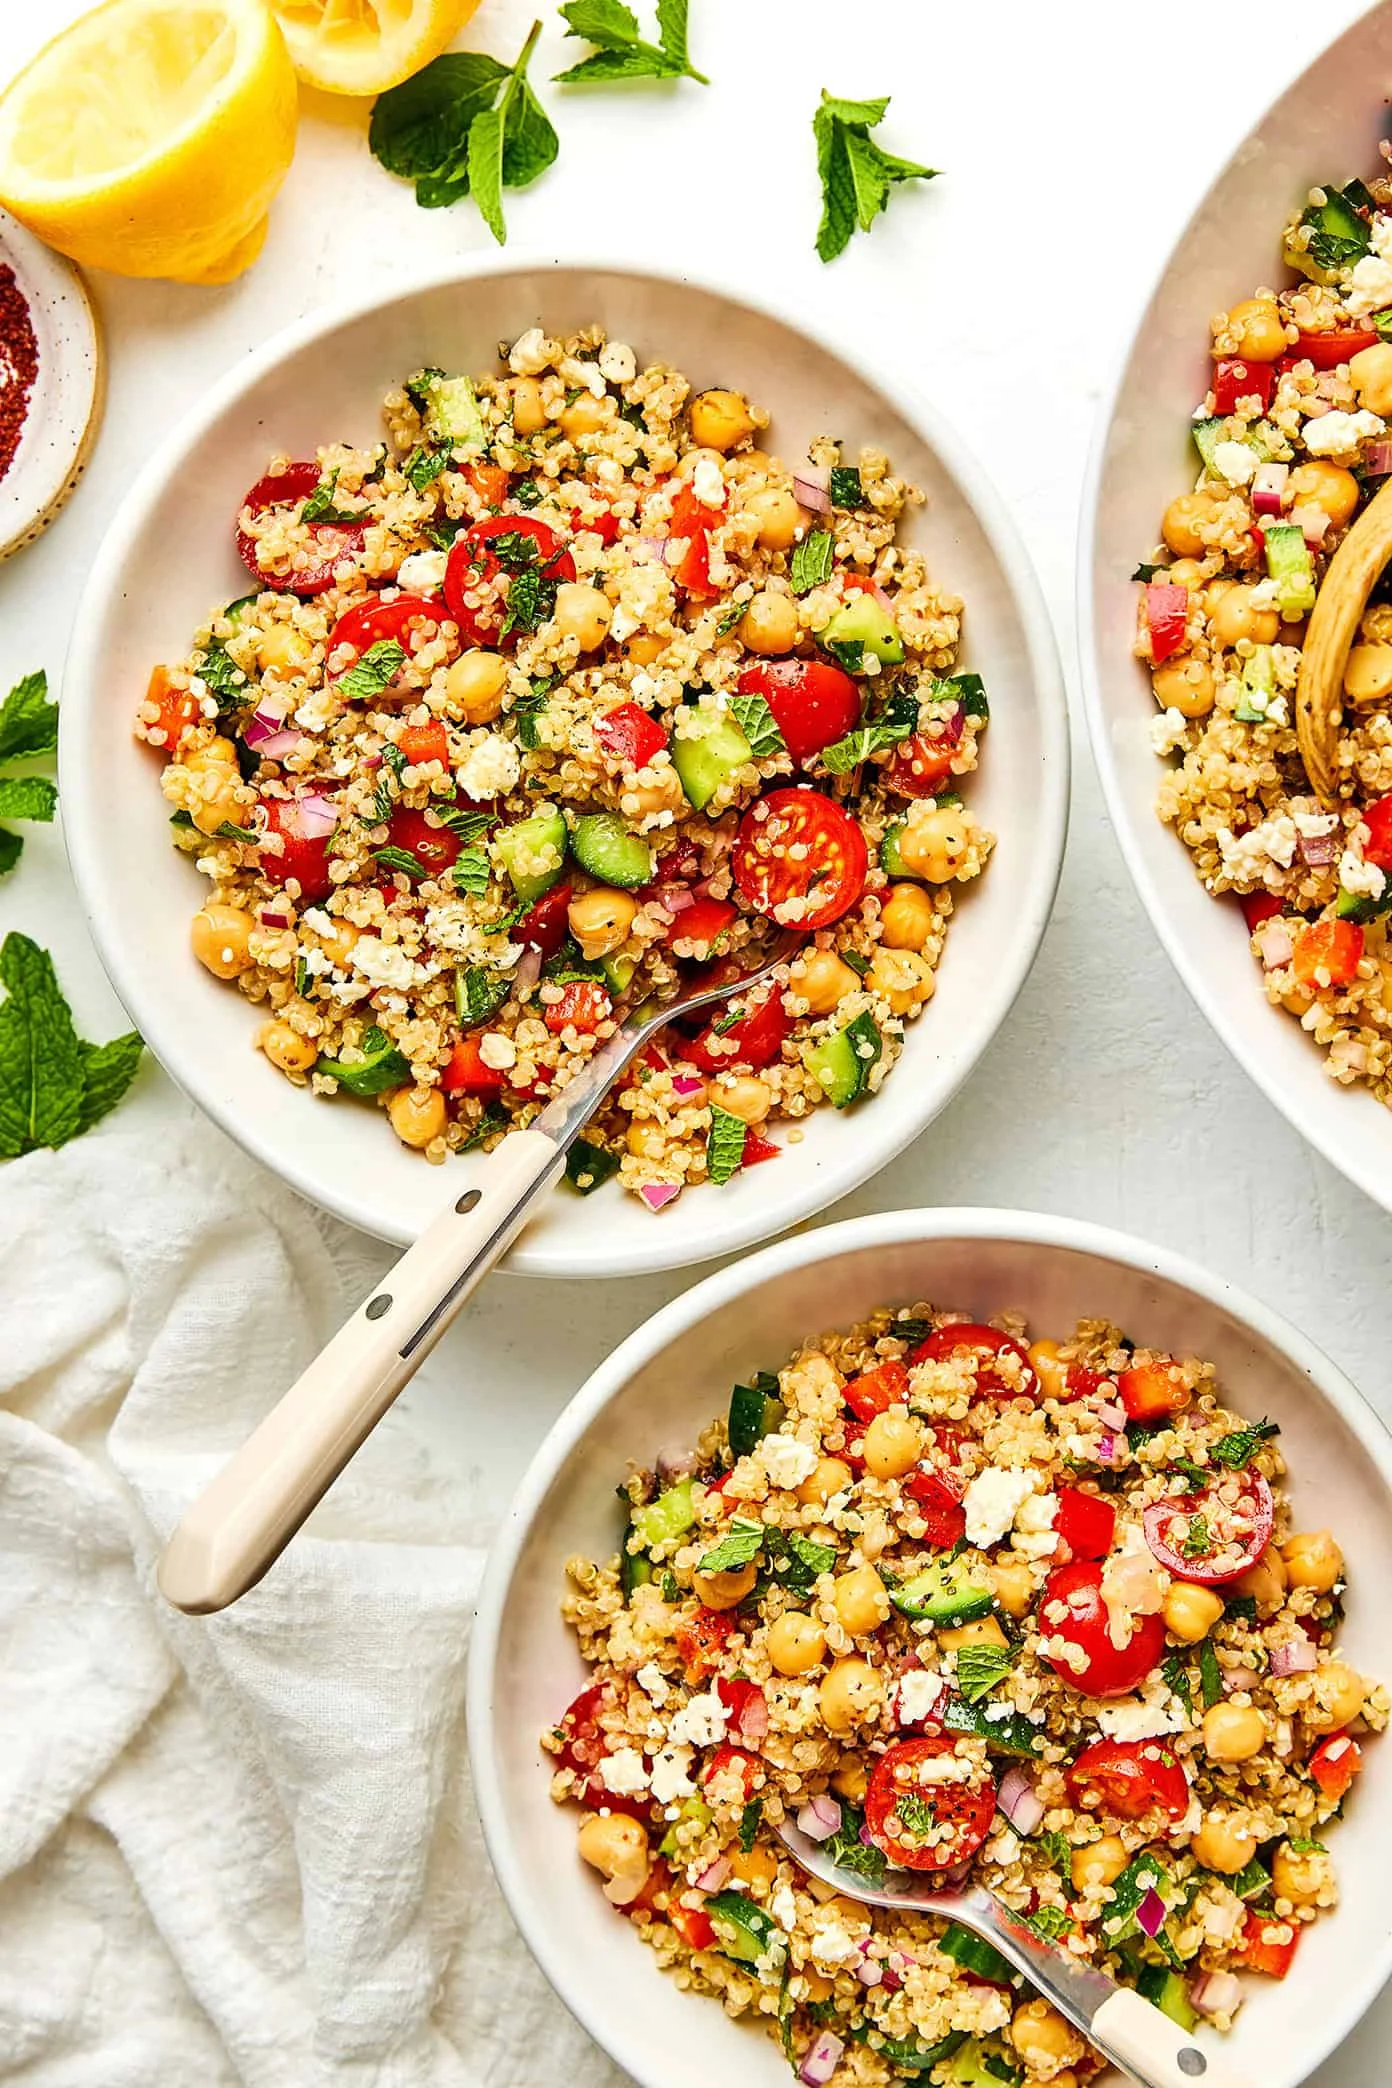
    Colorful quinoa salad with feta and herbs in a ceramic bowl

    It’s fluffy quinoa, chickpeas, crunchy cucumbers and peppers, juicy tomatoes, salty feta, and a very generous handful of mint. But it’s the lemon-sumac dressing that makes it sing. Bright, tangy, a little earthy, with just enough garlic, Dijon, and black pepper to keep every bite balanced.

    I’ve brought it to potlucks and it’s gone every single time. But honestly? Its real job is the week. Make it on Sunday and you have lunch or a light dinner sorted for days. Here’s the whole thing, the way I actually make it.

    Real time: 35 minutes

    Hands-on: about 20 minutes. Total: 35 minutes. Feeds: 6. Most of the waiting is the quinoa cooking while you cut veg and whisk the dressing. Nothing here needs babysitting.

    If you’ve never used sumac, it’s a ground spice with a tart, bright, slightly fruity flavor. It’s often compared to lemon, but with an earthy quality underneath that gives the dressing real depth. If you can’t find it, the FAQ below has a workaround.

    Ingredients

    For the salad

    • 1 cup (175 g) uncooked quinoa, rinsed and drained
    • 1 can (15 oz / 425 g) chickpeas, rinsed and drained
    • 1 red bell pepper, diced
    • 4 mini cucumbers, diced
    • 1 pint cherry tomatoes, halved
    • 1 cup (about 30 g) loosely packed fresh mint leaves, chopped
    • ½ cup (about 80 g) finely diced red onion
    • 4 oz (113 g) crumbled feta cheese, optional

    For the lemon-sumac dressing

    • ¼ cup (60 ml) extra-virgin olive oil
    • 3 tablespoons (45 ml) freshly squeezed lemon juice
    • 1 tablespoon (10 g) ground sumac
    • 1 teaspoon (5 g) Dijon mustard
    • 1 garlic clove, grated or pressed
    • 1 teaspoon (6 g) fine sea salt
    • Lots of freshly ground black pepper

    How to make it

    1. Cook the quinoa. Cook it according to the package directions. Fluff it with a fork, then spread it out on a baking sheet or a large plate so it cools fast. You want it no longer steaming, but not stone cold.
    2. Make the dressing while it cools. Whisk together the olive oil, lemon juice, sumac, Dijon, garlic, sea salt, and a serious amount of black pepper in a small bowl until combined. Taste it. It should be punchy.
    3. Dress the quinoa. Transfer the cooled quinoa to a large mixing bowl. Drizzle about half the dressing over it and toss until every grain is coated. Warm-ish quinoa absorbs the dressing beautifully, which is why this step matters.
    4. Combine. Add the chickpeas, bell pepper, cucumbers, tomatoes, mint, red onion, and feta. Drizzle with the rest of the dressing and toss gently until everything is evenly coated.
    5. Taste and season. Quinoa and chickpeas soak up a lot of seasoning. If it’s sitting flat, add a squeeze more lemon, a pinch of salt, or an extra sprinkle of sumac. Trust your tongue.
    6. Serve or stash. Eat it right away, or refrigerate in a sealed container for up to 3 days.
    Step-by-step photos of making lemon-sumac quinoa salad

    Tips that actually matter

    • Cool the quinoa before it meets the vegetables. Hot quinoa softens the cucumbers, wilts the mint, and turns the tomatoes into soup. The baking sheet speeds things up, and a few minutes in the freezer works in a pinch.
    • Dress it while it’s still slightly warm. No longer steaming, but not cold. That’s the sweet spot for absorption.
    • Keep the veg cuts small. They don’t need to be perfect. Smaller pieces mean every scoop has a little of everything.
    • Don’t be shy with the black pepper. It gives the dressing a subtle bite that balances the lemon and sumac. A pepper grinder beats pre-ground every time.
    • Refresh leftovers before serving. Cold quinoa firms up in the fridge. A drizzle of olive oil and a squeeze of lemon loosens it back up and wakes the flavors up again.

    Make it yours

    • Make it vegan by leaving out the feta or swapping in your favorite plant-based feta.
    • Add avocado just before serving for extra creaminess.
    • Turn it into a full dinner with grilled chicken, salmon, or shrimp.
    • Toss in olives for a salty, briny edge. Kalamata, Castelvetrano, or a mix all work.
    • Add toasted pistachios or almonds for extra crunch.
    • Stir in fresh greens like arugula, spinach, or chopped kale right before serving.
    • Make it spicy with a finely diced jalapeño or a pinch of crushed red pepper flakes.

    FAQ

    What does sumac taste like? Tart, bright, slightly fruity, with an earthy note underneath. It’s the lemon-compare every food writer reaches for, and once you’ve tried it, you’ll see why.

    What can I use instead of sumac? There’s no exact substitute, but the dressing still works without it. Add a little lemon zest and an extra squeeze of lemon juice to keep the citrus forward.

    Can I make this ahead of time? Yes. Assemble it several hours in advance, or up to a day. For the freshest texture, fold in the mint and feta shortly before you serve.

    Does it have to be served cold? No. Room temperature is great too. Just avoid piping hot, or the veggies and herbs will wilt.

    Quinoa salad portions in glass meal prep containers

    This one’s earned its place in my rotation, and I think it will in yours. Make it, eat it through the week, and let me know how yours turned out in the comments.

    Happy cooking,
    Maya
    Keep Reading

  • Chili’s Steak Fajitas, the Way I Actually Make Them

    Chili’s Steak Fajitas, the Way I Actually Make Them

    The night that convinced me, I was too tired to cook. We ordered fajitas at Chili’s and the platter came out sizzling, and I kept reaching across the table for another warm tortilla before the steak even finished resting. I’ve been trying to get that same dinner on my own counter ever since. This is what works.

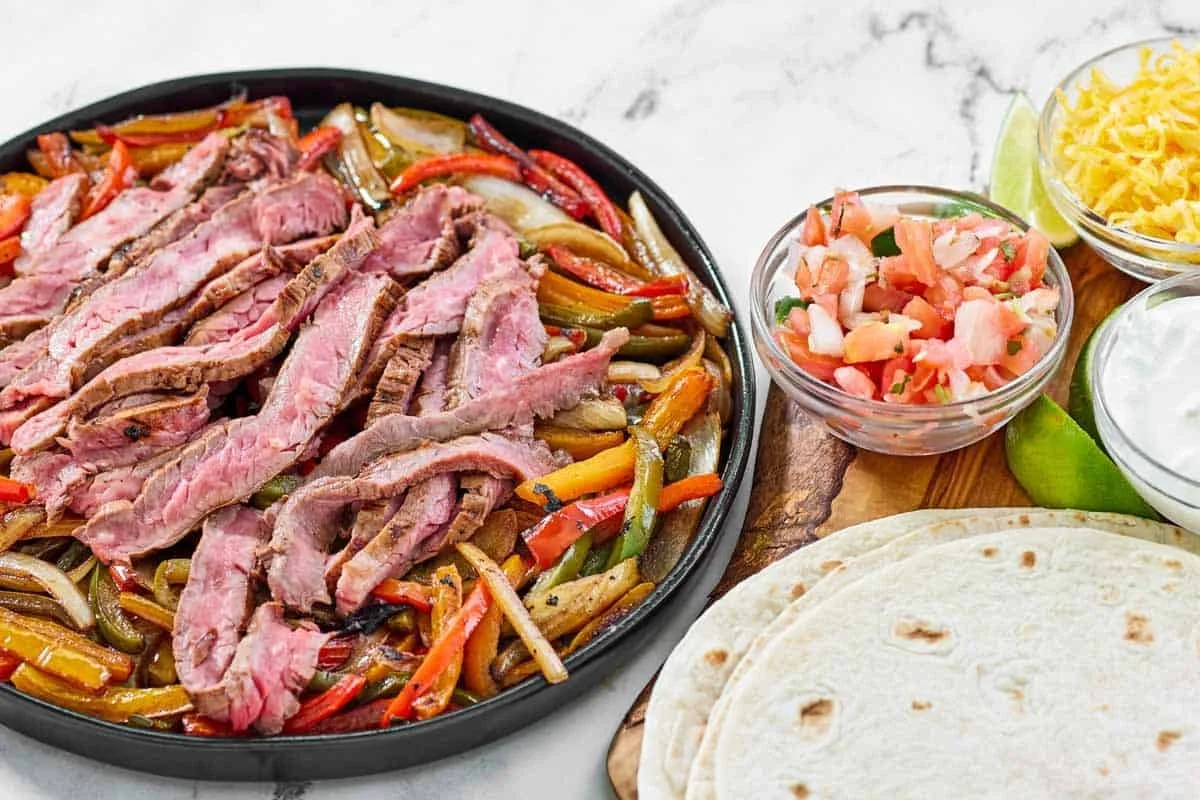
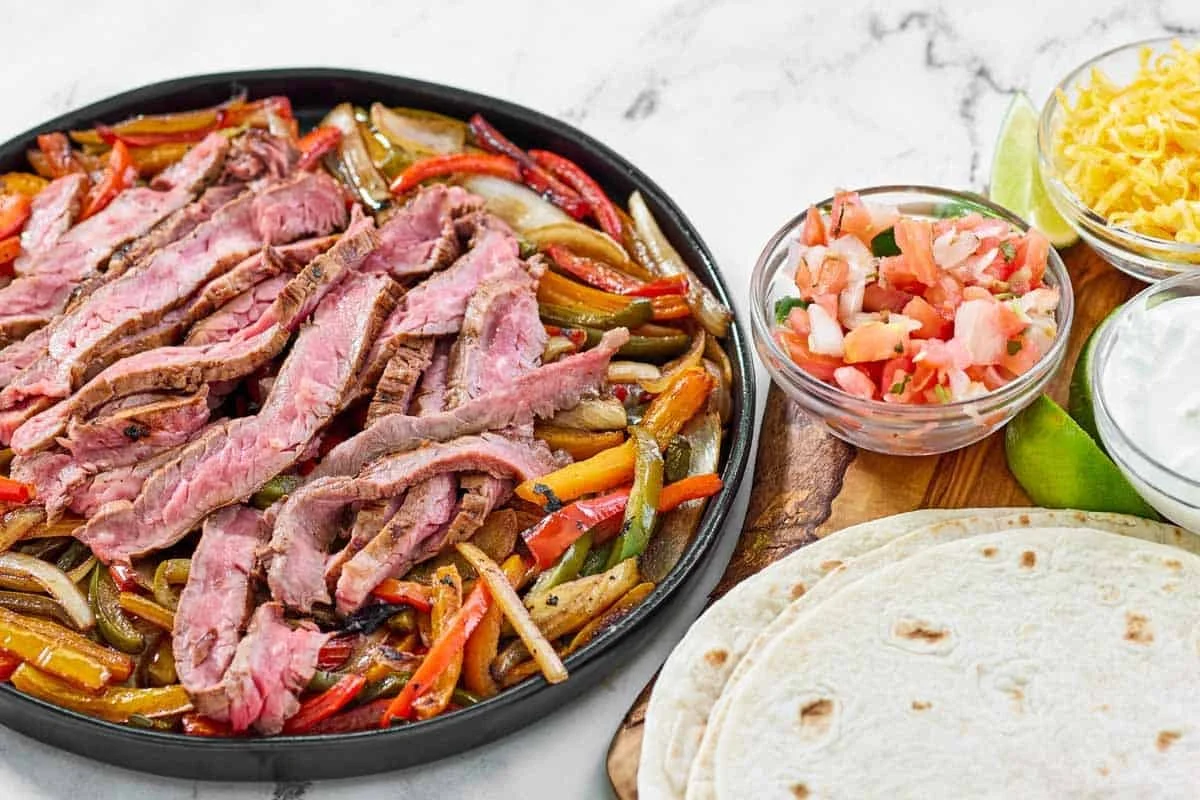
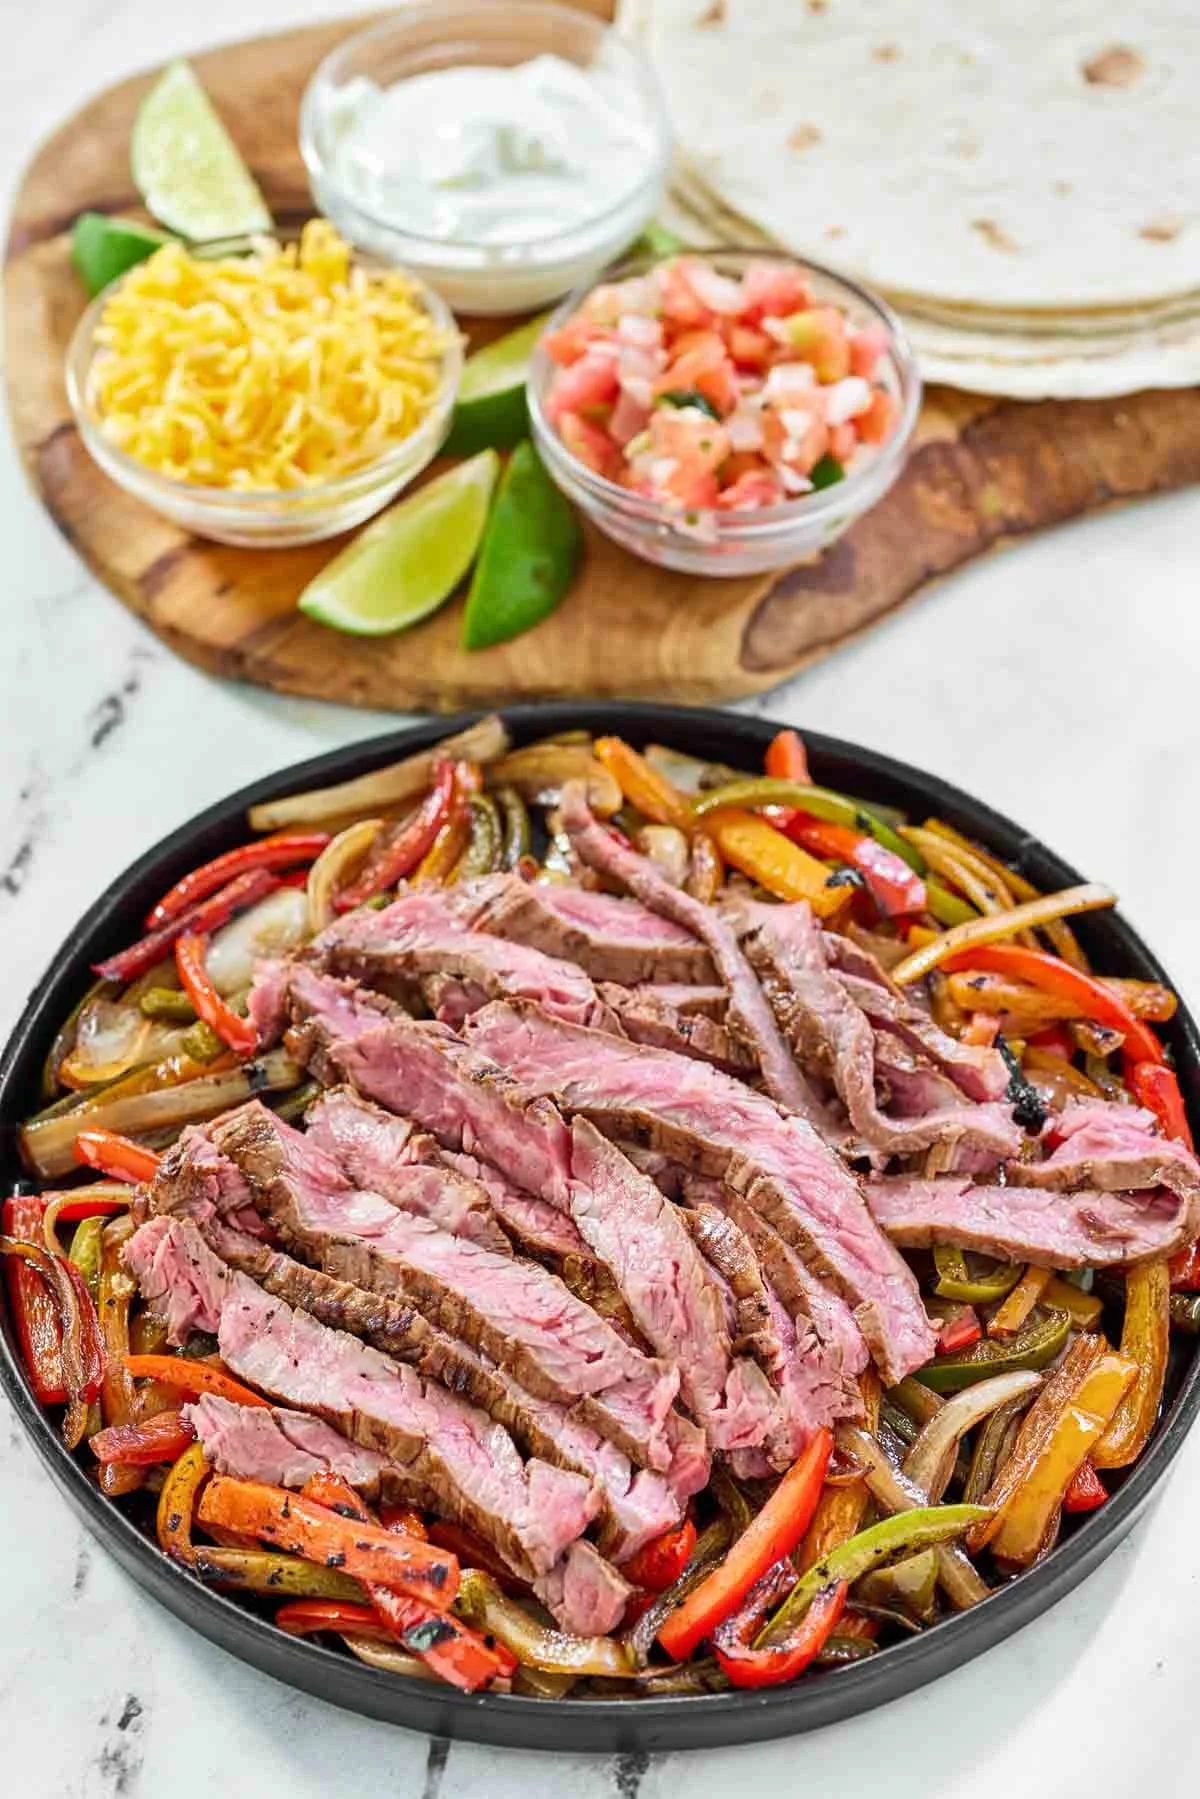
    Plated steak fajitas with warm tortillas, cheese, and pico de gallo

    This is a copycat take on the restaurant plate: skirt steak in a soy, Worcestershire, lime, and brown sugar marinade, seared hard and fast, with peppers and onions that stay crisp instead of mushy. Everyone builds their own stack with Colby Jack, sour cream, pico de gallo, and a squeeze of lime.

    This post contains affiliate links. As an Amazon Associate, I earn from qualifying purchases.

    Real time vs. hands-on

    Real time: about 2 hours 40 minutes. That’s mostly the steak sitting in the marinade. Hands-on: about 20 minutes, and most of that is a quick sear. If you start the marinade before work, dinner comes together fast.

    Skirt steak, bell peppers, onions, and marinade ingredients prepped

    Why skirt steak, and why this marinade

    Skirt steak is the cut the restaurant uses. It’s beefy, and it stays tender when you slice it against the grain. Outside skirt is the best version of it, but inside skirt is what you’ll actually find at most grocery stores, and it works fine.

    Fajita spread with steak, peppers, onions, and toppings laid out

    The marinade does the heavy lifting. The soy sauce brings salt and a deep, savory base. The Worcestershire adds another layer of umami with a faint sweetness. Fresh lime keeps it bright instead of heavy, and the brown sugar is what gives the seared edges that caramelized, almost sticky color. The garlic is there for aroma, nothing more dramatic than that.

    For the vegetables, you slice the onion and the three bell peppers to the same half-inch width so they cook at the same rate. The red pepper is the sweetest of the bunch, the green is the most earthy, and the orange lands somewhere in between with a little citrus note. They get their own lighter version of the same marinade, just enough to season them without diluting the flavor.

    What you’ll need

    For the steak

    • 2 pounds inside skirt steak
    • 3 tablespoons soy sauce
    • 1 tablespoon Worcestershire sauce
    • 2 tablespoons fresh lime juice
    • 3 cloves garlic, finely chopped
    • 2 teaspoons brown sugar

    For the peppers and onions

    • 1 large sweet yellow onion
    • 1 red bell pepper, sliced ½-inch
    • 1 green bell pepper, sliced ½-inch
    • 1 orange bell pepper, sliced ½-inch
    • 3 tablespoons neutral oil (vegetable or avocado), divided
    • 2 tablespoons water
    • 2 teaspoons soy sauce
    • 1 teaspoon Worcestershire sauce
    • 1 teaspoon lime juice, added at the end

    To serve

    • Flour tortillas
    • ½ cup shredded Colby Jack cheese
    • ½ cup sour cream
    • ½ cup pico de gallo (store-bought or homemade)
    • Lime wedges

    Make it

    1. Start the marinade. In a bowl or a large zip-top bag, whisk together the soy sauce, Worcestershire sauce, fresh lime juice, chopped garlic, and brown sugar until the sugar is mostly dissolved. Trim the fat and gristle off the steak, add it to the marinade, and turn it to coat. Seal the bag or cover the bowl and refrigerate for at least 2 hours, overnight if you can. Flip the steak halfway through.
    2. Prep the vegetables. Slice the onion and the bell peppers into ½-inch strips. In a separate bowl or bag, combine the neutral oil, water, soy sauce, and Worcestershire sauce. Add the vegetables, toss to coat, and refrigerate for at least 30 minutes, up to 2 hours.
    3. Bring the steak to temperature. About 30 minutes before you plan to cook, set the steak out on a plate to warm up a bit. When you’re ready, take it out of the marinade and pat it completely dry. The dry surface is what lets it brown instead of steam. Discard the used marinade.
    4. Step-by-step process of making steak fajitas at home
    5. Sear the steak. Heat a cast-iron skillet or heavy pan over high heat until it’s very hot and just starting to smoke. Add a tablespoon of oil and give it a second to heat. Sear the steak for 3 to 4 minutes per side, for medium-rare. Don’t move it around. A cooler pan is the main reason this recipe goes wrong for people.
    6. Rest and slice. Move the steak to a cutting board and let it rest for 5 minutes. Slice it thinly against the grain. Noticing that grain before the steak goes into the marinade, and then cutting across it later, is the difference between tender and stringy.
    7. Cook the vegetables. While the steak rests, heat a tablespoon of oil in a second skillet over medium-high heat. Add the onion and cook for about 2 minutes. Add the bell peppers and cook for another 3 minutes, until tender and just starting to char at the edges. Drain any liquid, stir in the last teaspoon of lime juice, and pull the pan off the heat.
    8. Warm the tortillas. Wrap them in a damp paper towel and microwave for 30 seconds.
    9. Put the table together. Set out the shredded cheese, sour cream, pico de gallo, and lime wedges. Mix the sliced beef, its juices, and the sautéed vegetables in a bowl and let everyone build their own plate.
    10. Optional sizzle plate. If you want the full restaurant presentation, heat a clean cast-iron skillet or sizzle platter for 4 minutes over high heat, add a splash of water, then add the beef and vegetables. It’ll steam hard. Serve it on a heatproof trivet. Skip this and the taste is exactly the same.
    11. Close-up of seared steak and peppers sizzling in a cast iron skillet

    What to serve alongside

    I keep this one simple. A bowl of fresh pico de gallo with tortilla chips covers the starter slot. For a drink, something bright works well with the saltiness of the steak. And if you want to make it a real night in, a chocolate dessert with a warm brownie and a scoop of ice cream rounds it out without a lot of effort.

    Overhead view of a full fajitas dinner with all the sides

    Storing and reheating

    Store the cooked steak and the peppers and onions in separate airtight containers in the fridge for up to 3 days. Keeping them apart stops the vegetables from turning the beef soggy. To reheat, warm the vegetables in a hot skillet over medium-high heat for about 2 minutes, then add the steak and cook for 2 to 3 more minutes until hot all the way through. I don’t recommend freezing. Skirt steak and sautéed peppers both fall apart in texture after a freeze-thaw cycle, and they come back out stringy and watery.

    Make it yours

    Swap the Colby Jack for whatever cheese you already have. I’ve made this with a pepper jack when I wanted more heat. If you don’t have three bell peppers, two work fine, and you can lean on the onion more. And if you’re making this for a group, double the marinade and the vegetable marinade and keep everything in the same bag-style setup. The only thing I wouldn’t change is the medium-rare doneness. Skirt steak is looser-fibered than a ribeye, and pushing it past medium turns it chewy fast.

    Happy cooking, Maya.

    Keep Reading

  • Perfect Sautéed Zucchini: Tender, Golden, and Ready in 15 Minutes

    Perfect Sautéed Zucchini: Tender, Golden, and Ready in 15 Minutes

    I was a zucchini skeptic for most of my life. Watery, bland, a vegetable that seemed to exist only so gardeners could feel productive. Then one summer, my mom pulled a pan of sautéed zucchini out of the oven-adjacent corner of our stove, and every single one of us went back for seconds. That was the recipe I never stopped thinking about — and the one I’ve spent years trying to nail down on my own stove.

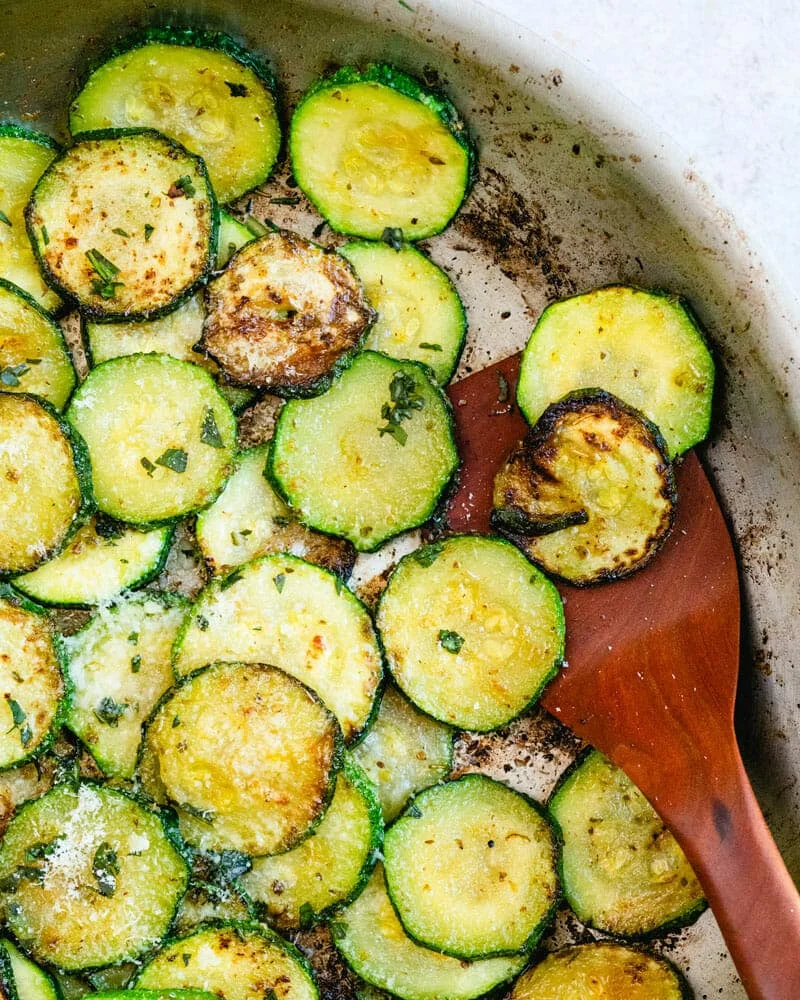
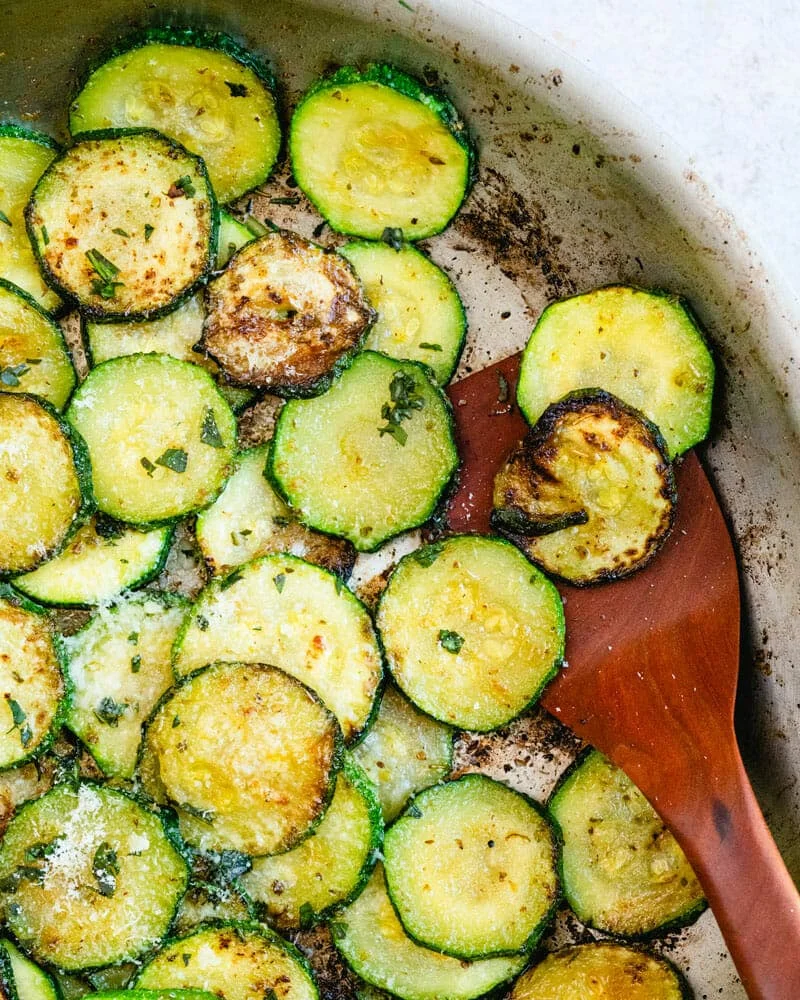
    Golden sautéed zucchini rounds with Parmesan in a serving dish

    This is my version now. It’s the same idea — high heat, a big skillet, oregano, and a finish of Parmesan — but dialed in so the rounds come out tender with real browned spots instead of a sad, steamed pile. The first three times I made it, I overcooked the batch and ended up with zucchini soup. Now it’s a staple whenever the garden or the produce aisle dumps its summer bounty on me.

    Real time: 15 minutes (5 to prep, 10 to cook). Hands-on: about 10, because you’ll want to keep the pan moving. This makes 4 side servings and costs less than a takeout side, which feels like a small win on a weeknight.

    What You’ll Need

    After years of trying roasting, grilling, and frying my way through zucchini season, sautéing is the method I trust for weeknights. High heat cooks the rounds fast enough to brown before they can sweat out all their water — that’s the whole trick. (Chocolate zucchini bread still wins for dessert, but that’s a different kitchen problem.)

    • Zucchini (1¾ pounds, about 2 medium or 3–4 small): small to medium gives you the best-looking rounds. Stuck with the giant kind? Cut the slices into half circles instead.
    • 2 tablespoons olive oil or butter: butter makes it deeply savory, oil keeps it vegan. Both work.
    • ½ teaspoon garlic powder and ½ teaspoon onion powder: fresh garlic and a diced onion work too, but the dried versions keep this a 15-minute job.
    • 1 teaspoon dried oregano: my non-negotiable here. It’s what takes this from “fine” to “why is the plate empty?” Fresh works, but dried gives consistent flavor.
    • ½ teaspoon kosher salt: added early, finished at the end.
    • 2 tablespoons grated Parmesan (optional): skip it for a vegan or dairy-free version — the dish still works. Freshly grated hits harder than the pre-grated stuff.
    • A handful of chopped fresh basil (optional): the finish that makes it look like you meant business.
    Zucchini rounds browning in a hot skillet with herbs

    Why This Zucchini Never Turns Soggy

    The difference between great and sad zucchini is heat and motion. Here’s what keeps it on the right side of that line:

    • Use your largest skillet. The rounds will still stack in layers even in a big pan — that’s normal, and it’s workable.
    • Keep moving the slices. The bottom layer browns first, so flip rounds and push un-browned pieces down as you cook. That’s the babysitting part, and it’s the only part.
    • Cover the pan for the first 2 minutes only. The lid steams the top layer so everything cooks at once. Then uncover and sauté for the rest of the time.
    • Pull it off early. Zucchini goes from perfect to mushy in the span of a microwave beep. Take the pan off the heat while the rounds are just tender with browned spots. They’ll finish softening on the plate.

    How to Make It

    1. Slice the zucchini into ¼-inch rounds. Skip the peeling — the skin is thin, tender, and holds the rounds together while they cook.
    2. Heat the olive oil or butter in your largest skillet over medium-high heat. Add the zucchini, then stir in the garlic powder, oregano, and salt until every slice is coated.
    3. Cover the skillet and cook for 1 minute. Uncover and stir. Cover again for 1 minute, then uncover and stir, moving slices down into the bottom layer so they get a chance to brown.
    4. Cook uncovered for another 6 to 8 minutes, keeping the slices flipped and rotating so the layers cook evenly, until most of the rounds are tender with browned spots.
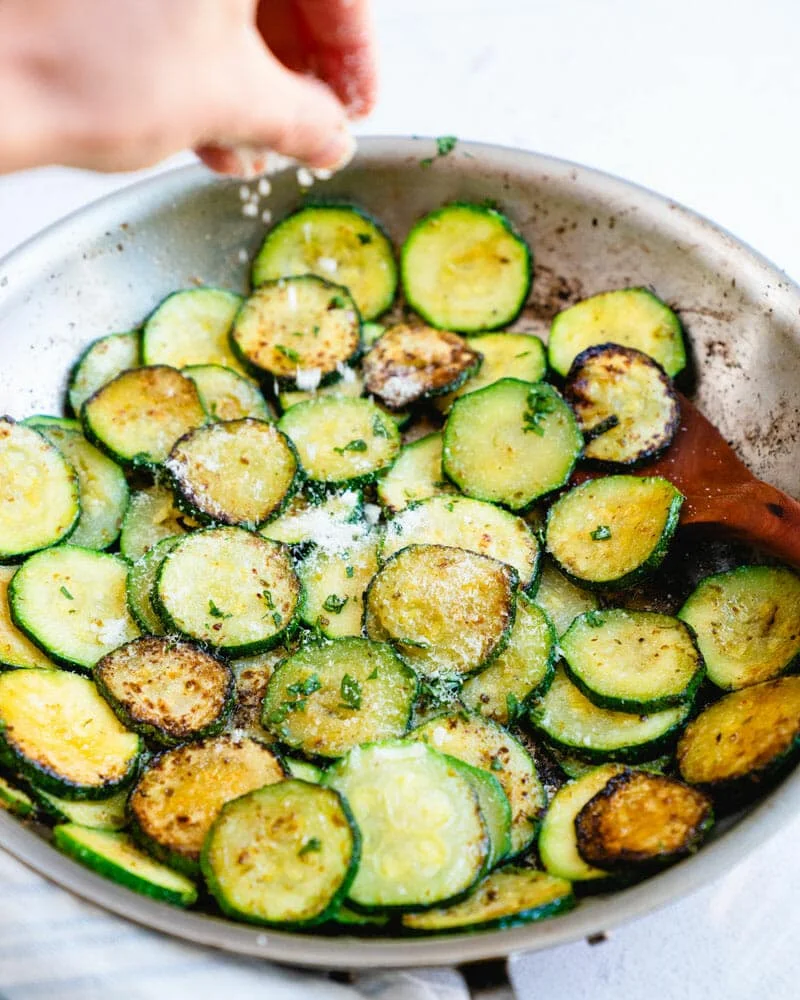
    5. Turn off the heat and shower the pan with the Parmesan and basil, if you’re using them. Eat it right there — it’s at its best hot from the pan.
    Finished sautéed zucchini served straight from the pan

    What to Put It Next To

    This is a side dish that goes with almost anything, especially in the heat of summer. A few pairings that have worked well at my table:

    • With seafood: grilled salmon, lemon dill salmon, pesto salmon, shrimp skewers, or sautéed shrimp. The light flavor doesn’t fight any of it.
    • With pasta: serve it on the side of a creamy pasta, or toss the finished zucchini straight into a pot of spaghetti with olive oil and extra Parmesan. It’s also great folded into pesto pasta for a vegetable bump.
    • At a cookout: alongside grilled vegetables, grilled potatoes, or grilled portobello mushrooms.
    • Vegetable-forward: pair with sautéed mushrooms, carrots, or spinach for a meatless plate.
    • On pizza: scatter about a quarter of a pan of the finished zucchini over a margherita or cheese pizza before the last stretch of baking.

    Storing and Reheating

    Leftovers keep in an airtight container in the refrigerator for up to 3 days. Reheat gently in a skillet over medium heat for 2 to 3 minutes, stirring often — the microwave works in a pinch, but the skillet keeps the texture closer to the real thing.

    Day-two zucchini won’t have that crisp edge, but it’s still good, and it disappears fast into scrambled eggs or a vegetarian frittata. Skip the freezer: it turns mushy once it thaws.

    Dietary Notes

    This recipe is vegetarian and gluten-free. It’s dairy-free if you skip the Parmesan — that makes it vegan too. Everything else on the list is plant-based.

    Questions I Actually Get Asked

    How do I keep it from getting soggy? High heat, the biggest pan you own, and keep the slices moving so they brown instead of steam. Salt lightly at the end, and pull the pan off the heat the moment the rounds are tender.

    Butter or oil? Both work. Olive oil gives a cleaner flavor and keeps the recipe vegan; butter adds a richer, savory depth. I rotate based on what’s in the butter drawer.

    Should I peel the zucchini? No. The skin is thin and tender, it keeps the rounds intact, and a lot of the good stuff lives right under the surface.

    What seasoning works on sautéed zucchini? The garlic powder, onion powder, and oregano combo is my default, finished with salt, pepper, and Parmesan. Italian seasoning, red pepper flakes, or a squeeze of lemon are all fair game too.

    Make It Yours

    This pan is a starting point, not a law. I’ve been known to add red pepper flakes with the garlic, finish with a squeeze of lemon instead of basil, or stir in a handful of spinach for the last minute. If your summer is delivering zucchini faster than you can eat it, this is the recipe I reach for — and I promise you’ll be sneaking bites straight from the pan before it makes it to the table.

    Happy cooking,
    Maya

    Keep Reading

  • Shrimp Boil: Louisiana-Style Feast in One Pot

    Shrimp Boil: Louisiana-Style Feast in One Pot

    The first time I tasted a crawfish boil, I was sitting on a folding chair in Louisiana with my cousin Rick, and the pot was bigger than my kitchen table. That’s how this recipe started. Years later, I’ve rebuilt that bayou feast for a stovetop stockpot, and it still lands the same way: shrimp, sausage, a mountain of vegetables, and a whole pineapple, all swimming in spiced broth and pulled out onto one big tray.

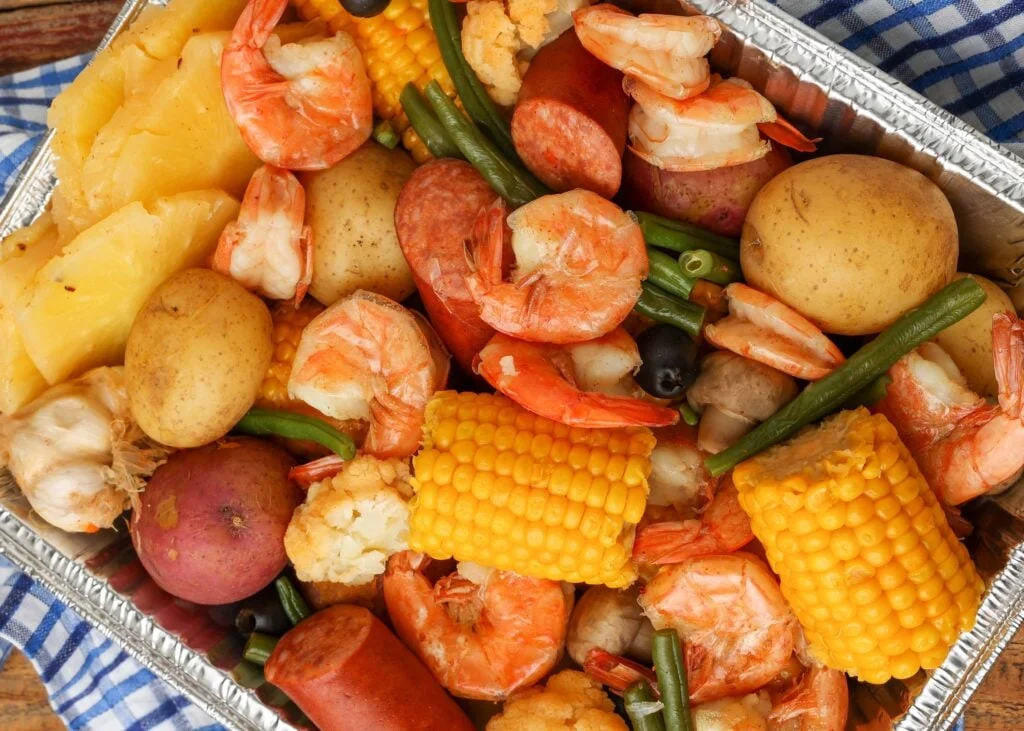
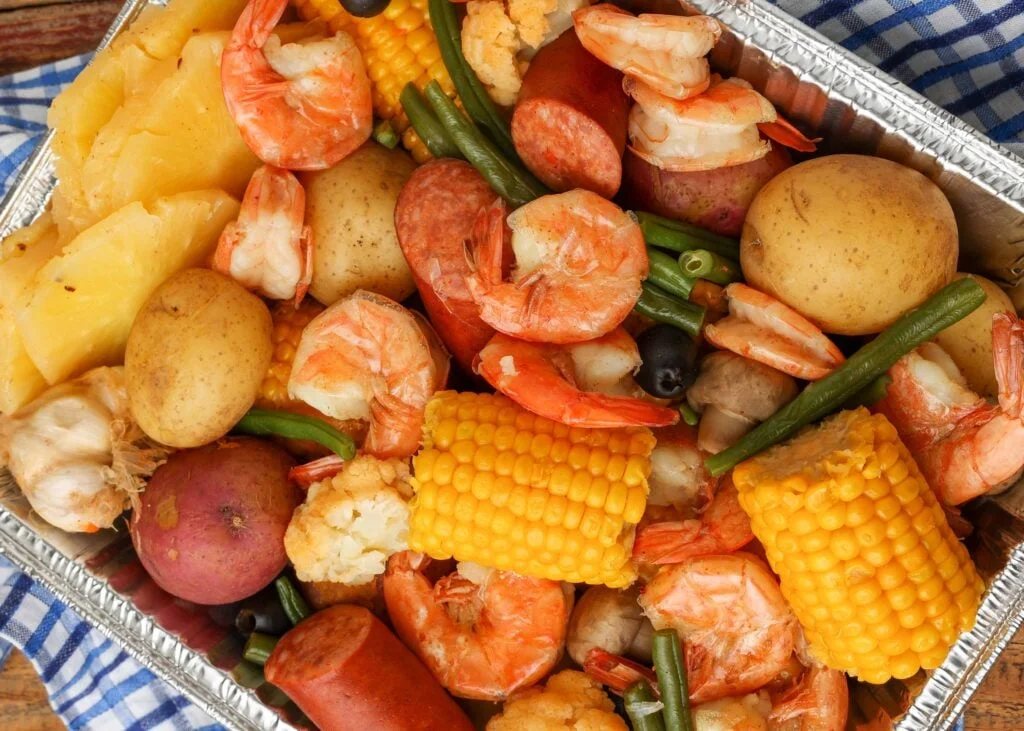
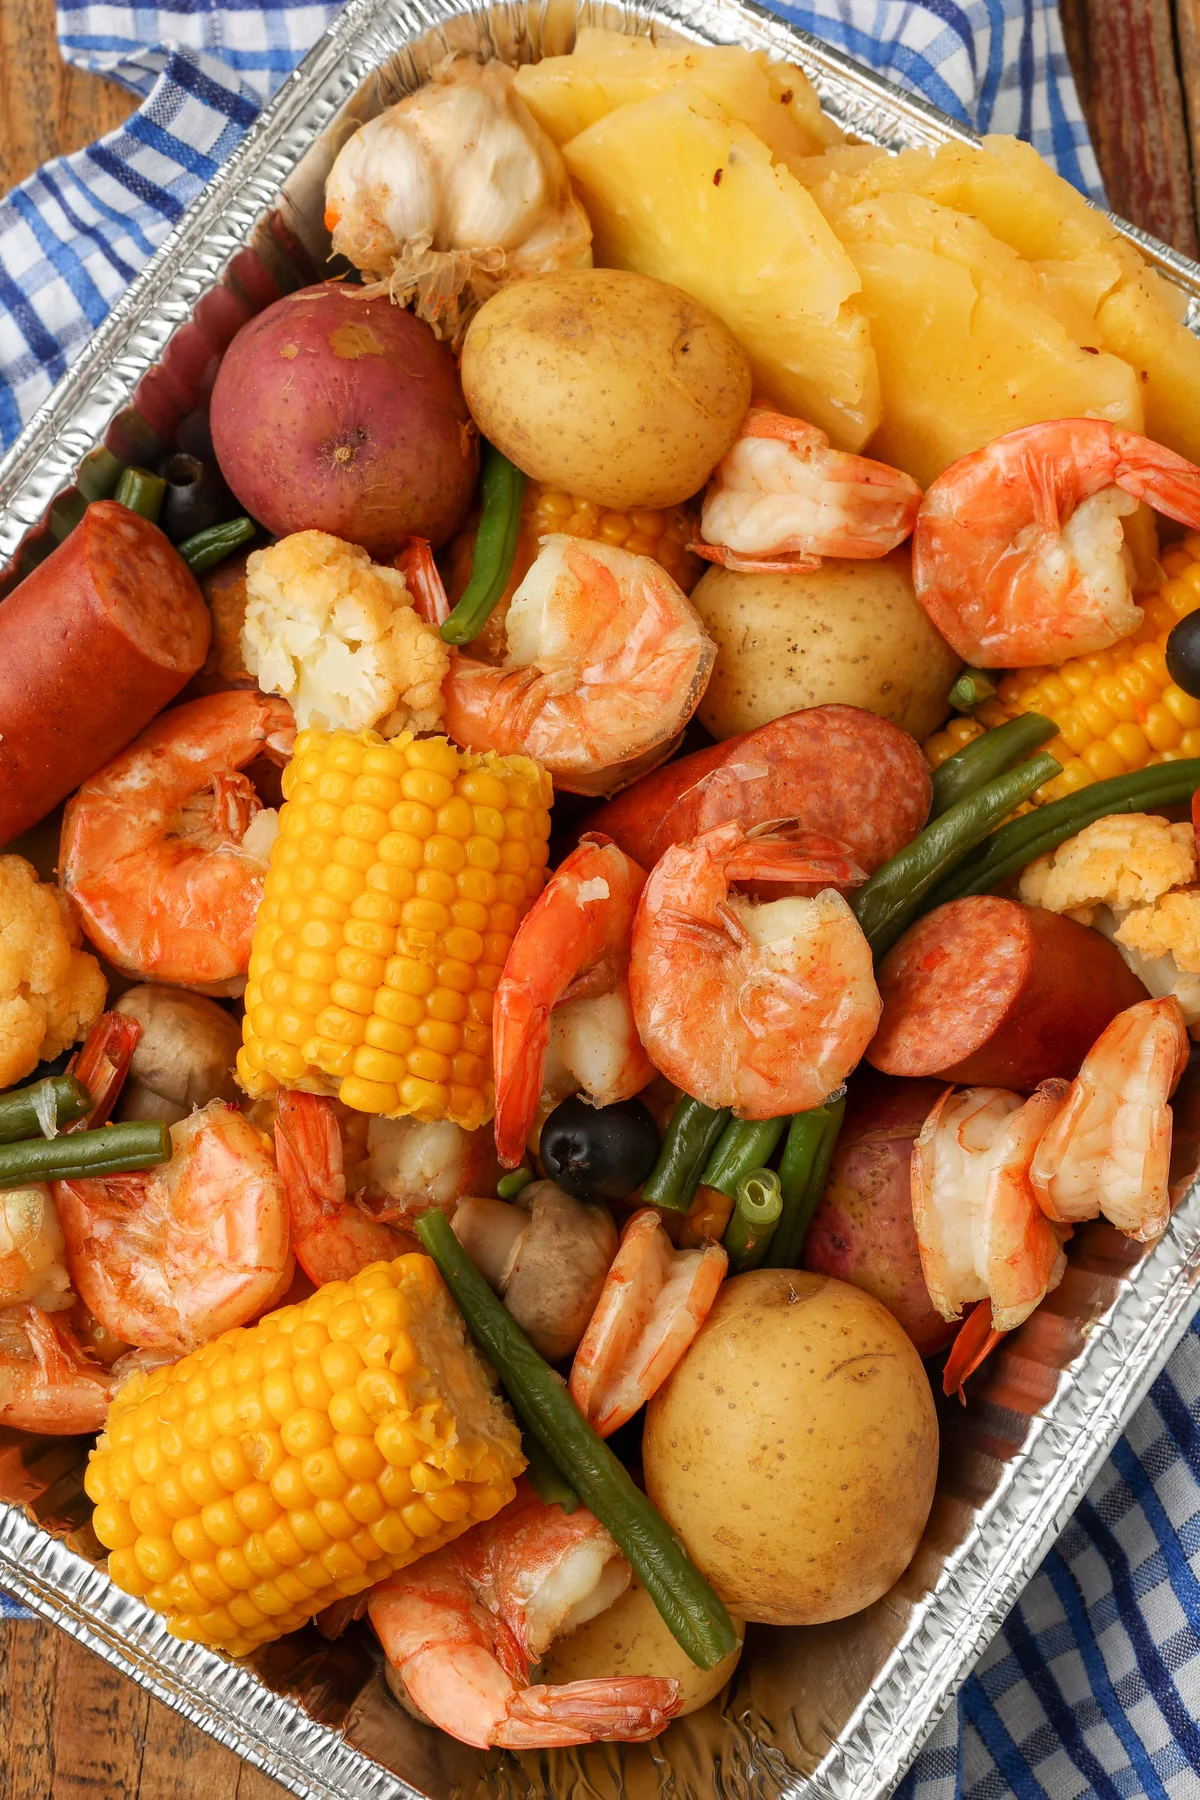
    Aluminum tray piled with shrimp boil, corn, sausage and potatoes

    Here’s the honest math before we start. Real time: 2 hours from first boil to plates on the table. Hands-on: 30 minutes of prep, then mostly waiting for the water to come back to a boil. It feeds at least eight hungry people, with a few servings left over. That’s not a Tuesday-night pasta situation. It’s a get-the-people-over thing, and I think that’s exactly what makes it worth the wait.

    Why this boil works

    The trick to a good boil is that nothing in the pot is an afterthought. The potatoes, corn, carrots, green beans, mushrooms and cauliflower all soak up the same spiced water as the shrimp, so the vegetables taste like they were the star all along. The smoked sausage carries the heat, the whole lemons cut through it, and the pineapple — yes, the pineapple — comes out sweet and spicy and gone before the plates are cleared.

    Ingredients and honest substitutions

    • Shrimp — 2 to 4 pounds (900 g to 1.8 kg) extra large or jumbo, deveined, shells on. I always use the biggest I can find. Frozen is perfectly fine; just thaw them completely before they go in the pot.
    • Sausage — 1 to 2 pounds (450 to 900 g) andouille sausage, cut into 2 to 3 inch (5 to 7 cm) pieces. Any smoked sausage works if you prefer it. Andouille just brings a smoky, hearty flavor that leans into the Cajun spices.
    • Seasoning — 2 x 3-ounce (85 g) packets of a crawfish, shrimp and crab boil seasoning blend (such as Zatarain’s), plus 8 ounces (about 240 ml) of the concentrated liquid boil. The blend is where the authentic Louisiana taste comes from, and the liquid form lets the vegetables, shrimp and sausage drink up even more flavor.
    • Salt and cayenne — 1 cup (about 200 g) of plain iodized salt, and 1 to 4 tablespoons (15 to 60 ml) of cayenne pepper for a proper kick.
    • The whole aromatics — 1 yellow onion halved, 2 lemons halved, and 4 heads of garlic, all left whole. No chopping, no mincing. They just sit in the pot and build flavor while everything else cooks.
    • The vegetables — 2 pounds (about 900 g) small red or yellow potatoes (not bite-size), 3 ears of corn broken in half (or 6 to 8 frozen mini ears), 1 pound (450 g) whole carrots scrubbed and cut in half, 1 pound (450 g) green beans trimmed, 1 small head of cauliflower with the leaves removed, and 5 to 8 ounces (140 to 230 g) whole button or crimini mushrooms.
    • Olives — 6 ounces (170 g) canned black olives, not drained. They add a bright, briny note that cuts through the spice, and anyone who doesn’t like them can simply skip them when plating.
    • Pineapple — 1 fresh pineapple, top and bottom removed and peeled, left whole.

    On the pineapple, hear me out. A whole fruit in a shrimp boil sounds like a dare, but it soaks in the spiced broth and comes out sweet and spicy with a firm bite. There is never a scrap left over.

    Equipment you actually need

    • A 30-quart (about 28-liter) stockpot for the recipe as written. Halving it? A 12-quart (about 11-liter) pot is enough, and smaller boils are fine in an 8 to 12-quart (8 to 11-liter) pot.
    • A long stirring paddle, so nothing sits too long on the bottom of a big pot.
    • A long skimmer ladle. You can improvise with a large slotted spoon if you move fast, or dump a smaller boil through a colander in the sink, but a proper skimmer makes the whole process a lot easier.
    Overhead of the finished boil tray with corn, sausage and shrimp

    How to make it

    The whole method runs on one rhythm: add a batch, wait for the pot to come back to a boil, repeat. How long each wait takes depends on your pot, your burner and how much is going in, so keep that in mind when you’re scheduling.

    1. Fill the stockpot halfway with water and bring it to a boil over high heat.
    2. Stir in the liquid boil, the two seasoning packets, the salt and the cayenne.
    3. Salt and seasonings stirred into a bubbling shrimp boil
    4. Drop in the onions, lemons, potatoes and the whole pineapple. Bring it back to a boil.
    5. When it’s boiling again, add the garlic, mushrooms, carrots and olives. Return to a full boil.
    6. Add the corn, cauliflower, green beans and sausage. Add more cayenne now if you want it spicier. Bring it back to a full boil.
    7. Add the shrimp and cook just until they turn opaque and the shells are pink, about 2 to 3 minutes.
    8. Lift out the pineapple with tongs and set it on a cutting board. Skim everything else out of the pot and pile it onto a large tray or platter.
    9. Slice the pineapple thinly with a sharp knife, add the slices to the tray, and serve immediately with a Cajun dipping sauce on the side.

    Notes from my kitchen

    Traditional boils are made outdoors in enormous pots for a whole crowd, and this version keeps the spirit while fitting a home kitchen. A few things I’d tell you before you start:

    • Adjust the quantities. The shrimp and sausage amounts are deliberately a range. I always use a full four pounds of shrimp, because my family can’t get enough of them. Scale the rest down if you’re feeding fewer people.
    • Customize the vegetables. The abundance of vegetables is what makes this boil extra special, but leave out anything your crowd doesn’t enjoy. Nobody’s losing sleep over it.
    • Keep the pineapple in. A lot of boil recipes skip it, but it’s a secret powerhouse here. Soaked whole in the broth, it comes out perfectly softened with a firm bite remaining, and it pairs with the spice in a way I can’t stop thinking about.
    • Whole cooked pineapple lifted from the spiced boiling broth
    • Schedule plenty of time. It’s easy, but it’s not fast. The more you add to the pot, the longer each return to a boil takes. Plan the evening around it, not the other way around.

    Serving

    Make a batch of Cajun dipping sauce first. That’s a requirement, not a suggestion. After that, a side of creamy pasta salad and a scoop of coleslaw, and you’re ready for the feast. Don’t forget extra napkins — everyone eats with their hands, and the pineapple slices are the last thing on the tray.

    Close-up of the finished shrimp boil with vegetables and shrimp

    Make ahead and reheating

    Store leftovers in an airtight container in the fridge. They keep well for 3 to 4 days. Reheat them in the microwave until just warm, taking care not to overcook the shrimp — they only need a moment.

    Frequently asked questions

    What equipment do I need for a boil at home? For a smaller-scale boil, you likely already have everything. An 8, 10 or 12-quart (8 to 11-liter) pot, plus a strainer or skimmer with a handle for lifting the food out of the broth.

    What’s the difference between a crawfish boil and a shrimp boil? Really not much, between the two recipes or methods. It comes down to preference and what you can get locally. Crawfish have a more subtle, sweet flavor that’s similar to lobster, while shrimp are stronger and can be a bit salty at times.

    Can I use frozen shrimp? Fresh or frozen both work fine. Just make sure the shrimp are thawed completely before they go in the pot.

    How long do you boil shrimp? Fresh shrimp are fully cooked in about 2 to 3 minutes in boiling water. You’ll know they’re done when they turn opaque and the shells are pink.

    Make it yours

    This boil is a canvas. Double the shrimp if your table is full of people who will eat every last one. Swap the cauliflower for more potatoes if that’s your crowd’s vote. And if you have a grill outside and a bigger pot, take it there — the recipe doesn’t care where it boils, only that it does.

    Happy cooking,
    Maya

    Keep Reading