作者: Maya Collins

  • Our Go-To Guacamole

    Our Go-To Guacamole

    For years I was making guacamole the wrong way, and I didn’t know it. I was young, I was cooking, and for some reason I’d reached for the 90s taco-seasoning drawer. Cumin in. Garlic in. A whole cabinet of nonsense in, all of it guiding a dip that didn’t need any of it.

    Then one night the bowl came out and I tasted it, and I just knew: I’d been working way too hard. Strip it back and the avocado does all the talking. That version became the one I’ve made ever since.
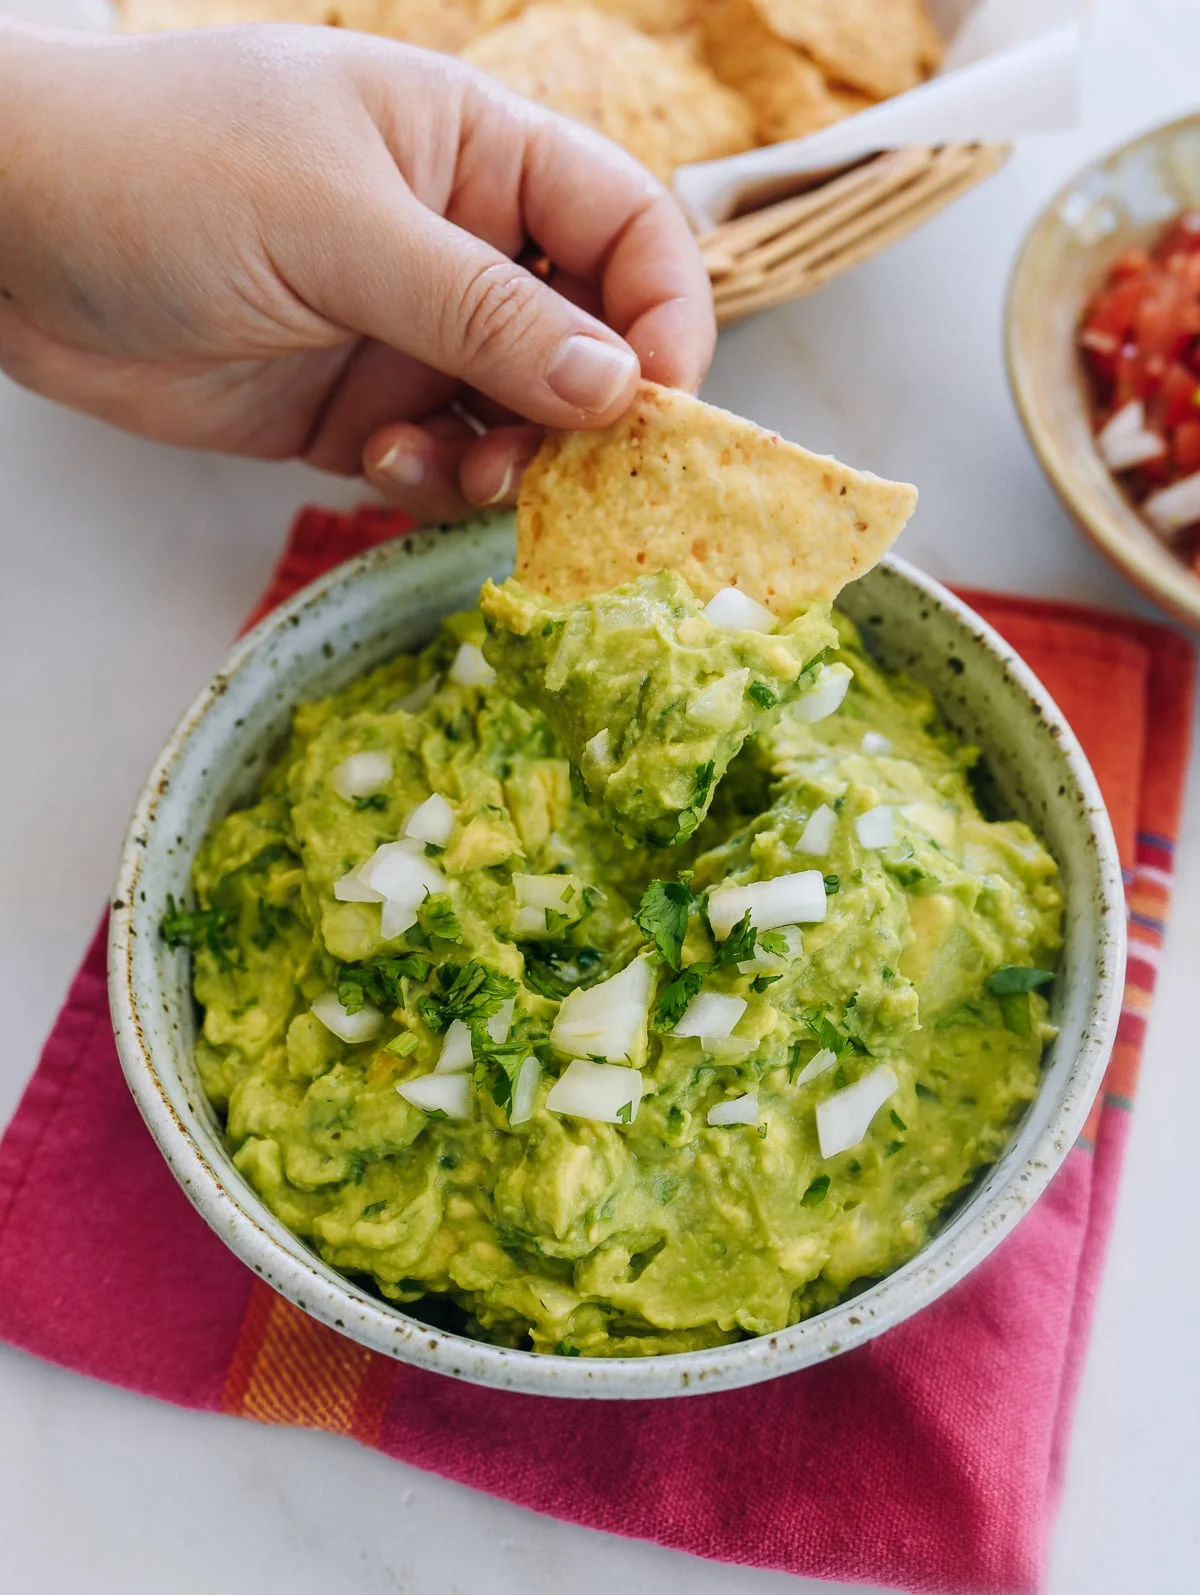
    Tortilla chip dipped into a bowl of fresh chunky guacamole

    Real time: 15 minutes. Hands-on: 15. Effort: none — one knife, one spoon, one fork.

    Here’s what goes in, and honestly, that’s the whole list:

    Ingredients

    • 3 large ripe Haas avocados
    • ⅓ cup finely diced white onion
    • ½ – 1 whole jalapeño or serrano chili pepper, deseeded and finely diced, to taste
    • 3–4 tablespoons chopped cilantro, leaves and stems, to taste
    • Juice of 1 lime
    • ½ teaspoon salt

    Makes 8.

    I use white or yellow onion — that’s what I keep in the pantry. If all you have is red, use it. It works.

    Why no tomato?

    If you’re wondering where the tomato went: I keep it out on purpose. Tomatoes are too unpredictable to bring into this equation. One soft, watery, subpar tomato can drag down an otherwise great bowl of guacamole.

    Save them for a pico de gallo on the side — that’s just a simple mixture of chopped tomatoes, onions, jalapeño, cilantro, lime juice, and salt. Or make a smokey, spicy restaurant-style salsa. Either way, the tomato gets its own spotlight instead of muddying the avocado.

    A note on juicing limes

    If you have a manual wooden juicer, like we do, go easy on the pulp. Pulp pushes its way into the guacamole and can turn it bitter, especially if the lime is older or out of season. A little juice, no pulp — that’s the goal.

    Finely diced jalapeño and white onion on a wooden cutting board

    Method

    1. Dice the white onion, and deseed and dice the jalapeño (or serrano). The finer you dice the pepper, the spicier your guacamole will be.
    2. Chop the cilantro, leaves and stems together. The stems add a pleasant textural crunch I really enjoy.
    3. Halve the avocados lengthwise and remove the pits. I wedge my knife into the seed, twist it out, and tap it into the trash. Then instead of scooping each half with a spoon, I use a large spoon to carve chunks straight into a mixing bowl. It starts the mashing for you and gives the guac a nice texture.
    4. Squeeze the juice of 1 lime over the avocado and mash with a fork to your desired texture. I like mine somewhere between chunky and not quite smooth.
    5. Add the onion, pepper, cilantro, and salt, and stir to combine. Serve with tortilla chips or your favorite Mexican foods.
    Cutting board with diced onion, minced jalapeño, and halved avocados
    Scooping avocado chunks from a halved avocado into a glass bowl
    Fork mashing avocado with lime juice in a glass mixing bowl

    Serving guacamole

    This is my party go-to, and it’s always a hit. My annual Super Bowl snack of choice is a bag of Doritos with this homemade guac. You can judge, but don’t knock it til you try it.

    Or put out a whole spread: carnitas tacos with rice, beans, tortillas, guacamole, pico de gallo, and red cabbage slaw. That’s been one of our go-to party spreads for years, and people always love it.

    Beyond party nights, guacamole goes great on turkey burgers, over eggs, inside breakfast burritos or tacos, in wraps or tortilla roll-ups, and stirred into chili. Or just put it out with some plain ol’ tortilla chips. It doesn’t need a reason.

    How to store your guacamole

    Guacamole is best enjoyed fresh the day you make it, because it immediately begins to oxidize. Lime juice helps slow the oxidation, but it won’t stop it.

    If you do need to store it in the refrigerator, place a layer of plastic wrap directly on top, so there’s no air between the wrap and the guacamole.

    Another popular trick: add the guacamole to an airtight container, flatten the surface, cover it with a half-inch of cold water, then top with the lid and stash it in the fridge. The water keeps the air off, and you pour it off before serving.

    Make it yours

    Want more heat? Leave the jalapeño seeds in, or reach for a serrano instead. Like it a little milder? A jalapeño with seeds removed, finely diced, keeps just a whisper of warmth. And if cilantro isn’t your thing, a few extra leaves of flat-leaf parsley hold up better than you’d think — it’s a small swap that keeps the bright, fresh note without the flavor war.

    Happy cooking,
    Maya

    Keep Reading

  • The Italian Pasta Salad I Make When Dinner Takes 30 Minutes

    The Italian Pasta Salad I Make When Dinner Takes 30 Minutes

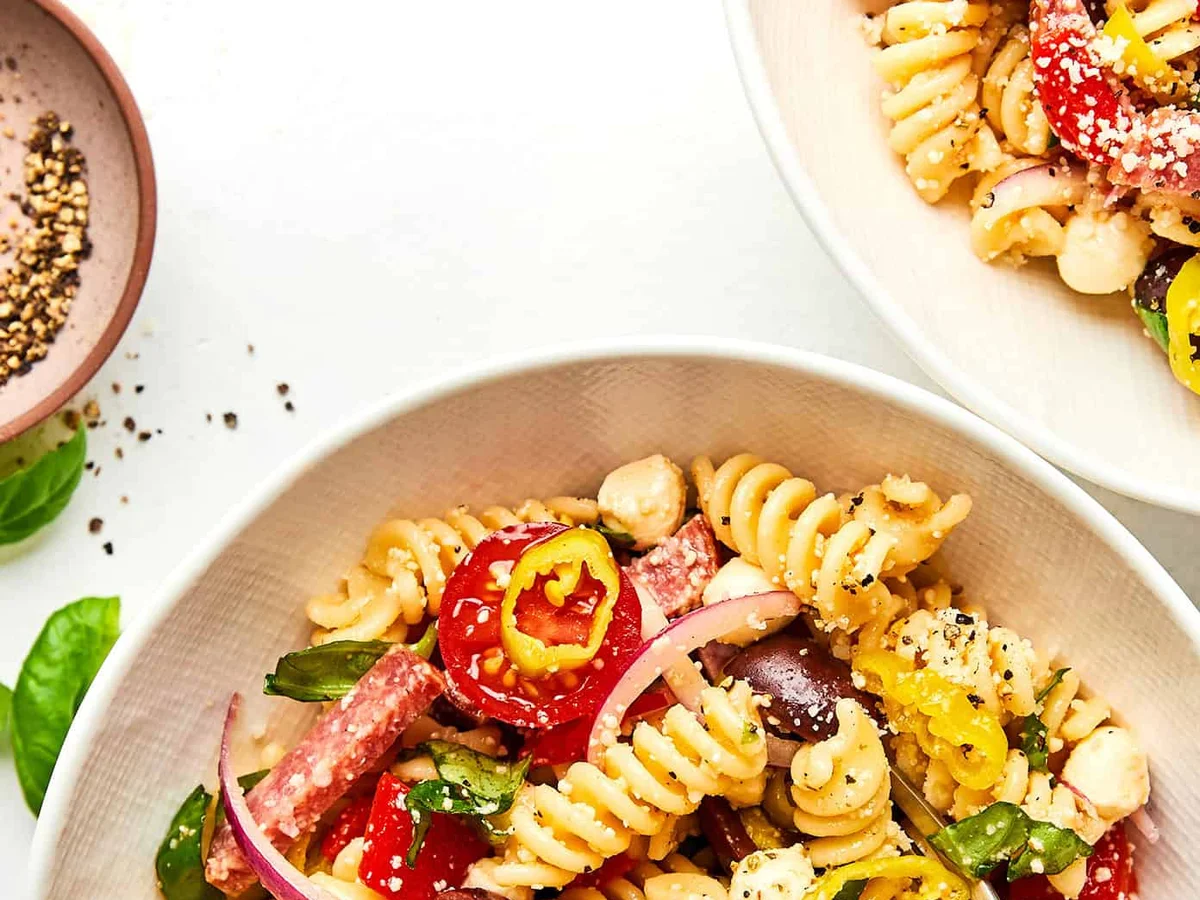
    The first three times I made this, it flopped. Not badly, just forgettably — the kind of pasta salad you eat out of polite obligation at a party. Then one hot evening I soaked the pepperoncini brine back into the dressing instead of pouring it down the drain, and the whole thing flipped. Now it’s the salad I trust at 7 p.m. on a week I can’t remember the days of.

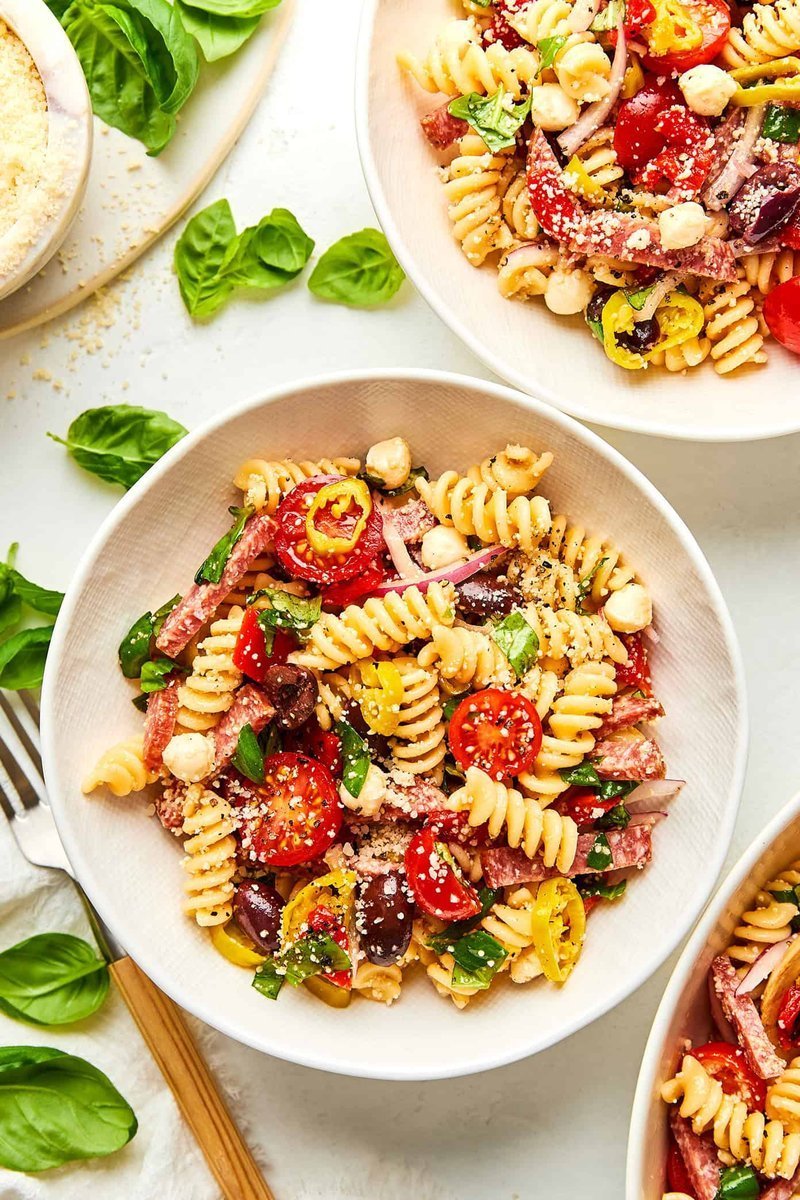
    Bowl of Italian pasta salad with salami, tomatoes, and basil

    Real time: 30 minutes, hands-on closer to 12. The rest is a pot of water doing its quiet thing, and the salad getting better while it sits. It’s hearty enough to be the whole dinner, and it’s the first thing to disappear at every potluck I bring it to.

    Why this one, actually

    Most boxed Italian dressing drowns the pasta in “meh.” This version gets dressed in a fresh red wine vinaigrette with a spoonful of pepperoncini brine — that’s where the zing lives, and it’s not the same as vinegar alone.

    Lessons learned making make-ahead Italian pasta salad

    Here’s what I’ve learned from making this a lot:

    • Cook the rotini just to al dente. It’ll keep softening as it sits in the dressing. Pull it with a little bite left.
    • Rinse it. Cool water after draining stops the cooking and keeps it from going gummy.
    • Salt the water like you mean it. This is your only shot at seasoning the pasta itself.
    • Save that brine. The pepperoncini juice is liquid gold in the vinaigrette — tangy, with a kick nothing else gives.
    • Give it 20 to 30 minutes. The pasta drinks up the dressing, the onion mellows, and all those salty, herby flavors settle in. If you’re making it ahead, you’re already golden.

    If you’ve got extra protein in the pantry — I made a version recently with high-protein pasta for a weekday lunch — any pasta you love works here. Rotini just holds up best.

    Flat-lay of raw rotini and fresh pasta salad ingredients

    Ingredients

    Pasta salad

    • 1 pound uncooked pasta (rotini works great)
    • 1 pint (11 oz) cherry tomatoes, halved
    • 1 cup pearl mozzarella
    • 6 ounces salami, sliced or chopped
    • 3/4 cup sliced pepperoncini
    • 1/2 cup thinly sliced red onion
    • 3/4 cup pitted Kalamata olives, halved
    • 1 cup roasted red bell peppers, chopped
    • 1 cup loosely packed fresh basil, chopped
    • 2/3 cup finely grated Parmesan, plus extra for serving

    Red wine vinaigrette

    • 1/3 cup extra-virgin olive oil
    • 3 tablespoons red wine vinegar
    • 1 teaspoon Dijon mustard
    • 1 teaspoon honey
    • 1 garlic clove, finely grated
    • 1/2 teaspoon dried oregano
    • 1/2 teaspoon fine sea salt
    • 1/2 teaspoon freshly cracked black pepper
    • 1 tablespoon pepperoncini brine

    How to make it

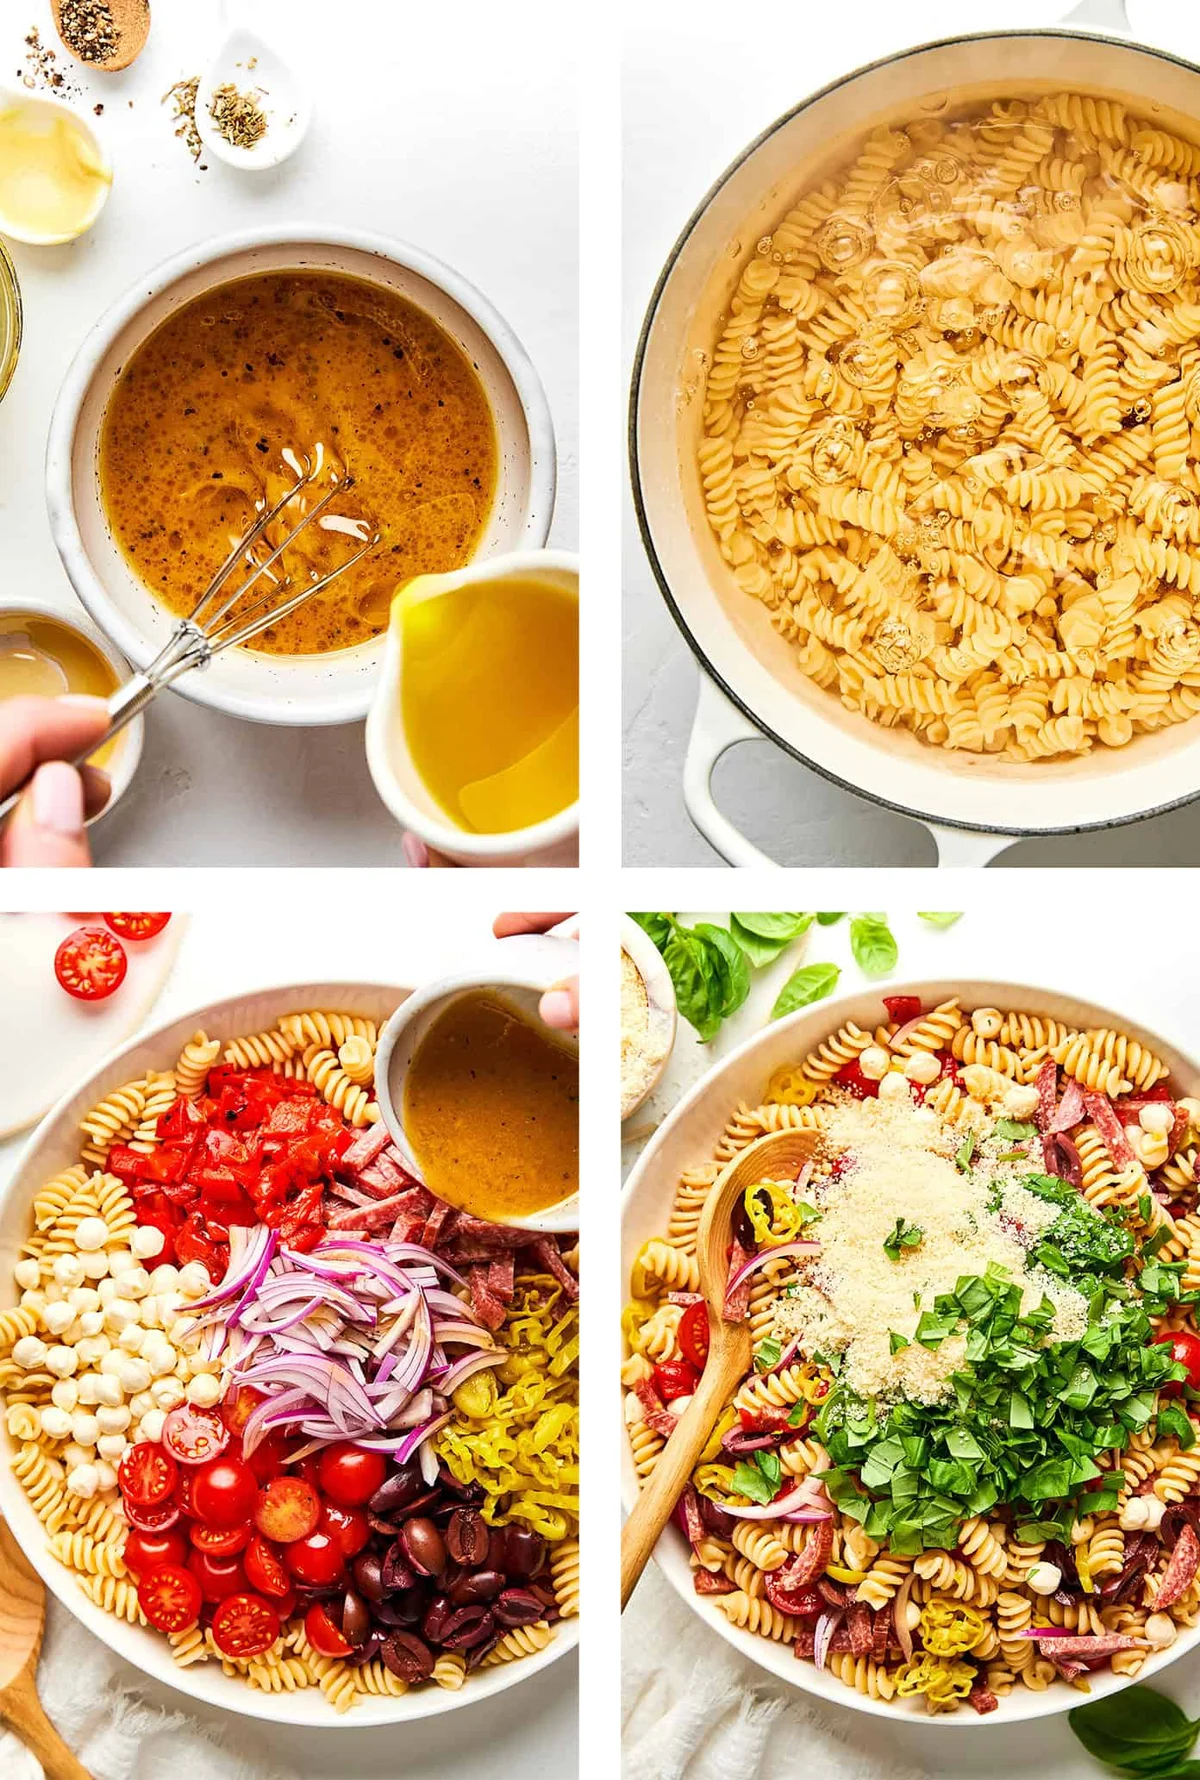
    1. Cook the pasta. Bring a large pot of generously salted water to a boil. Cook the rotini to al dente, drain, and rinse briefly with cool water until it stops steaming. Transfer to a big mixing bowl.
    2. Make the vinaigrette. Whisk the red wine vinegar, Dijon, honey, garlic, oregano, salt, pepper, and pepperoncini brine in a small bowl or jar. Drizzle in the olive oil slowly while whisking until it emulsifies.
    3. Toss the salad. Add the tomatoes, mozzarella, salami, pepperoncini, onion, olives, and roasted peppers to the pasta. Pour in the vinaigrette and toss until everything’s coated.
    4. Finish it. Stir in the basil and Parmesan and toss once more.
    5. Let it sit. Give it at least 15 to 20 minutes so the flavors meld. Toss again and serve with extra Parmesan on top.

    Make it yours

    This recipe bends without complaint:

    • Make it greener. Toss in arugula or baby spinach right before serving.
    • Turn up the heat. A pinch of red pepper flakes, or a few extra pepperoncini if you like a sting.
    • Pepperoni instead of salami. Simple, and works just as well.
    • Add protein. Diced grilled chicken or chickpeas both do it.
    • Salt it differently. Crumbled feta in place of the mozzarella adds a tangier, saltier edge.
    • Go herby. Fresh parsley, oregano, or chives alongside the basil.

    The answers you’re probably looking for

    Where are the pepperoncini? Banana peppers work — just a touch milder.

    How long does it keep? Three to four days in the fridge, in an airtight container.

    Can I freeze it? I wouldn’t. The fresh veggies and cheese don’t bounce back after freezing. Best enjoyed fresh.

    One last thing: this salad rewards patience better than any hot dish I make. Make it the night before, let it sit all night, and serve it cold at lunch or room temperature at dinner. The second day is honestly the best day.

    Happy cooking,
    Maya

    Keep Reading

  • Gluten-Free Toffee & Brown Butter Chocolate Chip Cookies

    Gluten-Free Toffee & Brown Butter Chocolate Chip Cookies

    I’ve been to enough gluten-free bakeries to know the truth: most of the cookies there are fine. A few are delicious. None have ever knocked my socks off. So when I set out to make my favorite chocolate chip cookie recipe gluten-free, I expected to be disappointed. I was wrong.

    This version starts with the brown butter toffee chocolate chip cookie recipe from Handle the Heat — if you can eat gluten, hers is the one to make. I kept her method almost exactly and changed just three things for the gluten-free version. The result is chewy, deeply flavored, and studded with salty toffee that makes the first bite feel like a bakery treat.

    Real time: about an hour, most of it chilling dough. Hands-on: roughly 35 minutes plus a 12-minute bake. Yield: 22 cookies.

    Why this version works

    Most chocolate chip cookies taste like chocolate and sugar and then… nothing. The original recipe fixes that with homemade toffee bits — a salty, crunchy bite against the chewy dough. The coffee crystals add a little extra depth without tasting like coffee. That’s the depth of flavor I’d been missing in every gluten-free cookie I’d tried.

    The three changes I made

    1. The flour

    I use King Arthur Measure for Measure Gluten Free Flour. It’s my pantry staple for turning any recipe into a gluten-free one, and for good reason: I once tested this recipe with Bob’s Mill gluten-free flour, and the batch came out with a faint beany flavor. Common in gluten-free baking, but not what I want in a cookie. The 1-to-1 blend gives you the same texture and flavor a wheat-flour cookie would. In the UK and EU, any 1:1 gluten-free all-purpose blend should work — just skip the extra flour reduction below if your blend already bakes moist.

    2. The flour amount

    Gluten-free cookies dry out fast — it’s the number-one complaint with this whole category. I dropped the flour from 2.5 cups to 2 cups to keep the dough moist. That half cup is the difference between a tender cookie and a crumbly one.

    3. The rest

    Chill the dough, but don’t overdo it. No longer than one day in the fridge. Longer, and the dough absorbs too much moisture, and you get dry cookies.

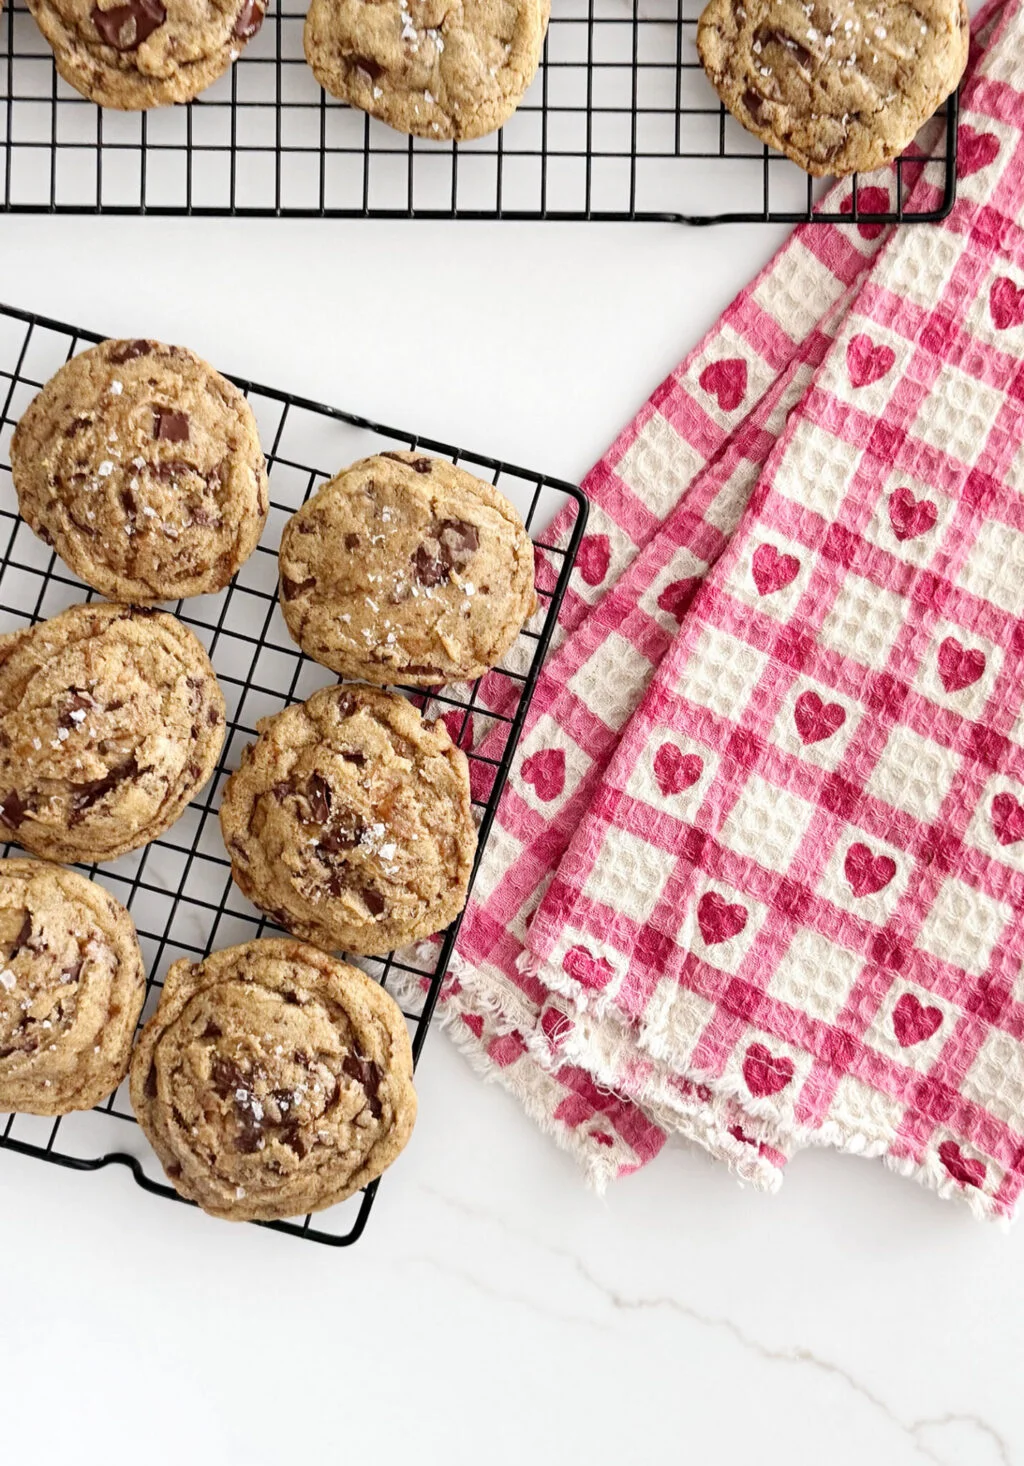
    Chewy gluten-free chocolate chip cookies with toffee bits

    Ingredients

    • 2 sticks (1 cup) unsalted butter
    • 1/2 cup (100 g) granulated sugar
    • 1 cup (200 g) lightly packed dark brown sugar
    • 2 cups (340 g) King Arthur 1-to-1 gluten-free flour
    • 1 teaspoon baking soda
    • 1/2 teaspoon baking powder
    • 1 teaspoon instant coffee crystals
    • 1 teaspoon fine salt
    • 2 large eggs, room temperature
    • 1 large egg yolk, room temperature
    • 2 teaspoons vanilla extract or vanilla bean paste
    • 10 oz (280 g) semi-sweet chocolate, chopped
    • 1 cup (about 150 g) homemade toffee bits
    • Flaky sea salt, for finishing

    Method

    Make the toffee first — it takes about 10 minutes of attention, and it’s the difference between a good cookie and a great one. Store-bought works in a pinch, but you’ll miss a lot of the flavor. Pour the melted toffee onto a silicone mat to cool; it peels right off and breaks into bits. (Get the mat if you don’t have one. Best baking money you’ll spend.)

    1. In a saucepan, melt the butter over medium heat, stirring often. Keep going for 5–8 minutes until it’s foaming and turns the color of caramel, with browned bits floating in the butter. Don’t let it burn.
    2. Whisk the hot butter with both sugars in a large bowl and let it cool to room temperature.
    3. Meanwhile, whisk together the flour, baking soda, baking powder, and coffee crystals in a separate bowl.
    4. Whisk the eggs, egg yolk, and vanilla into the cooled butter mixture.
    5. Stir the flour mixture in with a spatula until just combined, then fold in the chopped chocolate and toffee bits.
    6. Scoop the dough onto a parchment-lined tray — you’ll get 20–22 cookies. Cover with plastic wrap and refrigerate for up to 24 hours (no longer, or the cookies will dry out).
    7. Preheat the oven to 350°F (175°C) and line a baking sheet with parchment. Place the scooped dough on it, leaving 2 inches of space between each cookie.
    8. Bake 12 minutes, rotating the pan halfway through. Sprinkle with flaky salt right out of the oven, let cool a few minutes on the sheet, then move to a wire rack.
    9. Store in an airtight container for up to 3 days.

    Make it yours

    Swap the semi-sweet chocolate for dark — the toffee handles the sweetness. Add 1/2 cup of chopped pecans if your counter is already crowded. And if you’re feeding a gluten-free kid who’s picky about texture, skip the coffee crystals; nobody will notice the difference in the dough, and the cookies still taste the way you remember them.

    Happy cooking,
    Maya

    Keep Reading

  • Cheesy Jalapeño Cashew Dressing

    Cheesy Jalapeño Cashew Dressing

    Here’s a confession: I kept buying the same bottle of ranch for about a year. Not because I was lazy — I was. It lived in the salad drawer, opened at the last minute, no second thought. Then one Tuesday my blender was already out from smoothie duty, the counter was still wet from rinsing it, and I had raw cashews, a jalapeño, and a lime doing their quiet thing in the produce bin. I threw all of it in and let it run.

    What came out was creamy, savory, and just a little spicy — ranch’s cousin who actually knows what it’s doing. I’ve made it every week since. It’s the reason the ranch bottle is finally empty.

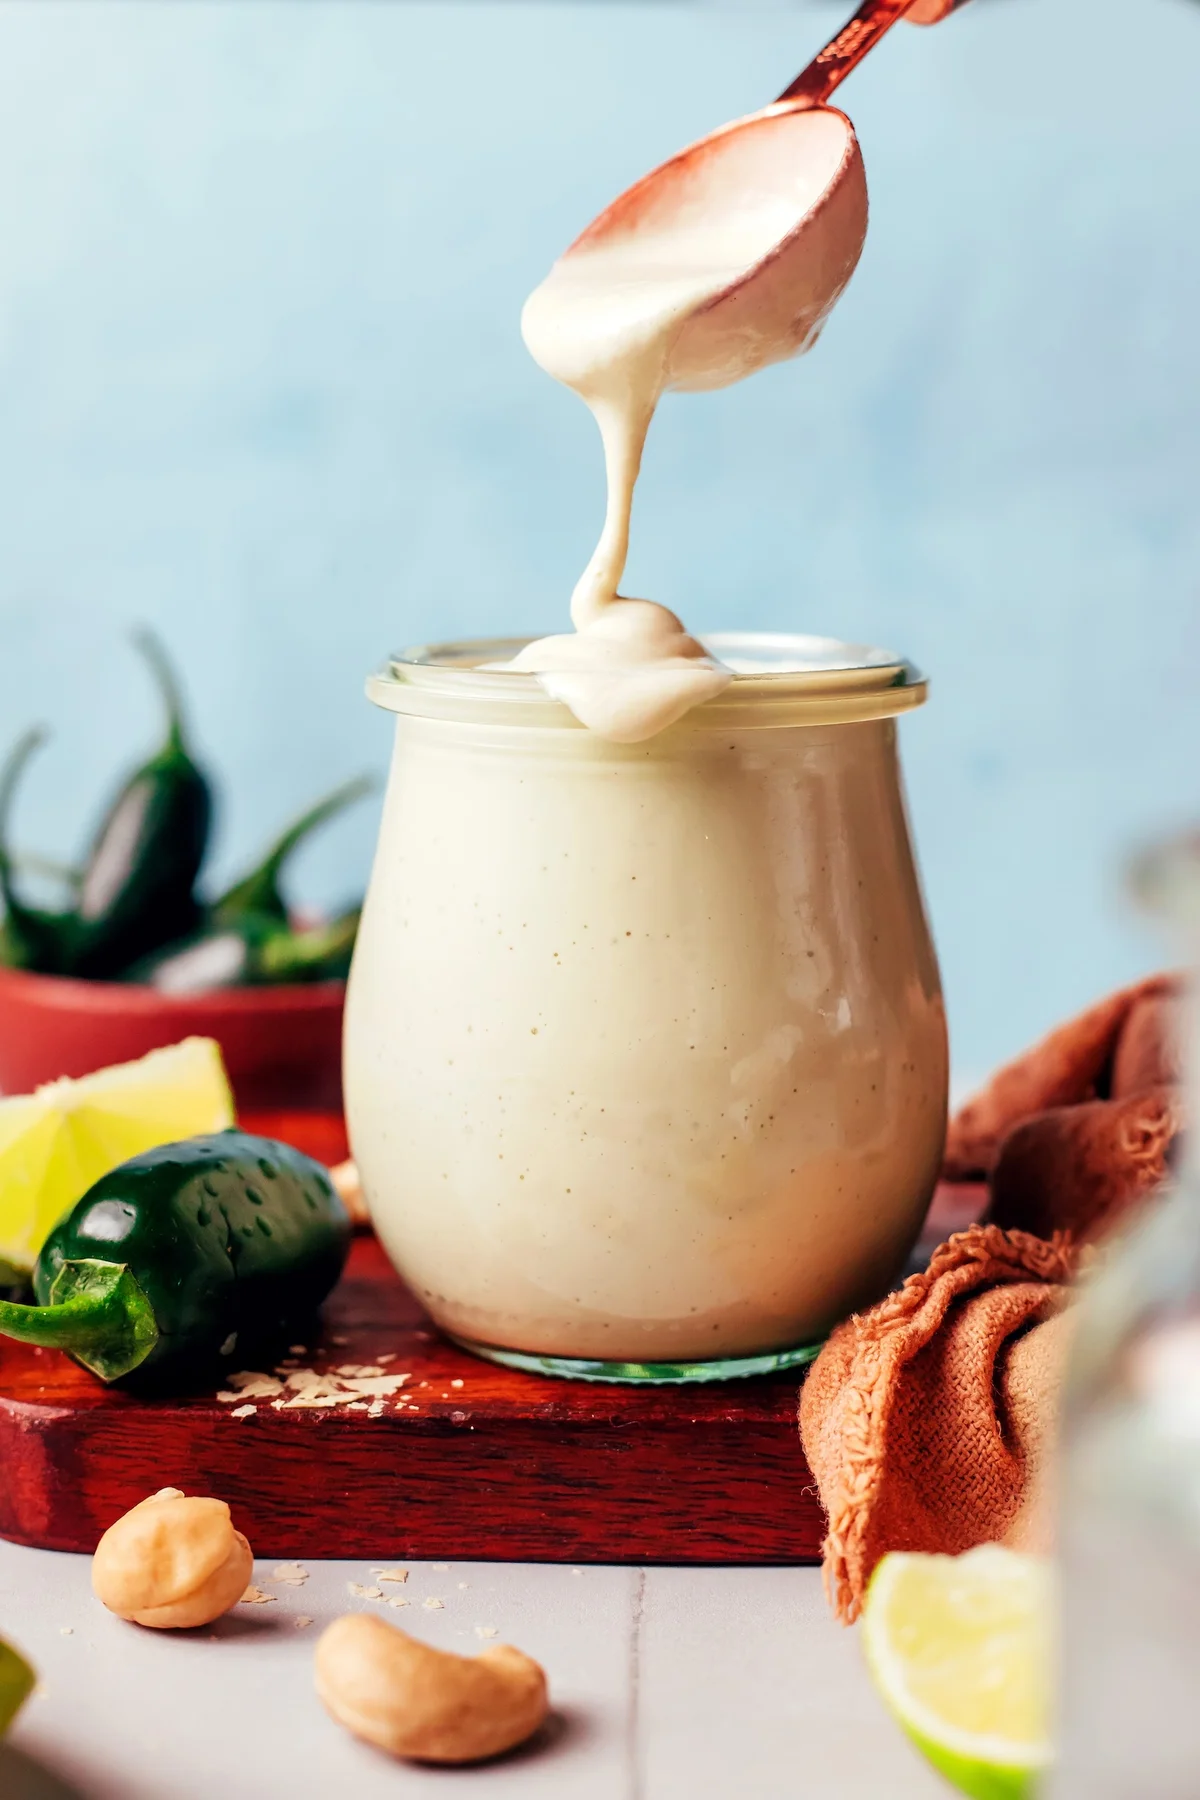
    Creamy cheesy jalapeño cashew dressing being poured from a spoon into a jar

    Real time: 5 minutes. Hands-on: 5 minutes. One blender, 9 ingredients, no soaking required (more on that below).

    What you’ll need

    Cashews are doing the heavy lifting here. Raw, whole cashews blend into a thick, creamy base that’s naturally oil-free and neutral enough to let the other flavors carry the show. No need to soak them — I haven’t found it necessary. If you do, just use a little less water.

    The rest of the pan is what makes it sing:

    • Water — the secret to dressing texture. Cashews plus water is what turns a nut into a pourable, creamy dressing.
    • Lime juice — a generous 1/4 cup. This is the brightness. Lemon works in a pinch if your lime is a sad little thing.
    • Nutritional yeast, miso paste, Dijon mustard, sea salt — this umami cluster is what makes it taste cheesy and savory without a drop of dairy. Fair warning: it’s good enough to taste straight from the blender. You’ve been warned.
    • Maple syrup — just a teaspoon. It rounds out the lime’s acidity so nothing screams at you.
    • Garlic and jalapeño — the zing. A modest amount keeps it balanced: spicy but not punishing, with no bitter edge.
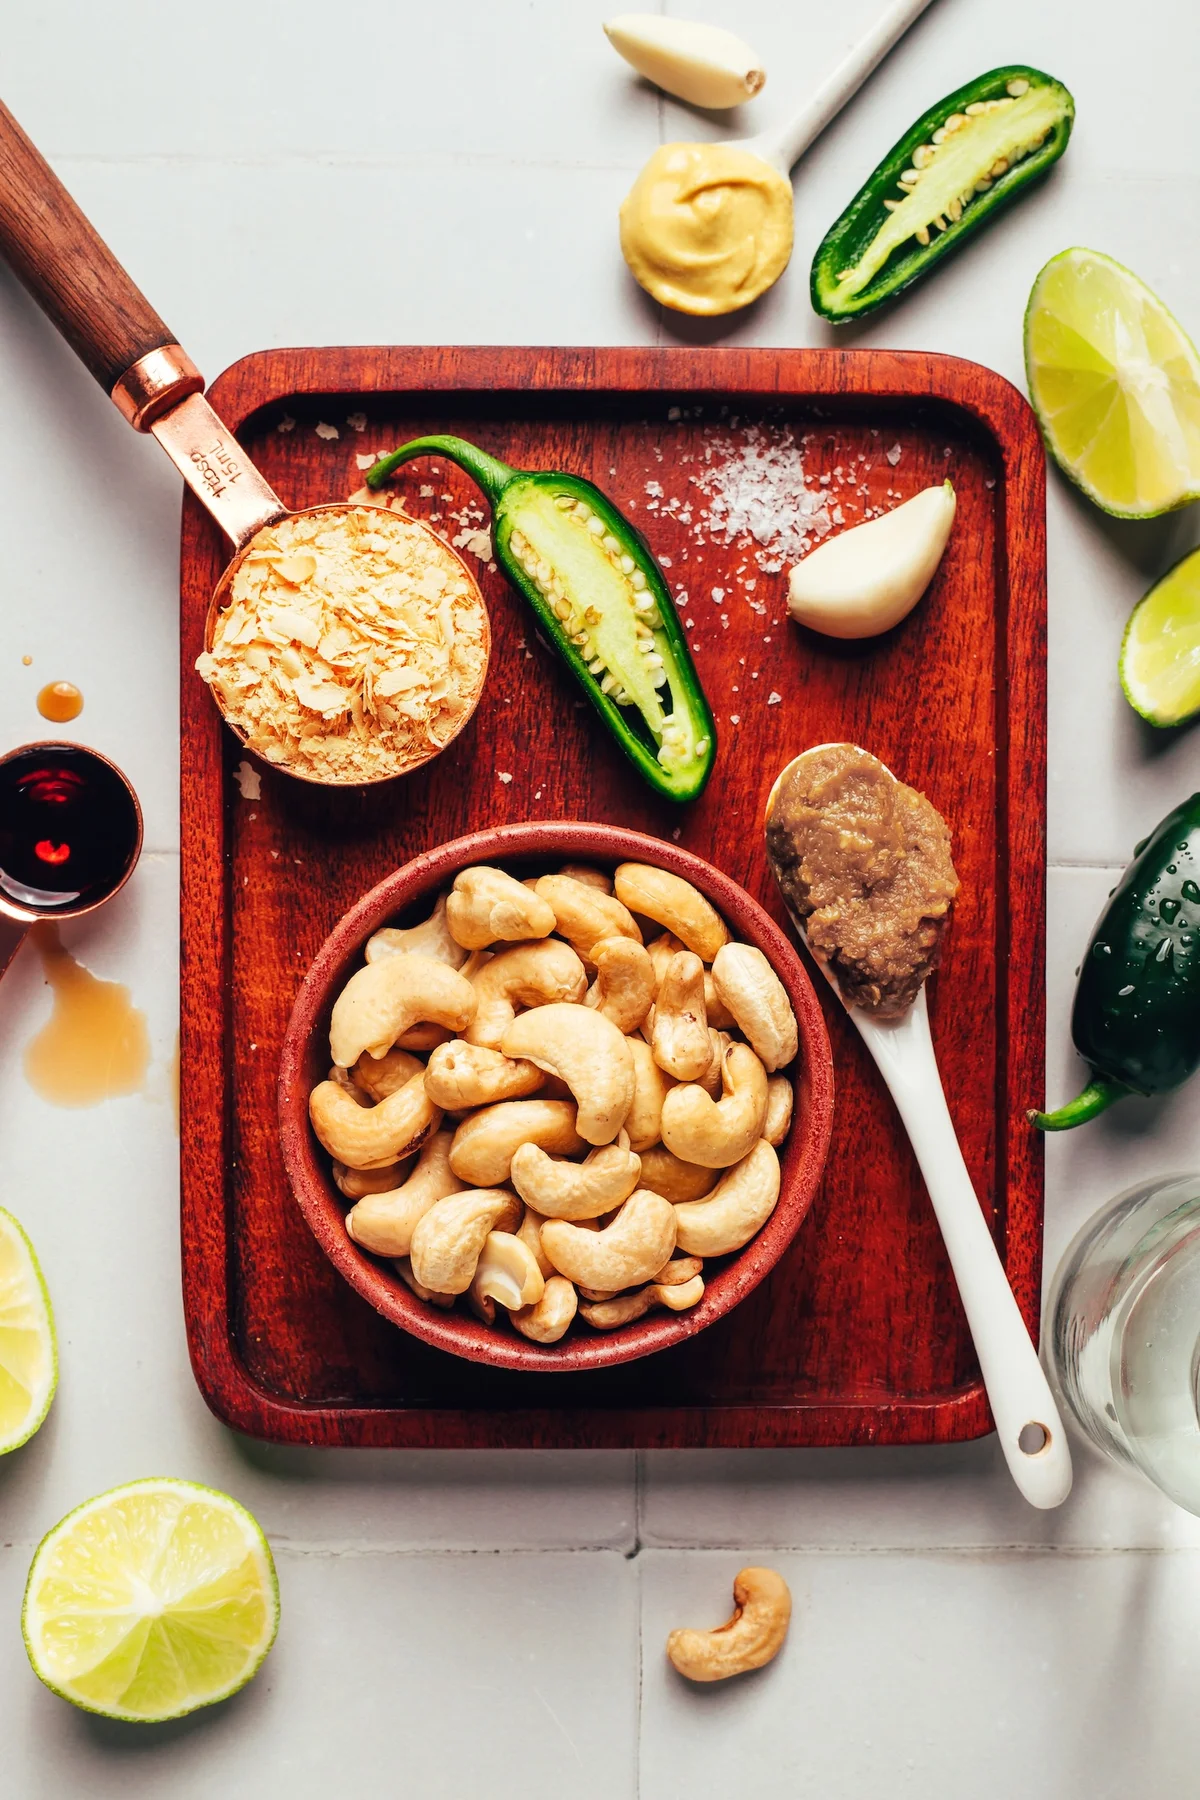
    Raw cashews, jalapeño, garlic, and lime arranged on a wooden tray

    How to make it

    Add everything to a high-speed blender. Blend on high until super smooth and creamy, about 1–2 minutes. That’s the whole recipe.

    Serve it at room temperature, or transfer it to a jar and chill it for 3–4 hours. It will thicken in the fridge — that’s normal. Thin it with a splash of water when you’re ready to use it.

    Cashews, garlic, and chopped jalapeño in a blender before blending

    A word on blenders, since this is the one place this recipe can fail you. You want a machine with some real muscle. I’ve had success with a Vitamix, a Blendtec, and even a NutriBullet. A cheap, quiet little blender might stall and leave you with a grainy paste instead of a pourable one. Also make sure the ingredients cover the blades — if there’s too little in the jar, it won’t blend smoothly. Double the batch or use a smaller blender instead.

    What it tastes like

    Creamy. Cheesy, in a savory way. Subtly spicy, with a bright finish from the lime. It’s not a fancy dressing — it’s the one you reach for without thinking, the way I used to reach for that ranch bottle. On a big green salad, in a wrap, drizzled over roasted cauliflower, or as a dip for whatever crunchy thing is in the crisper drawer. It does all of it well.

    Finished creamy cashew dressing in a jar with a wooden spoon

    It keeps covered in the refrigerator for up to 5–7 days. I usually make it Sunday night and it’s still good by the weekend.

    Why cashews?

    Short version: they’re the cheapest, most neutral nut that blends creamy with just water and a strong blender. No oil, no dairy, no long soaking — just five minutes of blending and a jar full of dressing that tastes like it took an afternoon.

    Recipe

    Cheesy Jalapeño Cashew Dressing — a creamy, cheesy, vegan jalapeño cashew dressing for salads, wraps, or dipping. 5 minutes, 1 blender, 9 ingredients.

    Servings: 12 (2-Tbsp servings) · Prep: 5 minutes · Total: 5 minutes · Keeps 5–7 days in the fridge

    Ingredients

    • 1 cup raw cashews
    • 3/4 cup water
    • 1/4 cup lime juice (or sub lemon juice)
    • 2 Tbsp nutritional yeast
    • 1 tsp white miso paste (if soy-free, use chickpea miso)
    • 1 tsp Dijon mustard
    • 1 tsp maple syrup
    • 3/4 tsp sea salt
    • 2 cloves garlic, peeled
    • 1 small jalapeño pepper, seeds removed, roughly chopped

    Instructions

    1. Add all ingredients to a high-speed blender and blend on high until super smooth and creamy, about 1–2 minutes.
    2. Use immediately at room temperature, or transfer to a jar and refrigerate for 3–4 hours to chill. It will thicken in the refrigerator — add more water later to thin if needed.
    3. Enjoy with salads, cauliflower wings, wraps, or for dipping veggies. Store leftover dressing covered in the refrigerator for up to 5–7 days.

    Notes

    • Soaking the cashews isn’t necessary, but you can if you prefer. If you do, you may not need as much water for blending.
    • For a nut-free version, try a mix of raw sunflower seeds and hemp hearts. I haven’t tested it that way, so let me know how it goes if you do.
    • Nutrition info is a rough estimate: about 70 calories, 5g carbs, 2.8g protein, 4.9g fat per 2-Tbsp serving.

    Make it yours: No jalapeño on hand? A few flakes of red pepper give you the heat without the bite. Want it for a crowd? Double the batch — it blends just as easily and the jar keeps for a week. And if you’re feeding a house full of ranch loyalists, start them on a small spoonful drizzled over their usual salad. They won’t know what hit them.

    Happy cooking,
    Maya
    Keep Reading

  • Homemade Fruit Leather (Dehydrator & Oven Recipe)

    Homemade Fruit Leather (Dehydrator & Oven Recipe)

    My blender was still warm from smoothie duty when the last of the strawberries started getting soft. Three pints, a dehydrator, and a cup of unsweetened applesauce later, I had the most honest, jammy, chewy snack I’ve ever made at home: fruit leather. No refined sugar, no long ingredient list, no babysitting. You spread the puree, you set a timer on your life, and you come back to something that peels right off the tray.

    Real time: about 8 hours to 10 hours total. Hands-on: about 10 minutes, and most of that is waiting for the blender. It’s the kind of thing you start after dinner and forget about, which is exactly the kind of thing I like to make.

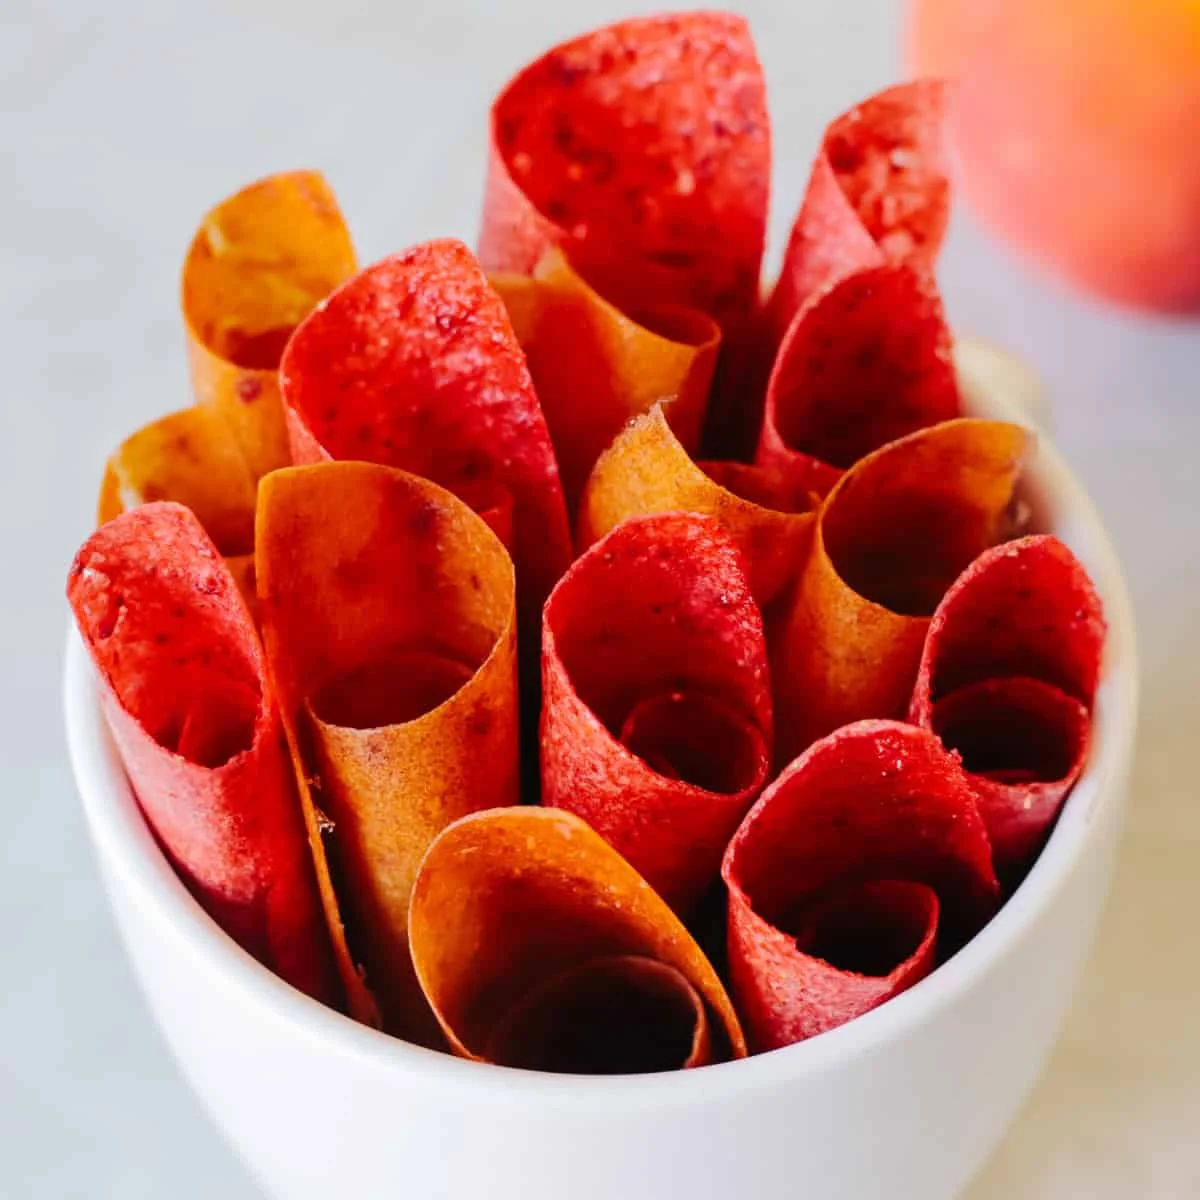
    Rolls of homemade strawberry fruit leather on a kitchen counter

    Why I keep coming back to this recipe

    Only two main ingredients. Fresh fruit and applesauce, with a squeeze of lemon if you want to keep lighter fruits from browning. That’s it.

    It’s a great way to rescue ripe fruit before it turns on you. A batch keeps for weeks once it’s dry, so nothing ends up in the compost bin. Most fruit is sweet enough on its own, but you can stir in a little honey or maple syrup if your batch is on the tart side.

    And it’s kid-approved, which is the real test in my house. Lunchboxes, road trips, after-school snacks. It rolls up in parchment and survives a backpack.

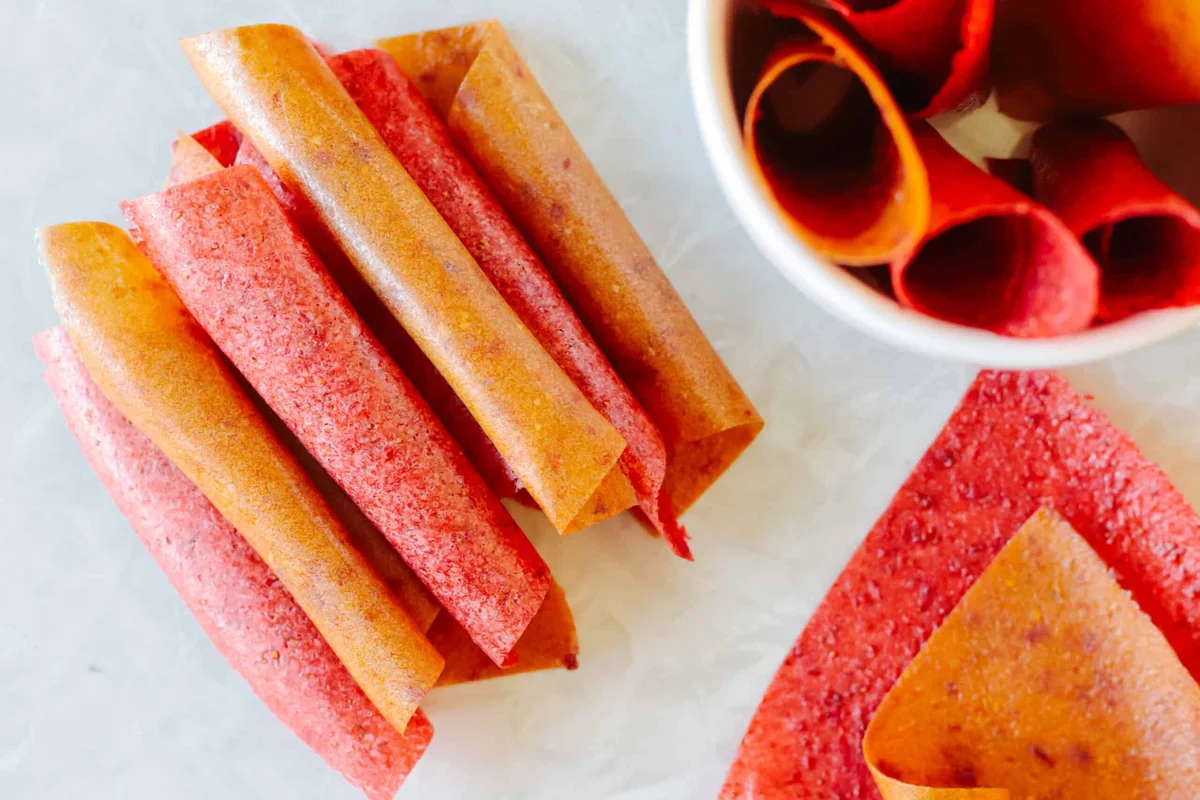
    Finished fruit leather strips rolled in parchment paper

    What fruit leather actually is

    You puree fruit into a smooth mixture, spread it into a thin layer, and let it dry slowly until it’s soft, chewy, and flexible. Think store-bought fruit roll-ups, minus the mystery ingredient list. The applesauce does the quiet work: it smooths the texture, stretches the puree, and helps a lot of fruits dry evenly without muting the fruit flavor. I use unsweetened applesauce, and I promise you’ll barely taste it. The fruit is still the star.

    I demoed this batch with strawberries, but the same method works beautifully with peaches, blueberries, raspberries, mangoes, and honestly, almost anything that rips in your kitchen. I don’t peel peaches for this. I just chop them up small, skin and all.

    Dehydrator or oven: pick your lane

    I make it in my dehydrator because the texture comes out better and my oven isn’t tied up for hours. If you own a dehydrator, use it. Mine came with fruit leather mats, and I ended up ordering an extra set so I could run two trays at once.

    No dehydrator? Your oven is a perfectly good alternative. Lowest temperature, slow and patient, until it’s no longer sticky. Both methods are below, so you can use whichever kitchen you have.

    What you need

    Fruit leather is as flexible as your fruit basket. Almost any ripe fruit works. The ones I reach for:

    • Strawberries
    • Blueberries
    • Raspberries
    • Blackberries
    • Peaches
    • Mangoes
    • Pineapple
    • Apricots
    • Plums

    Mixes work too. Strawberry peach is the one I make most, but blueberry peach, mixed berry, raspberry apple, and mango pineapple are all worth a batch. Frozen fruit works fine as long as you thaw it and drain it first.

    Ingredients

    • 1 pound fresh or frozen fruit, ripe and washed
    • 1 cup unsweetened applesauce
    • 1 tablespoon lemon juice (optional, keeps lighter fruits bright)

    That’s the whole list. One batch makes two dehydrator trays, or two jelly roll pans if you’re doing this in the oven.

    Blender full of fresh fruit and applesauce ready to puree

    How to make fruit leather in a dehydrator

    1. Prep the fruit. Wash it, and remove stems, pits, peels, or cores as needed. As above: peaches go in unpeeled, just chopped into small pieces.
    2. Blend the puree. Combine the fruit, applesauce, and lemon juice in a blender or food processor. Blend until completely smooth. If it looks thinner than applesauce, it will take much longer to dry. Aim for applesauce thickness, not juice.
    3. Fruit puree spread thin on a dehydrator tray
    4. Fill the trays. Lightly spray fruit leather trays or silicone liners with nonstick cooking spray. Pour in the puree and spread it into an even layer about 1/8 inch thick with an offset spatula. Leave the edges just a little thicker than the center so everything dries at the same pace.
    5. Dehydrator trays with fruit puree drying in layers
    6. Dry it. Set the dehydrator to 135 degrees F and let it run 6 to 10 hours, depending on the fruit, the humidity, and how thick you spread it. It’s done when it peels easily from the tray and isn’t sticky to the touch.
    7. Cool and cut. Let it cool completely, peel it off, and cut it into strips with kitchen scissors or a pizza cutter. Roll each strip in parchment paper and you’re set.

    How to make fruit leather in the oven

    Same puree, different drying station.

    1. Preheat the oven to its lowest setting, ideally 170 degrees F or lower.
    2. Line a rimmed baking sheet with parchment paper or a silicone baking mat.
    3. Spread the puree into an even 1/8-inch layer, edges slightly thicker than the center.
    4. Fruit puree spread on a parchment-lined baking sheet in the oven
    5. Bake 4 to 8 hours, checking every so often. Rotate the pan if your oven has hot spots.
    6. It’s ready when it peels easily from the parchment and feels dry but still flexible. Cool completely, then cut into strips.

    Tips from the counter

    • Use ripe fruit. It’s the difference between snack food and a science project.
    • Blend until perfectly smooth. The texture of the finished leather comes straight from the blender.
    • Don’t thin the puree down. Juicy fruit plus a thin puree means a lot more drying time.
    • Spread it evenly, edges a touch thicker. That’s what keeps the whole sheet dry at the same time.
    • Stop before it’s too dry. Good fruit leather bends without cracking.
    • Sticky? It needs more time. Keep drying in 30-minute increments until the surface isn’t tacky.
    • Cracked? You went too far. It should be soft, flexible, and easy to roll.
    Finished fruit leather strips cut and ready to store

    Make it yours

    Once you’ve got the basic batch down, this recipe is basically a blank slate. Strawberry peach is my favorite. Peach apricot is close behind. Apple cinnamon in the fall is the move. If your fruit is extra tart, stir in a tablespoon or two of honey or maple syrup before it goes in. And don’t be precious about combinations: whatever is getting soft in your crisper drawer is your fruit leather, and it’s going to taste like the fruit it was made from.

    Frequently asked questions

    Can I make fruit leather without a dehydrator? Yes. Spread the puree on a parchment-lined baking sheet and dry it in your oven on the lowest setting until it’s no longer sticky but still flexible.

    Is a dehydrator better than an oven? For texture, yes. It dries fruit more evenly at a lower temperature. The oven is still a great option if you don’t own one.

    Why isn’t my fruit leather drying? Drying time depends on the fruit, the humidity, the thickness, and your appliance. Keep drying until it peels easily and feels dry to the touch.

    Do I have to use applesauce? No, but it makes the texture smoother, adds a little sweetness, helps a lot of fruits dry more evenly, and stretches the recipe. I just don’t make it without.

    Can I mix different fruits? Absolutely. Use whatever ripe fruit you have on hand and blend combinations until you find the one you like.

    How do I store it? Once completely dry, cut it into strips and keep it in an airtight container or zip-top bag in a cool, dry place. It keeps for about 2 weeks at room temperature, 2 months in the refrigerator, or up to 6 months in the freezer.

    Recipe card

    Prep time: 10 minutes    Cook time: 8 hours    Total time: 8 hours 10 minutes
    Servings: 16    Per serving: 16 calories

    Equipment: dehydrator (or oven), blender or food processor, fruit leather trays or a rimmed baking sheet

    Ingredients: 1 pound fresh or frozen fruit, 1 cup unsweetened applesauce, 1 tablespoon lemon juice

    Method: prep and blend, spread 1/8 inch thick, dehydrate at 135 degrees F for 6 to 10 hours or bake at 170 degrees F or lower for 4 to 8 hours, cool, cut, roll. Notes: one batch makes two trays. Store airtight for about 2 weeks at room temperature, 2 months refrigerated, or up to 6 months frozen.

    Nutrition per serving (approximate): 16 calories, 4g carbs, 0.2g protein, 0.1g fat, 1g fiber, 3g sugar.

    Happy cooking, Maya.

    Keep Reading

  • Burrata Salad

    Burrata Salad

    There’s a specific moment every summer when the first real tomatoes hit the market and I can’t keep my hands off them. That’s when this burrata salad started living in our kitchen. I made it the first time in late spring, when the season’s first tomatoes landed on my counter. I can’t count how many times I’ve made it since.

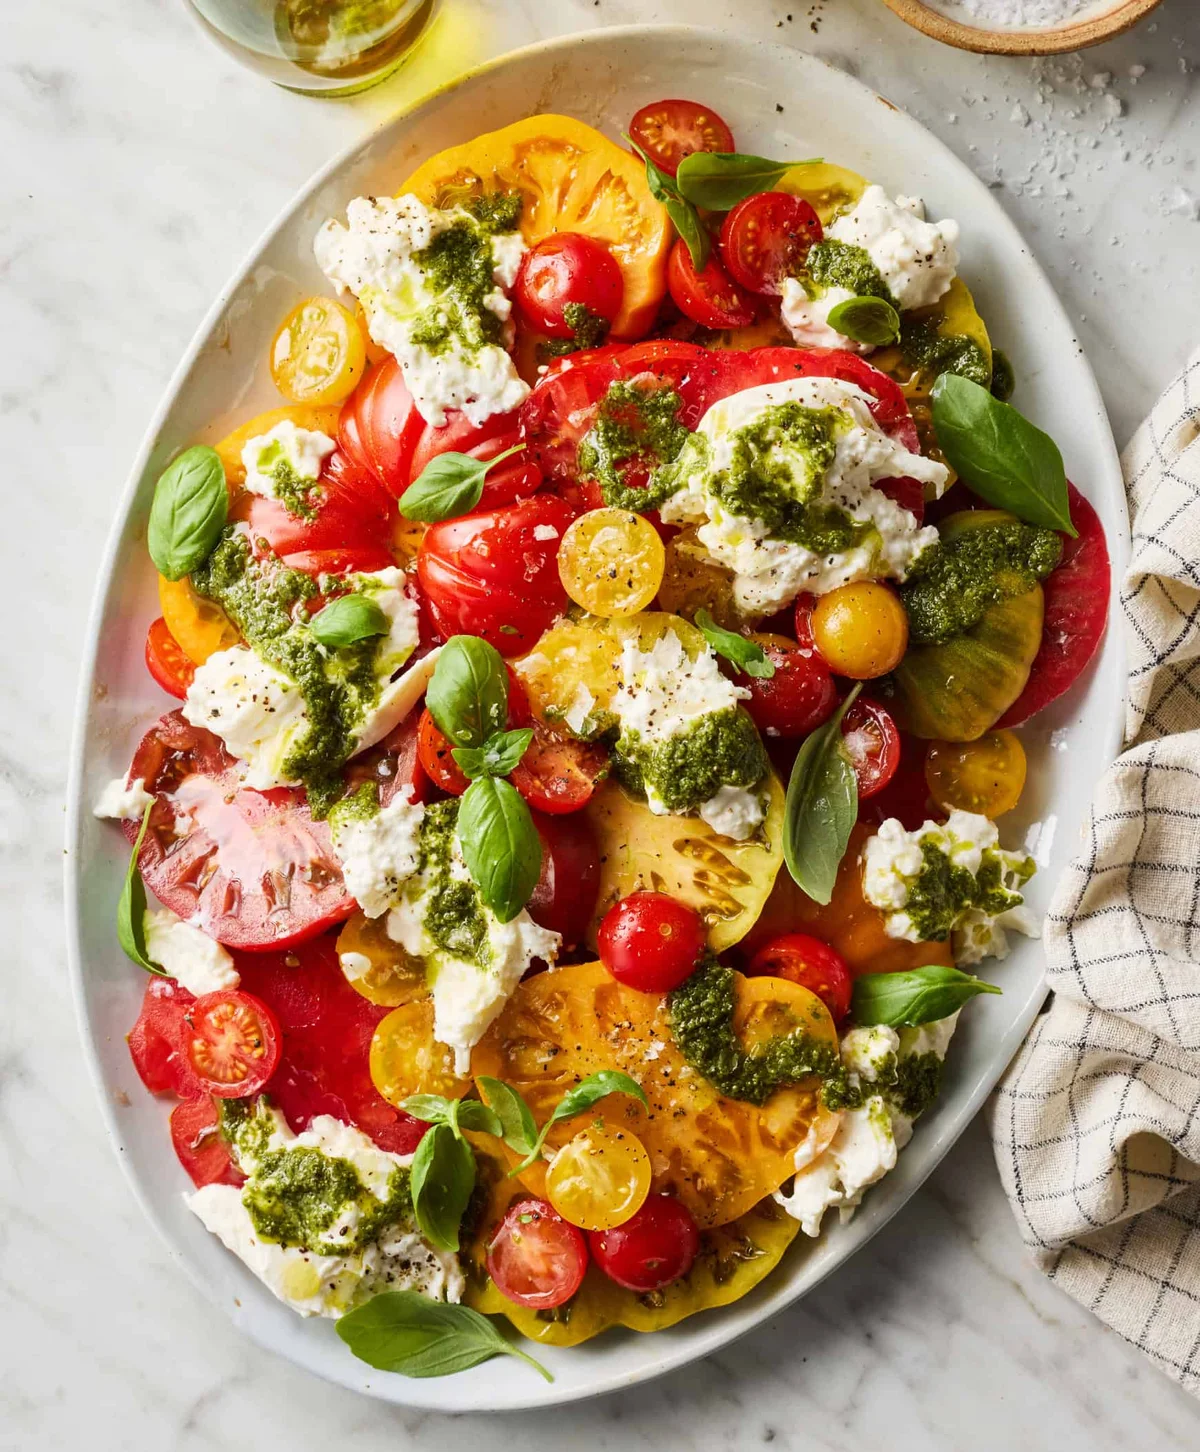
    Platter of sliced heirloom tomatoes, burrata, pesto, and basil

    It’s a Caprese salad that grew up: creamy burrata instead of mozzarella, a pesto drizzle for extra basil, cherry tomatoes tossed in balsamic. Real time: 15 minutes. Hands-on: 10. It’s the ultimate side for a big summer pasta or whatever’s coming off the grill.

    Before you grab the cheese, here’s what burrata actually is: a fresh Italian cheese made with cow’s or buffalo milk. Outside, it looks like a ball of mozzarella. Cut into it and the milky center oozes out. That creamy middle is basically dressing the salad as you eat it.

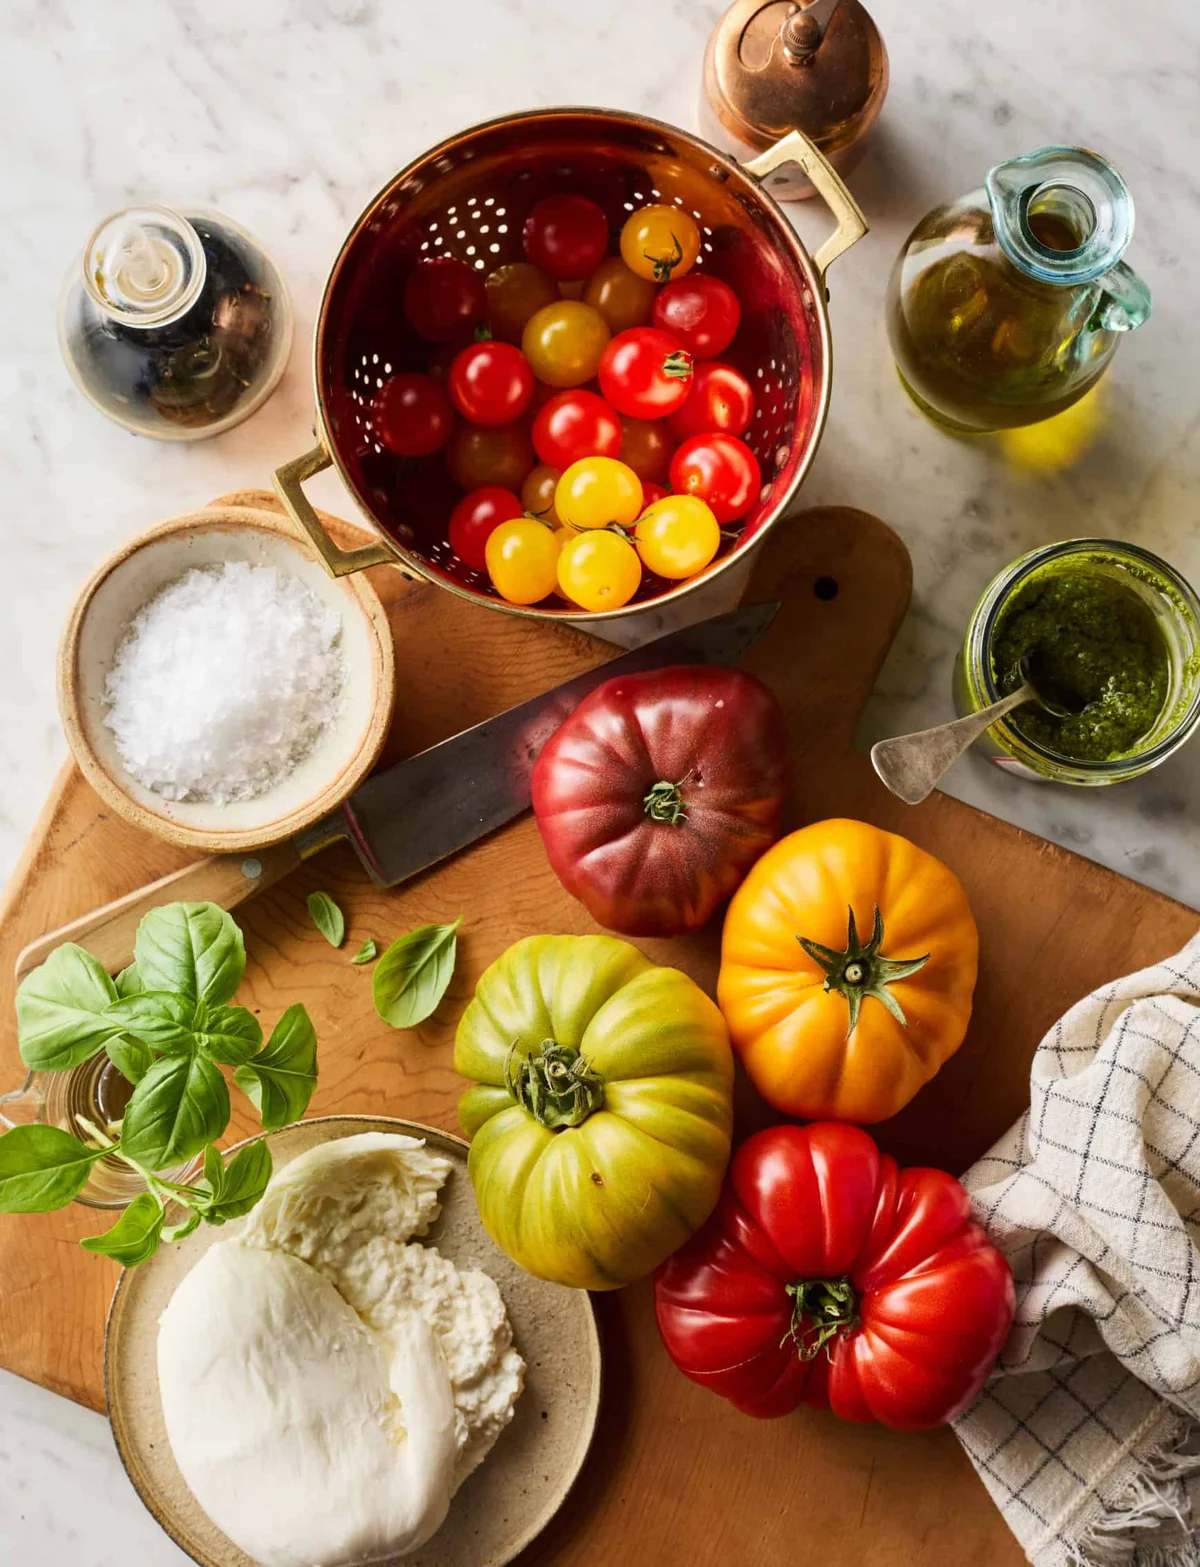
    Fresh burrata, heirloom tomatoes, basil, and pesto on a counter

    What you’ll need

    • Fresh burrata — in the cheese section, packed in water to keep the pouch intact, near the fresh mozzarella. 8 ounces.
    • Heirloom tomatoes (4) and cherry tomatoes (2 cups, halved) — I like mixing colors. The crisp, juicy cherry tomatoes against the tender heirlooms is what makes this work.
    • Balsamic vinegar (1 teaspoon) — tossed with the cherry tomatoes for sweet-tangy flavor. No need for fancy balsamic glaze; a basic vinegar does fine.
    • Extra-virgin olive oil — for drizzling, for the fruity richness.
    • Basil pesto (⅓ cup) — store-bought is perfectly fine.
    • Fresh basil or mint — whichever you have more of. A mix is great too.
    • Flaky sea salt and black pepper — the salt adds a delicate crunch that plays off all that juiciness.

    How to make it

    1. Slice the heirlooms thick. Use a serrated knife with a sawing motion — it keeps you from squishing the tomatoes and spilling their juices.
    2. Halve the cherry tomatoes and toss them in a medium bowl with the olive oil, balsamic vinegar, and pinches of salt and pepper.
    3. Arrange the heirloom slices on a large platter and scatter the cherry tomatoes over the top.
    4. Tear the burrata into pieces and arrange them over the tomatoes. Sprinkle with flaky salt and a few grinds of pepper.
    5. Dollop the pesto on top, drizzle with more olive oil, and finish with the fresh basil. Taste, adjust, serve.
    Finished tomato burrata salad with pesto and fresh basil

    This salad is best right out of the bowl. If you need to get ahead, assemble it up to an hour in advance and keep it in the fridge — just hold the fresh basil until right before you serve.

    Nutrition (per serving, ¼ of the recipe): 289 calories, 26g fat, 10g carbs, 12g protein.

    Make it yours

    If I have in-season peaches on hand, this is my favorite twist: swap one heirloom tomato for a large ripe peach, sliced. It adds unexpected sweetness and a firmer bite to the plate. So good.

    Happy cooking, Maya
    Keep Reading

  • Tofu Bánh Mì

    Tofu Bánh Mì

    My husband came home from a late shift with one sentence: “Get me a bánh mì.” I had no bread, no pâté, no plan. There was, however, a block of tofu, a baguette I’d bought on a dare, and a jar of pickled carrots I’d never opened. That sandwich was the beginning of this recipe, and it is the first thing I make when someone asks for “something Vietnamese that isn’t chicken.”

    Loaded tofu bánh mì with pickled carrots, cucumber, cilantro, and Sriracha mayo

    Here’s the honest version: pan-fried tofu in a garlicky, slightly sweet glaze, quick-pickled carrots and daikon, cucumber, jalapeño, cilantro, and a Sriracha mayo that takes two minutes. Every bite has something going on — crunchy, tangy, spicy, soft. You won’t miss the meat, and if you’re not vegetarian, you’ll make it anyway, because the baguette is doing all the heavy lifting.

    Real time: 1 hour 30 minutes. Hands-on: about 30 minutes. The rest is the pickles sitting in their juice, which you can start up to 3 days ahead.

    What Is Bánh Mì, Really?

    Bánh mì (bahn-mee) is a Vietnamese sandwich built on a light, airy baguette with a crisp crust — bread France left behind, turned into something entirely its own. Classic fillings are savory meat, pâté, pickled vegetables, fresh herbs, and chili. The result is crunchy, rich, and tangy all at once. This version swaps in tofu and keeps everything else that makes the sandwich work.

    The Tofu Trick (Why This Doesn’t Burn)

    Most tofu banh mi recipes marinate the tofu first, then pan-fry it. The marinade hits a hot pan and burns, leaving black bits stuck to your cookware while the actual flavor ends up on the pan instead of the tofu. I learned this the hard way.

    My version: a light dust of cornstarch, a quick pan-fry, then a toss in a savory garlic sauce with fish sauce, soy sauce, and lime zest. The cornstarch gives the tofu a crust for the sauce to grab onto, and it thickens the sauce into a glaze as it reduces. No burning, no lost flavor, no scrubbing.

    Ingredients

    Carrot and daikon pickles

    • 2 medium carrots, julienned (about 1½ cup, once cut)
    • 1½ cup daikon radish, julienned
    • 2 tablespoons sugar
    • 3 tablespoons rice vinegar
    • 2 teaspoons sesame oil
    • ½ teaspoon salt

    Glazed tofu

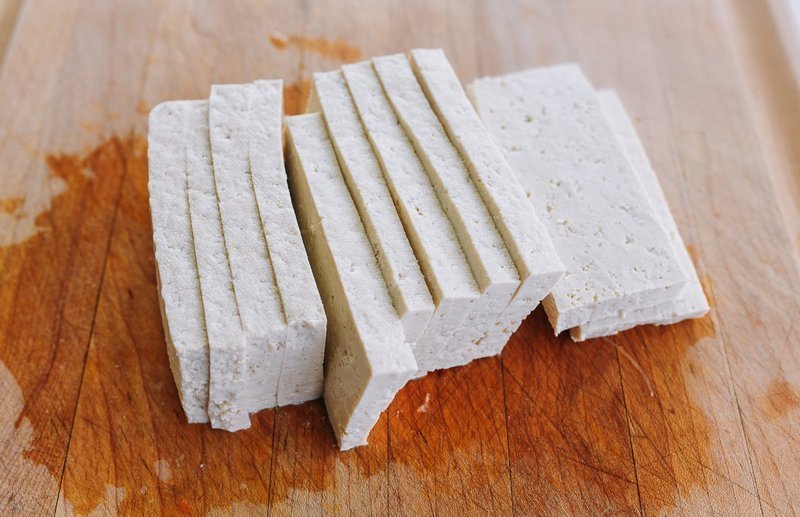
    • 1 pound firm or extra-firm tofu, sliced into ¼-inch (6mm) rectangles — firm holds its shape in the sandwich; soft works but gives a much softer, custard-like bite
    • 3 tablespoons neutral oil (vegetable, canola, or avocado)
    • ¼ cup cornstarch
    • 1 teaspoon sesame oil
    • 3 cloves garlic, chopped
    • 3 tablespoons water
    • 1 tablespoon sugar
    • 1½ tablespoons vegetarian fish sauce (a mushroom-based stand-in you can find in the international aisle; use regular fish sauce if pescatarian)
    • 2 teaspoons light soy sauce
    • Zest of 1 lime

    Assembly

    • ¼ cup mayonnaise
    • 2 teaspoons Sriracha
    • 1 tablespoon lime juice
    • 2 baguettes
    • 1 cucumber, thinly sliced on an angle
    • 1 jalapeño, deseeded and thinly sliced
    • 1 cup cilantro

    Yields: 4 sandwiches

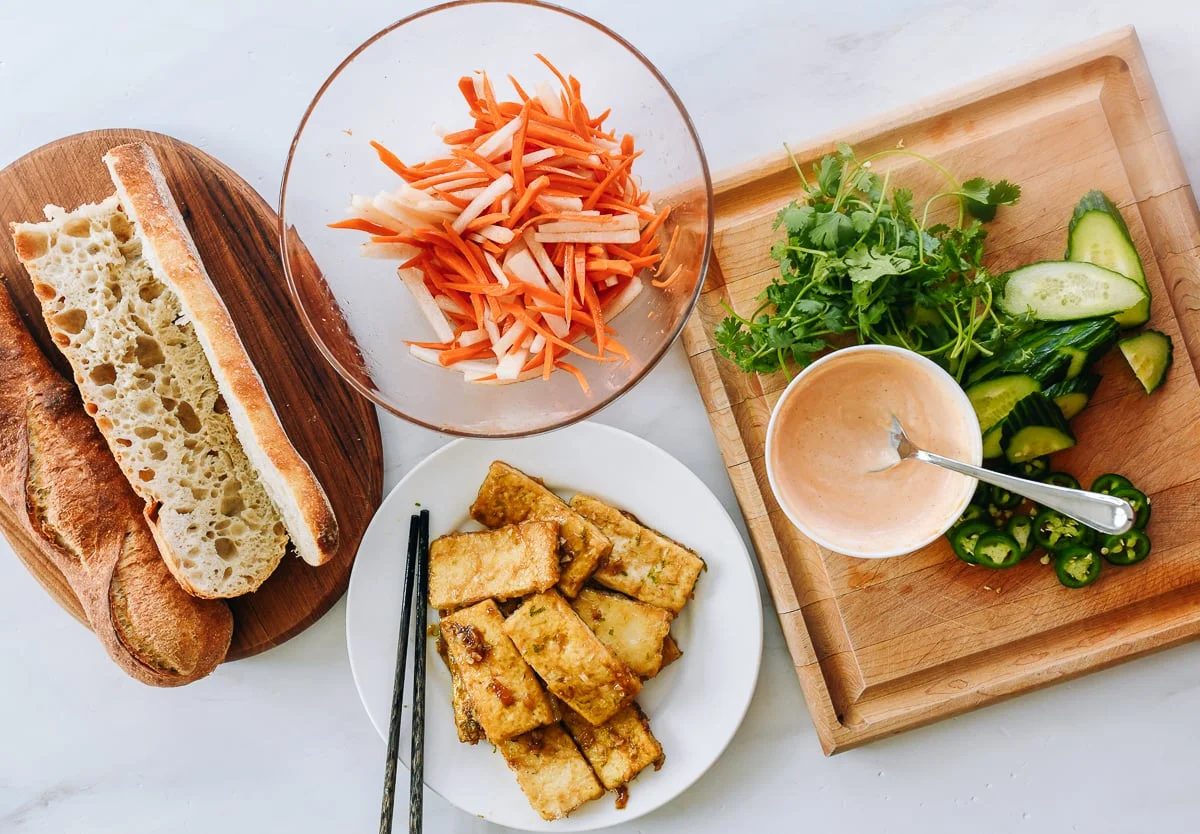
    All the bánh mì components laid out ready for assembly

    How to Make It

    1. Pickle the vegetables. Toss the julienned carrots and daikon with the sugar, rice vinegar, sesame oil, and salt in a large bowl. Let sit 1 hour, stirring occasionally. This is the longest part of the recipe, and it’s entirely hands-off. (You can make this, plus the Sriracha mayo, up to 3 days ahead and store in airtight containers in the fridge.)
    2. Set up for the tofu. Heat a large non-stick pan over medium-high heat and add the neutral oil. Put the cornstarch in a shallow dish.
    3. Pickled carrots and daikon tossing in a large bowl
    4. Coat and fry. Quickly dust the tofu slices in cornstarch, shaking off the excess, and lay them in the hot oil, working in batches. Fry until crisp and golden on both sides, about 4–5 minutes per side.
    5. Get them out. Move the tofu to a plate the moment it’s done — sitting in the pan, it will keep absorbing oil off the heat.
    6. Tofu slices being coated in cornstarch before frying
    7. Make the glaze in the same pan. Drop the heat to medium. Add the sesame oil and garlic and cook 1 minute. Add the water, sugar, fish sauce, and light soy sauce and bring to a simmer. Raise the heat to medium-high, add the tofu and lime zest, and toss for 1–2 minutes until the sauce reduces and clings to the tofu.
    8. Tofu slices pan-frying until golden and crisp in oil
    9. Warm the baguettes. While the glaze is going, preheat the oven to 400°F (200°C). Set the baguettes directly on the rack and heat 6–8 minutes, until warm and crisp.
    10. Make the Sriracha mayo. Whisk together the mayonnaise, Sriracha, and lime juice. It’s two minutes of work and worth it.
    11. Assemble. Cut the baguettes in half crosswise and open them. Spread the Sriracha mayo on both sides, then pile in the pickled carrots and daikon, the glazed tofu, cucumber, jalapeño, and a generous handful of cilantro. Close, cut if you like, and serve immediately — the bread is only crisp for so long.

    A Few Notes From My Counter

    • Make-ahead: The pickles and the Sriracha mayo keep up to 3 days in airtight containers. Everything else, make fresh the night you eat. Assemble right before serving so the baguette stays crisp.
    • Daikon is a big white radish — look for it in the produce section or the international aisle. If you can’t find it, the pickles still work with just the carrots, or with extra carrots and a little extra vinegar.
    • Vegetarian fish sauce is mushroom-based and reads the same as regular in this glaze; it’s usually in the international aisle. Not fussy? Regular fish sauce is fine.

    Make It a Party

    This recipe practically begs for a spread. I’ve been meaning to run a bánh mì bar — tofu as the vegetarian option, plus a few other fillings on the side. Make a big batch of the pickles and the Sriracha mayo, lay out the cilantro, cucumber, jalapeños, and baguettes, and let everyone build their own. Add drinks and you have a dinner party that costs almost nothing and makes the kitchen feel alive.

    Make It Yours

    Swap the jalapeño for Thai chilies if you want heat without the grassy bite. Add a spoon of pâté (if you’re not strictly vegetarian) under the tofu — the original sandwich does, and it’s good. Want it extra crunchy? Thin-slice some extra cucumber. The structure is sturdy; the fillings are where you make it yours.

    Happy cooking,
    Maya

    Keep Reading

  • Homemade Cinnamon Honey Butter: 5 Minutes, 3 Ingredients

    Homemade Cinnamon Honey Butter: 5 Minutes, 3 Ingredients

    My husband held up a piece of toast and asked, very casually, if I had tried the cinnamon butter again. It was a Saturday morning, pancakes waiting on the counter, and that question meant I had already made it three times that summer. I was about to make it a fourth, and this time it worked.

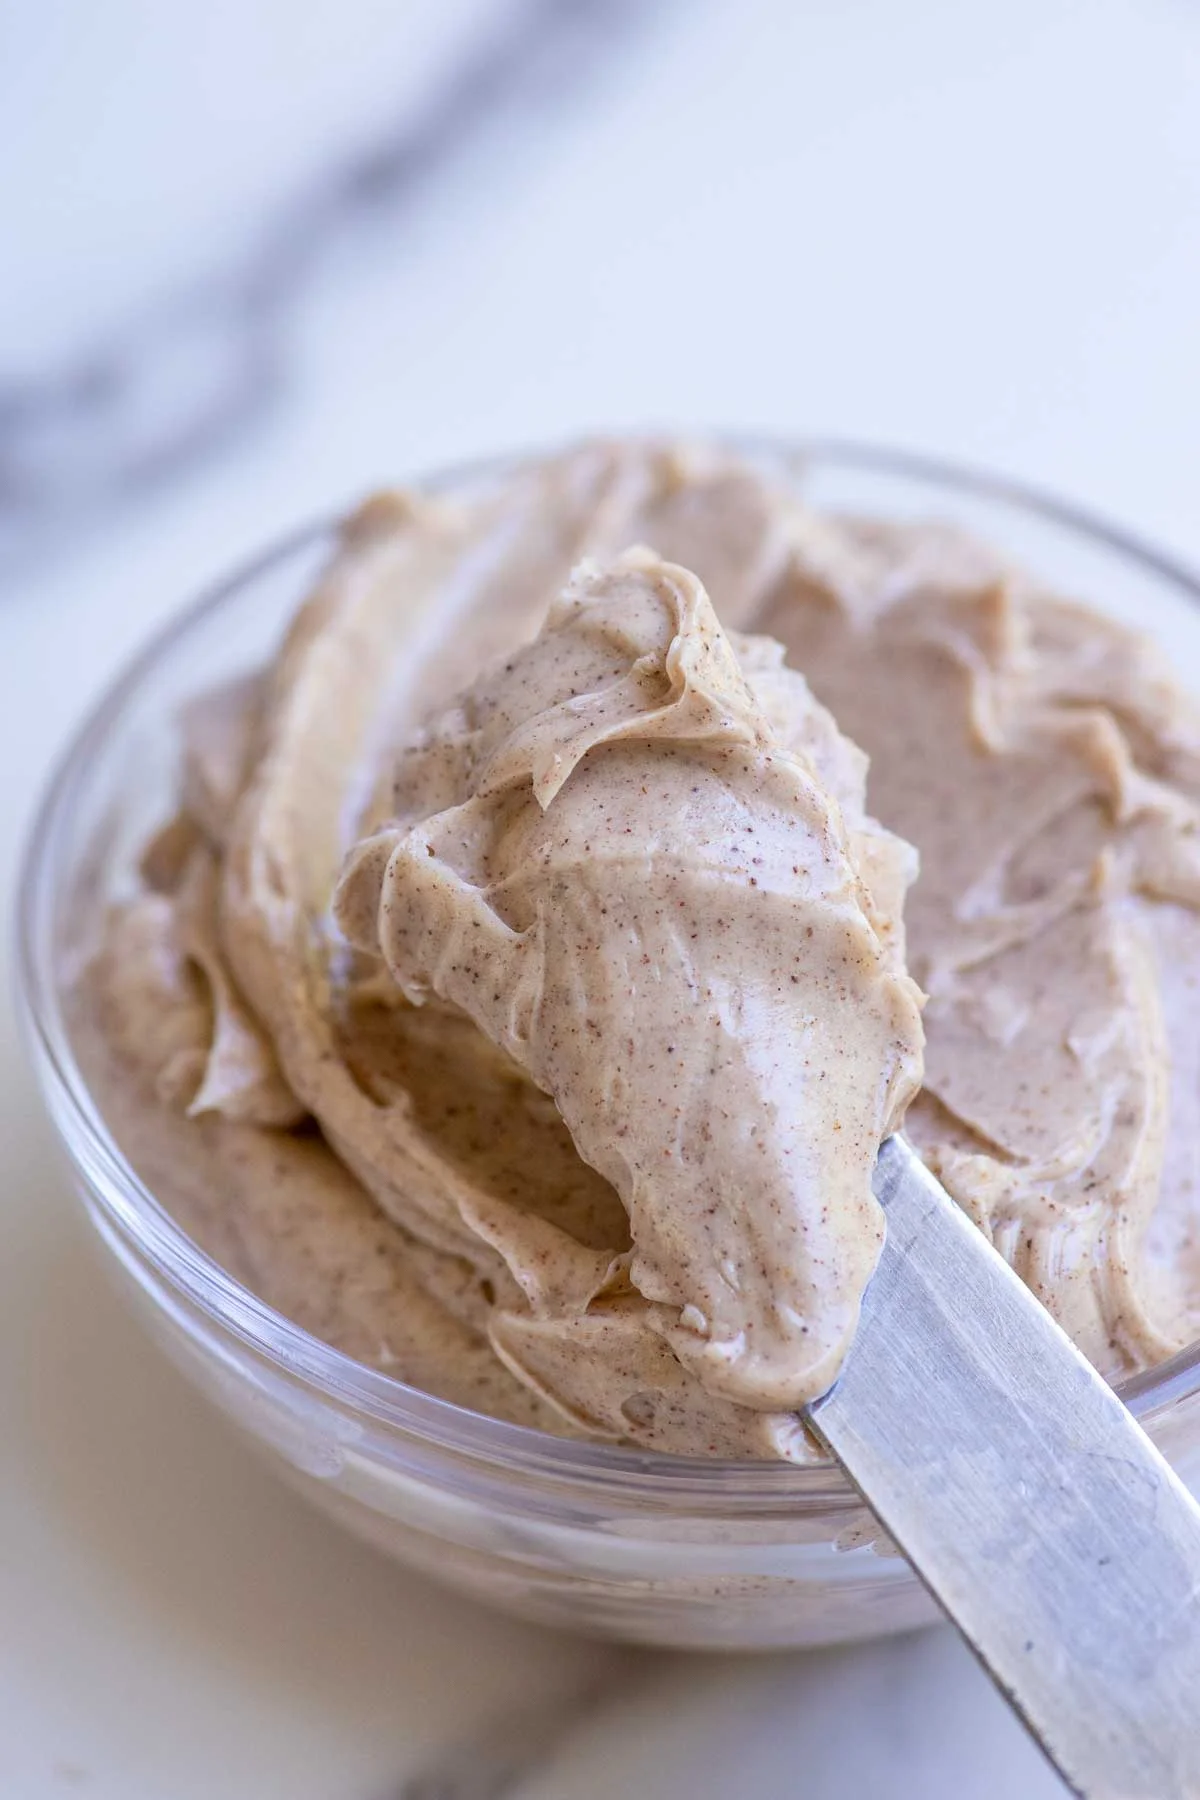
    Whipped cinnamon honey butter scooped from a glass bowl

    The honest version: I made this flopping, grainy mess three times before it turned into a fluffy, honey-sweet spread that disappeared in one day. The difference wasn’t technique, it was that I finally let the butter soften on the counter instead of throwing it in the microwave. Now this is the first thing I make when fresh bread comes out of the oven.

    It’s the kind of thing that makes homemade food feel a little extra special. Five minutes, three pantry staples, and it tastes like the cinnamon butter they serve at those chain steakhouses (the Texas Roadhouse one, if you’ve had it). Sweet, creamy, perfectly spiced — and it stores for weeks, so you can scoop some onto pancakes, biscuits, or roasted sweet potatoes without thinking about it twice.

    What you get, and what it really takes

    Real time: 5 minutes. Hands-on: the same 5 minutes, because it’s basically beating butter. No stand mixer required, though it helps if you want it extra fluffy.

    • Less than 5 minutes from bowl to table
    • 3 ingredients you already have in the pantry
    • Great for brunches, holidays, and lazy weekday mornings
    • Makes ahead and freezes easily

    Ingredients

    Butter, honey, and cinnamon laid out on marble
    • 1/2 cup butter, softened (salted or unsalted both work — just adjust the pinch of salt below)
    • 3 tablespoons honey
    • 1 teaspoon ground cinnamon
    • A pinch of salt, only if you used unsalted butter

    Local honey is ideal if you can find some, but any honey will do. The point is it should taste of breakfast, not a spice shop.

    Tools

    • A mixing bowl
    • Hand mixer, stand mixer, or a sturdy fork and a plan to earn arm day
    • Rubber spatula
    • A small bowl or airtight container for serving and storage

    How to make it

    1. Butter and honey beat together in a mixing bowl
      Put the butter and honey in a bowl. Beat with a hand mixer for 2 to 3 minutes until light and fluffy. If you want it especially airy, give it an extra minute — the air is what makes the texture feel luxurious.
    2. Cinnamon blended into the fluffy honey butter
      Add the cinnamon and beat until it’s evenly incorporated. You should see little specks through the whole mixture, not clumps in one spot.
    3. Taste it. Add a little more honey or cinnamon if your household leans sweet or spicy, then transfer to a serving bowl or airtight container.
    4. Serve right away, or refrigerate until you need it.

    Tips that actually matter

    • Softened means softened. If you have to watch the clock next time, take the butter out as soon as you remember — it should dent easily under a finger.
    • If it comes out stiff from the fridge, let it sit at room temperature for at least 10 minutes before you try to spread it.
    • Hosting? Double the recipe. It disappears fast, and people help themselves without asking.

    Make it yours

    • Maple: Swap some of the honey for maple syrup.
    • Brown sugar: Stir in a tablespoon for a deeper, toffee note.
    • Pumpkin season: Use pumpkin pie spice instead of cinnamon.
    • Vanilla: Add 1/2 teaspoon of vanilla extract for a bakery feel.
    • Pecans: Fold in some finely chopped toasted pecans for crunch.

    What to serve it with

    Warm cinnamon honey butter spread on fresh toast

    Wherever the bread ends up: toast, biscuits, pancakes, waffles, muffins, cornbread, banana bread, dinner rolls — and roasted sweet potatoes, which is a move that sounds extra but is deeply correct.

    Storage

    Kept in an airtight container, it keeps for up to 2 weeks in the fridge, or up to 3 months in the freezer. A tablespoon comes in around 126 calories.

    FAQ

    Salted or unsalted butter? Either works. Salted just means you can skip the pinch.

    Can I make it ahead? Yes, and it’s actually better when you have. It saves beautifully for holidays or whenever you want a 5-minute upgrade to breakfast.

    How do I make it fluffier? Whip it longer. A few extra minutes of mixing whips in more air.

    Can I use maple instead of honey? You can, though the flavor and texture shift a bit. If you keep honey in your pantry at all, make the honey version first — the maple version is worth a separate post someday.

    Can I freeze it? Yes. Use a freezer-safe container and thaw in the fridge before serving.

    Happy cooking, Maya.

    Keep Reading

  • Smashburger Tacos

    Smashburger Tacos

    There’s a version of this I made twice before it worked. First attempt: the beef slid off the tortilla and I ended up eating a sad open-faced patty. Second: I pressed too gently and the whole thing stayed rubbery. By the third round I stopped fighting it — one firm press, two to three minutes of patience, and suddenly I had a burger and a taco in the same hand. My husband took one bite and asked if I’d been cooking in a restaurant the whole time. (I have. The tacos still surprised him.)

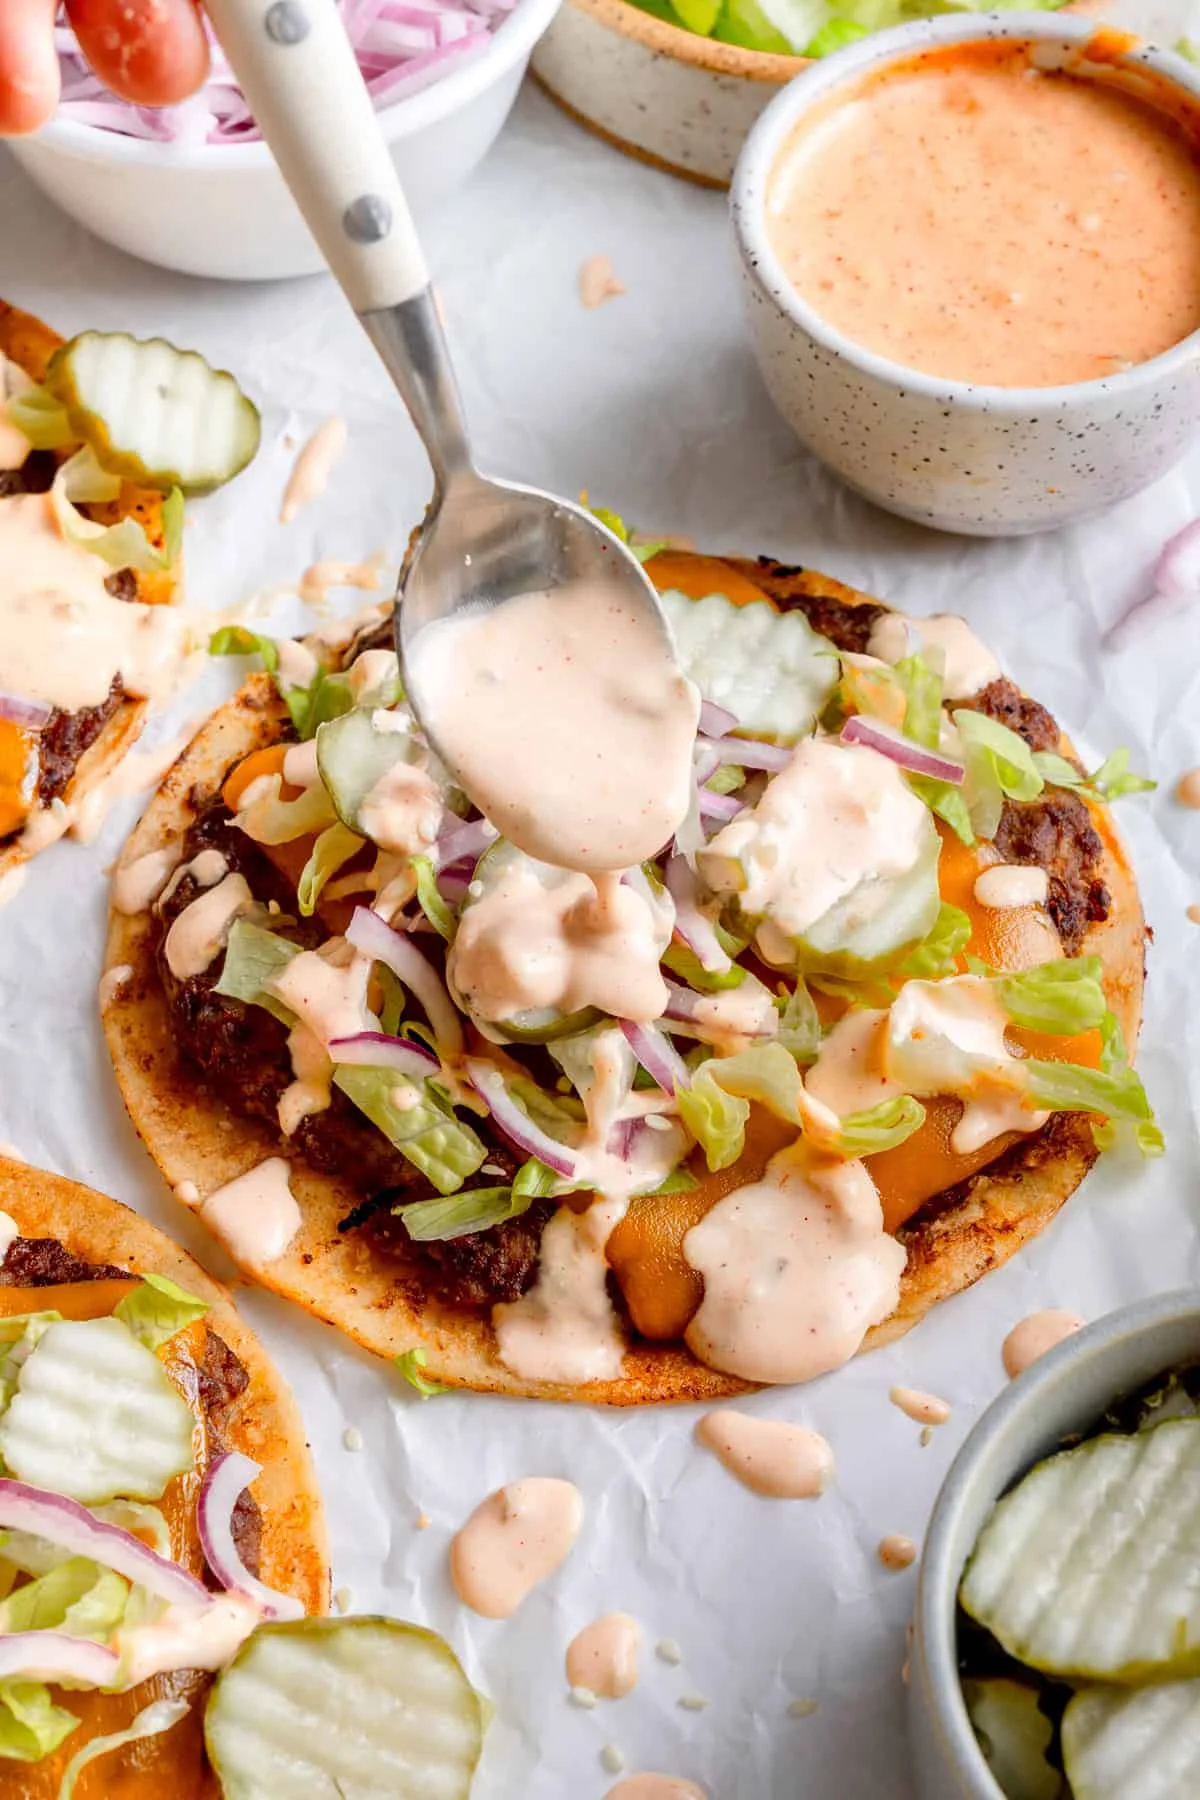
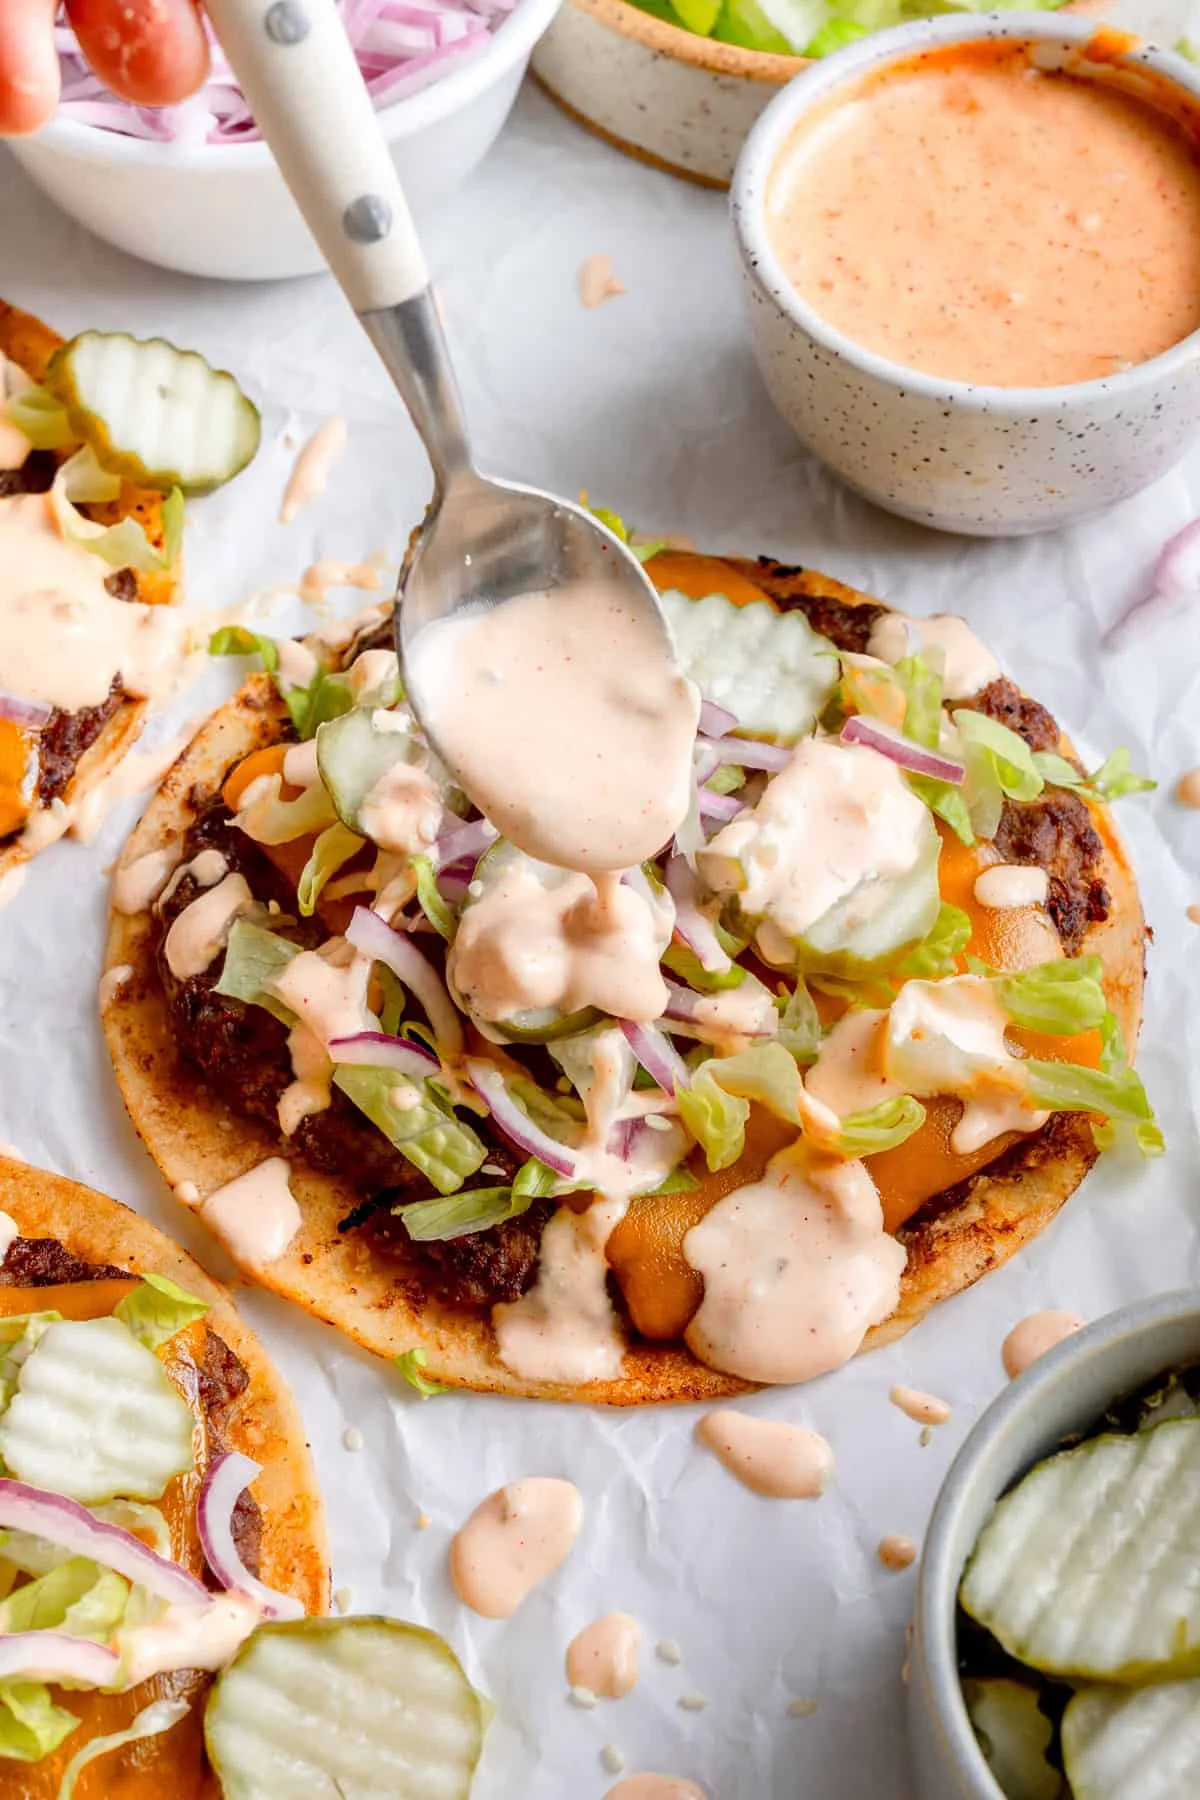
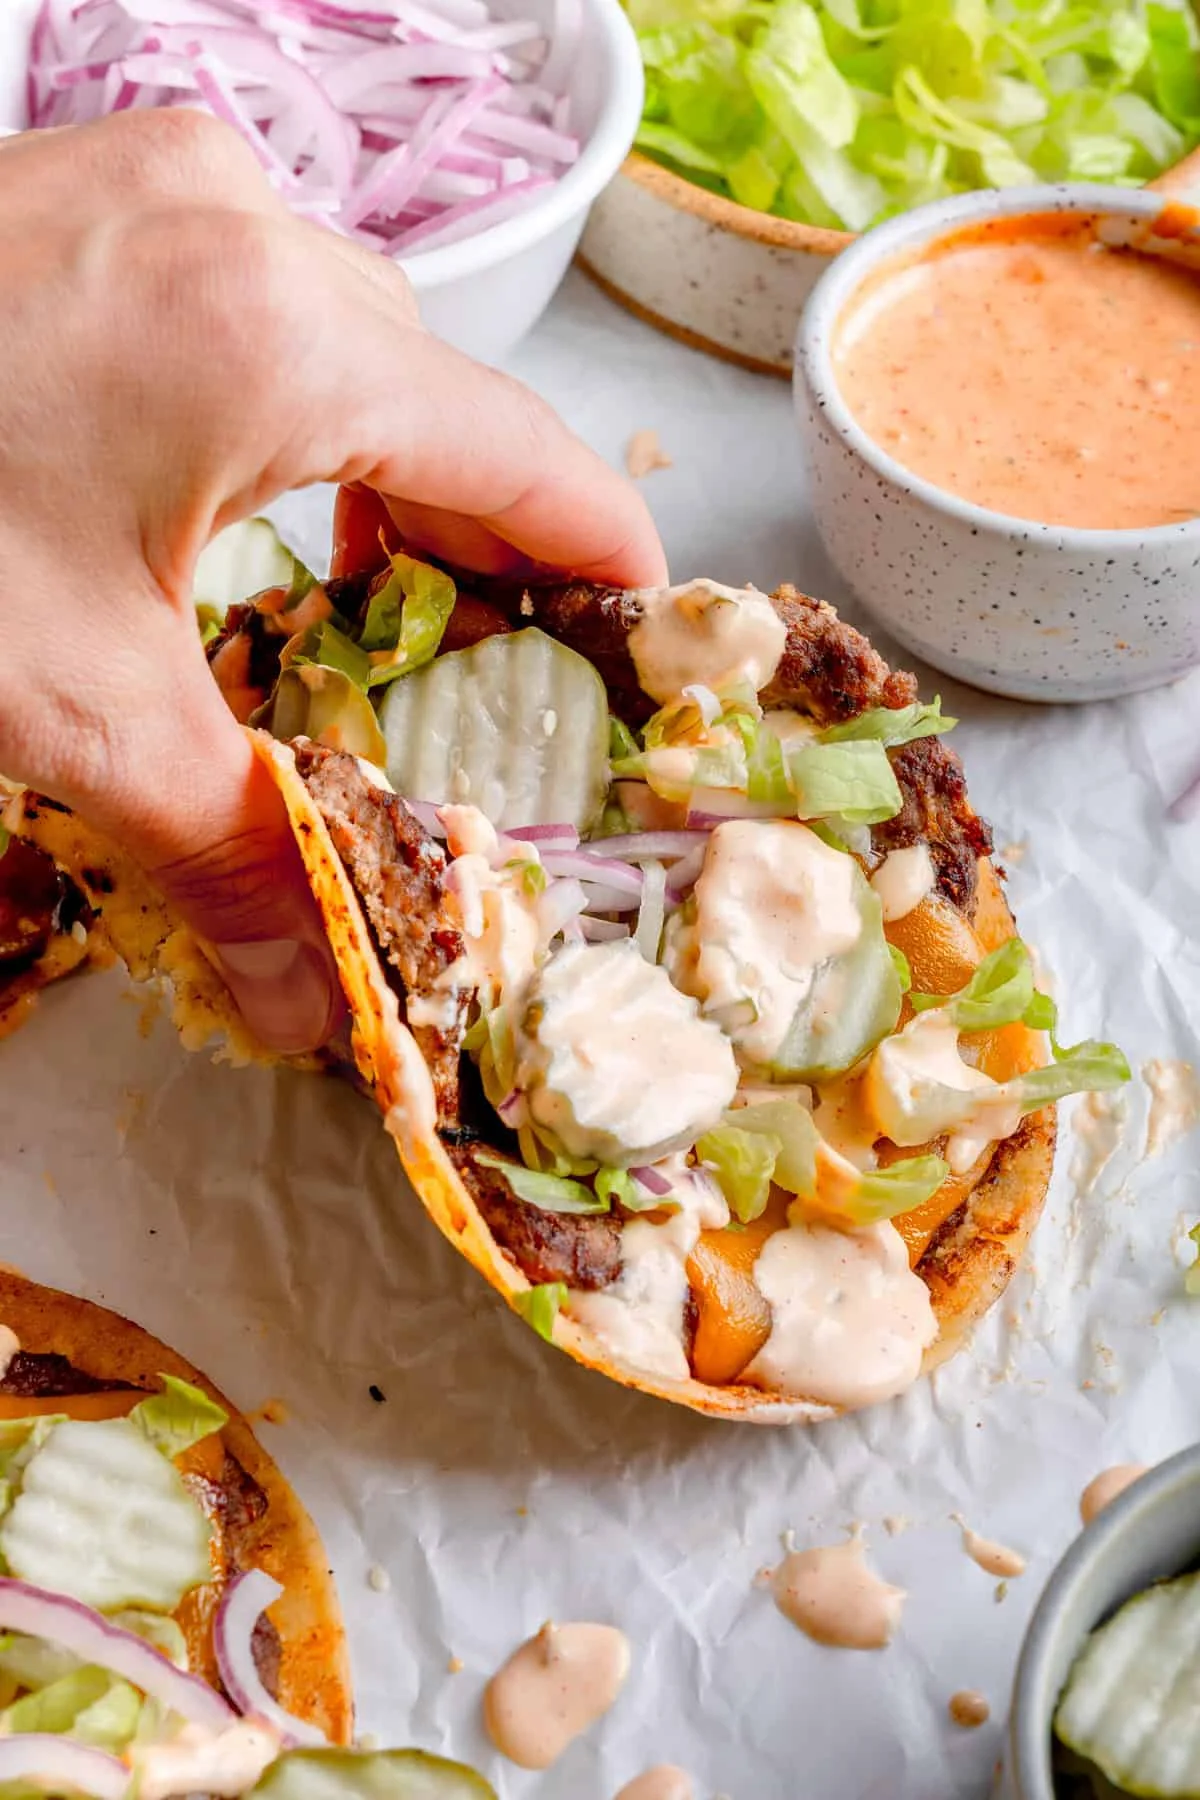
    These smashburger tacos are all the parts of a good burger — juicy seasoned beef, melted cheddar, crisp lettuce, pickles, a homemade sauce — wrapped in a corn tortilla with crispy edges. Gluten free as written, and honestly one of the easiest things I make when the week gets loud.

    Loaded smashburger tacos with melted cheese, lettuce, pickles, and sauce

    Real time: 45 minutes total (15 minutes prep, 30 minutes cooking). Hands-on: about 10. You will cook them in a few batches — each taco takes about 3-4 minutes in the pan, and it’s hands-off while they’re in there. That’s the whole trade, and it’s a fair one.

    Before we start

    • This makes 6 tacos. Want more of them, or lighter on meat? Roll the beef into 8 balls instead of 6.
    • Corn tortillas keep these gluten free. Flour works fine if you prefer, or almond flour tortillas for a grain-free or paleo version.
    • Ground turkey or ground chicken work in place of beef. Keep the seasonings and toppings the same — that’s what gives it the burger feeling.
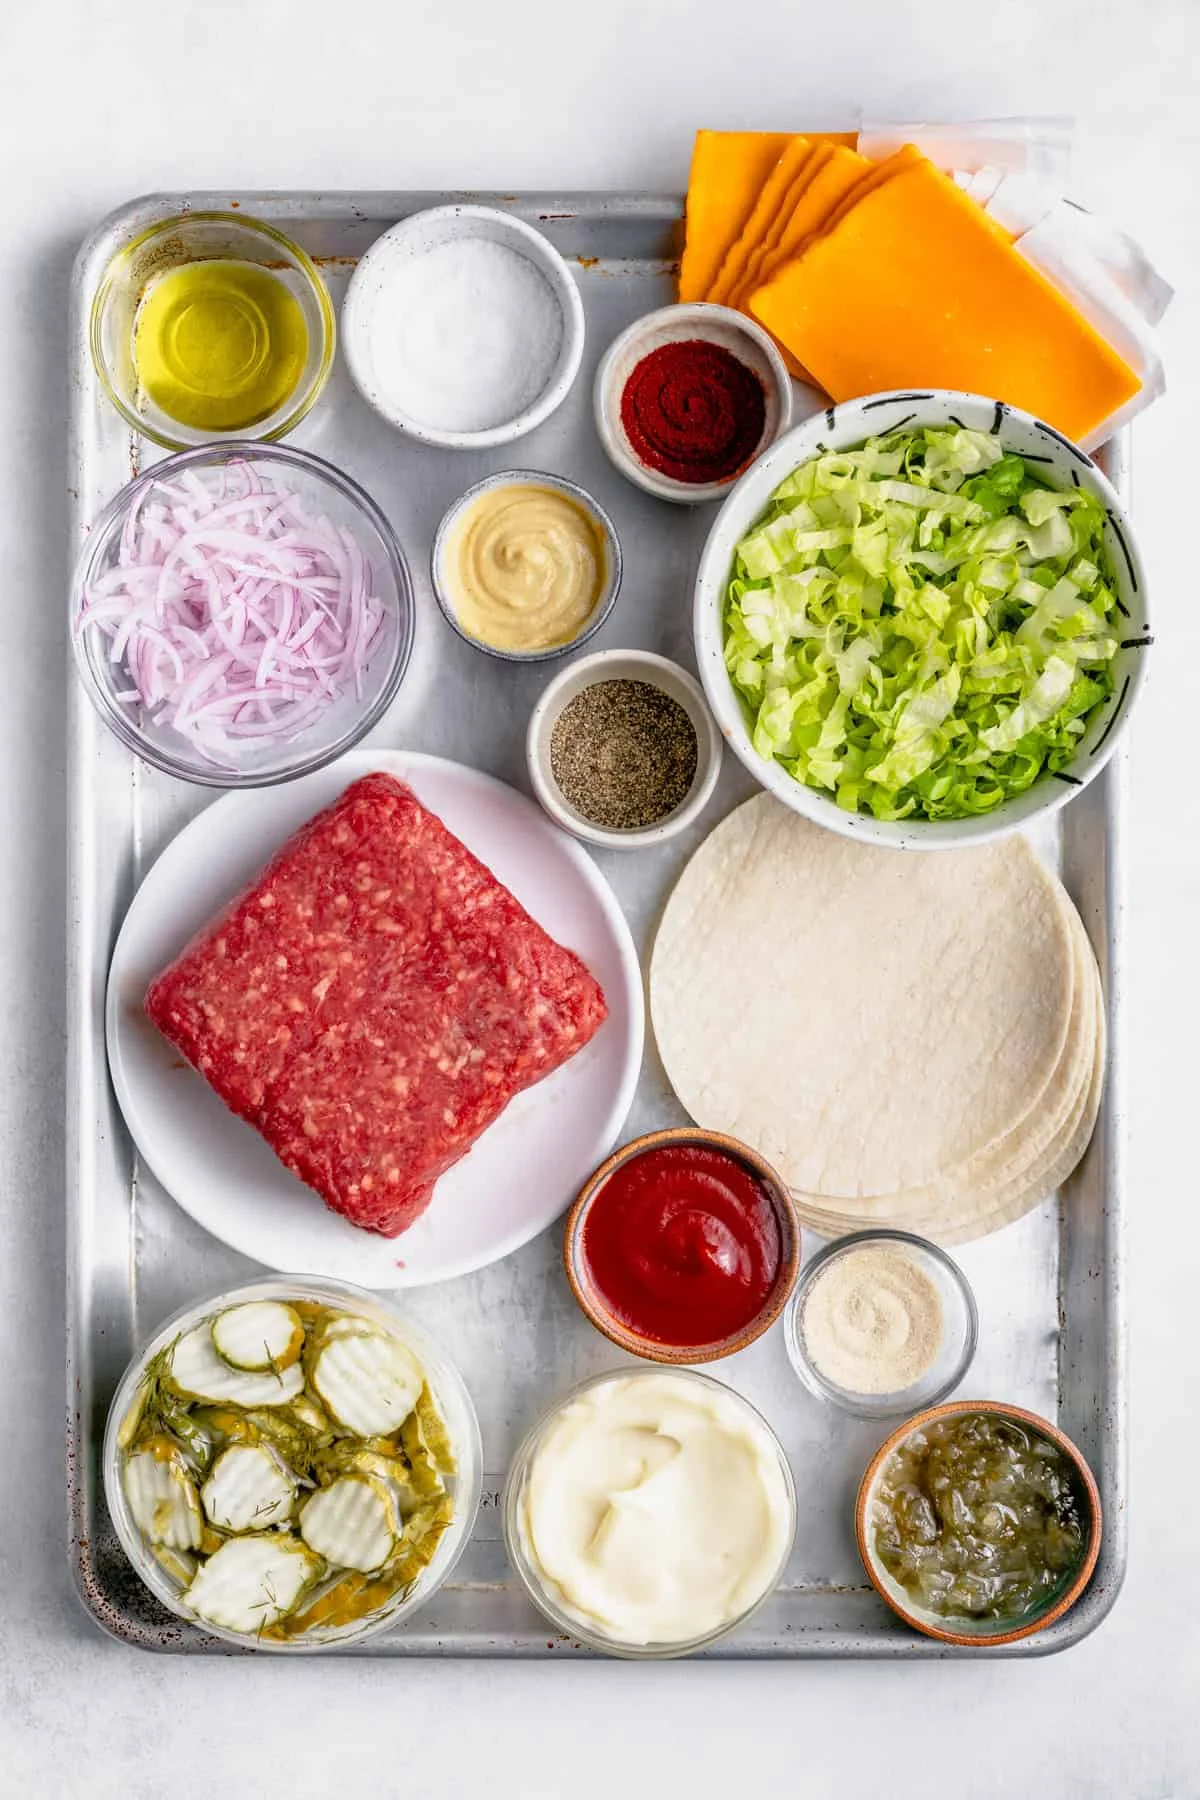
    Ground beef, tortillas, cheese, lettuce, and sauce ingredients laid out

    What you need

    • 1 pound ground beef
    • 1 teaspoon salt
    • ½ teaspoon black pepper
    • ½ teaspoon garlic powder
    • ½ teaspoon onion powder
    • 6 corn tortillas (I used white corn)
    • 1 tablespoon oil
    • 6 slices cheddar cheese
    • 2 cups shredded romaine lettuce
    • ½ red onion, thinly sliced
    • ½ cup sliced pickles
    • Burger sauce: ½ cup mayonnaise, 2 tablespoons ketchup, 2 tablespoons sweet relish, 1 tablespoon mustard, ½ teaspoon paprika, ½ teaspoon garlic powder, ½ teaspoon onion powder

    How to make smashburger tacos

    Whisk the burger sauce together and set it in the fridge — it’ll be ready by the time the last taco is off the heat.

    1. Coat the ground beef evenly with the salt, black pepper, onion powder, and garlic powder. Mix with your hands until it’s really combined, then divide into 6 balls of about 2 1/2 ounces each.
    2. Press each ball flat into a tortilla.
    3. Heat the oil in a skillet over medium-high heat.
    4. When the pan is hot, place a tortilla meat-side down and flatten it with a spatula. Cook 2-3 minutes, then flip once browned.
    5. Top with a slice of cheddar and cook until melted. Repeat with the remaining tortillas, in batches.
    6. Top with the shredded lettuce, sliced onion, pickles, and a drizzle of the burger sauce.
    Ground beef pressed flat into a corn tortilla before cooking

    The trick is the press — get it flat, get it hot, and don’t move it for the first couple of minutes. That’s where the crispy edge comes from. Then walk away. The pan does the rest.

    Hand holding a finished smashburger taco with toppings and drizzled sauce

    Storing and reheating

    These are best fresh, but they’ll keep in the fridge for up to 3 days. I reheat mine in the air fryer so the tortilla crisps back up; the oven works too — just warm them through. If you reach for the microwave, they’ll be fine, just soft.

    To freeze: cool the tacos completely, then pack them into a freezer-safe bag or container for up to 1 month. Store them without the toppings. Reheat straight from frozen in the oven at 400°F or the air fryer at 380°F until warm and crispy.

    Serving ideas

    They’re a full meal on their own. I like them with air fryer sweet potato wedges or a side caesar salad, and I almost always add fresh diced tomatoes or avocado for a bit of brightness on top.

    Make it yours

    Swap the cheddar for pepper jack or a blend. Go all-in on the toppings — extra pickles, a few jalapeño slices, a spoon of salsa. And if you’re already making beef tacos, a batch of the burger sauce is worth the two minutes it takes to whisk.

    Happy cooking, Maya
    Keep Reading

  • 30 Edible Valentine Ideas for Kids That Take No Baking

    30 Edible Valentine Ideas for Kids That Take No Baking

    The morning I decided to send my grandkids a Valentine’s Day treat, I wasn’t sure what I’d send. I just knew I wanted it to feel personal, not pulled off a store shelf. So I searched for edible Valentine ideas I could actually assemble at my own counter, and what I found kept me scrolling long past when dinner should have started.

    What follows is that whole list: thirty treats, none of them a real recipe. You’re gluing, folding, and wrapping store-bought snacks into something a kid will remember. If you’ve ever packed a lunchbox, you can do these. Real time: about 15 minutes a treat, or an evening’s worth of counter work to make a batch. Hands-on: most of it, but it’s the easy kind of busy.

    Assorted edible Valentine's Day treats for kids on a table

    A note on candy brands: this list is built around snacks that are easy to find in the US. If you’re in the UK or elsewhere, the swaps I mention in passing should point you in the right direction. And if a brand name sounds unfamiliar, don’t worry about it. The idea is the wrapper, not the specific candy.

    Start with the classics (1-6)

    Collage of edible Valentine treats with candy and paper

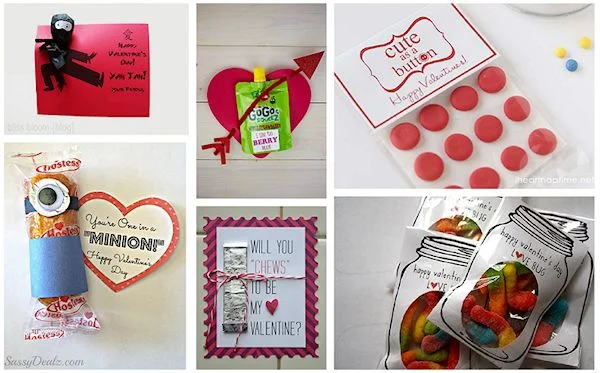
    1. Ninja-Pop Valentine. A lollipop in a paper ninja costume. Print a face, cut, attach. Done before the lollipop melts.

    2. Despicable Me Minion. A candy stick in a banana peel and goggles. The goggles are the whole personality of the project.

    3. GoGo Squeez Valentine. A squeezable fruit pouch dressed up as a heart-shaped character. (UK readers: any small fruit purée pouch will do.)

    4. Chews to Be Mine. A box of fruit chews with a hand-drawn heart on the lid. The pun does the work.

    5. Cute as a Button. A small treat tucked under a paper button and a card. Quiet, small, easy to pack for school.

    6. Mason Jar Love Bug. A printable love bug on a mason jar filled with candy. The jar becomes the keepsake, which I like.

    Playful and snacky (7-12)

    Edible Valentine snack crafts for kids to make

    7. Superhero Valentine. A snack wrapped in a paper cape and mask. Every kid in the class thinks they’re the main character.

    8. All That and a Bag of Chips. A chip bag with a sweet and a card tucked in. The phrase lands harder than you’d expect.

    9. Blow Me a Kiss. A lollipop and a paper kiss. The classic, and it still works.

    10. Bananas for You. A banana (or banana-shaped candy) with a paper stem and card. Cheap, sweet, zero waste.

    11. Smartie Pants. A paper pair of pants filled with small round candies. (UK readers: you already have Smarties. This is your home turf.)

    12. Robot Valentine. A small box with paper robot arms and antennae. The more lopsided the robot, the better the kid likes it.

    The printable-friendly batch (13-18)

    Valentine treats with printable templates and candy

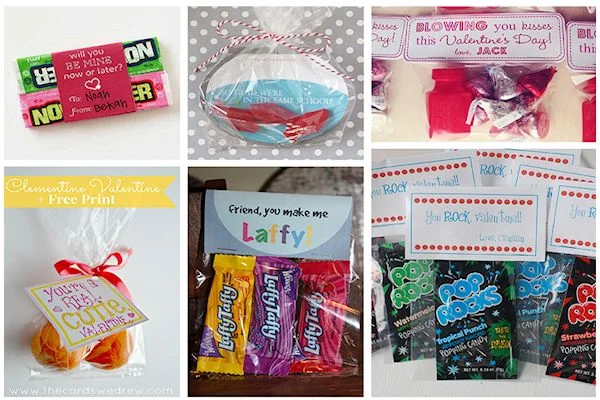
    13. Now and Later. A candy bar in a heart frame. (Swap for any chocolate bar with a wrapper you can decorate.)

    14. Clementine Valentine. A real clementine with a paper stem and face. Fresh fruit wins points in the lunchbox.

    15. Swedish Fish Valentine. A fish-shaped candy in a paper tank. (UK readers: any small gummy fish fills the same job.)

    16. Laffy Taffy Valentine. A small taffy wrapped in a paper bow. The bow is the whole craft.

    17. Blowing You Kisses. A lollipop and a paper heart with a kiss print. Sibling number nine, different paper.

    18. You Rock. A small rock-shaped candy in a paper hand. Simple enough for a six-year-old to help with.

    Hearts, hugs, and everyday snacks (19-24)

    Printable Valentine's Day craft ideas for kids

    19. Bear Hugs. A small treat in a paper bear. The bear is huggable. That’s the point.

    20. Fan-Tache-Tic. A tic-tac-style candy with a paper mustache. The mustache is where it all lives.

    21. Cereal Valentine. A small box or cup of cereal with a heart label. Breakfast gets a Valentine’s upgrade for the cost of a label.

    22. Popcorn Valentine. Popcorn in a paper heart. Salted, sweet, or both. The paper is the craft.

    23. I Dig You. A small scoop of candy with a paper shovel. The shovel is optional but the pun is not.

    24. Goldfish Cracker Valentine. Goldfish crackers in a paper heart or small bag. (UK readers: any small fish-shaped cracker will work the same way.)

    The last six (25-30)

    Sweet edible Valentine's Day treats for school

    Assorted candy Valentine treats in heart shapes

    25. Valentine Rolo Pencils. Pencils wrapped to look like chocolate rolls. (Swap any small roll-shaped chocolate if you can’t find Rolo.)

    26. Pirate Valentine Sucker. A lollipop in a paper pirate hat and eye patch. The eye patch is non-negotiable.

    27. Orange You Glad. A clementine or small orange with a paper face. The citrus peel is the hat.

    28. Love Monster Candy Box. A small box decorated like a monster, filled with candy. The monster face is the whole design.

    29. Gummy Worm Valentine. A gummy worm in a paper heart or small bag. (UK readers: any gummy worm does the job.)

    30. Edible Scrabble. Candy letters arranged to spell a short word. Keep the word short. Kids don’t have patience for anagrams.

    My take after the counter work

    I ended up not making all thirty. Nobody does. But the shortlist I actually built came down to the mason jar, the clementine, and the popcorn hearts. They use real fruit, a snack you’d buy anyway, and a printable that took ten minutes to cut. If you only have one evening, start there.

    A few things I’d do differently next time: cut the printables the night before, keep a small bag of tape and glue sticks on the counter, and don’t let a crooked fold stop you. Kids love the ones that look a little handmade and a little imperfect. That’s the whole charm.

    Make it yours: swap the candy for whatever’s in your pantry, use a real fruit when you can, and let the kid you’re making it for help with one. The making is half the treat.

    Which one are you making? Tell me in the comments, and if you know a good printable idea I’m missing, I want to see it.

    Keep Reading