作者: Maya Collins

  • 20 Thanksgiving Sides That Leave the Oven Alone

    20 Thanksgiving Sides That Leave the Oven Alone

    Eight side dishes. One oven. A turkey that’s in there for the next four hours and not budging.

    I’ve been hosting long enough to know what happens when the kitchen fills up. One year I burned a loaf of garlic bread on the grill because there was no counter, no burner, no oven — just me and a pan of bread I didn’t know what to do with. This list is for that feeling.

    Every dish below needs no oven space. Some need a microwave, some need one burner, and some need nothing more than a bowl and a spoon. Real times are listed, and nothing takes more than 15 minutes of hands-on work.
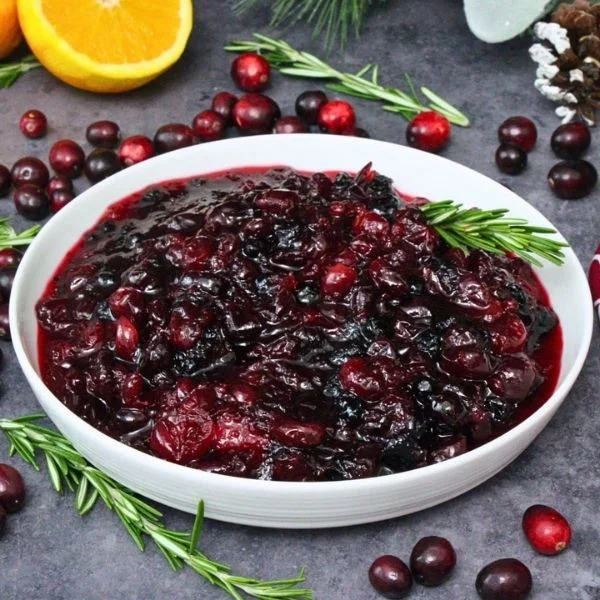
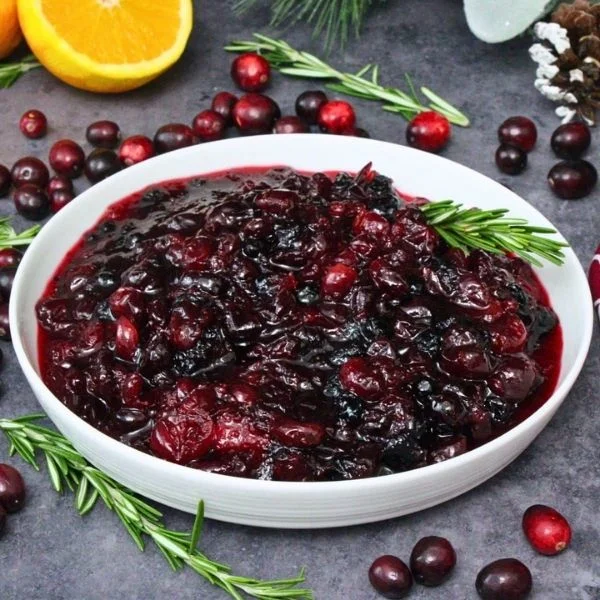
    Glossy homemade cranberry sauce in a white bowl with rosemary and scattered raw cranberries

    1. Cranberry Sauce in the Microwave

    A can of whole cranberries, half a cup of sugar, and you’re looking at about $3 total. Dump it all in a microwave-safe bowl and cook on high for 4 minutes. Stir. Cook another 4 minutes. That’s it — 8 minutes flat, no stovetop, no scorching. The berries pop and the sauce thickens as it cools, and honestly it tastes better this way than it does on the stove.

    Start it while the turkey’s resting and it’ll set up perfectly by the time you’re plating.
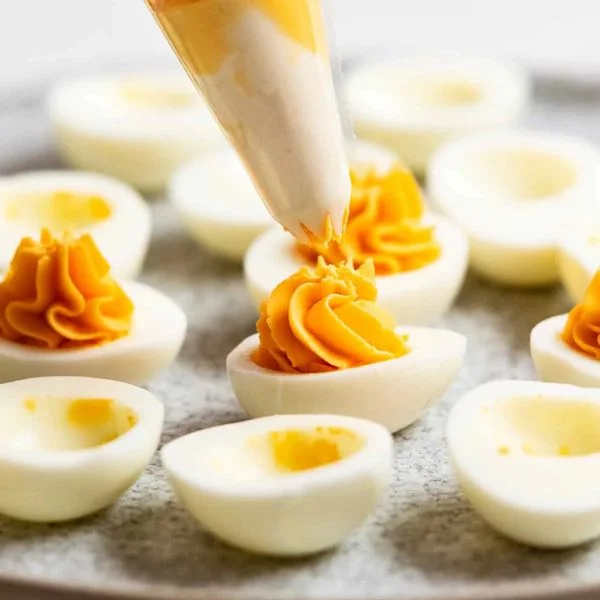
    Deviled eggs being piped with a piping bag, orange filling on a neutral surface

    2. No-Cook Deviled Eggs

    Boil a dozen eggs the night before and your actual work is done. Twelve eggs run $4 to $5, and the mayo and mustard are probably already in your fridge. Halve them, mix the yolks with a little mayo and a squirt of mustard, then spoon it back in. Ten minutes on the day, zero counter space needed.

    These go first every single year. A dusting of paprika or everything bagel seasoning on top makes them look like more work than they were.

    3. Dump-and-Stir Broccoli Salad

    Raw broccoli florets, a bag of shredded carrots, dried cranberries, and a bottle of coleslaw dressing — the whole thing comes in under $8. Chop the broccoli into bite-sized pieces, dump it all in a bowl, stir, done. No heat, no oven, no stovetop.

    Make it a few hours before dinner so the flavors have time to come together. Add sunflower seeds or bacon bits for crunch. It stays in the fridge until you’re ready to serve, which is one less thing on your mind that day.

    4. Slow Cooker Mashed Sweet Potatoes

    If you don’t have a slow cooker, one runs $25 to $40 — and on Thanksgiving alone it pays for itself. Peel and cube 3 pounds of sweet potatoes (about $4 to $5), toss them in the pot with a stick of butter and a splash of cream. Cook on low for 4 hours and mash right in the crock.

    Zero stovetop, zero oven time, and they stay warm until you’re ready to serve. I learned this trick when I started hosting in-laws and needed my oven for three other dishes. Add a little cinnamon or brown sugar if your family likes them sweet.

    Creamy slow cooker mashed sweet potatoes topped with melting butter and cracked black pepper

    5. Room Temperature Green Bean Salad

    Blanch 2 pounds of green beans the night before, shock them in ice water, and you’re halfway done. On the day, toss them with olive oil, lemon juice, toasted almonds, and shaved parmesan. The whole thing totals maybe $10 and takes 10 minutes to pull together.

    Serve it at room temperature so nothing gets heated. Good olive oil and real parmesan matter here — not the stuff in the green can. Make it an hour before dinner and let it sit on the counter.

    6. Microwave “Baked” Beans

    A can of navy beans, some ketchup, brown sugar, and a little mustard get you baked beans without touching the oven. Everything comes in under $3. Dump it all in a microwave-safe dish, stir, cover loosely, and microwave for 5 minutes. Stir again. Another 3 minutes.

    They taste like they slow-cooked all day. Baked beans usually just sit in the oven taking up space while the turkey hogs all the heat anyway. Add cooked bacon or a splash of maple syrup if you want to get fancy.

    7. Marinated Tomato and Mozzarella Skewers

    For about $8 to $10, cherry tomatoes, mozzarella balls, and fresh basil on toothpicks look like you tried. Zero cooking involved. Drizzle with balsamic glaze and olive oil, add salt and pepper, done.

    Make them in the morning and let them marinate in the fridge until dinner. They’re colorful, they’re fresh, and they give the table something besides beige carbs. Use the good balsamic if you have it.

    8. Single-Burner Stovetop Stuffing

    One skillet, one burner, 15 minutes. Sauté a diced onion and celery in butter — the vegetables run about $3 — then add a bag of stuffing mix and the broth the box calls for. Stir until it’s fluffy and the liquid’s absorbed.

    Total: maybe $6, and your oven is completely free. The stovetop version gets crispier edges than baked stuffing if you let it sit undisturbed for a minute. Top with fresh herbs right before serving.

    9. No-Heat Cucumber and Dill Salad

    When you need something cool and crunchy to cut through all the heavy dishes, this is it. Slice 3 cucumbers thin, toss with sour cream, fresh dill, a little vinegar, and salt. Everything costs under $5 and takes about 12 minutes.

    No cooking, no reheating, no fighting for burner space. Let it sit in the fridge for at least an hour so the cucumbers release some liquid and the flavors blend. Drain off excess liquid before serving.

    10. Microwave Glazed Carrots

    Baby carrots in a microwave-safe bowl with butter, brown sugar, and a splash of water cook in 8 minutes. A bag of carrots is about $2 to $3, and you probably have the glaze ingredients on hand. Microwave for 4 minutes, stir, then another 4 minutes until tender.

    They come out glazed and perfect without touching the stovetop. The microwave does in a quarter of the time what roasting does. Add a pinch of thyme or a little orange zest if you’re feeling it. The sugar caramelizes just enough to make them taste like a lot more work went into them.

    11. Make-Ahead Cornbread, Served Room Temperature

    Bake a pan of cornbread the night before when the oven’s free. A box of mix runs about $2 to $3, or make it from scratch for maybe $4. Let it cool completely, cube it, and serve at room temperature in a basket.

    It doesn’t need to be warm, and it’s one less thing to heat on the day. Stack it in a dish lined with a kitchen towel and drizzle with honey butter on the side if you want. Room-temperature cornbread is perfect for soaking up gravy.

    12. Cold Pasta Salad with Peas and Bacon

    Cook a pound of pasta the night before, toss with frozen peas, cooked bacon, mayo, and a little mustard. The whole thing costs around $8, and zero cooking happens on Thanksgiving Day.

    Pull it from the fridge and put it on the table. It’s filling, it’s colorful, and kids eat it. Half the side dishes are carbs anyway, so why not one that doesn’t require oven time? Add shredded cheddar or diced red onion for more flavor. Serve it cold or let it come to room temperature.

    13. Instant Pot Mac and Cheese

    If you have an Instant Pot, you can make mac and cheese in 12 minutes without touching the stovetop or oven. A box of pasta and some cheese runs under $6. Cook the pasta on high pressure for 4 minutes, quick release, stir in shredded cheese and milk.

    It’s creamy, it’s fast, and the pot keeps it warm until you’re ready to serve. The Instant Pot just sits on the counter doing its thing while the turkey rests. Use sharp cheddar for better flavor and add a handful of parmesan to make it extra creamy.

    14. No-Cook Relish Tray

    Celery sticks, baby carrots, cherry tomatoes, olives, and pickles arranged on a platter come in around $10 to $12. Zero cooking, zero prep beyond washing and arranging. It gives people something to nibble while you’re finishing everything else and takes up no kitchen resources at all.

    Put this out early — it keeps everyone from hovering in the kitchen asking when dinner’s ready. Buy pre-cut vegetables if you’re short on time. Add ranch or hummus for dipping if you want.

    15. Microwave Butternut Squash Mash

    Pierce a small butternut squash with a fork and microwave for 12 to 15 minutes until soft. Scoop out the flesh, mash with butter, a drizzle of maple syrup, and salt. The squash costs about $3 to $4, and you’ve made a side dish without using oven space.

    It’s faster than roasting and tastes the same. The microwave steams it perfectly, and the flesh comes out sweet and tender. Add a pinch of nutmeg or cinnamon if your family likes warm spices.

    16. Single-Burner Sautéed Mushrooms

    Slice a pound of mushrooms, cook them in butter with garlic over one burner for about 10 minutes. A pound of mushrooms runs $4 to $5, plus garlic and butter you probably have. They shrink down to almost nothing, so they don’t take up much serving space either.

    Make them right before serving because they only take one pan and about 12 minutes start to finish. Season with fresh thyme or a splash of balsamic vinegar. They’re fancy enough that people think you worked harder than you did.

    17. No-Cook Apple and Walnut Salad

    Dice 4 apples, toss with chopped walnuts, dried cranberries, and a little lemon juice to keep them from browning. Add a dollop of Greek yogurt or a drizzle of honey. The whole thing comes to under $8 and takes 10 minutes.

    No heat, no cooking, no fighting for kitchen space. It’s sweet and crunchy and feels lighter than most Thanksgiving food. Make it in the morning and keep it in the fridge until dinner. The lemon juice keeps the apples from turning brown for hours. Mix in some celery for extra crunch if you want.

    18. Microwave Corn Casserole

    Mix a can of corn, a can of creamed corn, a box of cornbread mix, sour cream, and melted butter in a microwave-safe dish. Microwave for 10 to 12 minutes, stirring halfway through. The ingredients total around $8, and you’ve made a crowd favorite without the oven.

    It sounds weird, but it sets up just like the baked version. Top with shredded cheese in the last 2 minutes if you want it cheesy.

    19. Cold Quinoa and Cranberry Salad

    Cook quinoa the night before, toss with dried cranberries, chopped pecans, green onions, and a simple vinaigrette. Quinoa costs about $3 to $4 per cup dry, plus maybe $5 for the mix-ins. Serve it cold or at room temperature.

    It’s filling, it’s healthy, and it doesn’t need reheating. The quinoa soaks up the dressing overnight and tastes even better the next day. Add feta or goat cheese if you want more richness.

    20. No-Bake Cranberry Fluff

    Mix a can of whole cranberry sauce with a tub of Cool Whip and a can of crushed pineapple. Fold in mini marshmallows and chopped pecans. Everything costs under $10 and takes 5 minutes to stir together. Chill until serving time.

    It’s sweet, it’s nostalgic, and some people treat it like dessert. This is what my grandma always brought, and honestly, Thanksgiving doesn’t feel right without it. No cooking, no appliances, just a bowl and a spoon. Let it set in the fridge for at least 2 hours so the flavors blend and the marshmallows soften.

    Make It Yours

    Not every one of these will land on your table — pick the ones that fit what you already have and what you actually want to eat. A couple of no-cook salads, one microwave dish, and something from the slow cooker is a solid spread without the chaos. The goal is a kitchen where you’re not shuffling hot pots around like a game of Tetris while the turkey hogs the oven.

    Happy cooking,
    Maya

    Keep Reading

  • Our Go-to Side Salad

    Our Go-to Side Salad

    A few weeks back I made chicken pot pie for a group of friends on a Sunday. After they left, the texts started coming in. Not about the pot pie — too complicated, they said. About the salad.

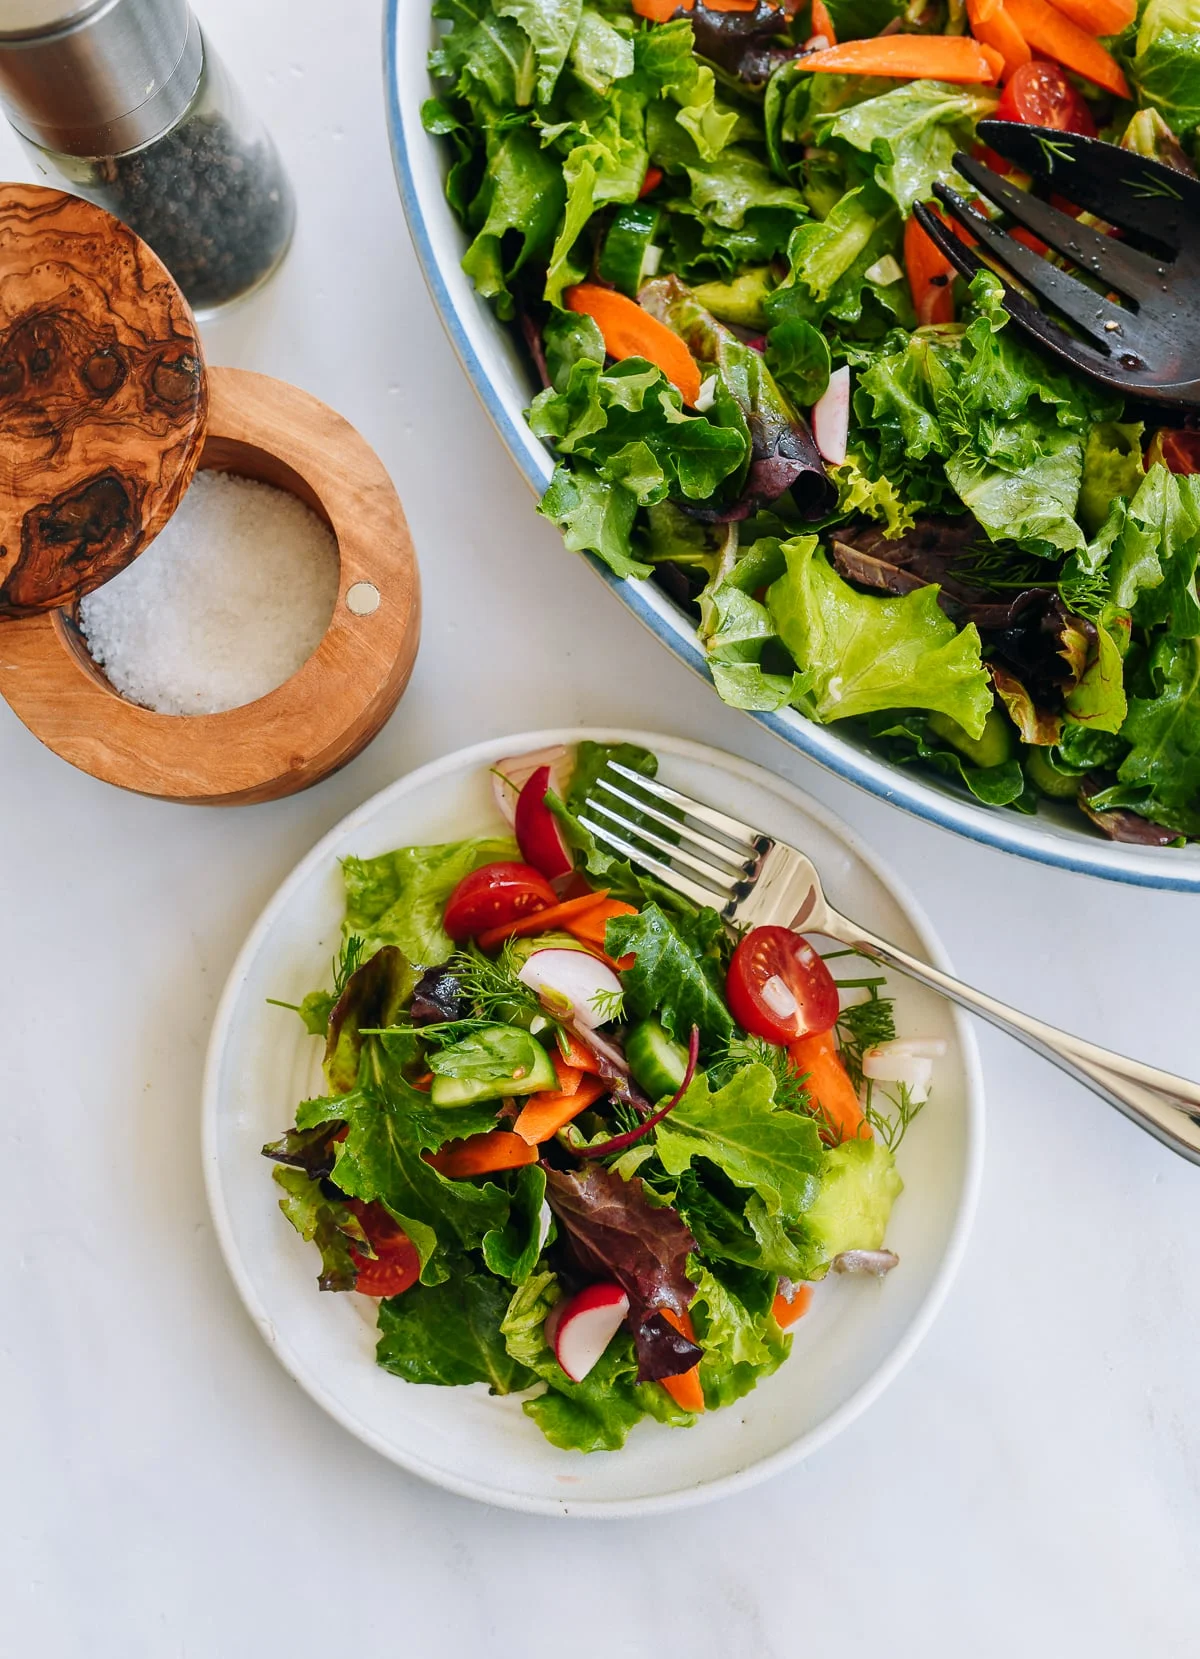
    It’s the side salad I reach for when I want dinner to feel put-together without actually being put-together. Two people or ten, it works the same way: a big bowl of good greens, a handful of dill, and a drizzle of white wine vinegar and olive oil. Real time: 20 minutes, all of it hands-on.

    Two bowls of fresh side salad on a marble counter with serving spoons

    The secret is a little dill

    The extra-special part of this salad is a handful of dill, roughly chopped or torn into the bowl with your fingers. Skeptical? Dill is one of the main herbs in ranch dressing, and it gives the whole thing that quiet “special” note — the kind that makes the vegetables disappear on a weeknight, or that has dinner guests eating greens as happily as the main course.

    The friends I made it for last month got exactly that reaction. They didn’t want the pot pie recipe. They wanted the salad.

    How it comes together

    Green leaf salad with vegetables in a white ceramic bowl

    You don’t make a dressing. You don’t need to. Once the vegetables are in the bowl — just enough to look special, not so many it feels like a chore — a good swirl of extra-virgin olive oil, a few lighter swirls of white wine vinegar, and a few pinches of flaky sea salt are the whole job. Toss it right before you serve.

    Here’s a small thing I learned along the way: I cut my radishes and cucumbers into wedges, not paper-thin shaves. Wedges are easier to grab with a fork, they keep their crunch in every bite, and they don’t get soggy as fast — which matters when you’re feeding a larger table and need the salad to wait ten extra minutes while you finish the rest.

    What I actually use

    Greens: the easiest version is a box of spring mix, and honestly it’s great. But I like something with more snap — crisp green leaf lettuce, the baby kind in the prewashed boxes. Romaine or iceberg if you want more of that refreshing crunch. Red leaf, radicchio, and frisée are all good for color. Arugula adds a nice peppery kick, and watercress works too.

    Cutting board with raw vegetables beside a bowl of mixed greens

    Vinegar: I stick with white wine vinegar because this is a side salad, not the main event — I want something mild and light, not sharp. Red wine vinegar works similarly. Apple cider is fine, though it’s a bit more acidic. Balsamic is great too, just bolder, so use it with a lighter hand.

    The recipe

    Makes 6 servings. Real time: 20 minutes. Hands-on: 20 minutes.

    Ingredients

    • 10 ounces (285g) salad greens of your choice
    • 2 small/medium carrots (about 120g), thinly sliced
    • 6–7 radishes (about 110g), cut into wedges
    • 1 large shallot (about 90g), thinly sliced
    • 10 cherry tomatoes (about 170g), halved
    • 2 Persian cucumbers (or ½ of an English cucumber, about 200g), sliced
    • ⅓ cup (about 15g) dill, lightly packed, roughly chopped or hand torn
    • 3–4 tablespoons white wine vinegar
    • ⅓ cup (80ml) extra-virgin olive oil
    • A few pinches of flaky sea salt

    Method

    1. Pile your greens into a large salad bowl. Pile the carrots, radishes, shallot, tomatoes, cucumbers, and dill on top in big blocks of color, or scatter them over the greens in layers.
    2. Drizzle the white wine vinegar over the salad, then the olive oil. If you’re eyeballing it, I do a few good swirls of oil around the bowl and a few lighter swirls of vinegar.
    3. Sprinkle with flaky sea salt, crushing it between your fingers as you go. Toss well and season with more salt and/or vinegar to taste.
    Close-up of sliced cucumber, cherry tomatoes, carrots, and radishes

    A note on the salt: any good flaky sea salt works here. Crush it between your fingers as you sprinkle — it lands better that way.

    Want it to be the whole meal? Well-drained chickpeas or cannellini beans fold in nicely, or just pile the salad under a salmon fillet, sliced chicken, or grilled shrimp.

    Finished side salad with wooden spoons in a white bowl

    Make it yours: swap in whatever’s at the end of the week — shredded carrot instead of sliced, a handful of fresh peas in spring, or a spoonful of capers if you like something briny. The structure stays the same: good greens, a little dill, a little acid, a little oil, a little salt.

    Happy cooking,
    Maya

    Keep Reading

  • Marinated Tomatoes: The Summer Side I Make Every Evening

    Marinated Tomatoes: The Summer Side I Make Every Evening

    My counter has a leak. Set tomatoes out to marinate and by the afternoon they’re halfway gone, no matter how many times I told myself I was just “stirring to check.” I learned this the hard way with this very recipe. I could not stay out of the bowl on the counter, so I moved it to the fridge. It didn’t help. I was still going back for a taste every time I passed. So, written warning: it really is that good.

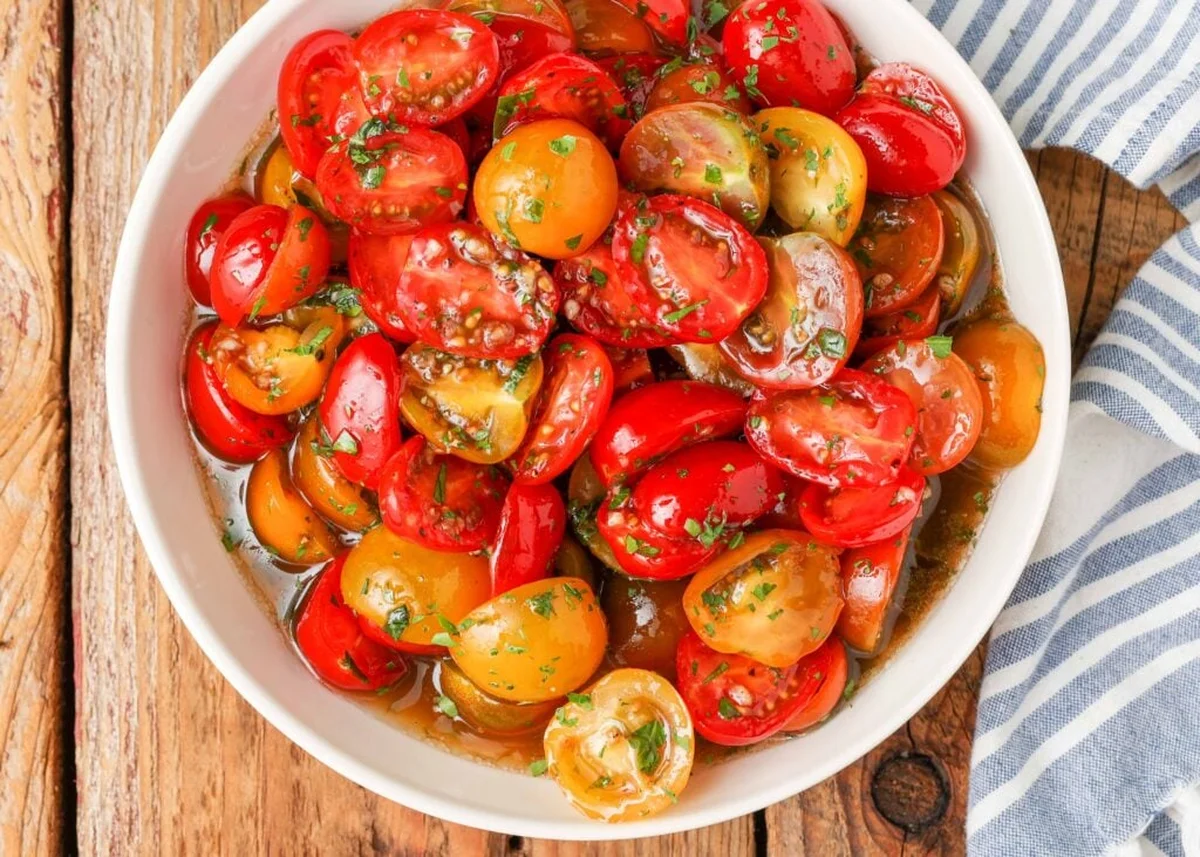
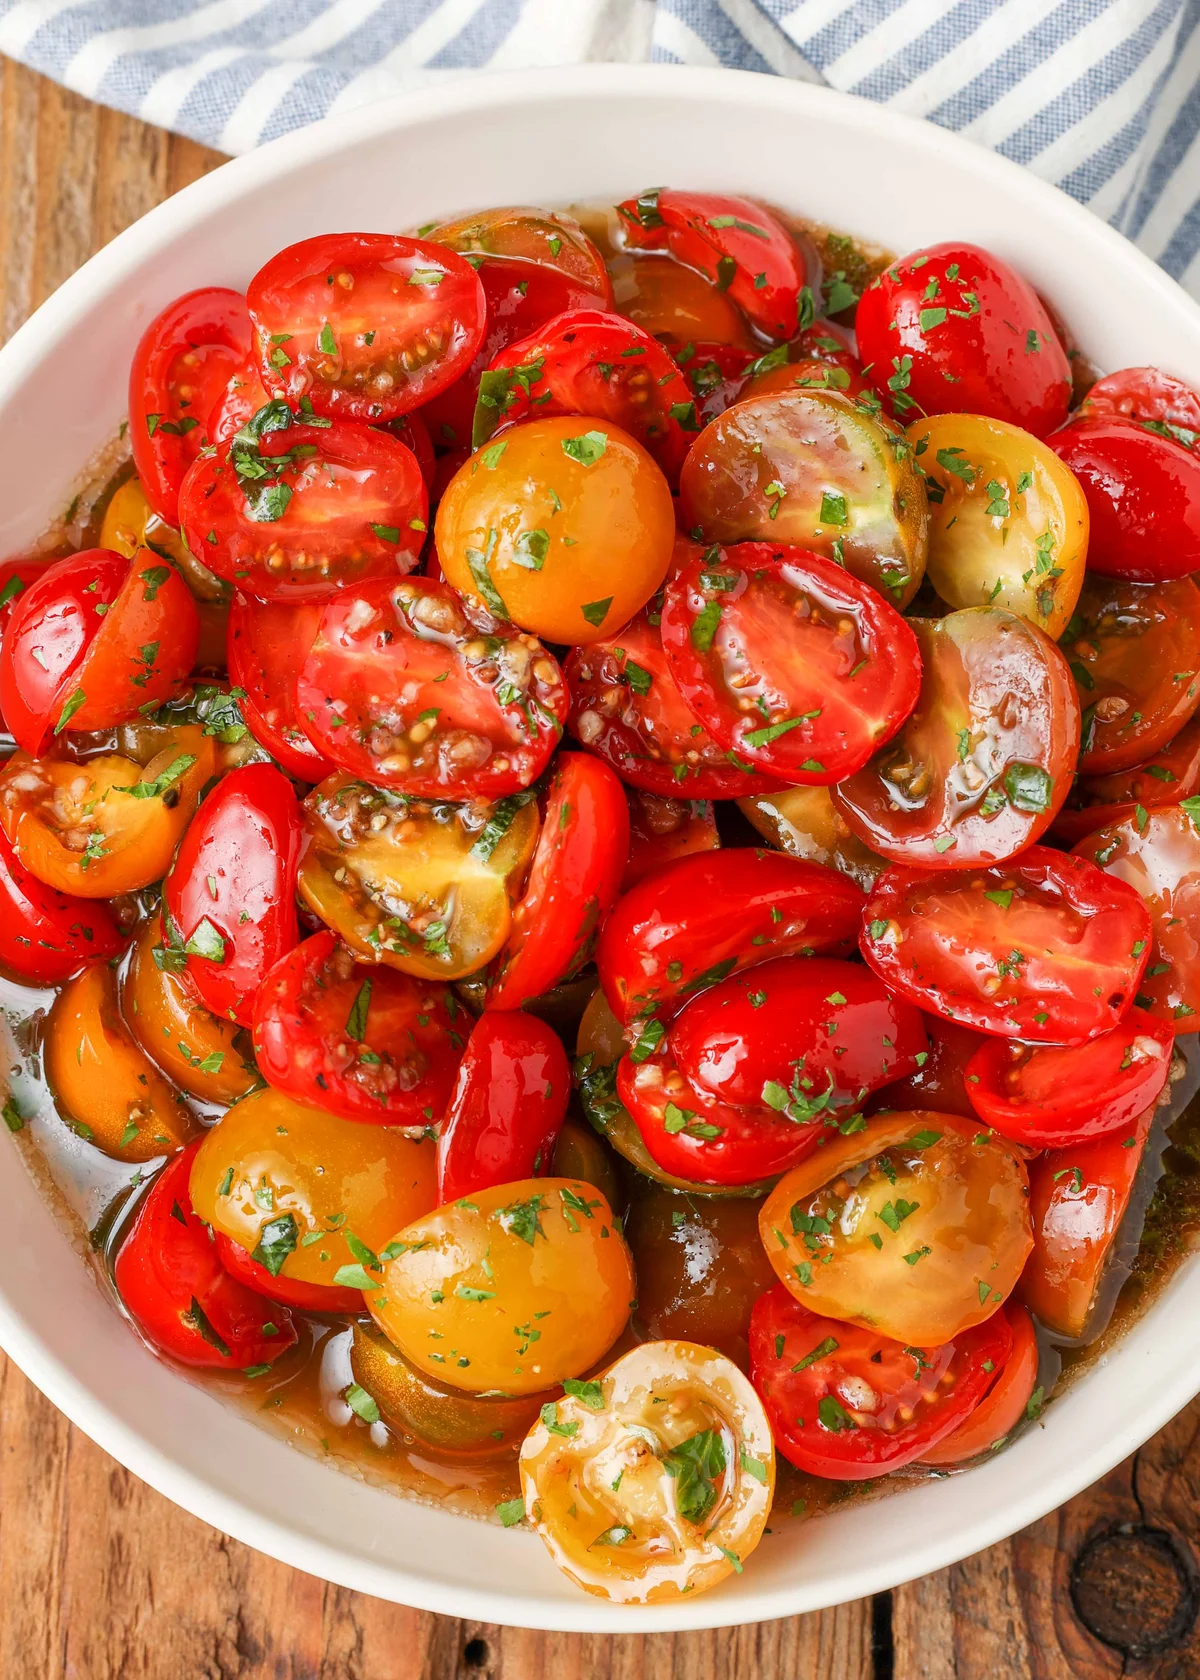
    Bowl of heirloom marinated tomatoes with fresh herbs

    Here’s the promise. This is a tomato side that makes its own dressing. You toss everything together, cover the bowl, and go live your actual evening for a few hours. You come back and find the tomatoes have released enough juice to become a proper savory-sweet marinade on their own. No emulsifying, no pre-cut bouquets, no twenty-ingredient lineup. Just acid, oil, a bit of sugar, garlic, and herbs, and the tomatoes doing their work in the background while you get on with dinner.

    Real time: 4 hours (the tomatoes resting, you mostly off duty)
    Hands-on: about 10 minutes
    Servings: 12 as a side, or fewer if you’re like me and keep sampling the bowl

    Ingredients

    • 2 pounds tomatoes, halved or cut into 1-inch pieces (about 950 g; cherry, grape, or whatever you have on hand)
    • 2 cloves garlic, minced (about 12 g)
    • 1/4 cup chopped parsley (about 30 g)
    • 10 basil leaves, sliced very thin (about 8 g)
    • 2 tablespoons sugar (about 25 g)
    • 1 teaspoon kosher salt (about 6 g)
    • Freshly cracked black pepper to taste
    • 1/8 teaspoon ground thyme (about 1 g or less)
    • 1/2 cup extra virgin olive oil (about 118 mL)
    • 2 tablespoons balsamic vinegar (about 30 mL)

    A few honest substitutions, in case you’re not exactly what the list says.

    • Tomatoes. I usually go cherry or grape. But whichever you find at the end of summer, they’ll work. The freshest, ripest ones you can find are the whole point of the recipe. You want tomatoes that smell fragrant, feel heavy for their size, and have taut, unbruised skin. That’s the whole of tomato selection, really.
    • Vinegar. Balsamic does the heavy lifting here. It plays with the tomato’s acidity in a good way. If you’re out, a good sherry vinegar or grape vinegar gets you close, just less sweet.
    • Sugar. Don’t skip it. This is not a dessert, but a small amount of sweetness rounds out the acid and keeps the bowl from tasting sharp.
    • Herbs. The basil is doing the bulk of the flavor work. Parsley adds the earthy note, and thyme rounds it out with a faint minty hint. If you’re short on fresh basil, a good handful of parsley will still get you a solid, if quieter, bowl.
    • Garlic. Fresh garlic is the move here. There is no substitute and I will not entertain your garlic powder at this hour.

    What you need

    • A deep mixing bowl or an airtight container with a lid
    • A cutting board and a knife you actually enjoy using. Quality knife makes prep easier. I’ve had mine for over 10 years and it just gets better at its job.
    • Measuring spoons, and a garlic press if mincing is fighting you. The press I use is two pieces of stainless steel that click together and pull apart for cleaning. That’s the whole thing, and it makes the whole prep step go much faster.

    Method

    1. Wash the tomatoes and pat them dry with a clean cloth or paper towel. All the cutting you’ll do is halve the tomatoes or cut them into 1-inch pieces, chop the parsley, mince the garlic, and slice the basil very thin.
    2. If the word chiffonade makes your eye twitch, it isn’t as scary as it sounds. Stack the basil leaves into a neat pile, gently roll it up, and slice the whole pile into thin ribbons. Run a finger through the pile and it falls apart into fine ribbons. That’s the whole trick, and it smells ten times better than hacked basil.
    3. Put the tomatoes in the bowl. Add the garlic, parsley, and basil. Sprinkle over the sugar, salt, pepper, and thyme. Pour in the olive oil and balsamic.
    4. Toss everything together until the tomatoes are thoroughly coated.
    5. Cover the bowl and let the tomatoes rest for a few hours. Room temperature or fridge, either works. This is the part where they make their own marinade. You are legally allowed to go back and taste test. You will want to.
    6. Serve cold or at room temperature, with or without their pool of juice.
    Cherry tomatoes tossed with basil, garlic, and oil

    What I’ve changed from the first time

    • I no longer skip the sweetness. That was always the mistake. A little sugar is what makes the whole bowl taste like it belongs together, not like you just tossed acid at tomatoes. That’s the whole secret of this recipe, I think.
    • I chiffonade the basil properly instead of hacking it into the bowl. Takes 30 seconds extra of effort and changes the dish a lot.
    • I don’t use canned tomatoes now. I used to, back when I was in a hurry and lazy, and the texture turns out wrong, and they’ve already absorbed all the juice they’re ever going to absorb. Use fresh.

    Serve them and use the leftovers

    These work as a summer side next to almost anything coming off the stove. I’ve served them next to white fish with a topping of cracked pine nuts on a lighter night, and I’ve used them beside roasted chicken thighs, which is honestly the best combination I’ve settled on. One of the things I actually do is spoon the tomatoes and all the juice over a bowl of plain rice pilaf and let the rice drink up all the leftover tomato liquid. The bowl will not survive the night. It should, though.

    Marinated tomatoes served alongside grilled chicken and rice

    Make ahead and storage

    You can prep these in advance. For a marinated dish, you kind of have to. In an airtight jar or container, they’ll keep in the fridge for 3 days. As they rest, they release juice. If you’re serving them as a side on their own, lift them out with a slotted spoon and leave the marinade in the bowl. If you’re using them on a salad or in another dish, don’t throw that pool away. It’s a real salad dressing at this point, built entirely by the tomatoes themselves. That’s the whole food design of this recipe. Use it before you stumble over a sad little jar of leftover juice on the counter.

    FAQ

    Do I need to seed the tomatoes?
    No, you don’t. The seeds will melt into the dressing the way they’re supposed to. Leave them right where they are.

    Should I drain the marinade before serving?
    Depends on what you’re using them for. If you’re serving them as a side on their own, use a slotted spoon and leave the juice in the bowl. If you’re using them on a salad or in another dish, pour it all in. That’s where you want it.

    Can I use canned tomatoes?
    No, no. Canned tomatoes have a different texture and have already absorbed all the liquid they’re going to absorb. The point of this recipe is that the tomatoes make their own dressing from the fresh juice, so canned just doesn’t get there.

    Make it yours

    A few variations I reach for.

    • Add a handful of sliced cucumber for a little extra water and crunch. Works well when I’m serving a lot of people.
    • Sweeten it with honey instead of sugar for a deeper, less sharp finish.
    • Toss it with torn mozzarella for a quick caprese-style starter.
    • Marinate enough of it to use as a warm-weather salad alongside sliced sausage or other grilled meat for a summer plate.

    I first made these about 15 years ago, right after a friend passed me the recipe, and I’ve adapted it the same way every summer since. This is genuinely what I make when I want a side I don’t have to think about, the kind of thing that disappears from the plate before anyone asks what’s in it.

    Happy cooking,
    Maya

    Keep Reading

  • Vegan Nutella Ice Cream (6 Ingredients)

    Vegan Nutella Ice Cream (6 Ingredients)

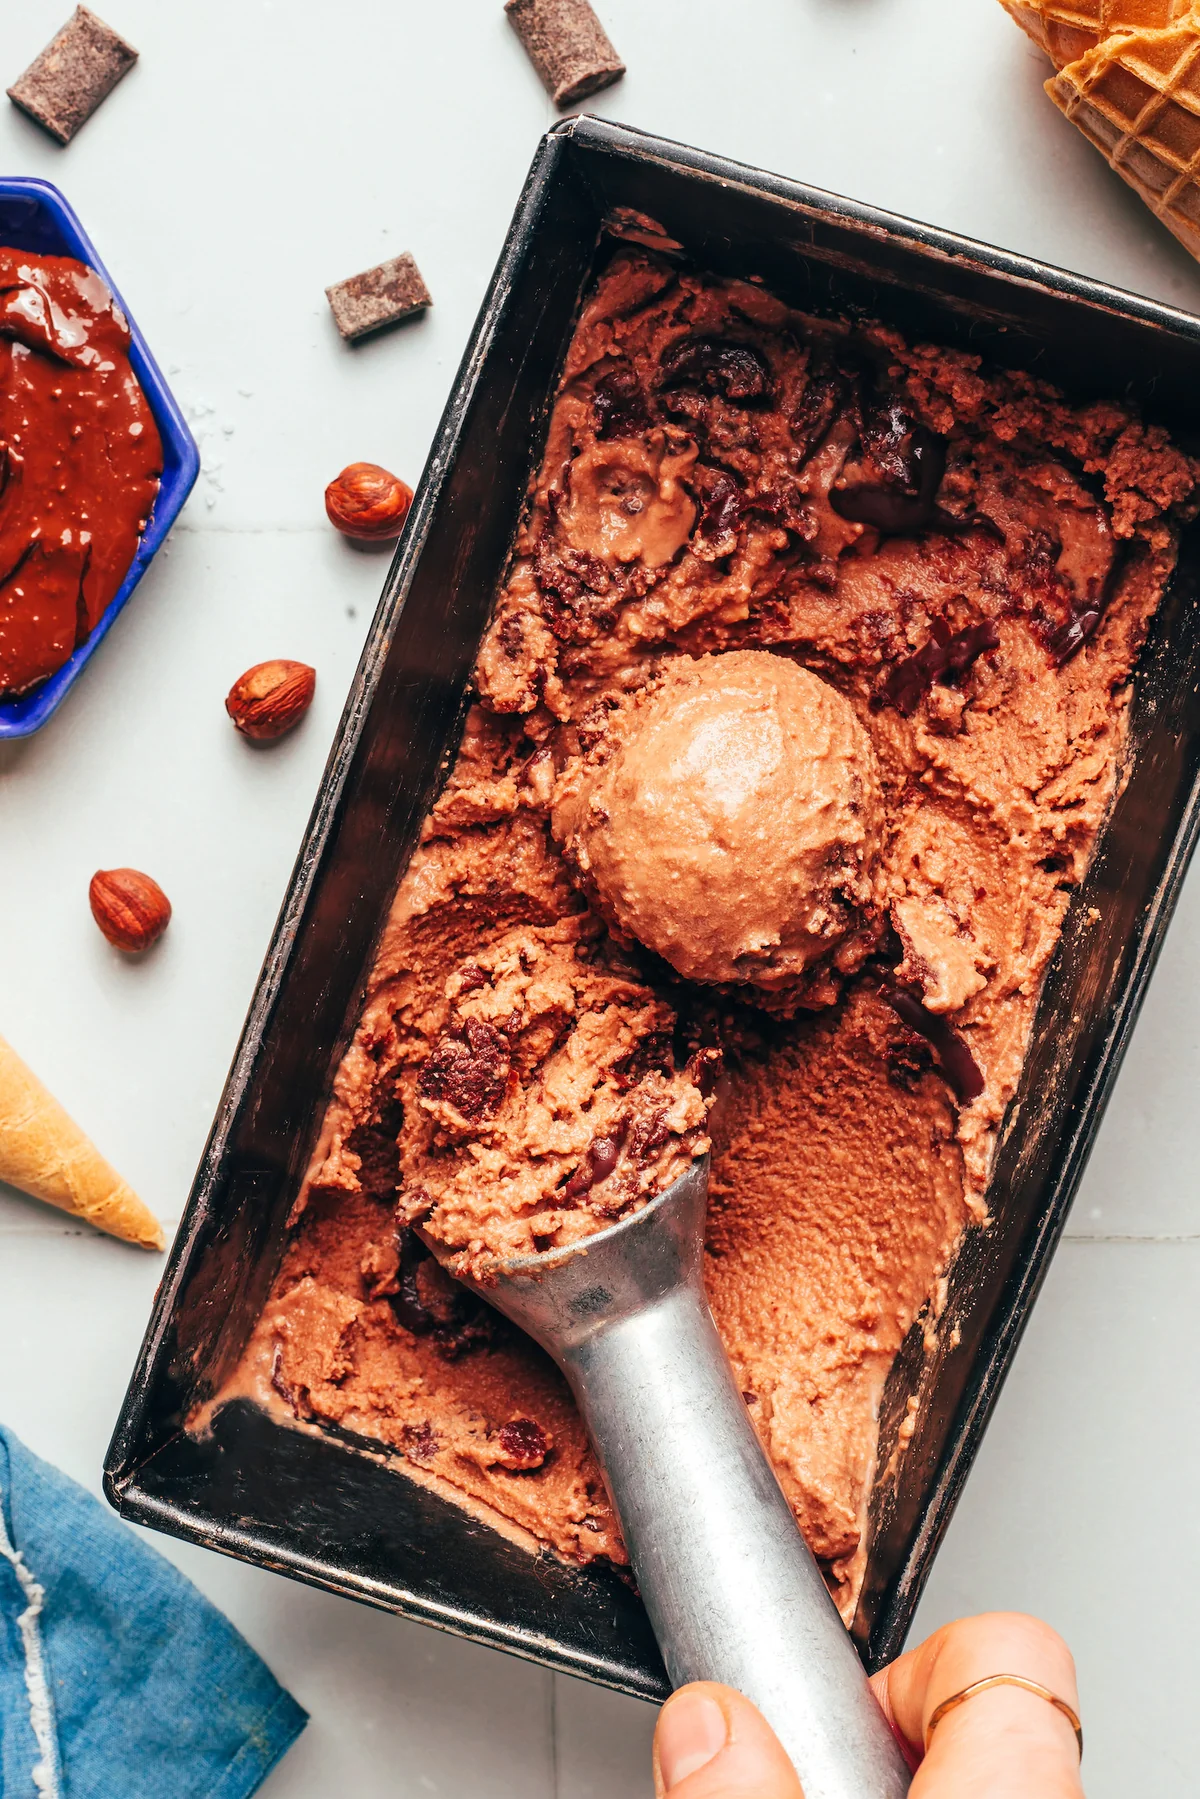
    The first two times I made this, it tasted good but looked sad — dense, a little crumbly, not one bit of what I wanted. The third time I stopped rushing the roasting and let the chocolate fully melt, and suddenly the churn came out thick and glossy, swirled with ribbons of nut chocolate. It’s the kind of thing that makes you forget it’s entirely plant-based.

    Chocolate hazelnut ice cream swirled in a metal pan with cones

    Here’s the honest version of what this is: a warm-day dessert that needs an ice cream maker and a good chunk of the afternoon. Real time: about 3 hours (mostly freezer and fridge waiting). Hands-on: around 30 minutes, and you can do most of it the day before.

    Why this one works

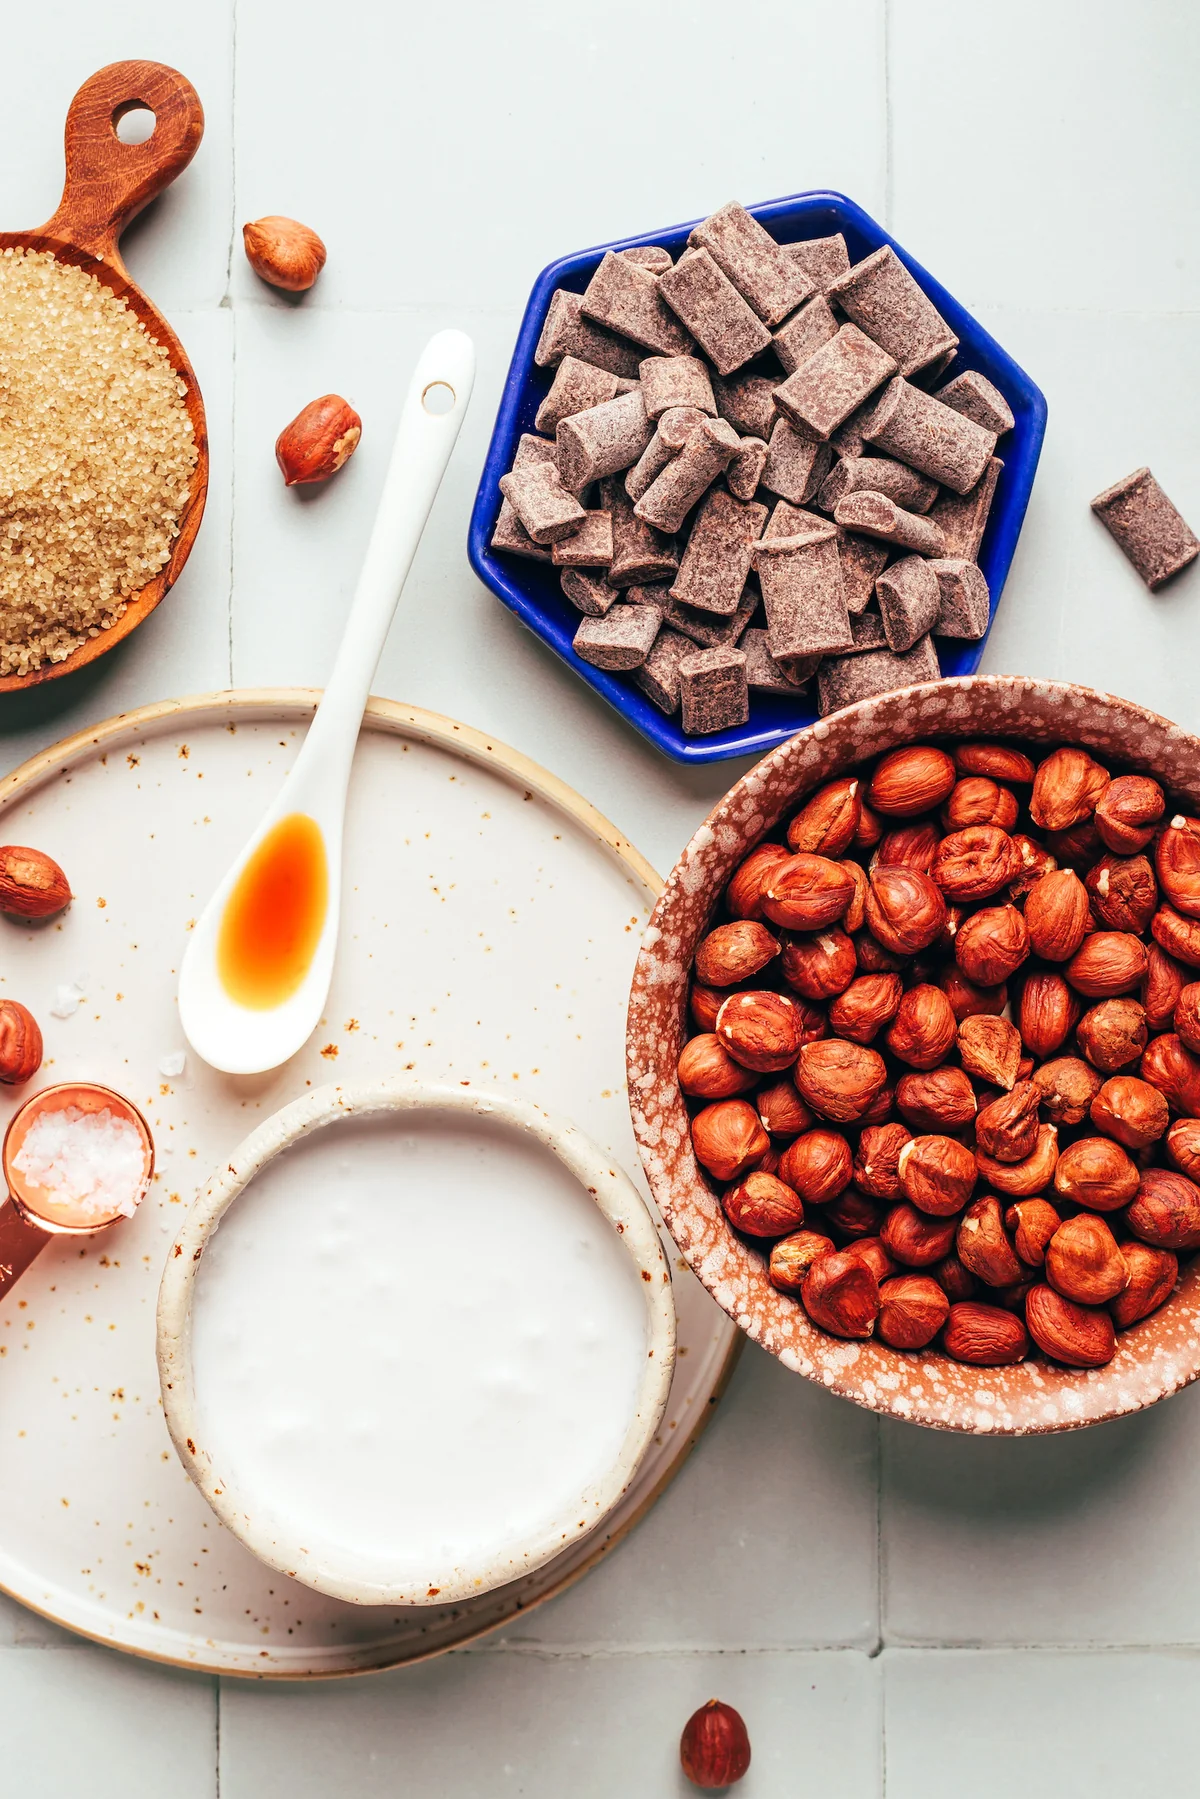
    It starts the same way my homemade nut spread does — roasting hazelnuts to wake up their oils and loosen the skins. Blend them with melted chocolate and you have a homemade, better-for-you nut chocolate spread, the kind that’s even better as an ice cream base than as a toast topping. The coconut milk and cane sugar round it out, and a little vanilla and salt do the quiet work of making chocolate taste like chocolate.

    Hazelnuts, chocolate chunks, and cane sugar laid out

    The best part is that the base can sit in the fridge for a few hours (or overnight). So you can do all the prep on a quiet morning and churn it on the evening the heat actually arrives.

    What you need

    • 1 cup raw hazelnuts
    • 1 cup semi-sweet chocolate chips or chunks (we like Enjoy Life)
    • 2 (14-oz) cans light coconut milk (we like Whole Foods 365 — see note below)
    • 1/4 cup cane sugar (organic if you want this strictly vegan)
    • 1 tsp vanilla extract
    • 1/8 tsp sea salt

    Makes 9 servings (about 1/2 cup each). Keeps in the freezer, well covered, for up to 1 month.

    How to make it

    The day before you plan to churn, pop your ice cream maker’s bowl in the freezer so it’s properly cold. That’s the only true “prep” — everything else happens when you’re ready.

    1. Roast the hazelnuts. Preheat the oven to 350°F (176°C) and spread the nuts in a single layer on a bare baking sheet. If they’re raw, roast 10–12 minutes. If already roasted, just 8–10 minutes to warm the oils and loosen the skins. Let them cool slightly, then roll them in a kitchen towel until most of the skins rub off. You don’t have to get every last one — just as many as you reasonably can, since skin-free nuts blend creamier.
    2. Blitz the hazelnuts. Transfer them to a high-speed blender and run from low to high until they look like coarse crumbs.
    3. Melt the chocolate. In a small saucepan over low heat, stir until about half the chips are melted (roughly 1 minute), take it off the heat, and stir until fully smooth. Microwave works too — 30-second bursts, stirring between.
    4. Make the spread. Pour the melted chocolate into the blender and run from low to high until it’s a completely smooth nut chocolate spread. The smoother, the better — plan on about 3 minutes. Scoop out 3 tablespoons and set them aside; you’ll want them for the swirl.
    5. Make the base. To the remaining spread, add the light coconut milk, cane sugar, vanilla, and salt. Blend on high until smooth, creamy, and fully combined.
    6. Cool it down. Pour the base into an airtight container and refrigerate for at least 1 hour. This is where the “do it ahead” trick lives — the base is happy waiting for hours or overnight.
    7. Churn. Add the chilled base to your ice cream maker and churn according to the machine’s instructions. Ours took 30 minutes, and it should come out like a thick soft serve.
    8. Swirl it in. Spoon the reserved nut chocolate spread over the top and gently fold it in — you want ribbons and streaks, not a uniform mix. Eat it right now if you like it soft, gelato-style.
    9. Firm it up. Or transfer it to a freezer-safe container, smooth the top with a spoon, press parchment onto the surface, and freeze for at least 1 hour, or until firm. Let it sit out 10–15 minutes before scooping.

    One technique note, because it matters: for the creamiest result, use a light coconut milk brand that’s smooth and creamy (Whole Foods 365 is what we reach for). These usually contain emulsifiers like guar gum, which is exactly what keeps the ice cream from turning icy.

    Make it yours

    Chopped roasted hazelnuts stirred through before freezing give you real crunch in every scoop. Want it less sweet? Drop the cane sugar to 1/3 cup — the roasted nuts carry more sweetness than you’d think. And if you make extra spread (you will), keep the rest in a jar. It outlasts the ice cream by about a week, and toast doesn’t care about your dairy-free plans.

    Happy cooking,
    Maya

    Keep Reading

  • No-Bake Protein Bites, Two Ways: Thin Mint & S’mores

    No-Bake Protein Bites, Two Ways: Thin Mint & S’mores

    The first batch I made came out of the tray like little bricks of regret — dry, crumbly, and exactly the kind of thing you toss in the compost and pretend never happened. Same with batch two. By the third, I’d figured out the one thing that was tripping me up all along: my nut butter was still separated in the jar, oil and solids living separate lives. Stir it properly, and suddenly the whole method just works.

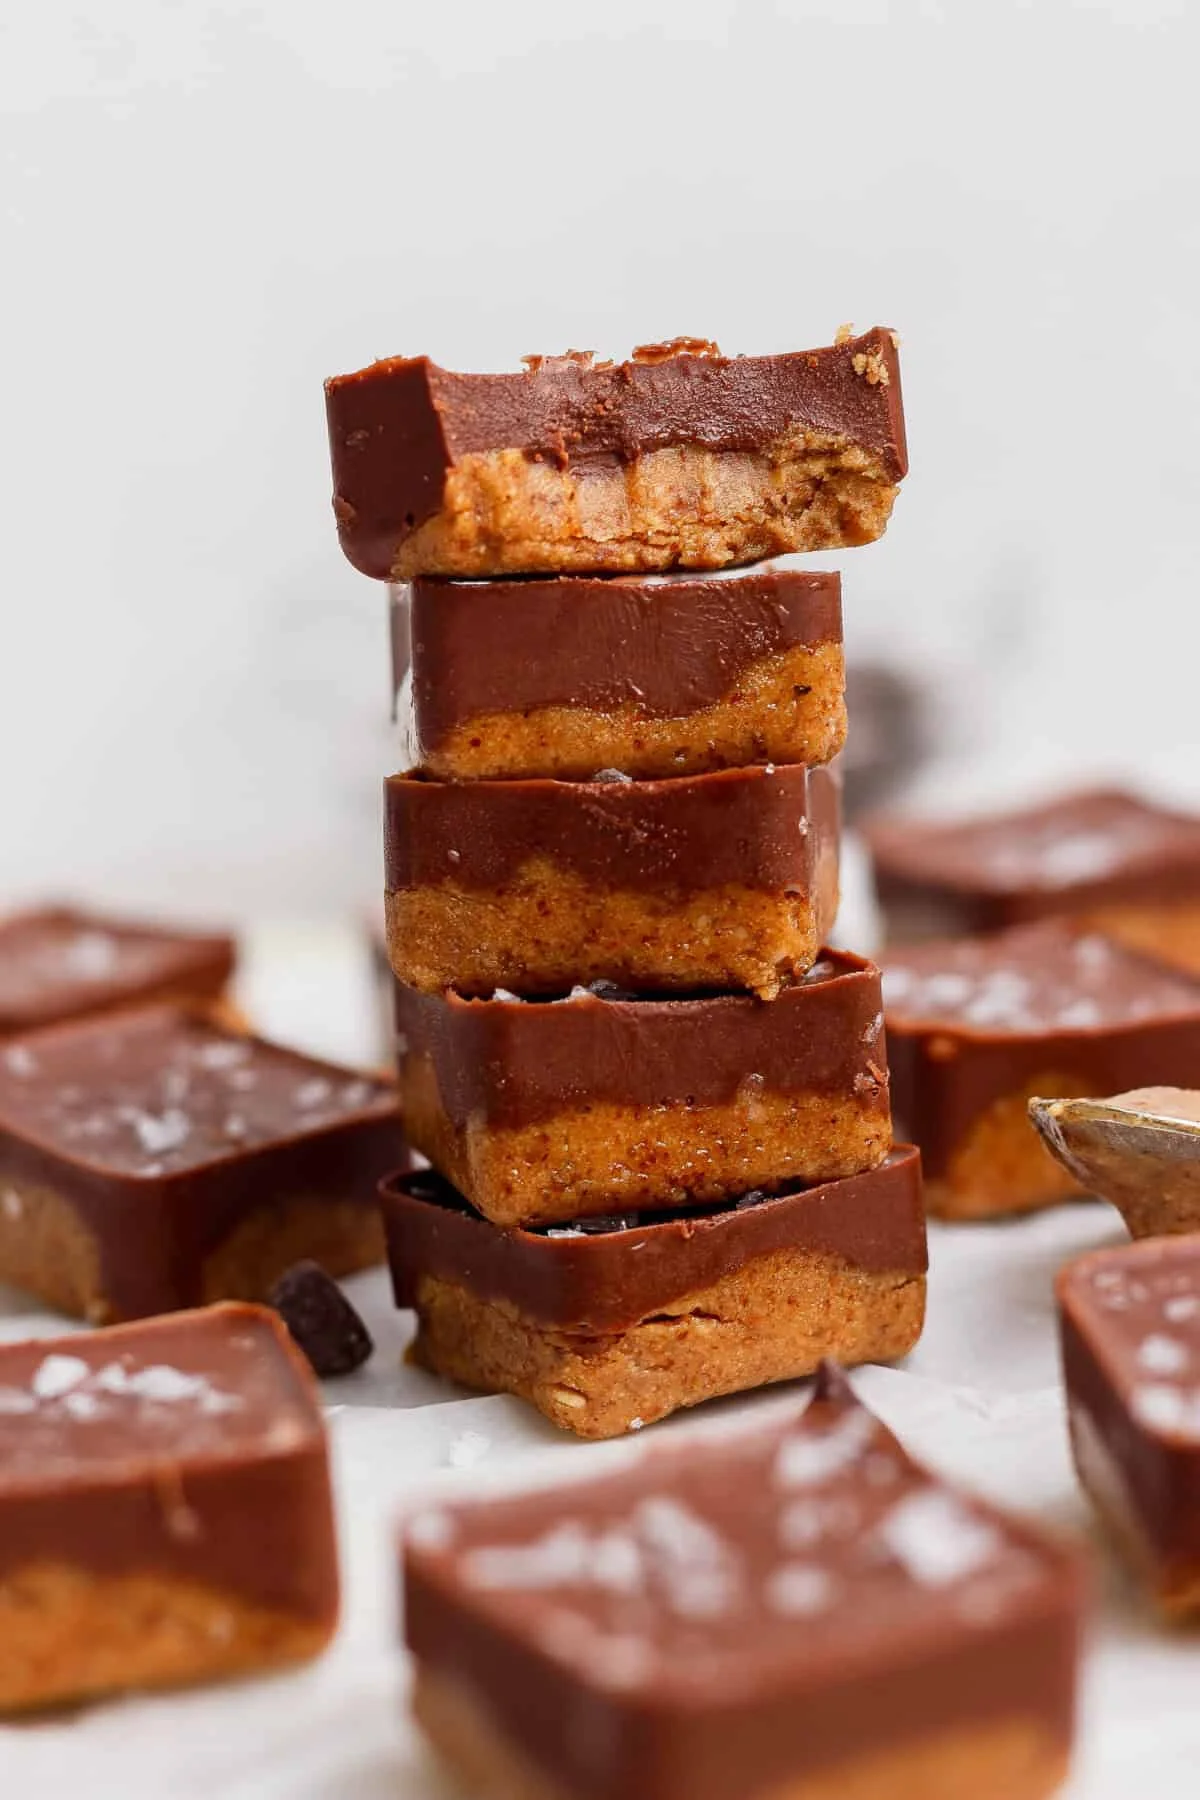
    Now these are the snack living in my freezer. Same easy base — nut butter, whey protein, maple syrup — pressed into a silicone ice cube tray instead of rolled into balls, then built into two completely different flavors: a Thin Mint version with a poured chocolate shell and flaky salt, and a S’mores version loaded with marshmallows, dark chocolate, and graham crackers.

    Stack of two-layer protein bites with chocolate topping and flaky salt

    Real time: about 1 hour 20 minutes total, most of it freezer-set. Hands-on: 20 minutes. Equipment: a silicone ice cube tray (a 5×3 cube tray works best), a microwave-safe bowl, and a mixing bowl. You’ll end up with 15 bites per batch.

    Why This Method Wins

    Almost every protein ball recipe out there asks you to roll a sticky dough by hand, and almost all of them end with sticky fingers and lopsided balls that crumble in the bag. Pressing the mixture into a silicone tray solves both problems at once. Even portions, no rolling, nothing to clean but a tray and a spoon.

    Both flavors use the same technique and the same freezer time, so you can make the whole two-flavor spread in one session. The nut-butter base needs no blending and no food processor — just stir and press. And because everything sets in the freezer, it’s a genuine make-ahead snack that holds its shape all week.

    The One Trick That Matters

    Stir your nut butter completely before you start. The natural oil content is what makes the base moldable without any other binder, but only if the oil and solids are fully recombined. Straight from the jar, most natural nut butters have separated, and dough made with separated butter won’t set right. That’s the number one mistake I see with any nut-butter-based recipe, and it’s the one that wasted my first two batches.

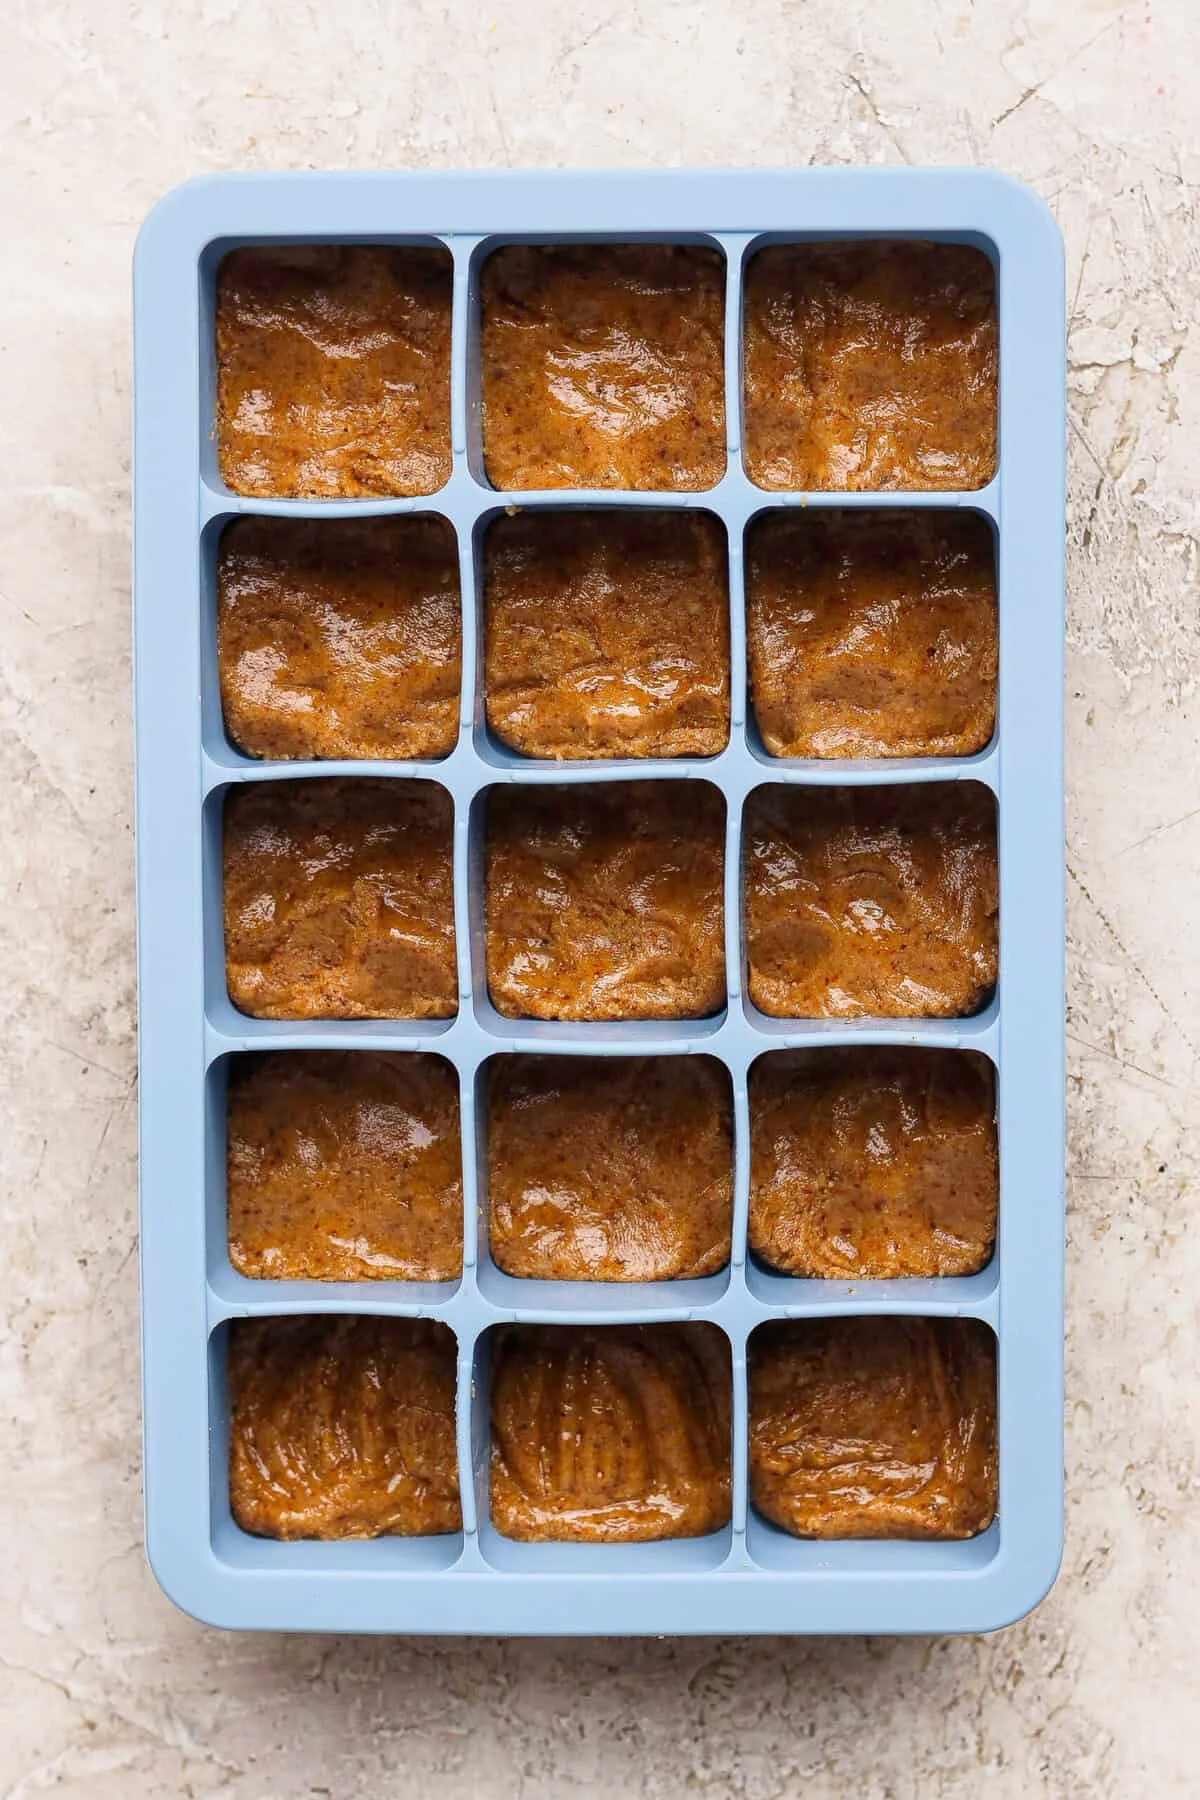
    Nut butter base pressed firmly into silicone tray cubes

    Thin Mint Protein Bites

    This one starts with a fudgy base of drippy almond butter, vanilla whey, maple syrup, and a small dose of peppermint extract, then gets a poured topping of coconut oil, chocolate chips, and chocolate whey, finished with flaky sea salt. That two-layer structure — fudgy base, chocolate shell — is what makes it taste closer to a candy bar than a protein snack.

    One warning on the peppermint: a little goes a long way. If you over-add it, the whole thing tastes like toothpaste. Stick to the amounts in the recipe card — ¼ teaspoon in the base and ⅛ teaspoon in the topping — and you’ll land on real Thin Mint flavor instead of a mint overdose.

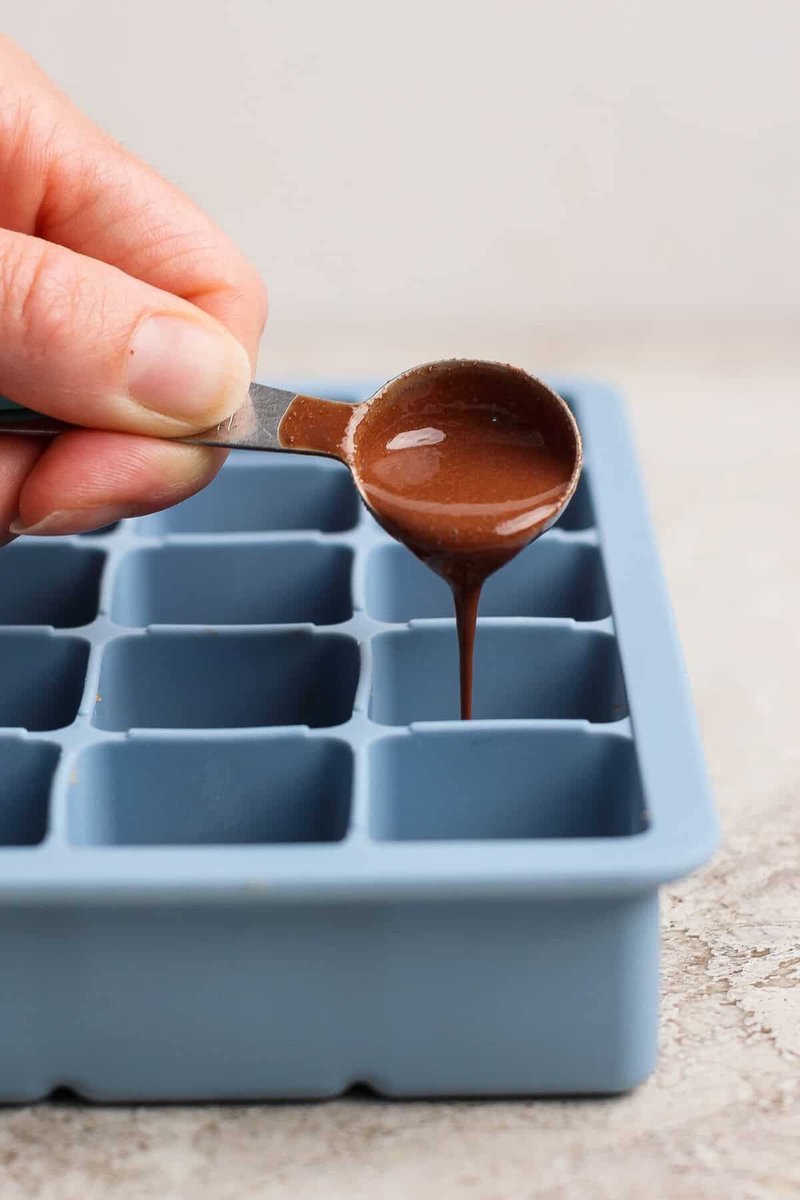
    Melted chocolate being spooned over pressed protein bite cubes

    S’mores Protein Bites

    The campfire flavor skips the poured topping and folds everything into the base instead: creamy cashew butter, vanilla whey, and maple syrup, mixed with mini marshmallows, chopped dark chocolate, and broken graham crackers. A mixing bowl and a freezer stand in for the fire pit.

    Two things to know before you start. Mini marshmallows firm up and get chewy once frozen solid, so if you want them soft, let the bites sit at room temperature for a few minutes first, or keep the batch in the fridge instead of the freezer once set. And cashew butter separates in the jar even more than almond butter — oil floats to the top — so give it a full stir before measuring.

    Ingredients

    Equipment: silicone ice cube tray (5×3 works best), microwave-safe bowl, mixing bowl

    Thin Mint base:

    • 1 cup drippy almond butter — it must be drippy and pourable, fully stirred
    • 1/4 cup vanilla whey protein powder
    • 1/4 cup maple syrup
    • 1/4 teaspoon peppermint extract

    Thin Mint chocolate topping:

    • 1/4 cup coconut oil
    • 1/2 cup chocolate chips
    • 2 tablespoons chocolate whey protein powder
    • 1/8 teaspoon peppermint extract
    • flaky sea salt, for finishing

    S’mores base:

    • 1 cup all-natural creamy cashew butter, fully stirred to recombine the oil
    • 1/4 cup vanilla whey protein powder
    • 2 tablespoons maple syrup

    S’mores mix-ins:

    • 1/4 cup mini marshmallows
    • 4 rectangles special dark Hershey’s chocolate, chopped
    • 2 sheets graham crackers, broken into small pieces

    Notes: vanilla or chocolate whey both work — plant-based powder absorbs more liquid, so add a splash of milk if the dough goes dry. Maple syrup can be swapped for honey in either flavor without changing the texture. A gluten-free graham cracker keeps the S’mores version gluten-free.

    How to Make the Thin Mint Bites

    1. In a large mixing bowl, combine the almond butter, vanilla protein powder, maple syrup, and peppermint extract. Stir until smooth.
    2. Scoop about 1/2 tablespoon of the mixture into each cube of the silicone tray and press it firmly in with the back of a spoon or your fingers.
    3. Combine the coconut oil and chocolate chips in a microwave-safe bowl. Microwave in 20-second increments, stirring between each, until completely melted and smooth.
    4. Stir the chocolate protein powder and peppermint extract into the melted chocolate until smooth.
    5. Spoon 1–2 teaspoons of the chocolate over each cube, spreading it to cover the top.
    6. Freeze for at least 30 minutes until firm. Top with flaky sea salt, then pop each bite out of the tray.
    Finished mint-chocolate protein bites dusted with flaky sea salt

    How to Make the S’mores Bites

    1. Combine the cashew butter, vanilla protein powder, and maple syrup in a large bowl and stir until smooth. If the cashew butter has separated, fully recombine the oil and solids first.
    2. Fold in the mini marshmallows, chopped dark chocolate, and broken graham crackers until evenly distributed.
    3. Scoop about 1–2 tablespoons of the mixture into each cube of the tray and press firmly up to the rim.
    4. Optional: top each bite with a few extra mini marshmallows, chocolate pieces, and graham cracker crumbs.
    5. Freeze for at least 1 hour until firm. Pop the bites out and store them in a freezer-safe bag.

    When the Dough Won’t Hold Together

    Too dry or crumbly: the nut butter almost certainly wasn’t fully recombined. Stir in an extra teaspoon of nut butter or maple syrup until it presses together.

    Too oily or loose: usually a very high-oil nut butter. Add protein powder one teaspoon at a time until it firms up.

    The pressed format is actually more forgiving than rolled balls — the tray holds the shape while it sets, even with a slightly looser dough. Every jar behaves a little differently, so my fix is always the same: stir completely smooth first, then adjust with a touch more nut butter or protein powder rather than fighting the dough as it is.

    Storage

    Thin Mint: freezer, in an airtight container or freezer-safe bag, for up to 1–2 months. The chocolate topping seals the top layer, and these are best eaten straight from the freezer.

    S’mores: freezer for up to 1 month. For the softest marshmallow texture, keep them in the fridge instead — up to 1 week — because frozen marshmallows firm up and turn chewy.

    FAQs

    Can I make these without a silicone ice cube tray? Yes. Line a small square or loaf pan with parchment, press the dough in evenly, and cut into squares once set. You can also roll the dough into balls by hand, though you’ll lose the clean, uniform shape the tray gives you. The tray is genuinely the fastest, least messy way I’ve found to portion these.

    How are these different from regular protein balls? It’s the technique, not the ingredients. Most protein ball recipes have you roll a sticky dough by hand; these get pressed into the tray and pop out as clean squares. Less mess, and every portion comes out the same size.

    Can I use a different nut butter? Any well-stirred, drippy nut butter works in either flavor — peanut butter, sunflower seed butter, or a different almond or cashew butter are all fine. Just make sure it’s fully stirred and not separated straight from the jar, or the dough won’t hold together as well.

    Why is my dough too dry or crumbly? Almost always the nut butter wasn’t fully stirred. The oil and solids need to be completely recombined. Stir in an extra teaspoon of nut butter or maple syrup until it presses together easily.

    Can I use a different protein powder? Yes — vanilla or chocolate whey both work as written. Plant-based powders absorb more liquid, so you may need an extra splash of milk or maple syrup to get the same consistency.

    How long do these keep? Both flavors keep 1–2 months in the freezer in an airtight container. If you want the S’mores marshmallows soft rather than firm, keep that batch in the fridge instead, where it’ll last about a week.

    Nutrition (Thin Mint flavor, per bite): 191 calories, 11 g carbohydrates, 6 g protein, 15 g fat, 2 g fiber, 8 g sugar. Automatically calculated, so treat it as an approximation — the S’mores flavor will vary.

    Make It Yours

    Swap the peppermint extract for coffee extract in the base for a mocha-mint twist, or fold the S’mores base with a handful of crushed cookies for extra crunch. And if your freezer is full, make one flavor, eat one flavor, and treat the other as next week’s problem.

    Happy cooking, Maya.

    Keep Reading

  • Matcha Overnight Oats

    Matcha Overnight Oats

    There was a week last spring when I was running on coffee and pure stubbornness. Every morning the same thing: grab something, eat it standing at the counter, out the door. That’s when I started whisking a spoonful of matcha into my overnight oats the night before. By morning it had set into a thick, green, slightly sweet porridge that tastes like a latte you can eat.

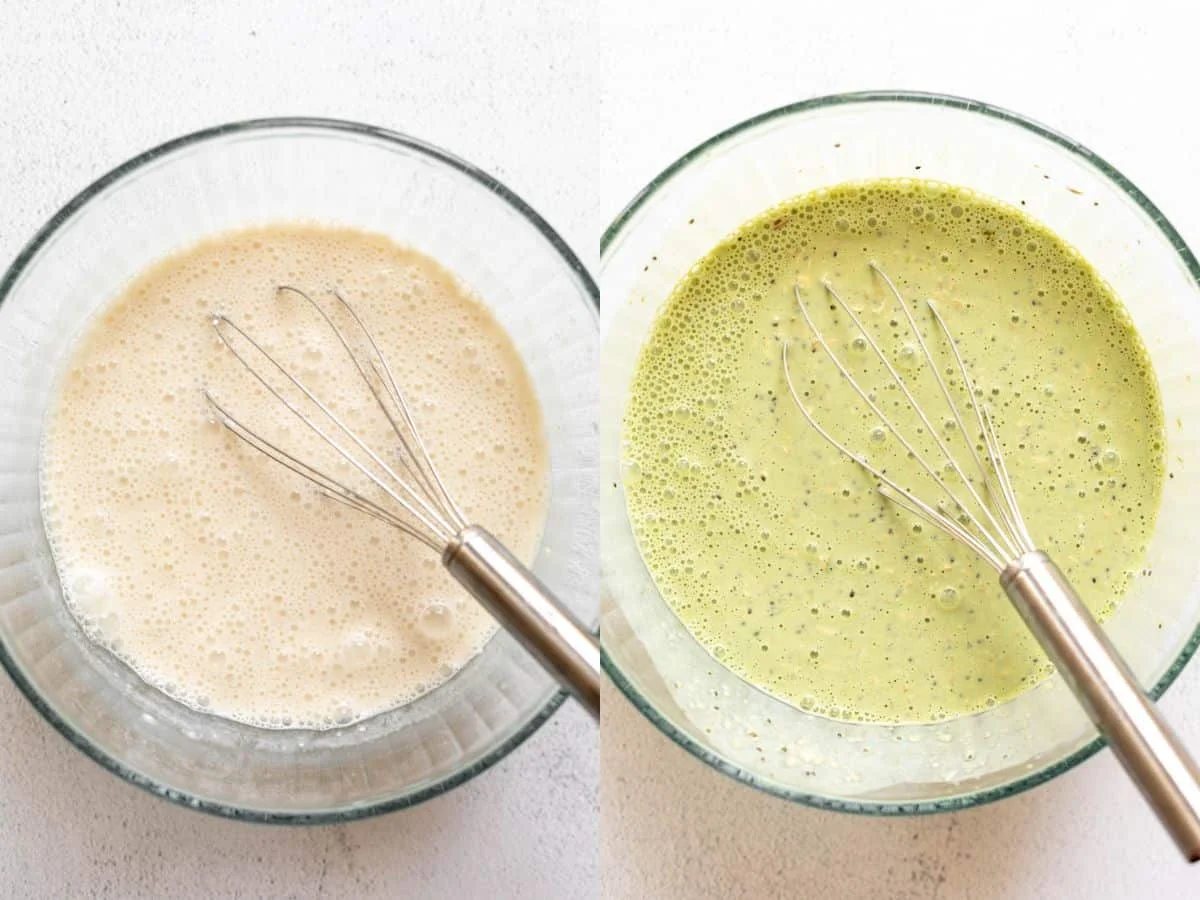
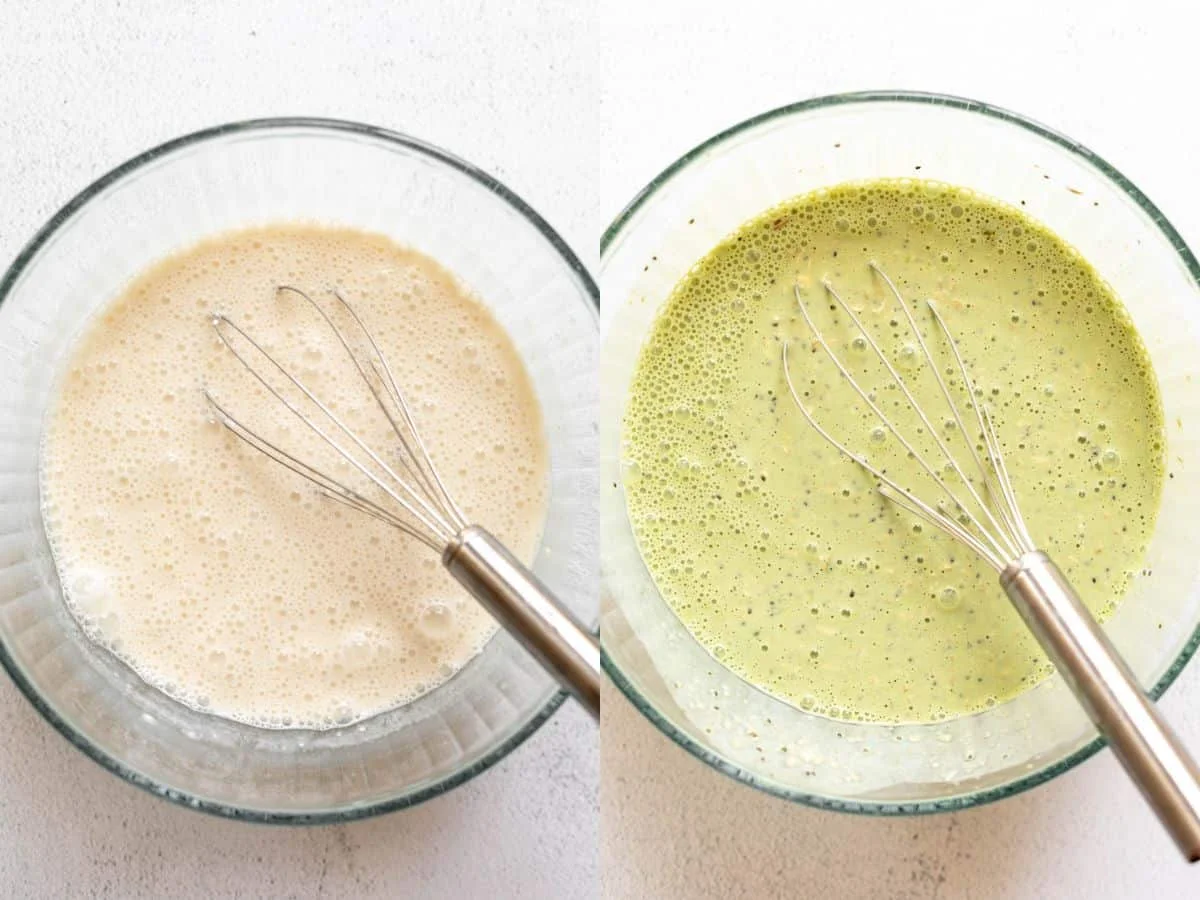
    Whisking matcha into milk for overnight oats

    It’s become my go-to make-ahead breakfast, and not just for me. My husband will fight over the last jar, which is the highest compliment I know for a weekday morning.

    What you get, and what it costs you in time

    Oats and chia seed for the fiber, Greek yogurt for the protein, matcha for the gentle caffeine lift. No baking, no blender, no 47-ingredient shopping list.

    Real time: 2 hours 10 minutes (most of it the fridge doing its quiet thing)
    Hands-on: 10 minutes

    Finished matcha overnight oats layered with strawberries and pumpkin seeds

    Ingredients

    • 2 cups milk, dairy or non-dairy
    • 1/2 cup Greek yogurt
    • 2-3 tablespoons honey or maple syrup
    • 1 teaspoon vanilla extract
    • 2 cups quick cooking oats
    • 2 tablespoons chia seeds
    • 1 tablespoon matcha powder
    • Pinch of salt (about 1/8 teaspoon)

    On the matcha: use a ceremonial grade in a vivid green color, not a dull yellow-brown. The color is the whole point of this recipe, and so is the flavor. I keep mine in a small jar by the coffee.

    Oats, matcha, yogurt, honey, milk, chia seeds, and vanilla labeled

    Method

    1. In a medium bowl or a lidded container, whisk the milk, yogurt, honey or maple syrup, and vanilla until the yogurt is fully blended in.
    2. Whisk in the oats, chia seeds, matcha, and salt until evenly mixed.
    3. Let it sit for 10 minutes and stir again, so the chia can start to thicken the mix.
    4. Cover and refrigerate for 2 hours (or overnight if you’re prepping ahead). Stir once more before serving.
    5. Top with more yogurt, berries, honey, and pumpkin seeds. Eat it before your coffee, not after.
    Layered green matcha chia parfait topped with fresh strawberries
    Spoon lifting creamy matcha oats from a glass bowl

    Make it yours

    • Extra protein: stir in a scoop of vanilla protein powder or some collagen peptides (they’re nearly flavorless). You’ll probably need an extra 2 tablespoons of milk to keep the texture right — thick enough to hold a spoonful, like the bowl in the photo above.
    • Vegan: swap in almond or soy milk and a plant-based yogurt like coconut. You’ll lose a little protein, but the flavor and texture hold up fine.
    • Glow up: sliced banana, chopped nuts, or nut butter on top. I kept mine simple with berries and a little more yogurt.
    • Gluten-free: oats are naturally gluten-free, but if you have Celiac, use certified gluten-free oats since they can pick up gluten during processing.

    Storing it through the week

    Prepared, these keep in the fridge for 3-4 days in an airtight container — a mason jar, a Weck jar, or a good lidded container all work. Give it a proper stir before eating, because things settle. I portion mine into smaller jars on Sunday so breakfast is grab-and-go all week, which sounds lazy but is the single best thing about this recipe.

    Real talk: the first batch I made, I under-sweetened it and the matcha came out more grassy than I wanted. Now I use the full 3 tablespoons of honey and I’m never reaching for a coffee pot first thing again. If you’re already a matcha person, this is the version that stays in rotation.

    Happy cooking, Maya

    Keep Reading

  • Strawberry Lemonade: Four Ingredients, 15 Minutes, Done

    Strawberry Lemonade: Four Ingredients, 15 Minutes, Done

    The first Saturday it hit 90 degrees, my husband was on the back porch with a cold glass of tap water and a look that said we need something better. I had fresh strawberries from the weekend farmers market, a box of lemons, sugar, and about 15 minutes before he started asking if the lemonade was ready yet. That’s where this one came from.

    Strawberry lemonade is the drink I make every single summer, and it has never once disappointed. It’s sweet, it’s tart, it’s pink, and it takes less time than the dishwasher cycle. No simple syrup shopping trip required — though you can absolutely cheat if you want to, and I’ll show you how.

    Glass pitcher and glass of pink strawberry lemonade over ice

    Real time: 15 minutes

    Hands-on: 15 minutes · Yield: about 7 glasses · Cost: around $5 for the whole batch. You need strawberries, lemons, sugar, and water. That’s the entire list.

    Bowls of fresh strawberries, lemons, and sugar on a checkered napkin

    What you’ll need

    • Strawberries: 1/2 pound (230 g) — half of a 1 pound (455 g) carton. Frozen works if you defrost them first, but fresh berries are worth it when you can get them.
    • Lemons: 1 1/4 cups (300 mL) fresh lemon juice — that’s about 9 lemons. I use a lemon squeezer; it saves my hands and my sanity.
    • Sugar: 1 1/4 cups (250 g), or 1 3/4 cups (415 mL) store-bought or homemade simple syrup. You can grab a bottle of simple syrup if you’re short on time — that link is an affiliate, same deal either way.
    • Water: 2 cups (475 mL) hot for dissolving the sugar, plus 4 cups (950 mL) chilled for the pitcher. Tap water is fine; filtered or purified gives a cleaner taste if you have it on hand.

    Equipment: a food processor or blender. That’s it.

    How to make it

    1. Make the sugar water. Boil the 2 cups (475 mL) water on the stove, take it off the heat, and stir in the sugar until it’s completely dissolved. Let it cool a bit while you do the rest. Dissolving the sugar first is the trick — no grains sinking to the bottom of your pitcher, just even sweetness in every sip.
    2. Juice the lemons. Cut them in half widthwise and squeeze. Pro move from years of kitchen prep: roll each lemon firmly on the counter before cutting. Sounds odd, works every time — you’ll get noticeably more juice.
    3. Puree the strawberries. Hull them, drop them in the food processor, and puree until smooth. Want it silky? Strain the puree through a fine mesh sieve to pull out the seeds and pulp. I usually strain — the texture is worth it.
    4. Mix it all together. Pour the sugar water into a pitcher, add the 4 cups (950 mL) of chilled water, then the lemon juice and the strawberry puree. Stir to combine. Look at that color.
    5. Serve. Ice goes in the glasses, not the pitcher — melting ice in the pitcher waters down the whole batch. Fill glasses with ice and pour over the top.
    Two glasses of strawberry lemonade garnished with lemon and strawberry

    Tips I actually use

    • Roll the lemons first. Firm, 20-second rolls on the counter before juicing. Non-negotiable.
    • Keep ice out of the pitcher. It dilutes. Glass by glass is the move.
    • Want a frozen version? Make the batch a little stronger on sugar and lemon, then blend it with ice until it turns slushy. It’s the best part of July, honestly.
    • Make it sparkling. Top the finished glass off with sparkling water. Instant upgrade, zero extra effort.

    Make it yours

    • Strawberry Arnold Palmer. For anyone who’s never had one: an Arnold Palmer is a 50-50 mix of iced tea and lemonade. Pour your strawberry lemonade and iced tea together in equal parts and you’ve got a version that tastes like a backyard barbecue.
    • Mint lemonade. Muddle fresh mint leaves at the bottom of the pitcher before adding everything else. Subtle, and it smells amazing.
    • Spiked. A shot of vodka or gin in the glass for grown-ups. The kids get the regular pitcher. Nobody minds.

    Quick answers

    How do I make simple syrup? Combine 2 cups (500 g) sugar and 2 cups (475 mL) water in a small pan. Simmer over medium heat, stirring, until every grain has dissolved. Don’t boil longer than it takes — overcooked syrup turns to caramel. Cool it, bottle it, fridge.

    Can I freeze strawberry lemonade? Yes. Freeze the lemon juice, strawberry puree, and syrup in a freezer bag (or in ice cube trays first, then bag the cubes). Thaw in the fridge and top with water when you’re ready. Perfect for starting summer before the weather’s ready.

    How do I store it? Fridge, airtight container. No lid on the pitcher? Plastic wrap over the top does the job.

    Honey instead of sugar? It works, but it shifts the flavor away from the classic version. Use sugar if you want that right strawberry-lemonade taste.

    Bottled lemon juice? Fresh is always better, but bottled will get you through in a pinch.

    Serve it with

    This drink shows up at every picnic and backyard party I host. It pairs well with simple crowd food — a good dip, deviled eggs, something with buffalo sauce, mango salsa, or guacamole if it’s a Mexican night. Cold pitcher, warm evening, done.

    That’s the whole thing. Four ingredients, one pitcher, and the best way to get through a hot Saturday. Make a double batch — trust me on that part. It never lasts to the next day.

    Happy cooking, Maya
    Keep Reading

  • Sauteed Cauliflower in Under 30 Minutes

    Sauteed Cauliflower in Under 30 Minutes

    Here’s a side dish my family doesn’t even wait for dinner to start over. A few nights ago the whole pan got raided while I was still plating the main course — pieces snatched straight out, no napkin, no manners, no complaints. That’s the highest review a kid can give.

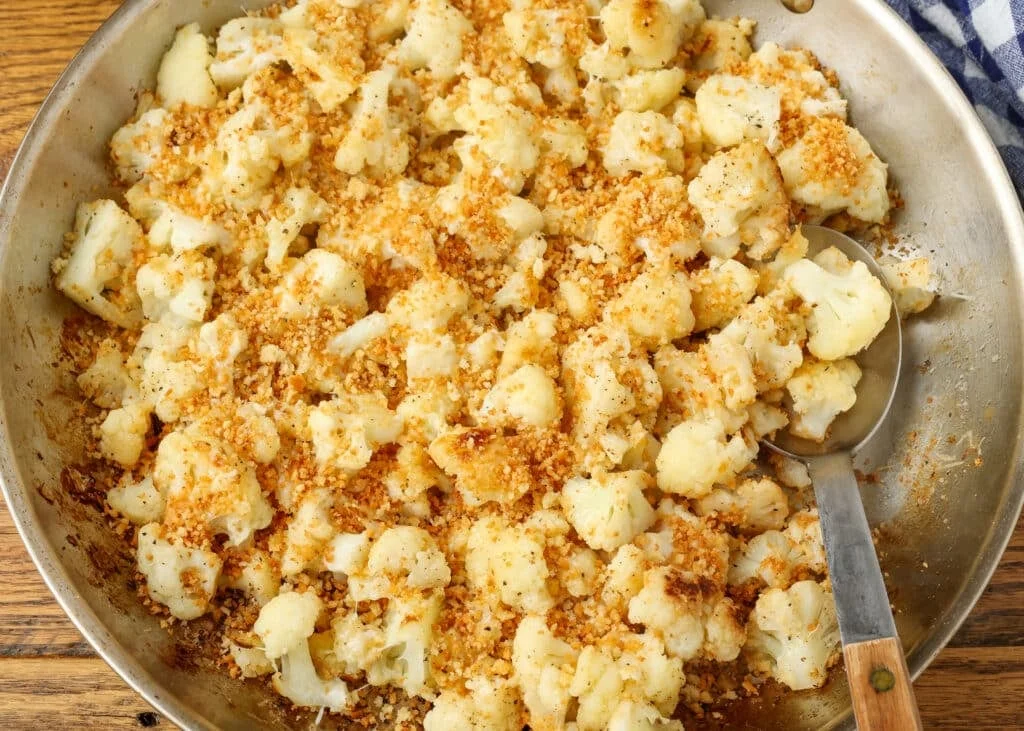
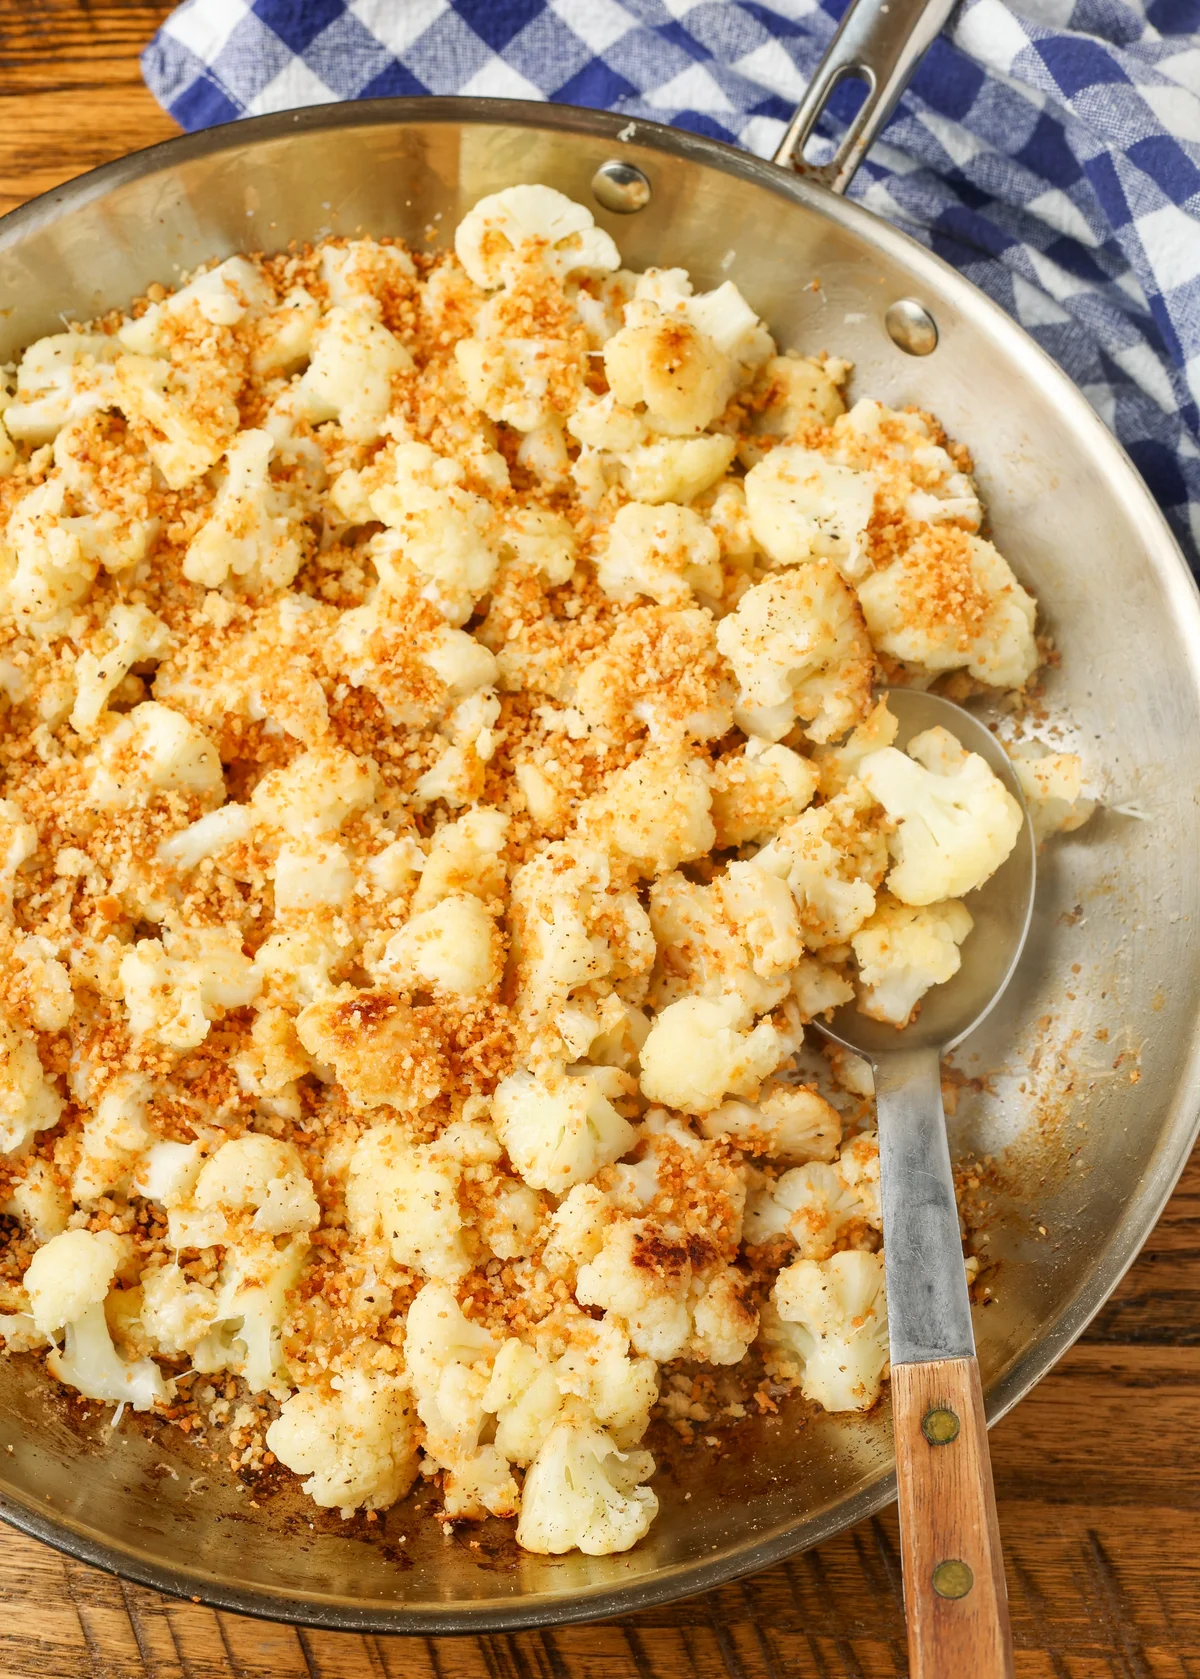
    Cheesy sauteed cauliflower topped with toasted breadcrumbs in a skillet

    This sauteed cauliflower is the reason. It’s the kind of thing I keep on rotation all week: hearty, cheesy, and done in under 30 minutes with barely any fuss. I’ve spent eight years in restaurant kitchens, and I still can’t explain why a simple pan of browned cauliflower, a little butter, and toasted breadcrumbs lands so hard at the table. Maybe it’s the contrast — tender inside, crisp outside, that salty Parmesan melt. One of my boys is normally a fierce critic of anything with cauliflower in it. He came back for seconds.

    Real time: 25 minutes. Hands-on: 10. One oven-safe skillet, one lid, that’s your whole toolkit.

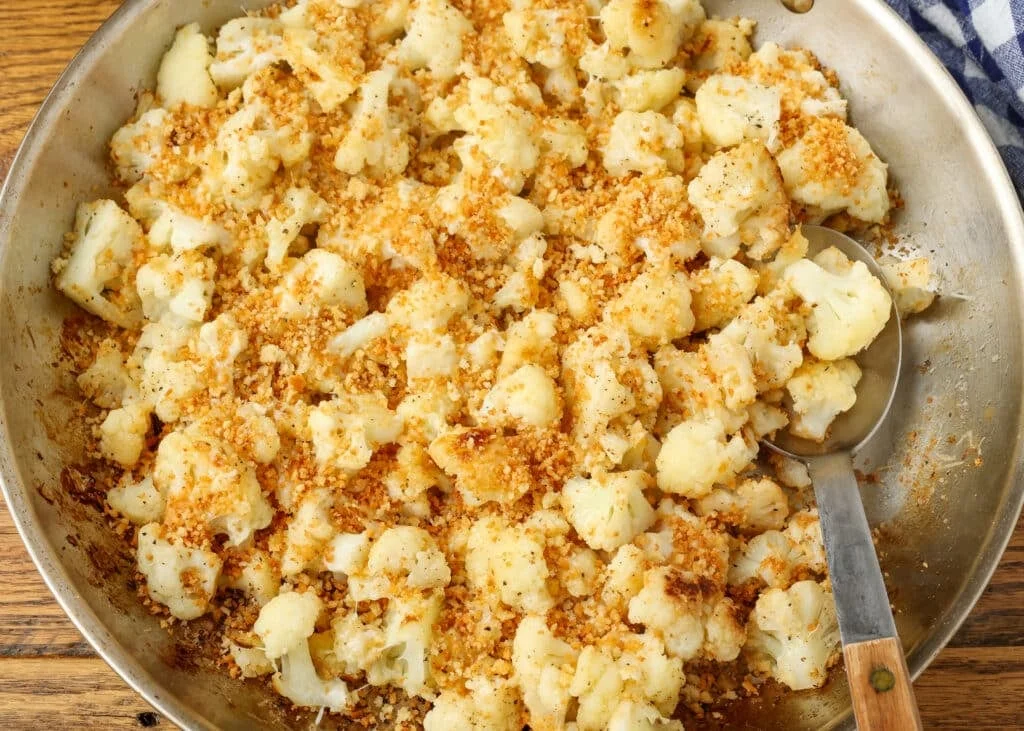
    Top-down view of golden sauteed cauliflower with crisp crumbs in a pan

    Ingredients (and honest swaps)

    • Cauliflower, 1 medium head, cut into 1-1½-inch pieces (about 6 cups). It soaks up flavor like nothing else in the produce aisle, and it keeps a satisfying crunch.
    • 2 tablespoons salted butter, divided. I only cook with salted butter unless a recipe says otherwise.
    • ⅓ cup panko breadcrumbs. Panko is my go-to for the crunch, but any good breadcrumb works — I’m not brand loyal here.
    • ¼ cup freshly shredded Parmesan. That’s where the nutty, savory depth comes from. Shred it yourself; the pre-shredded stuff clumps.
    • ½ tablespoon kosher salt and ¼ tablespoon freshly ground black pepper, adjusted to taste. Kosher salt, freshly cracked pepper, always.

    You’ll also want a large oven-safe skillet (mine is a heavy 12-inch one, broiler-safe to 800°F, and it earns its keep), a sharp knife, a cutting board, and a microplane if you have one.

    Method

    Prep while the pan heats. Grate the Parmesan and set it in the fridge. Chop the cauliflower into uniform pieces — this part matters, because even pieces brown evenly, and you want every floret to come out the same shade of golden.

    1. Melt 1 tablespoon of butter in the skillet over medium-high heat.
    2. Add the panko and stir quickly to coat it in the butter.
    3. Toast for about 2 minutes, until golden. Don’t rush this step, and don’t walk away — breadcrumbs can go from nutty to bitter-black in the space of a minute. If yours are browning fast, drop the heat and give them a little more time.
    4. Transfer the crumbs to a plate. They’ll keep browning for a moment or two after they come out of the pan, so let them cool before they get too dark.
    5. Return the pan to the stove over medium-low. Add the cauliflower and 2 tablespoons of water, cover, and let it steam for about 5 minutes.
    6. Uncover, raise the heat to medium, and cook until the water evaporates.
    7. Add the remaining tablespoon of butter and let it melt. Keep the cauliflower moving — stir frequently — for 8-10 minutes, until it’s browned all over, fork-tender, but still plenty crisp. That’s the texture I’m after: tender enough to slice, firm enough to bite into.
    8. Season generously with salt and pepper.
    9. Shower the Parmesan over the top, cover, and turn off the heat. Let it sit until the cheese melts and the pan gives off one last little puff of steam.
    10. Top with the toasted crumbs and serve straight from the pan. It’s best the moment it hits the table.
    Toasted golden panko breadcrumbs coating the bottom of a skillet

    Make it yours

    This is a blank canvas, honestly. A pinch of chili flakes before the cheese if the house likes some heat. Fresh parsley stirred in at the end for color. Or go all-in: this pairs great with anything that comes out of a skillet — pork chops, a baked chicken, a steak with rice on the side. It’s the kind of side that disappears first, which is how I know a weeknight went right.

    Make ahead & storage

    If I’m being honest, don’t. Reheating kills the crisp on both the crumbs and the florets, and this dish is all about that texture. If you do have leftovers, they’re fine in an airtight container in the fridge, and a quick reheat in the microwave gets the job done — just know you’re eating a good, warm version of this, not the first-serve version.

    FAQ

    How often should I stir? Every minute or two. Vegetables in a skillet want attention — flip and turn them as needed so every side gets a proper brown sear.

    Why is my cauliflower sticking? Usually it means you need more butter, or the heat crept up while it was simmering. Drop the burner to medium-low and give it another knob of butter if things are grabbing on.

    How do I know it’s done? The fork test. It should slide in with a little resistance — tender, but with a real crunch left in it.

    Happy cooking,
    Maya
    Keep Reading

  • Baked Greek Chicken and Potatoes (One Pan, Zero Fuss)

    Baked Greek Chicken and Potatoes (One Pan, Zero Fuss)

    My husband asked me last month what I’d make for a slow Sunday, and I was honestly staring at the kitchen counter, half-listening to him, when it hit me: the one dish I make more often than almost anything else. Baked Greek chicken and potatoes. Lemon, garlic, dried herbs, and a pan of potatoes that roasts right alongside the chicken until the whole kitchen smells like a seaside dinner I can barely afford.

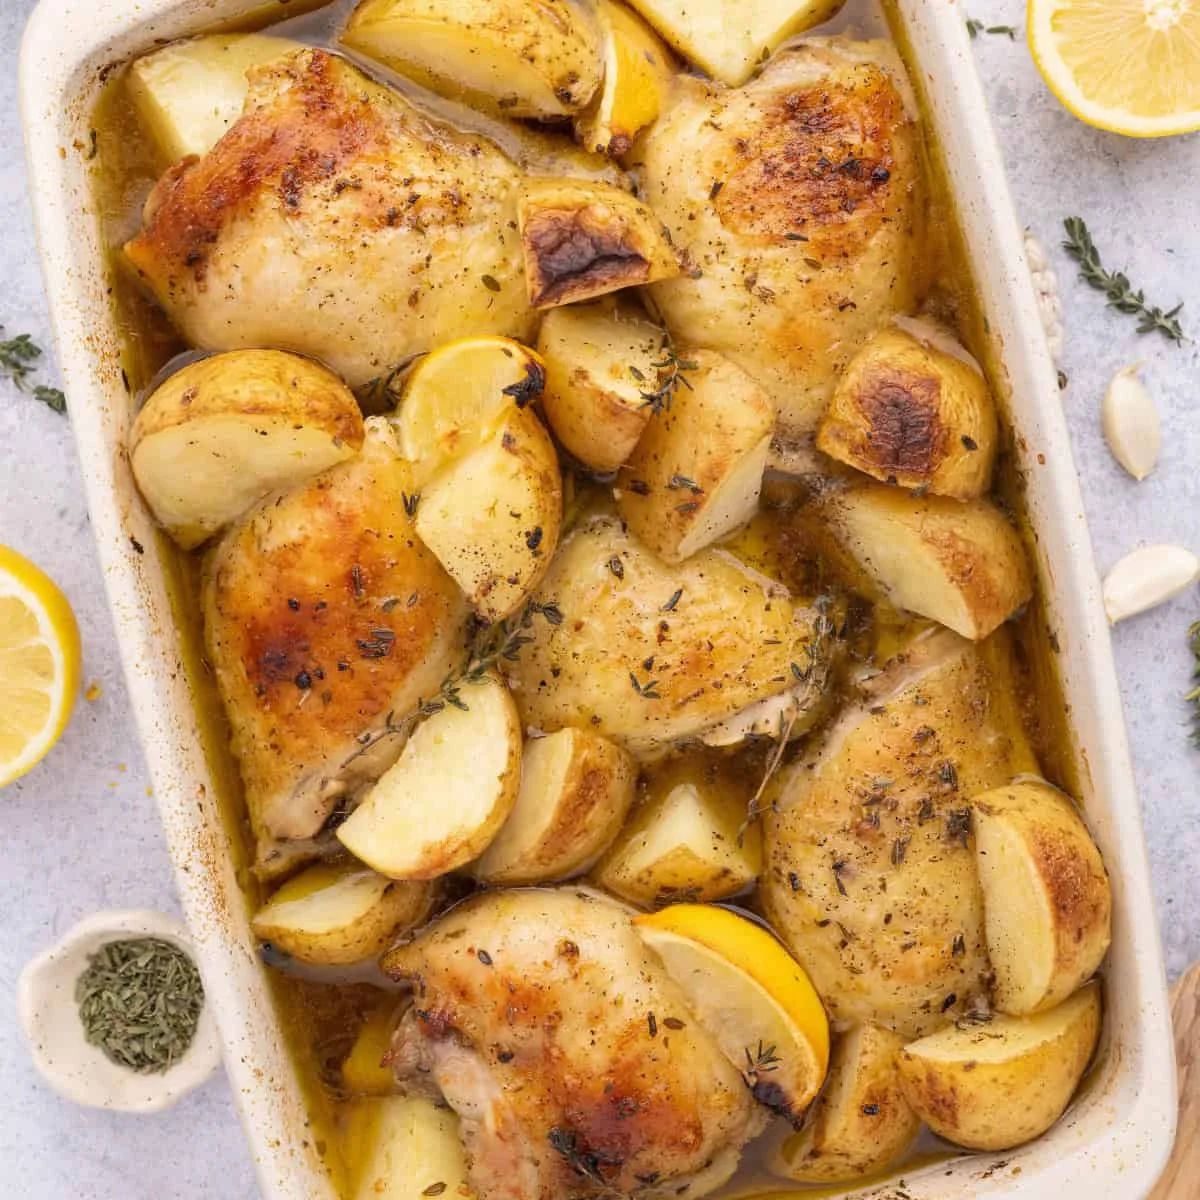
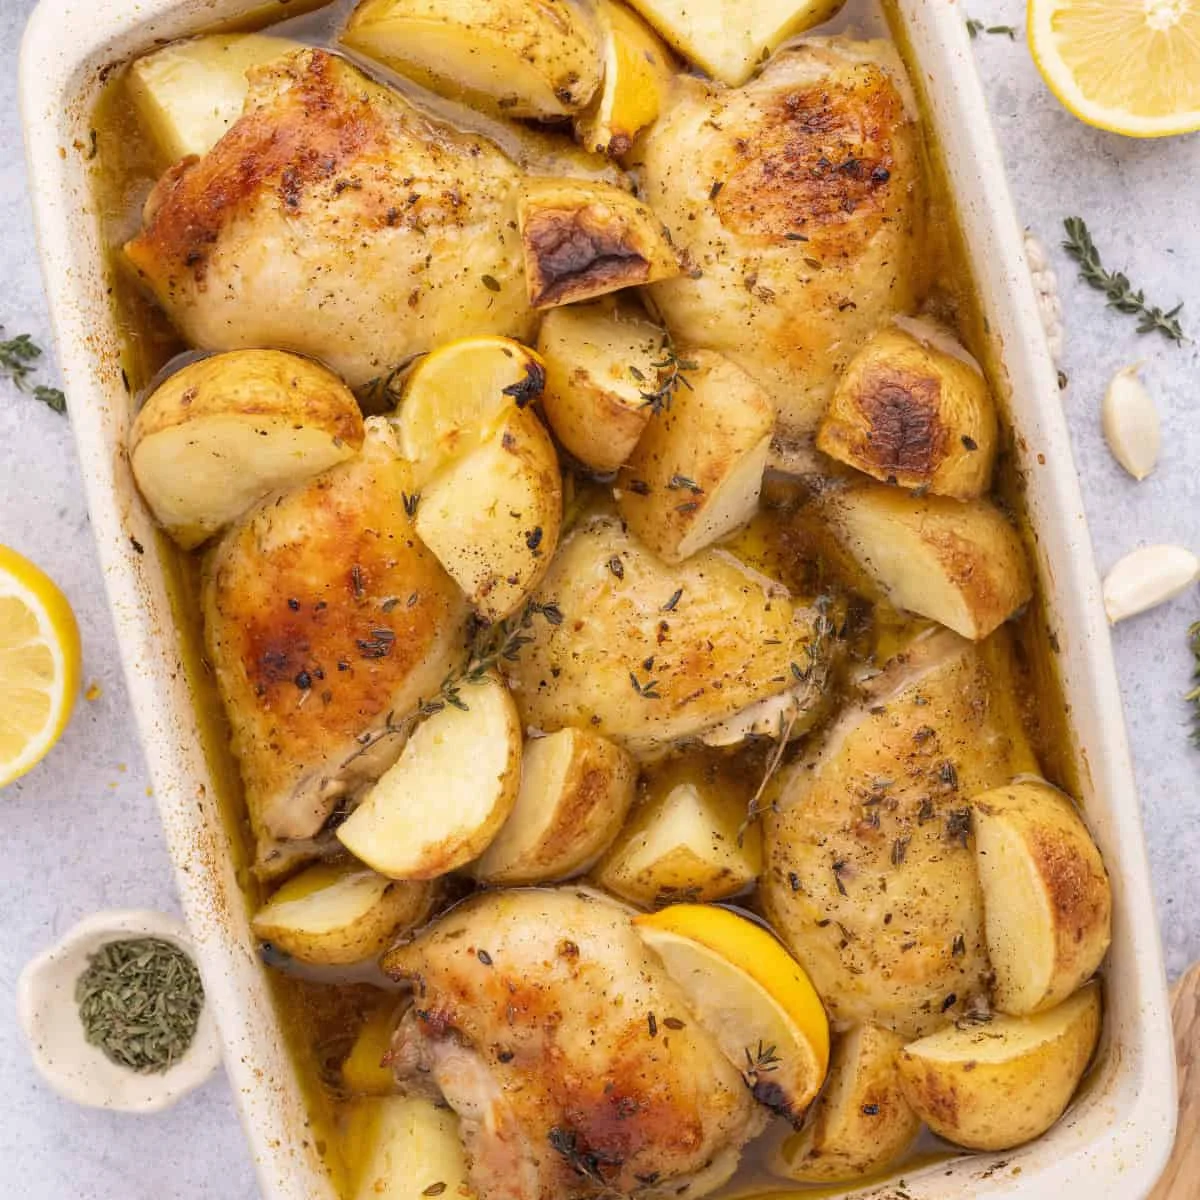
    Baked Greek chicken thighs and potatoes with lemon in a baking dish

    It’s not a quick dish — let’s be honest about that. Real time: about 1 hour 55 minutes. Hands-on: a short stretch of active cooking. But almost all of that time is the chicken marinating in the fridge or doing its quiet thing in the oven. You mix the marinade, you wait, you bake. That’s the whole job.

    Why this one works

    Everything cooks in one dish, which means one dish to wash and a pan full of sauce you’ll want to drizzle over every piece of chicken before you serve it. The lemon juice and zest plus a mix of thyme, oregano, and marjoram give both the chicken and the potatoes a proper Mediterranean flavor — bright, herby, a little garlicky. The chicken comes out juicy and the potatoes fork-tender, and it feeds a whole family or a small dinner party without any fuss.

    I call it a weekend dish on purpose. On a packed Tuesday with errands and work, I don’t have an hour for marinating and another for baking. But when I’m home all day, or guests are coming over and I’d rather sit and talk than stand over the stove, this is the recipe I reach for. You can even do the prep a day ahead — mix the marinade, trim the chicken, wash the potatoes — and the dish assembles itself on the day.

    Ingredients

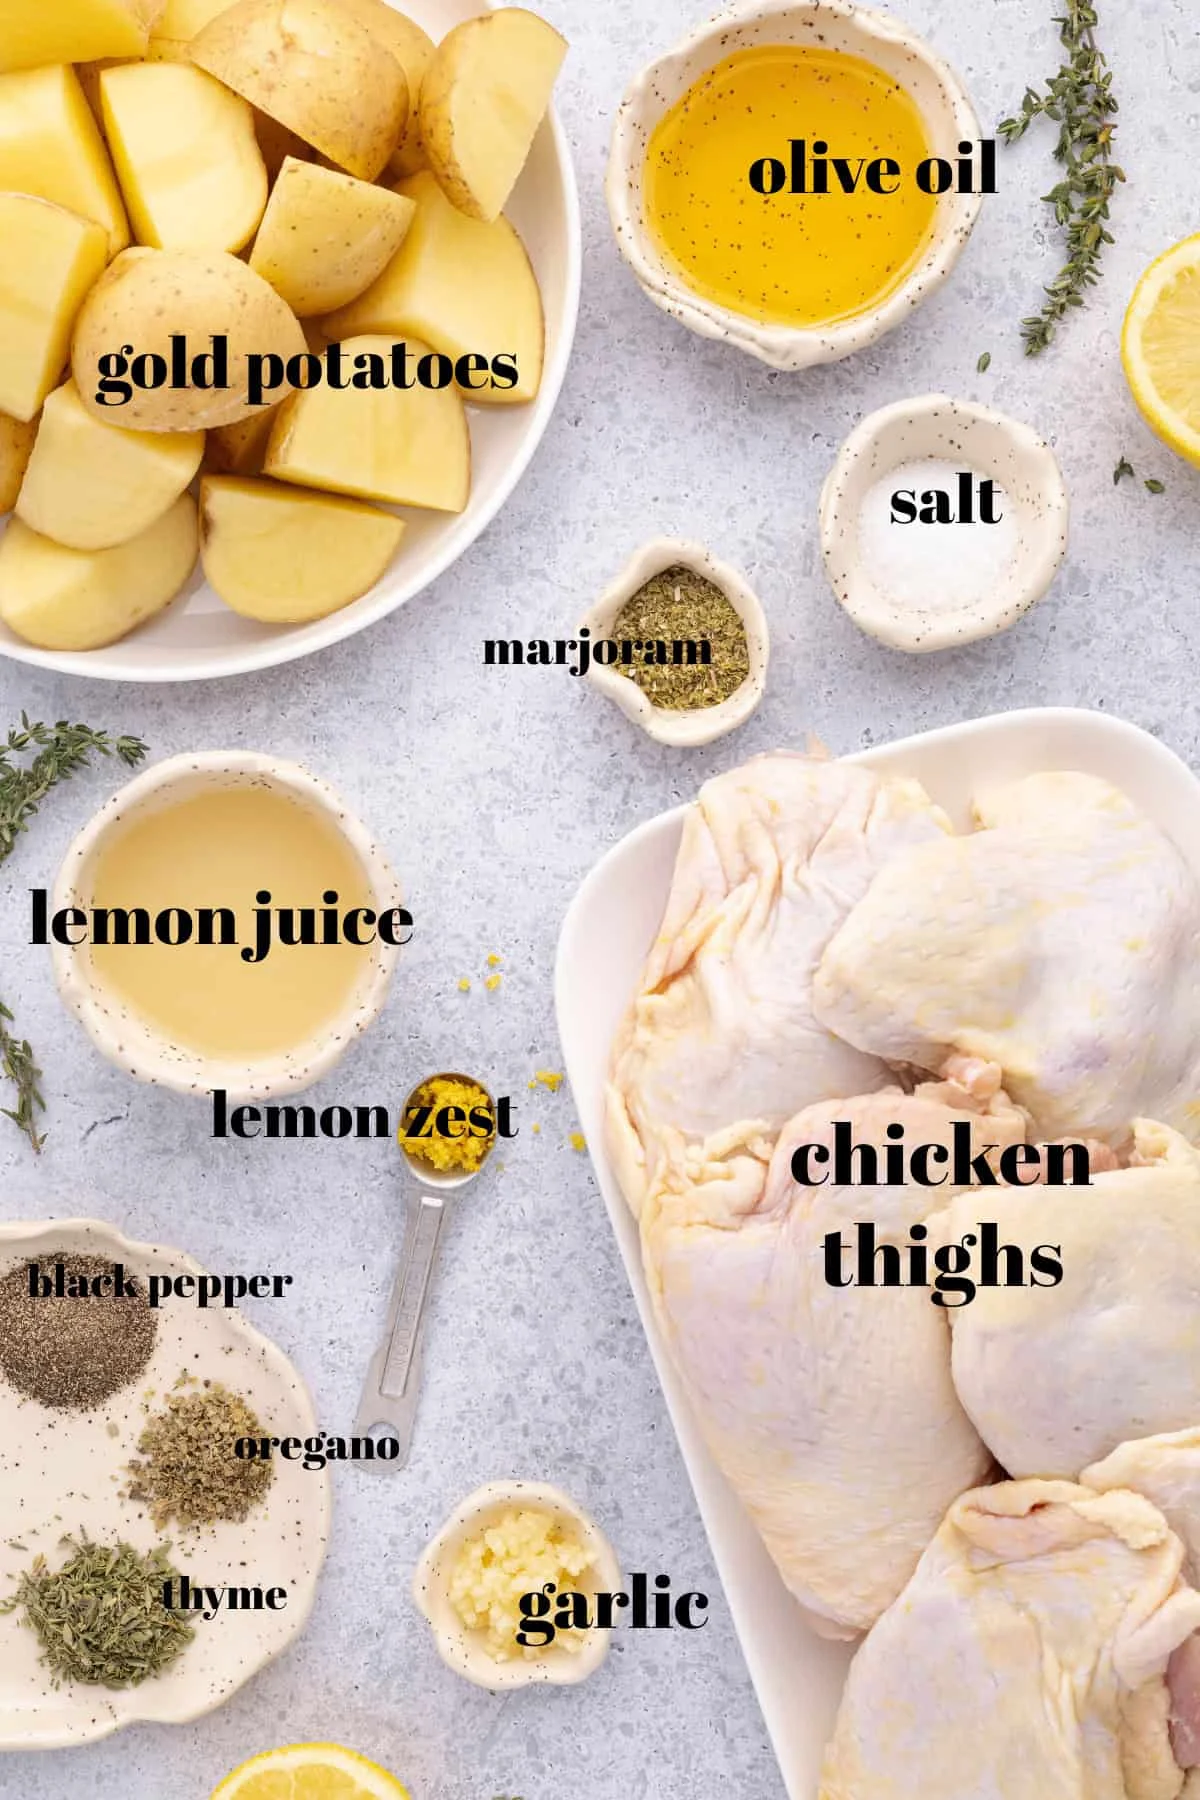
    Raw ingredients for Greek chicken and potatoes laid out on a counter
    • 6 chicken thighs, bone-in, skin-on — pick thighs roughly the same size so they bake evenly. Trim off the excess skin and fat.
    • 1 to 1.5 lbs small Yukon gold potatoes, washed and halved or quartered. Yukon golds are my favorite for roasting alongside chicken in one dish — they hold their shape but turn properly tender.
    • 1/2 cup olive oil
    • 1/2 cup lemon juice, plus the zest from 1 lemon — I use all of the lemon, juice and zest. Fresh is better, but bottled juice works if that’s all you have on hand.
    • 2 teaspoons kosher salt
    • 1 teaspoon black pepper
    • 1 teaspoon dried oregano
    • 1 teaspoon dried thyme
    • 1/2 teaspoon dried marjoram
    • 3 garlic cloves, minced
    • Lemon wedges and fresh herbs for the pan, optional
    • Chopped parsley, for finishing

    How to make it

    1. Whisk the marinade. Combine the olive oil, lemon juice, lemon zest, salt, pepper, oregano, thyme, marjoram, and garlic in a bowl until it’s nicely emulsified.

    2. Marinate the chicken. Place the thighs in a large bowl, pour all the marinade over them, and turn to coat. Cover and refrigerate for at least 1 hour. Overnight is fine too, if you want to plan ahead.

    3. Build the dish. Arrange the chicken thighs and potatoes in a 13″ x 9″ baking dish. Pour the rest of the marinade over everything, and add lemon wedges and a few fresh herb sprigs if you like.

    4. Bake. Let the dish sit at room temperature while the oven preheats to 375°F. Cover with aluminum foil (or an inverted metal baking sheet) and bake on the middle rack for 35 to 40 minutes. Remove the foil and bake for another 40 minutes, or until the potatoes are tender and the chicken reads at least 165°F on a meat thermometer.

    5. Finish it. Broil for 2 to 3 minutes to crisp the skin — watch it so it doesn’t go from golden to burnt. Then let it rest for a few minutes, drizzle the pan juices over each piece, and serve with chopped parsley.

    Roasted chicken and potatoes with charred lemon wedges and fresh thyme

    Honest tips

    Use a meat thermometer, especially with bone-in chicken. It’s the one tool I can’t over-recommend when you’re roasting this way.

    If you only have a sheet pan, it works — but the chicken will be a little drier, because the juices have somewhere to run. A deep dish keeps everything in its own sauce.

    Don’t skip the pan sauce. Drizzle it over the chicken before serving, or whisk in a little flour or cornstarch to make a quick gravy for the potatoes.

    Want to prep ahead? Mix the marinade the day before, trim the chicken, and wash the potatoes — but don’t cut them until the day of, or the cut edges turn brown.

    FAQs

    Can I marinate overnight and bake the next day? Yes — overnight marinating is just fine. The only rule is that the chicken needs at least one hour before it hits the oven. Marinating in the morning and baking at dinnertime works perfectly.

    Can I use bottled lemon juice? It works as a shortcut, but fresh lemon is better — the juice has a stronger flavor and the zest adds another layer of citrus. I’d only reach for the bottle when fresh isn’t available.

    Can I marinate the potatoes with the chicken? Yes. Toss both in the bowl with the marinade and coat everything well — uncoated potato edges will brown unevenly.

    Make it yours

    Swap the Yukon golds for any potato you like, add a few sliced zucchini or bell peppers to the pan, or pile the whole thing over rice. And if you’re already in the mood for more one-pan chicken dinners, this pairs nicely with a crisp green salad and some good bread to soak up the sauce.

    Happy cooking,
    Maya