分类: Food

  • Crab Cake Recipe

    Crab Cake Recipe

    There’s a moment in every crab cake recipe where you stop trusting your hands. The crab is expensive, the shells are sharp, and one clumsy fold and your dinner turns into crab mush. I learned this the hard way, at the counter, with a jar of lump crab and a stack of empty patty shapes in front of me.

    The fix isn’t technique. It’s restraint. Whisk the wet stuff separately, fold the crab in like you’re handling something that will complain, chill it longer than feels necessary, and the pan does the rest. You get a crisp, golden outside, a tender inside that’s mostly actual crab, and a plate that makes a regular weeknight feel like a little celebration.

    Golden crispy crab cakes with tartar sauce and lemon

    Here’s the honest math on this one: Real time: 1 hour 40 minutes (that’s the 1-hour chill doing the quiet work). Hands-on: about 40 minutes. You get 8 crab cakes out of it. No 47-ingredient list, no fancy equipment — a big bowl, a plate, plastic wrap, and a nonstick skillet.

    Why this version works

    Very little filler. The panko and mayo are there to hold the crab together, not to disguise it, so each bite is meaty with a bright hit of lemon and herbs. A quick pan-fry gets you that shatter-crisp golden finish without a deep fryer. And they’re flexible enough to be appetizers, a side, or the whole main course — whatever your evening actually needs.

    Picking your crab

    For the best flavor, go with fresh crab meat or lump crab meat — it’s usually in a jar near the seafood counter. Lump has bigger pieces, which is what you want in a cake. Canned crab works fine too and saves money; it’s just a little more work.

    Whichever you choose, do the pick-through. Pull out shell bits and cartilage before you mix. It takes a few minutes and it’s the difference between a pleasant bite and a surprise.

    Notes on the other ingredients

    The seasoning is doing real work here: Dijon mustard, a hint of Worcestershire, and Old Bay — that classic American seafood spice blend if you’re outside the US — with fresh parsley on top. It’s what makes the inside taste like crab and not like breadcrumbs.

    On the binder: I use just enough panko to hold things together, and a little mayo is what keeps the texture soft. If you’re out of panko, crushed saltine cracker crumbs are a fine swap.

    Ingredients

    Serves 8 · Real time: 1 hour 40 minutes · Hands-on: about 40 minutes

    • 1 pound (454 g) lump crab meat, picked over for shell and cartilage
    • ¼ cup (60 ml) mayonnaise
    • 1 large egg, beaten
    • 1 tablespoon (15 ml) Dijon mustard
    • 1 tablespoon (15 ml) Worcestershire sauce
    • 1 teaspoon (5 ml) Old Bay seasoning
    • ½ cup (60 g) panko bread crumbs, unflavored
    • 1½ tablespoons (22 g) chopped fresh parsley
    • 1 teaspoon (5 ml) lemon zest
    • ½ teaspoon (3 g) kosher salt, or to taste
    • ½ teaspoon (2 g) black pepper, or to taste
    • ¼ cup (60 ml) canola oil, for frying
    • lemon wedges, for serving

    How to make them

    1. Check the crab meat for any hard, sharp cartilage. Remove it and toss.
    2. In a bowl, whisk together the mayonnaise, beaten egg, Dijon mustard, Worcestershire sauce, and Old Bay seasoning.
    3. Add the crab meat, panko, parsley, lemon zest, salt, and pepper. Gently fold to combine — you want it just holding together, not mashed.
    4. Press about ⅓ cup (80 g) of the mixture into each of 6–8 crab cakes. Place them on a plate, cover with plastic wrap, and refrigerate for at least 1 hour.
    5. Heat the oil in a large nonstick skillet over medium heat. Cook the crab cakes 3–5 minutes per side, or until golden brown.
    6. Serve immediately with a squeeze of lemon and your favorite dipping sauce — homemade tartar, remoulade, or garlic aioli all work.

    One technique note, and it’s the whole game: be gentle. The crab breaks apart faster than you think. And don’t skip the chill — it’s what lets the cakes hold their shape in the pan. If you’d rather bake than fry, preheat the oven to 450°F (230°C), set the cakes on a foil-lined tray, and bake 13–18 minutes until browned.

    Make it yours

    • Stir in 1–2 tablespoons of finely diced red bell pepper or green onion before you shape the cakes.
    • Add a pinch of cayenne or Cajun seasoning for gentle heat.
    • Form them smaller for an appetizer plate and shorten the cook time a bit.

    Storing and reheating

    Cooked crab cakes keep in an airtight container in the fridge for up to 3 days. To get them crisp again, reheat in a dry sauté pan over medium heat, or in the air fryer — don’t microwave them if you can help it, or you’ll lose the crust. Cooled, uncooked cakes freeze fine for up to 3 months; thaw overnight in the fridge, then pan-fry or air fry to finish.

    Leftovers have a second life: chop them up and fold into a crab salad, or mix into a cheesy crab dip.

    Per crab cake (approximate)

    232 calories · 3 g carbs · 11 g protein · 18 g fat (2 g saturated) · 50 mg cholesterol · 938 mg sodium · 153 mg potassium · 145 IU vitamin A · 6.8 mg vitamin C · 42 mg calcium · 1 mg iron. Estimates only — they’ll shift with your ingredients and how much oil the pan takes.

    Happy cooking,
    Maya

    Keep Reading

  • Blueberry Quinoa Bars

    Blueberry Quinoa Bars

    The morning I made these, the kids’ school bags were still in the hallway and the bread bin was officially empty. I had rolled oats, a bag of quinoa, and a container of blueberries that had been quietly judging me from the back of the fridge. So I made bars. They’re vegan, gluten-free, and the quinoa goes straight from the bag to the bowl — no cooking first.

    Real time: 30 minutes, plus 20 minutes of cooling. Hands-on: about 10 minutes. It’s the kind of thing I make on a Sunday so there’s something solid waiting in the fridge when the week gets loud.

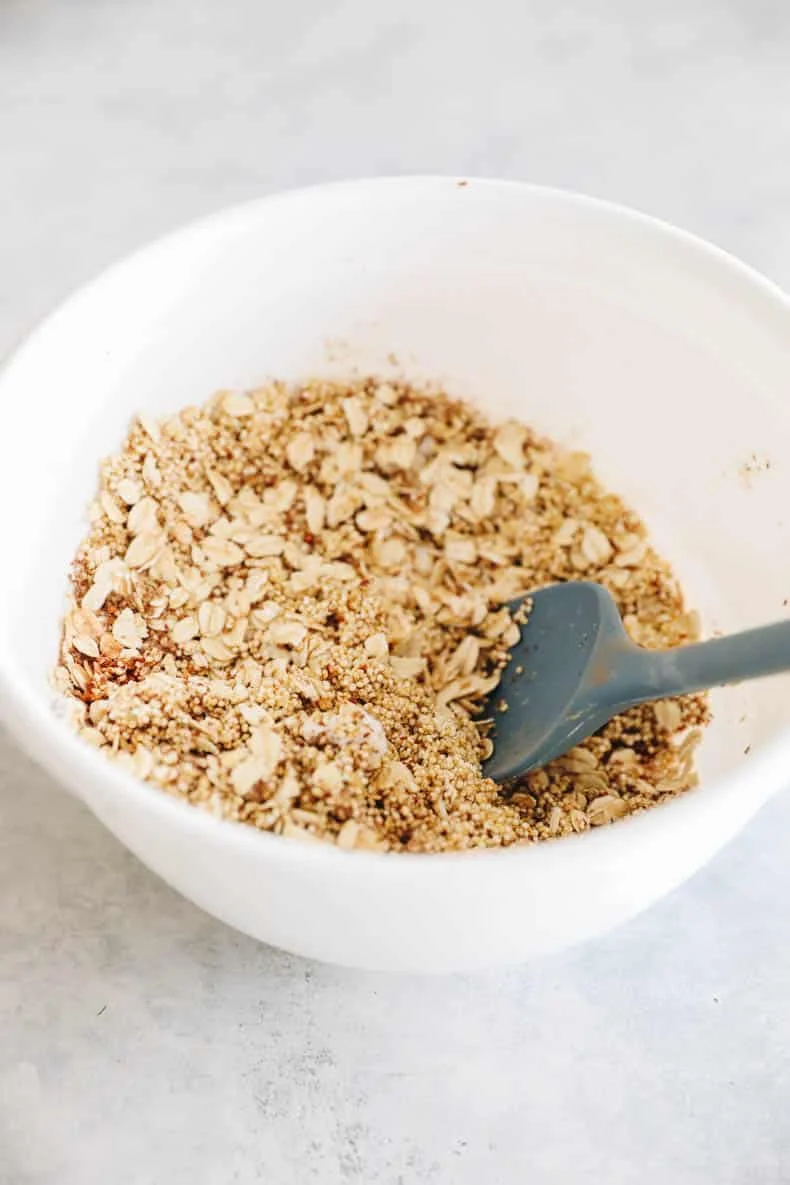
    Rolling oats and ground flaxseed mixed in a bowl

    Why I love these bars

    • No-cook quinoa. It sounds too good to be true, but I’ve tested both ways and the uncooked quinoa bakes up with the better texture.
    • Fresh or frozen berries work. Frozen keeps the recipe on the table all year round.
    • They’re genuinely any-time. A breakfast, a lunchbox snack, a dessert with a clear conscience. I don’t even care which one.
    • The flax seed does the work of an egg, so the whole thing is vegan without any special ingredients.

    What you need

    1 cup (120 g) rolled oats — use certified gluten-free oats if that’s your thing.
    1 cup (170 g) uncooked white quinoa, rinsed — white quinoa is the most neutral-tasting and lightest. Rinse it well to wash off the saponins, or the bars will taste a little bitter.
    1 tsp (4 g) baking powder — helps the bars rise.
    1/2 tsp (2 g) cinnamon — it’s a perfect match with the blueberries.
    A pinch of sea salt — brings everything together.
    2 tbsp (20 g) ground flaxseed — binds the bars the way a flax egg would.
    1/3 cup (80 g) unsweetened applesauce — keeps things moist and light. Get the unsweetened kind so you control the sugar.
    3 tbsp (45 g) almond butter — any other nut or seed butter works fine.
    1 tbsp (15 g) coconut oil, melted — unrefined is what I look for.
    1/4 cup (85 g) pure maple syrup — honey works too, but then the recipe stops being vegan.
    1 cup (140 g) fresh or frozen blueberries — swap in another berry if that’s what you have.

    Blueberry oat bar batter folded with fresh blueberries in a bowl

    How to make them

    1. Preheat and prep. Preheat the oven to 350°F (175°C). Grease a 9 x 9 inch (23 x 23 cm) baking dish with a little coconut oil, or line it with parchment.

    2. Mix the dry. In a large bowl, combine the oats, quinoa, baking powder, cinnamon and salt.

    Blueberry oat bar batter folded with fresh blueberries in a bowl

    3. Stir in the wet. Add the applesauce, flax, almond butter, melted coconut oil and maple syrup. Stir until well combined, then fold in the blueberries. Let the batter sit for 10 minutes while the flax soaks up liquid.

    Baked blueberry quinoa bars cut into squares in a baking pan

    4. Bake. Spread the batter evenly into the dish and bake for 25-30 minutes, until the edges are crisp and the center is set.

    5. Cool, then cut. Let the bars rest in the pan for 20 minutes, then slice into 9 to 12 squares and let them cool completely. Trust the 20 minutes — cutting too early is how you end up with crumbles and a short temper.

    Good to know

    Do I have to cook the quinoa first? No. I’ve baked these with both cooked and uncooked quinoa, and the uncooked version came out better every time.

    Why white quinoa? I’d recommend it. Tri-color quinoa takes longer to bake, so white is the safe bet here.

    Do I really need to rinse it? Yes. Quinoa is coated in saponin, which tastes bitter. Rinse it under cold water in a fine mesh strainer before using.

    Are they gluten-free? Yes, as long as your oats are certified gluten-free.

    Are they vegan? Yes — no eggs, no dairy, just flax seed and applesauce doing the work.

    Storage

    Fridge: once they’ve cooled completely, keep them in an airtight container in the refrigerator for up to 3 days. They store really well and hold together fine for lunchboxes.

    Freezer: up to 3 months in an airtight container. Thaw overnight in the fridge, or on the counter for several hours.

    Make it yours

    Swap the blueberries for whatever berries are in season — blackberries and raspberries both work. A handful of chopped nuts before baking adds crunch. And if you’re baking these for a crowd, double the batch and freeze half straight away; future-you will be grateful.

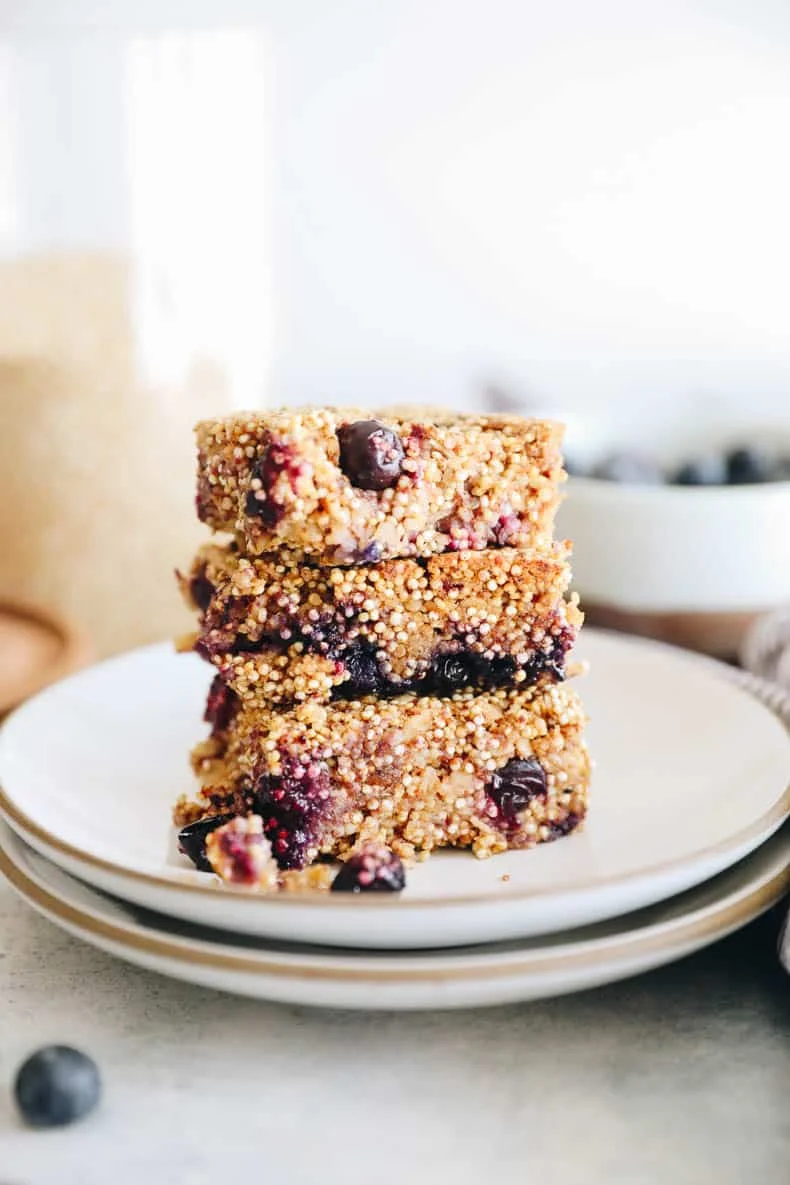
    Stacked blueberry quinoa bars on plates with a bowl of fresh blueberries

    Happy cooking,
    Maya

    Keep Reading

  • What Greeks Actually Eat for Breakfast

    What Greeks Actually Eat for Breakfast

    Eight years in restaurant kitchens taught me one thing: the people who eat least at breakfast tend to be the ones who show up hungry, on time, and ready to work. So when I learned how Greek mornings actually run, I wasn’t surprised at all. I just kept the notes.

    Greek breakfast isn’t the hearty European spread you might picture. It’s light, fast, and honestly a little bit lazy in the best way. Here’s what it really looks like.

    Coffee first, everything else second

    For centuries, a Greek morning meant one thing: a cup of strong Greek coffee. Maybe a piece of bread or a rusk on the side. That was it. The thinking was simple — eat lightly, get to work, and save your appetite for lunch, which was the big meal of the day.

    That habit still lives on. In villages, and with a lot of older Greeks, the day still starts with coffee and a cigarette, though the health crowd is slowly winning that argument. The philosophy never really changed: breakfast should be light enough that you can work through the morning without feeling weighed down.

    Koulouri: the sesame ring on the go

    Sesame-covered koulouri bread rings on a counter next to Greek coffee

    Walk through any Greek city in the morning and you’ll pass a koulouri stand. The rings are bread covered in sesame seeds, slightly chewy, subtly sweet, and they cost just a euro or two. They’re the perfect grab-and-go breakfast for people heading to work or school.

    Koulouri stands are as common in Greece as coffee carts are here. Greeks usually pair one with a freddo espresso or a cappuccino, and eat it while walking or commuting. It’s fast, it’s cheap, and it’s good enough that nobody bothers upgrading it.

    The café stop: Greek coffee and a pastry

    Some mornings are a little slower. Greeks stop at the local café or a zacharoplasteio — a pastry shop — for coffee and something sweet. It’s not the rushed coffee run you see in most other countries. Even a short stop takes fifteen minutes, and that’s the point.

    What you get depends on the morning. Tiropita (cheese pie), spanakopita (spinach pie), or bougatsa — a custard-filled phyllo pastry that’s especially beloved in northern Greece. It’s more substance than a koulouri, but it still respects the Greek preference for keeping breakfast light.

    The modern version: yogurt, honey, and fruit

    Tourism and a bit of globalization changed things, especially in cities. A lot of younger Greeks now eat a continental-style breakfast: Greek yogurt with honey and walnuts, fresh fruit, toast with jam, and orange juice.

    Greek yogurt became an international phenomenon, but in Greece it’s just called stragisto yogurt. Served with local honey and nuts, it gives you protein and energy without feeling heavy. It’s the one breakfast that honestly bridges the old way and the new one.

    Hotels and cafés in tourist areas now put out proper spreads — local cheeses, olives, tomatoes, cucumbers, boiled eggs, cold cuts. Not traditionally Greek, but nobody’s complaining.

    Regional treats worth knowing about

    Greek breakfast varies by region, and it’s worth knowing the difference.

    In Crete, you might get paximadi — a hard barley rusk softened with water or coffee, then topped with tomatoes, olive oil, and mizithra cheese. It reflects the island’s agricultural heritage and its preference for simple, honest ingredients.

    In Thessaloniki and the north, bougatsa is king. Some locals eat it as a complete breakfast on its own. Others add a piece of fruit or a small salad. On weekends, families slow down and go bigger — larger spreads, more time at the table.

    Why it works

    Greek breakfast is light because the rest of the day is heavy. Lunch is the big meal, the food is fresh, and nobody’s rushing. Whether you go the traditional route — coffee and a koulouri — or the modern one, yogurt and fruit, the pattern is the same: be efficient in the morning, and save your appetite for the meals you actually share.

    Make it yours: grab a sesame ring from your local bakery (or roll your own on a weekend), strong coffee, and a bowl of Greek yogurt with honey and walnuts. It takes fifteen minutes, it costs almost nothing, and it’ll keep you honest until lunch.

    Happy cooking, Maya.

    Keep Reading

  • Green Goddess Dressing (Panera Copycat)

    Green Goddess Dressing (Panera Copycat)

    It was a cold evening and a bag of leftover spinach, and I was done with the sad store-bottle dressing situation. I’d practically lived on Panera in college — my order was always the fuji apple salad — and I’d been meaning to make their green goddess dressing at home for months. So I pulled up the recipe they’d published, used it as a guide, and adjusted the proportions into a smaller, lighter batch with less mayo. It kept the creamy texture and that fresh basil flavor I love. It has quickly become one of my favorite homemade dressings, and I have a feeling it’s going to become one of yours too.

    Creamy green goddess dressing in a glass jar with fresh basil

    Real time: 10 minutes, plus 30 minutes of chilling if you can manage it. Hands-on: about 5. One blender, zero whisking. It’s the kind of thing that’s ready before the oven even warms up — which is saying something when you’re cooking dinner in a real kitchen at 6 p.m.

    Why I keep making this one

    It tastes just like the Panera version I grew up craving — creamy, bright, herby. I use it as the base for my green goddess cobb salad, which is my homemade take on another Panera favorite. And it’s not just a salad thing: drizzle it over grain bowls, spread it on sandwiches, or serve it as a dip. Honestly, it makes almost everything it touches better.

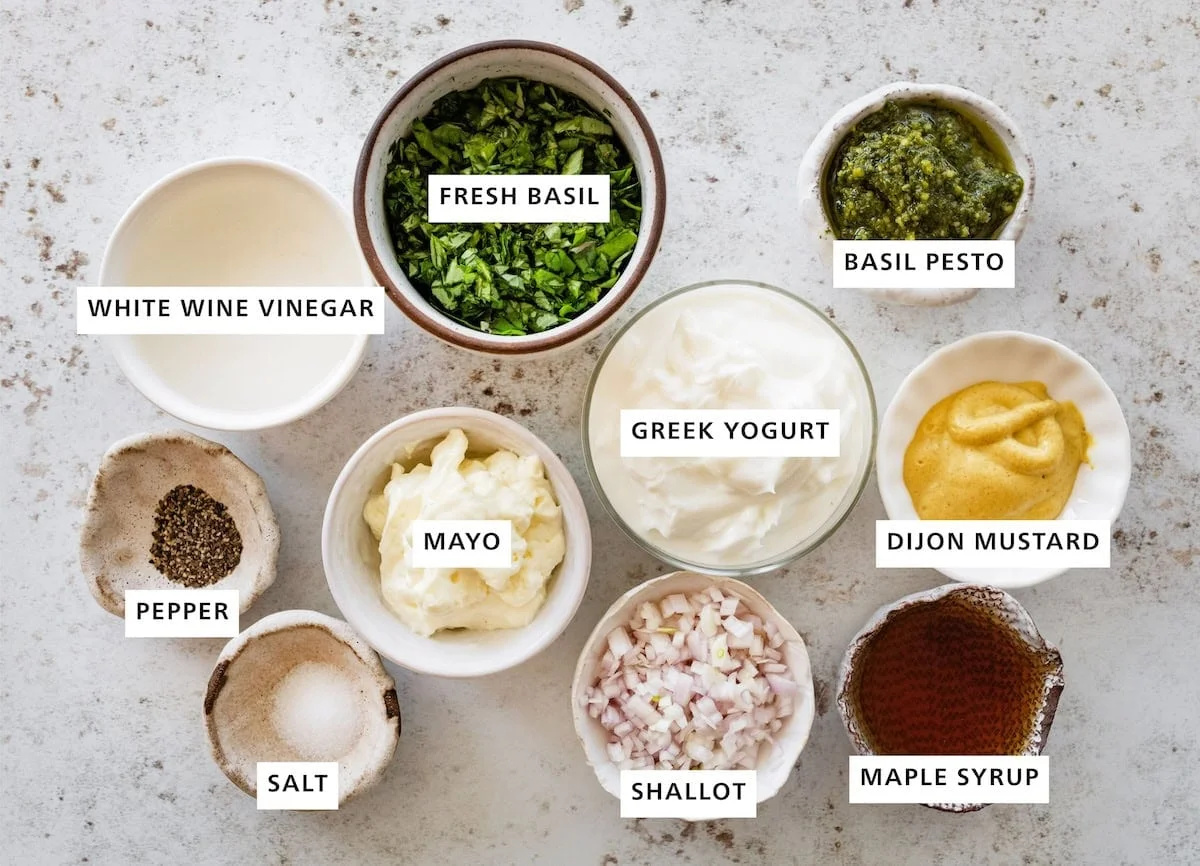
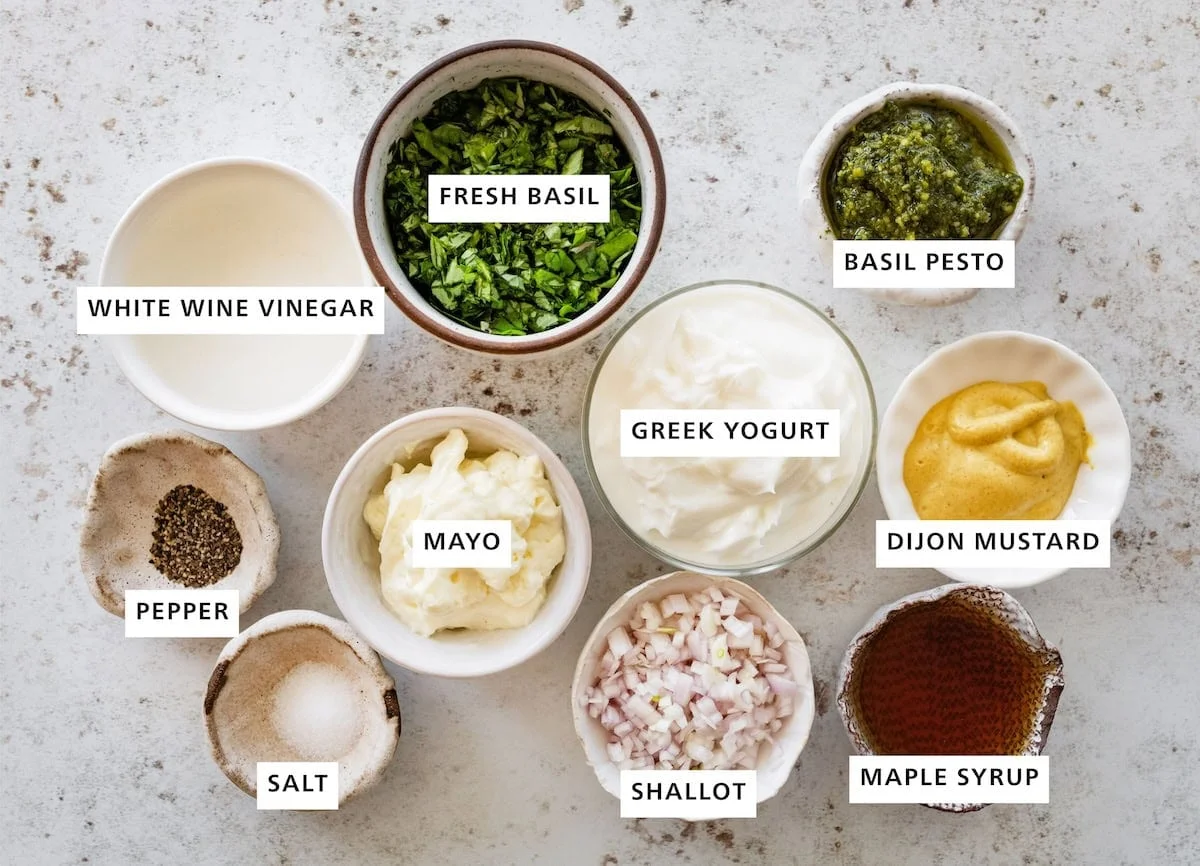
    Flat-lay of salad dressing ingredients in small labeled bowls

    What you’ll need

    • plain full-fat Greek yogurt — the creamy base. Full fat gives you the best texture and richness. Low fat works, but the dressing will be slightly thinner.
    • avocado oil mayo — just one tablespoon, for a subtle richness that helps everything emulsify. I prefer it for a cleaner ingredient list.
    • fresh basil leaves — the star of the show. Use fresh, not dried. Dried basil won’t give you that bright, vibrant green color or flavor.
    • shallot — a mild, slightly sweet oniony flavor that garlic alone can’t replicate.
    • basil pesto — the secret ingredient. One tablespoon deepens the herb flavor in a way fresh basil alone can’t achieve. Store-bought works great here.
    • white wine vinegar — the brightness that balances all that creaminess. Apple cider vinegar works as a swap if that’s what you have.
    • maple syrup or honey — just a touch of sweetness to balance the tang. Either works perfectly.
    • Dijon mustard — a subtle sharpness that also helps the dressing stay creamy and smooth.

    Full measurements are in the recipe card below.

    How to make it

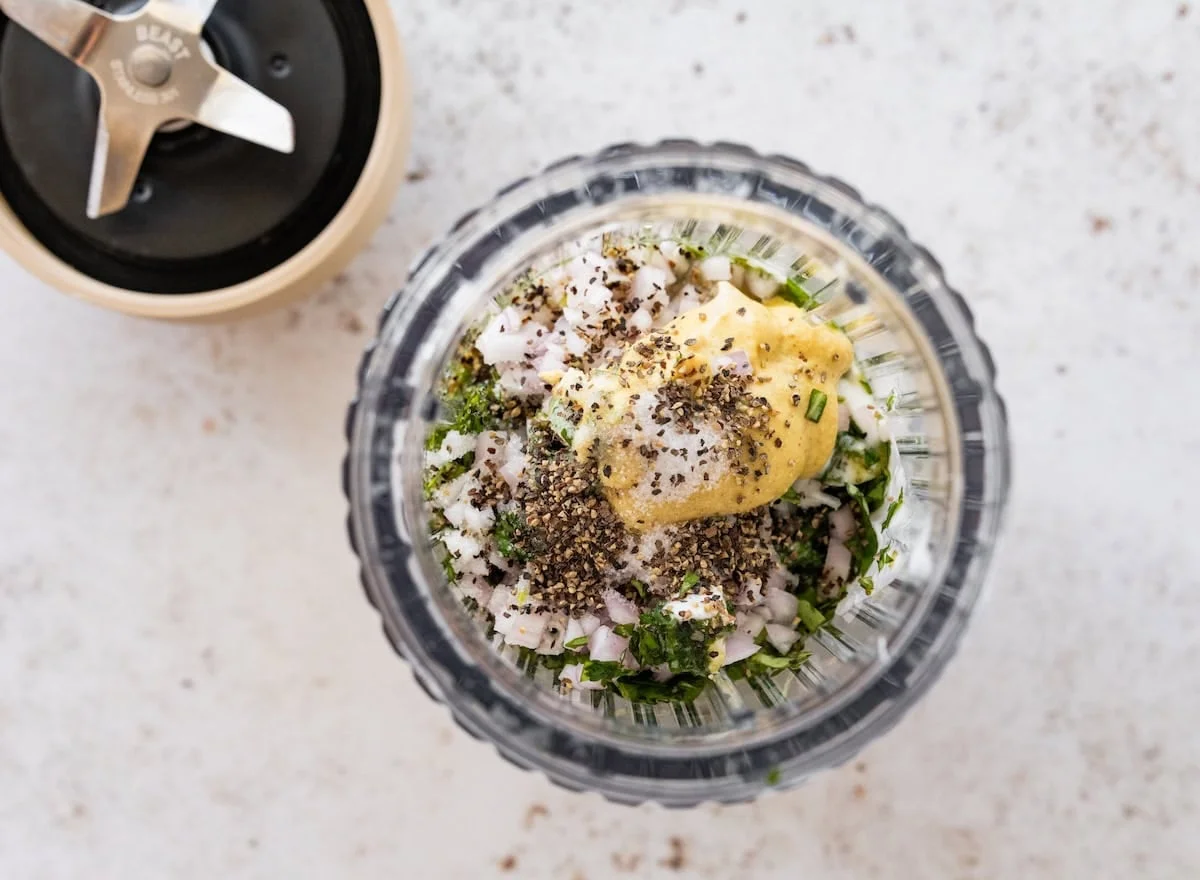
    Blender cup filled with herbs, shallot, and mustard before blending

    1. Blend. Add the basil, Greek yogurt, white wine vinegar, mayo, shallot, pesto, maple syrup or honey, Dijon mustard, salt, and pepper to a high-speed blender or food processor. Blend until smooth and creamy, scraping down the sides as needed.

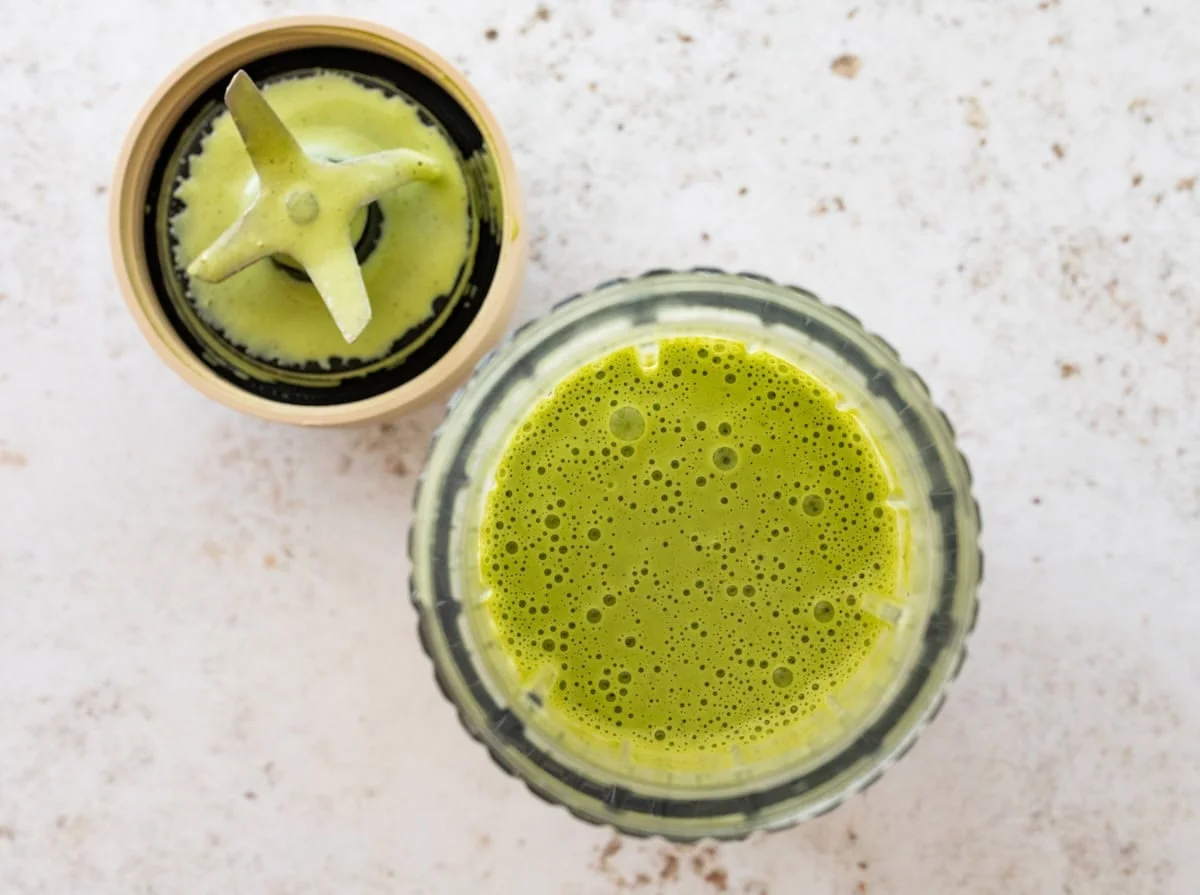
    Smooth green goddess dressing freshly blended in a glass jar

    2. Taste and adjust. If it feels too thick, blend in 1 to 2 teaspoons of water at a time. For the best flavor, refrigerate it for 30 minutes before serving — the flavors meld and it thickens slightly.

    My tips

    • Use a high-speed blender. A food processor works, but a high-speed blender like a Vitamix makes the dressing extra smooth and creamy.
    • Let it chill. I know it’s tempting to use it right away, but 30 minutes in the fridge makes a real difference.
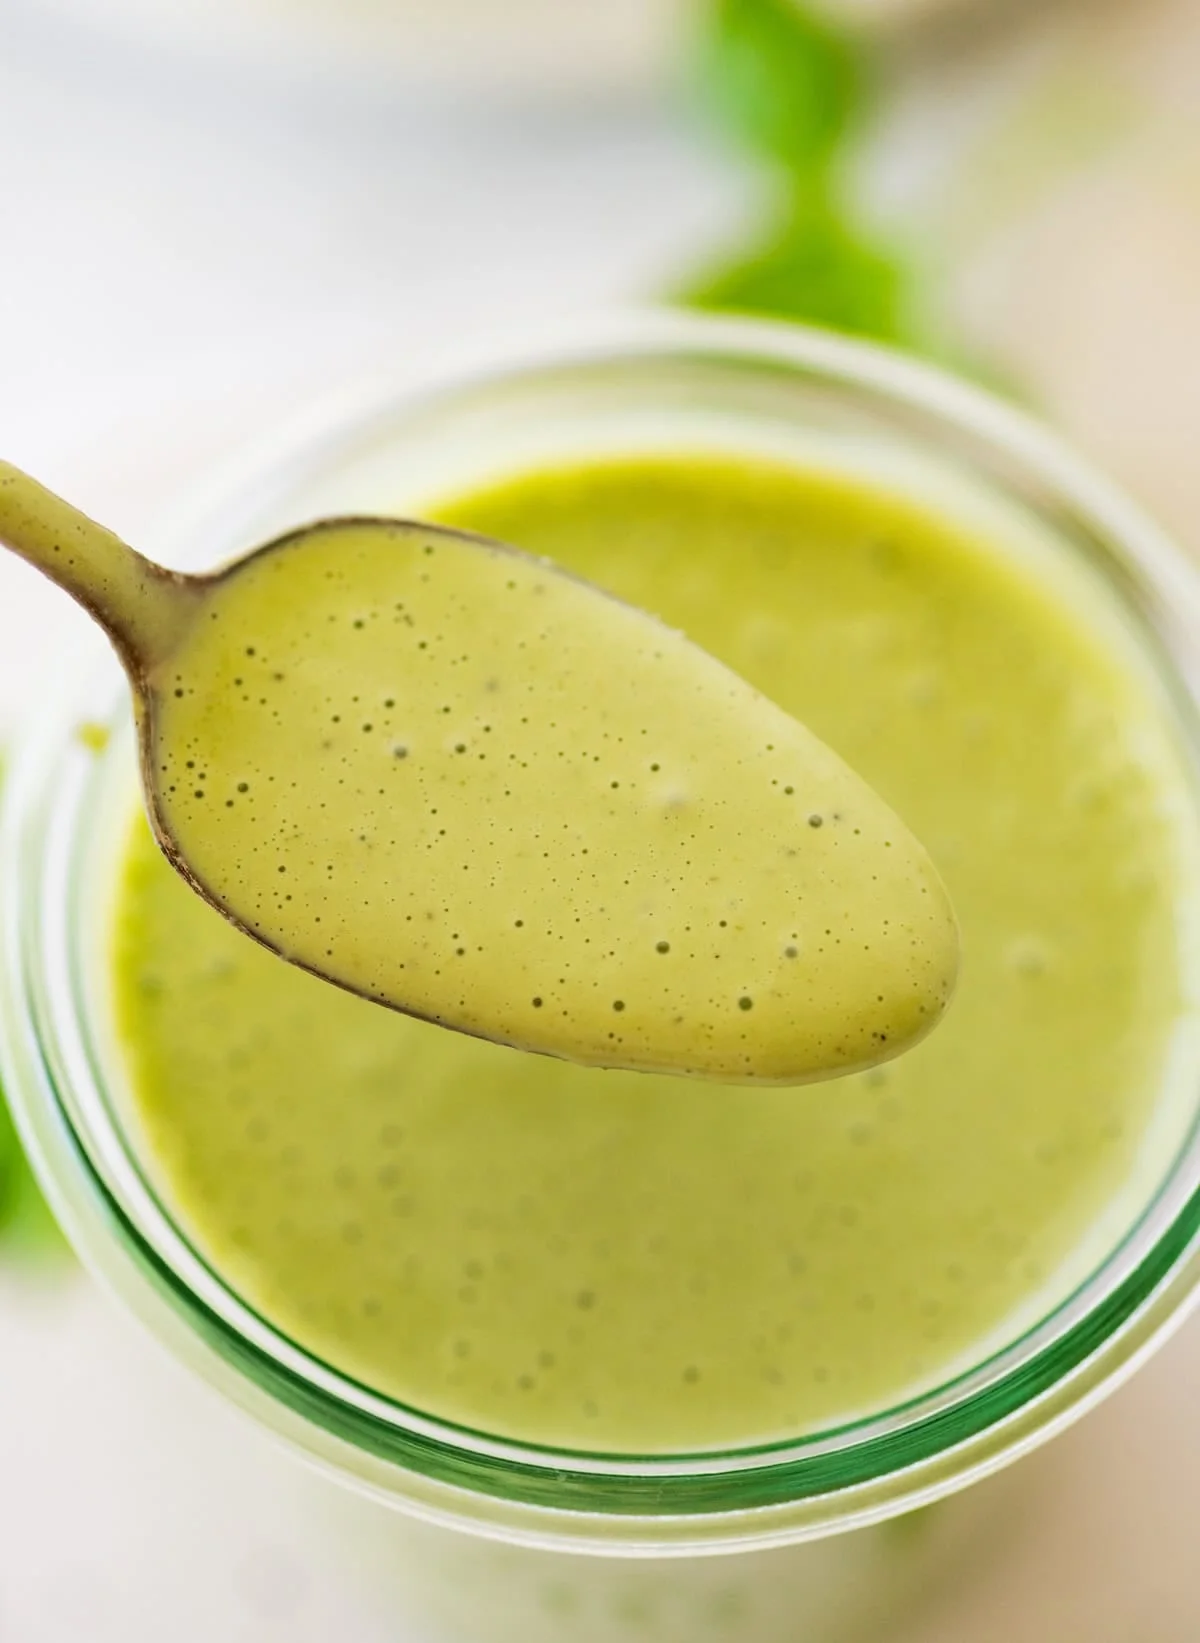
    • Don’t worry if it’s thick. This dressing is meant to be thick and creamy, just like Panera’s. If you prefer it thinner for tossing salads, blend in 1 to 2 teaspoons of water at a time until it reaches your desired consistency.
    Close-up of a spoonful of thick creamy green dressing

    What to do with it

    • As a salad dressing. It’s delicious on a green goddess salad, and it works on just about any simple green salad. I also love it on a grilled chicken salad.
    • On grain bowls. Drizzle it over roasted vegetable bowls with chickpeas. It ties all the flavors together.
    • As a dip. Serve it with fresh vegetables, pita chips, or almond flour crackers. It’s a fun alternative to ranch — and it always disappears fast.
    • With grilled chicken or salmon. Spoon it over grilled chicken or air fryer salmon just before serving for an easy, flavor-packed dinner.
    • As a sandwich spread. Swap your usual mayo or mustard for this dressing on sandwiches and wraps for an instant flavor boost.
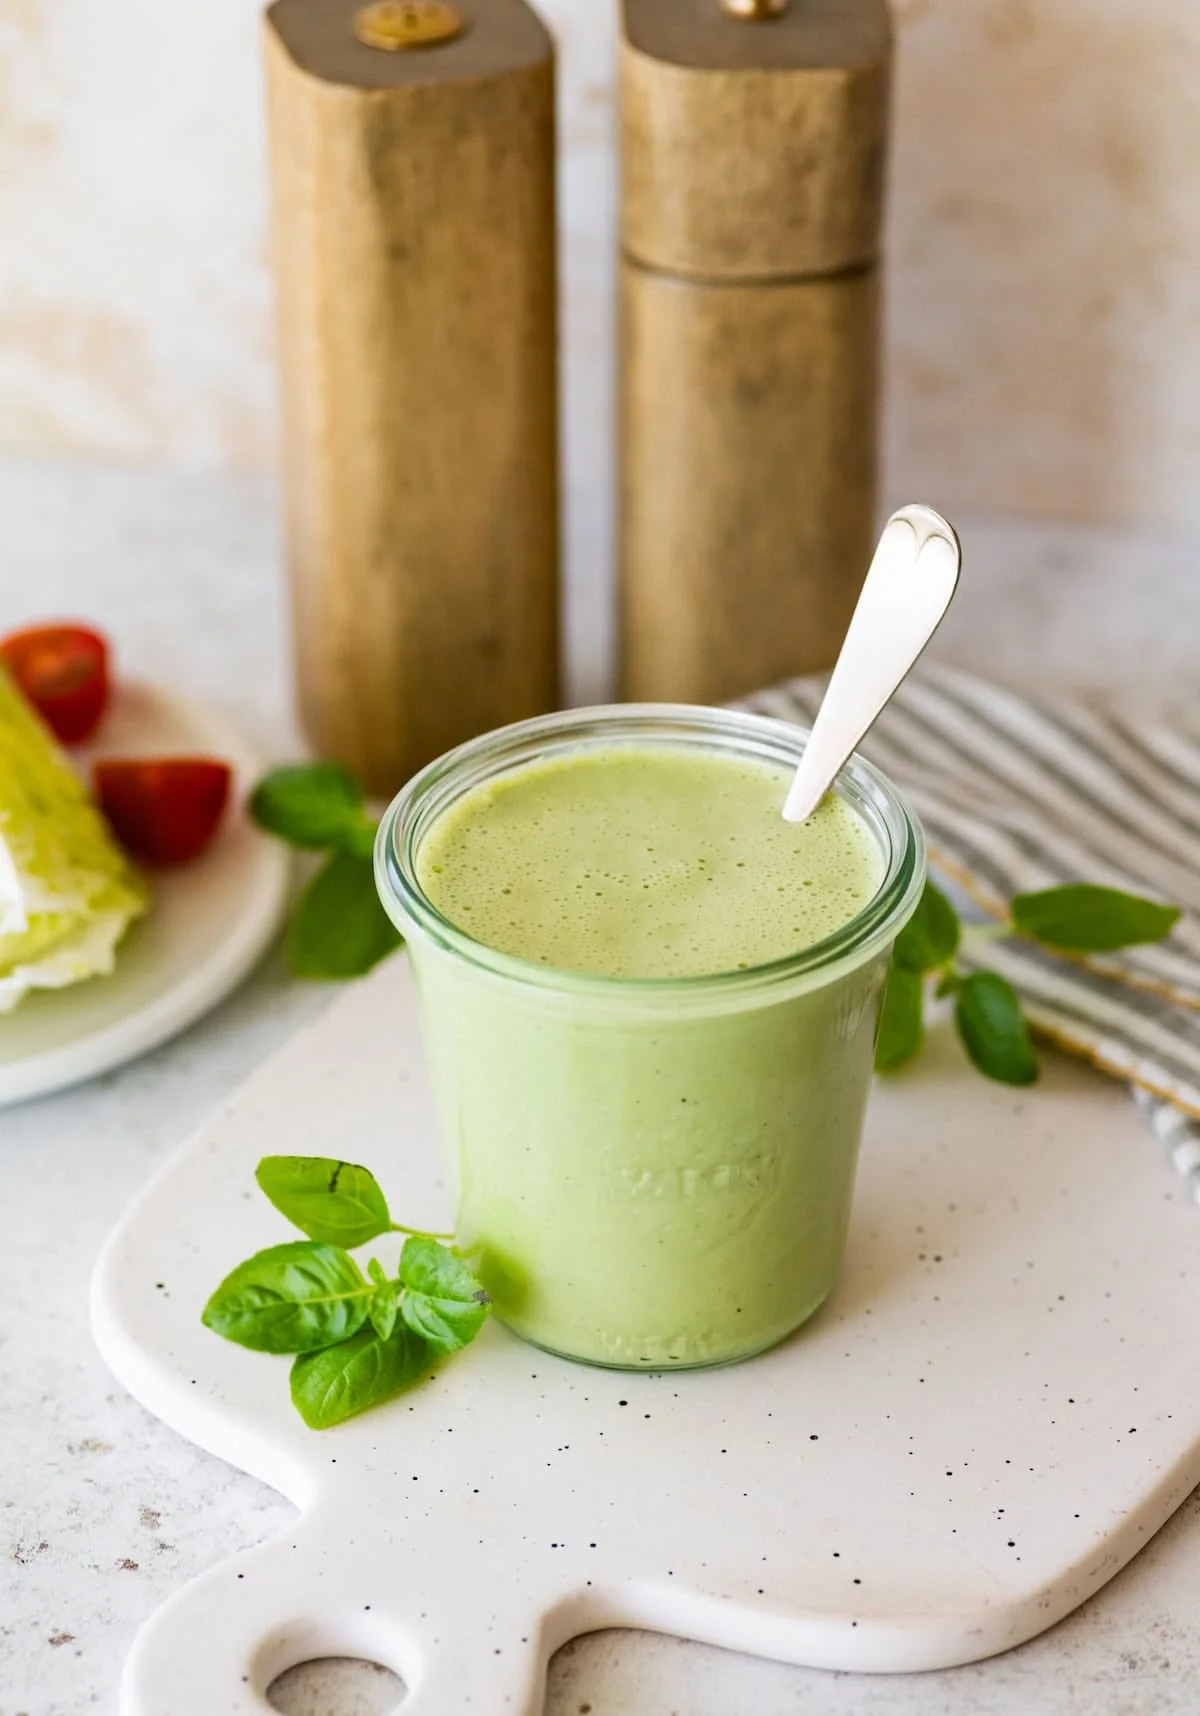
    Green goddess dressing jar beside lettuce, tomatoes, and basil

    Storage

    Store the dressing in an airtight jar or container in the refrigerator for up to 5 days. Give it a good stir before serving since it may separate and thicken slightly as it chills. If needed, stir in a splash of water to loosen it back up. I don’t recommend freezing it — a Greek yogurt base doesn’t thaw well.

    Frequently asked questions

    What is green goddess dressing? It’s a creamy, herb-packed dressing traditionally made with fresh herbs, mayonnaise, yogurt or sour cream, and vinegar or lemon juice. This Panera-inspired version swaps in Greek yogurt, fresh basil, basil pesto, and Dijon mustard for a creamy dressing that’s vibrant and flavorful.

    Can I make it without a blender? Yes, but the texture will be chunkier. Finely mince the basil and shallot, then whisk everything together until well combined. It will still taste great, just without that silky smooth consistency.

    Can I make it ahead? Yes — it tastes even better after chilling for about 30 minutes, because the flavors have time to meld together. Keep it in an airtight container in the refrigerator and use within 5 days.

    Recipe

    Prep time: 10 minutes · Total time: 10 minutes · Serves: ¾ cup

    Ingredients

    • ¾ cup fresh basil leaves, finely chopped (lightly packed)
    • ½ cup plain full-fat Greek yogurt
    • 2 tablespoons white wine vinegar
    • 1 tablespoon avocado oil mayo
    • 1 tablespoon diced shallot
    • 1 tablespoon basil pesto
    • 2 teaspoons maple syrup or honey
    • 1 teaspoon Dijon mustard
    • ¼ teaspoon sea salt, plus more to taste
    • ¼ teaspoon black pepper

    Instructions

    1. Add the basil, Greek yogurt, white wine vinegar, mayo, shallot, pesto, maple syrup (or honey), Dijon mustard, salt, and pepper to a high-speed blender or food processor.
    2. Blend until smooth and creamy, scraping down the sides as needed. Taste and adjust the seasoning if needed. If you’d like a thinner consistency for salads, add 1 to 2 teaspoons of water at a time.
    3. Chill the dressing for 30 minutes before serving, if possible. This gives the flavors time to meld together and makes the dressing even more flavorful.
    4. Serve immediately, or store in an airtight container in the refrigerator for up to 4 to 5 days. Stir well before serving.

    Nutrition (per 2 tablespoons): 60 kcal, 3g carbohydrates, 2g protein, 4g fat, 1g saturated fat, 7mg cholesterol, 173mg sodium, 4g sugar. Nutrition information is automatically calculated, so use it as an approximation.

    Make it yours

    Swap the white wine vinegar for lemon juice if you want a rounder, less sharp bite. Or go all-in on the dip route — a batch with a plate of crunchy veg on a slow Sunday afternoon is the whole point.

    Happy cooking,
    Maya

    Keep Reading

  • 4 Ritz-Carlton Cookie Recipes I Keep Coming Back To

    4 Ritz-Carlton Cookie Recipes I Keep Coming Back To

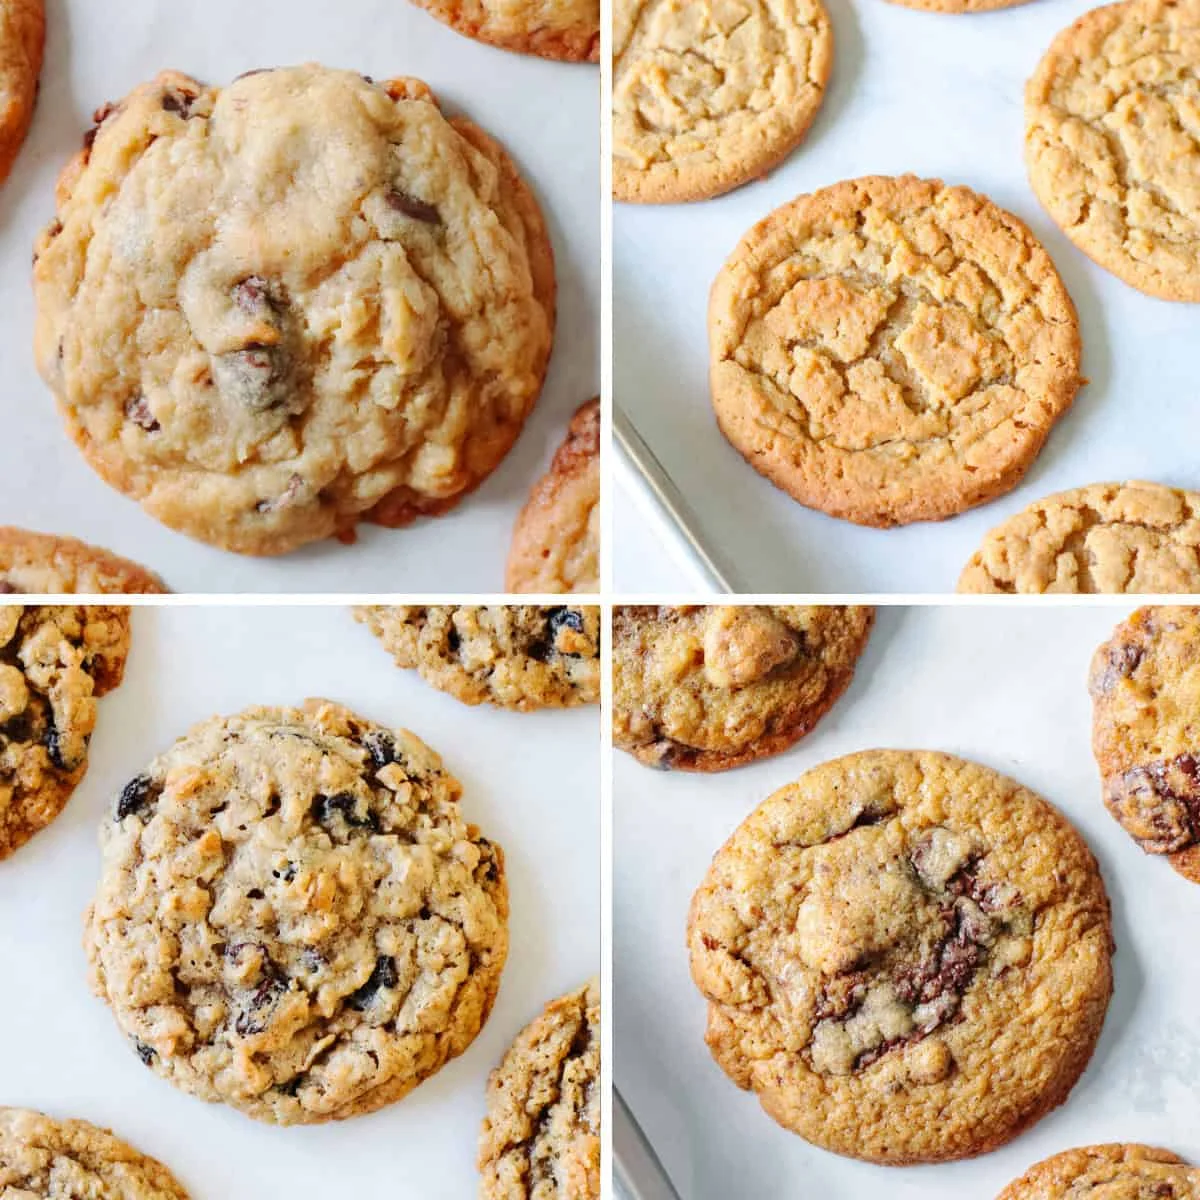
    Most hotel cookies don’t survive the trip home. You get a little box, you eat three on the drive, and the rest end up in the fridge until they’re stale. So when I realized the Ritz-Carlton had actually handed out its real cookie recipes for years, I treated it like a treasure map. I baked all four. Three flopped on my first try. All four now live in my weekend rotation.

    Real time per batch: about 30 minutes of hands-on work, plus cooling. Hands-on: 15 minutes. Every recipe below is one I’ve actually made on my own counter, and every one is linked to the full recipe with measurements.

    Bakery-style Ritz-Carlton chocolate chip cookies cooling on parchment

    1. Ritz-Carlton Chocolate Chip Cookies (Amelia Island)

    This is the one I reach for when the house needs convincing it’s a good day. Crisp buttery edges, a soft fudgy center, enough chocolate that you’ll fight your husband over the last one. The recipe comes from the Ritz-Carlton Amelia Island, and it’s the kind of classic that stays a classic for a reason.

    One honest note: I tested the recipe as written, and the cookies spread more than I wanted. I’ve included a small adjustment in the full post that helps them hold their shape without drying out.

    Freshly baked chocolate chip cookies on a parchment-lined baking sheet

    Full recipe with the adjustment: Ritz-Carlton Chocolate Chip Cookie Recipe

    2. Ritz-Carlton Oatmeal Raisin Cookies (Washington DC)

    Oatmeal raisin gets a bad reputation. Most versions come out dry and crumbly, like you’re eating a very committed granola bar. This one doesn’t. It’s soft, chewy, and the raisins stay plump instead of turning into little raisin rocks. Cinnamon does quiet, steady work throughout.

    If your family already argues about whether oatmeal raisin counts as a real cookie, bake a batch and let them argue over the plate instead.

    Soft oatmeal raisin cookies with a crackled golden surface

    Full recipe: Ritz-Carlton Oatmeal Raisin Cookie Recipe

    3. Ritz-Carlton Chocolate Chunk Pecan Cookies (Marina Del Rey)

    Chocolate and pecans were a match before this recipe existed. Big chocolate chunks melt into little rivers as the cookies bake, and the pecans give every bite a buttery crunch that chocolate chip cookies just can’t. These are the ones I’d pack for a potluck if I wanted people to ask what I did different.

    They taste like something from a hotel gift shop, which is either a compliment or a warning. I think it’s a compliment.

    Chocolate chunk pecan cookies with melted chocolate and crunchy pecans

    Full recipe: Ritz-Carlton Chocolate Chunk Pecan Cookie Recipe

    4. Ritz-Carlton Peanut Butter Cookies (Half-Moon Bay)

    No fork marks needed. That’s the first thing I thought when I pulled these out of the oven. The dough bakes into perfectly crackly, even cookies on its own, with a deep peanut butter flavor, crisp edges, and a center that actually melts. If your peanut butter cookies have been living in the same unambitious shape since 1998, this is the upgrade.

    Crackly peanut butter cookies with no fork marks on tray

    Full recipe: Ritz-Carlton Peanut Butter Cookie Recipe

    What I’ve learned from baking all four

    Are these official Ritz-Carlton recipes? They’re based on recipes the hotel and its individual properties have shared with guests over the years, through recipe cards and hotel promotions. Each full post links to the source I used, and I’ve added my own baking notes from making them at home.

    And yes, they freeze. Most of them freeze beautifully after baking, and scooped dough freezes too, so you can have warm cookies on a random Tuesday without any plan. That’s the whole point of a recipe you can trust: it’s always one tray away.

    Make it yours: Swap in white chocolate chips in the pecan version, or add an extra tablespoon of butter to the oatmeal raisin if your kitchen runs dry. The Amelia Island chocolate chip cookies also handle a handful of chopped walnuts without complaint.

    Happy cooking, Maya

    Keep Reading

  • Vegan Gluten-Free Morning Glory Muffins

    Vegan Gluten-Free Morning Glory Muffins

    My friend’s grandmother swears these muffins were made at a little Nantucket restaurant in 1978, and she’s never let me forget it. I finally made them myself this weekend, and her story suddenly made sense. Morning glory muffins are lightly sweet, softly spiced, and packed with fruit, veg, and nuts, which is a lot of flavor for something that should be a snack.

    I made them vegan and gluten-free, using oat flour and potato starch instead of almond flour. The result is tender rather than dense, naturally sweetened, and honest about what’s inside. One bowl, 35 minutes, a dozen muffins. Real time: 35 minutes. Hands-on: 15 minutes of prep. Serve them with coffee or tea and a glass of dairy-free milk, and let the weekend be a little slower than the week.

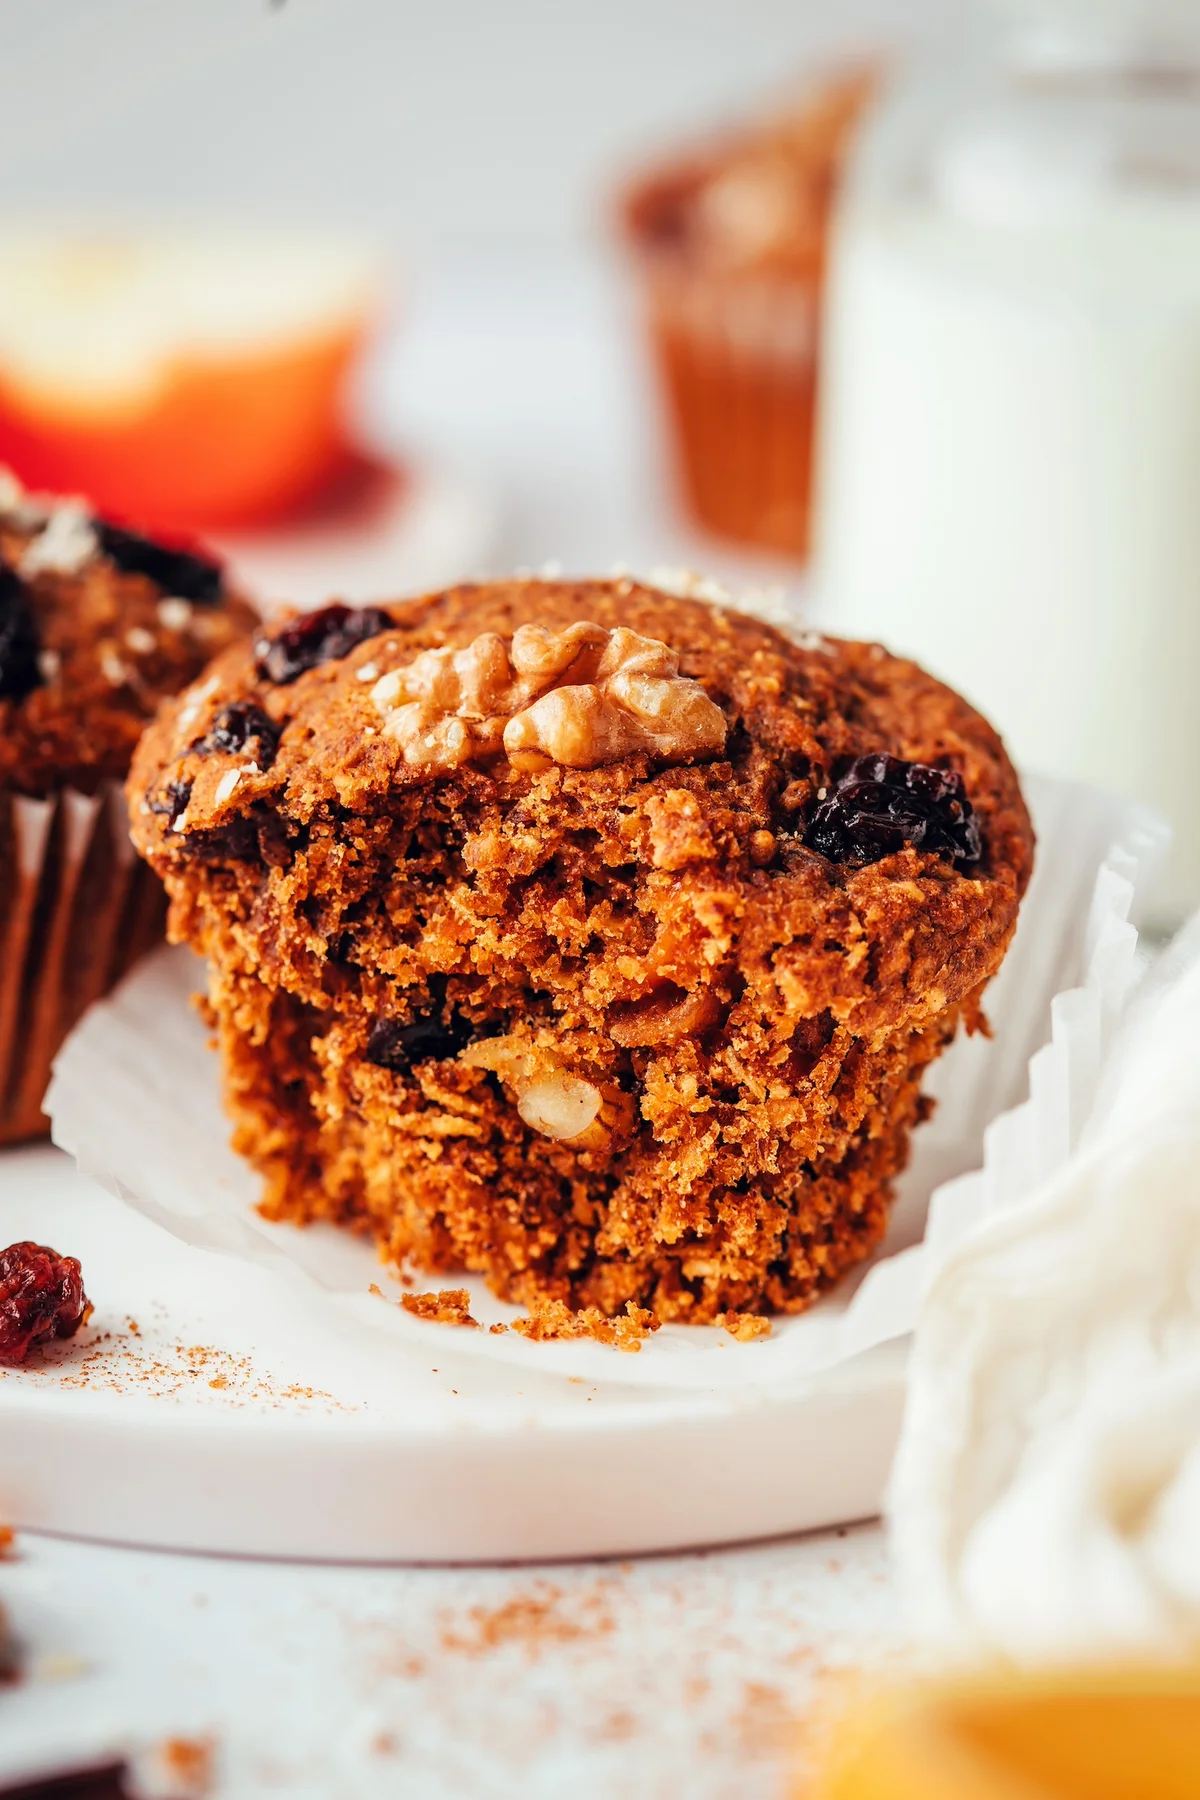
    Baked morning glory muffins topped with walnuts and dried fruit ” alt=”Baked morning glory muffins topped with walnuts and dried fruit on a white plate”>

    What’s actually in a morning glory muffin?

    The original, created by Pam McKinstry at her Nantucket restaurant, Morning Glory Cafe, is built on wholesome fillers: shredded coconut, raisins, grated apple and carrot, pineapple, pecans or walnuts, and cinnamon. Around that she adds the usual flour, sugar, baking soda, salt, eggs, oil, and vanilla. My version keeps most of the goodies and swaps the rest to make the batter vegan and gluten-free.

    • Flaxseed meal + orange juice form the flax egg. No eggs, and the orange adds a quiet sweetness and a hint of citrus.
    • Coconut sugar is the sweetener. It’s lower glycemic with a light caramel note. Brown sugar or cane sugar would probably work fine.
    • Avocado oil + dairy-free milk. This batter is lower in oil than the classic, so the milk keeps it pourable. Any neutral oil works, even melted vegan butter.
    • Oat flour + potato starch. This gluten-free pairing keeps the crumb light so the muffins don’t turn out dense and gummy. Not potato flour, by the way.
    • The classics: grated apple and carrot, shredded coconut, raisins, walnuts, cinnamon, ginger, vanilla, salt, baking soda.
    • Baking powder gives extra lift. Gluten-free batters flop into dense, gummy mounds without it, and this one doesn’t.

    How to make them

    Box grater beside apple and carrot on a counter ” alt=”Box grater next to apple and carrot on a kitchen counter”>

    Whisk the flaxseed meal and orange juice in a large bowl and let it sit for a few minutes while it thickens. In that time, grate the apple and carrot on the large side of a box grater. I use this box grater for almost everything, and it’s doing real affiliate work for the brand (full disclosure).

    Hands mixing muffin batter in a large bowl ” alt=”Hands mixing muffin batter in a large bowl”>

    Once the flax has gelled, whisk in the coconut sugar, dairy-free milk, avocado oil, and vanilla. Add the oat flour, potato starch, cinnamon, ginger, baking soda, baking powder, and salt, and mix until smooth with no lumps. Fold in the grated carrot and apple, then the raisins, coconut, and walnuts. Let the batter rest about 5 minutes so it thickens slightly. You don’t need to squeeze the liquid out of the grated fruit.

    Muffin tin filled with raw muffin batter ” alt=”Filled muffin tin with raw muffin batter in paper liners”>

    Divide the batter between 12 muffin cups. They will be full, and that’s fine. Bake for 20 to 24 minutes, until risen, dry to the touch, and a toothpick comes out mostly clean.

    Let them cool, then eat

    These are very moist right out of the oven, so I like to give them at least 20 minutes to cool before the first one hits the plate. They’re wholesome, satisfying, moist, tender, naturally sweet, subtly spiced, and packed with fruit, nuts, and vegetables. Honestly? They’re just really good.

    Baked morning glory muffins topped with walnuts and dried fruit ” alt=”Close-up of a cut morning glory muffin showing the moist crumb”>

    They work as a grab-and-go snack or a proper sweet breakfast. They keep covered at room temperature for 2 to 3 days, in the fridge for 4 to 5 days, or frozen for about a month.

    Make it yours

    • Skip the nuts for a nut-free batch, or add more coconut instead.
    • Swap the raisins for chopped dried cranberries or currants.
    • Prefer buckwheat over oats? Try it in place of the oat flour, though I haven’t tested that swap myself.
    • Want to use a real egg instead of the flax egg? Use 1 large (or 2 small) and dial back the milk a touch. Untested by me, but it sounds right.

    Nutrition per muffin, as a rough estimate: 244 calories, 35.7 g carbs, 2.5 g protein, 11.2 g fat, 2.8 g fiber, 16.6 g sugar.

    Happy cooking,
    Maya

    Keep Reading

  • Vegan Sweet Potato Chickpea Taco Salad

    Vegan Sweet Potato Chickpea Taco Salad

    My husband walked in from work and said the magic sentence: I’m starving, what’s for dinner? It was a Wednesday. It was just past five. The clock was already against me.

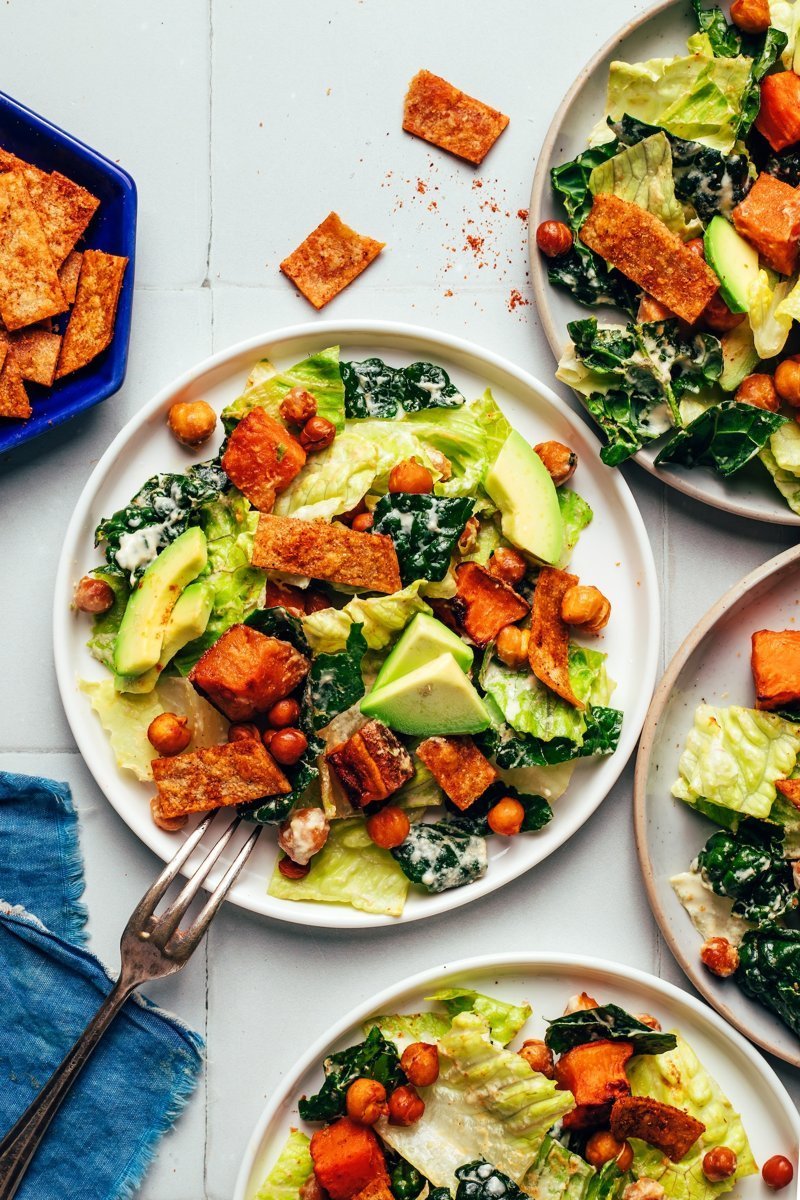
    Bowl of vegan sweet potato chickpea taco salad with chips and avocado

    That’s how this salad earned a permanent spot in my rotation. It’s a vegan taco salad built on roasted sweet potatoes and smoky chickpeas, crunchy tortilla chips, and a creamy jalapeño cashew dressing that’s a little cheesy, a little tangy, and good enough to spoon out of the blender. Fresh romaine and lacinato kale round it out, so you get that crunch alongside the soft, caramelized edges of the roasted vegetables.

    Roasted sweet potatoes and spiced chickpeas on a baking sheet

    Real time: 30 minutes. Hands-on: about 10. The trick is multitasking. The sweet potatoes and chickpeas hit the oven first, and while they roast, you chop the greens and blend the dressing. By the time the timer goes off, you’re ten seconds from a plate. It’s weeknight timing with weekend flavor, and it feeds four.

    Why this one works

    It’s fresh, savory, smoky, and subtly spiced, with crunchy textures layered throughout. As a standalone plant-based dinner it’s satisfying on its own. Want more protein? Top it with shredded tofu or shredded chicken (skip that for a strictly vegan version). Or keep it as a side alongside a Mexican-inspired main. And it’s not precious: the greens are flexible. Any sturdy, not-too-bitter, not-too-tender mix will work. I like romaine plus lacinato kale, because the contrast between the sweet crunch and the hearty leaves is the whole point.

    Ingredients

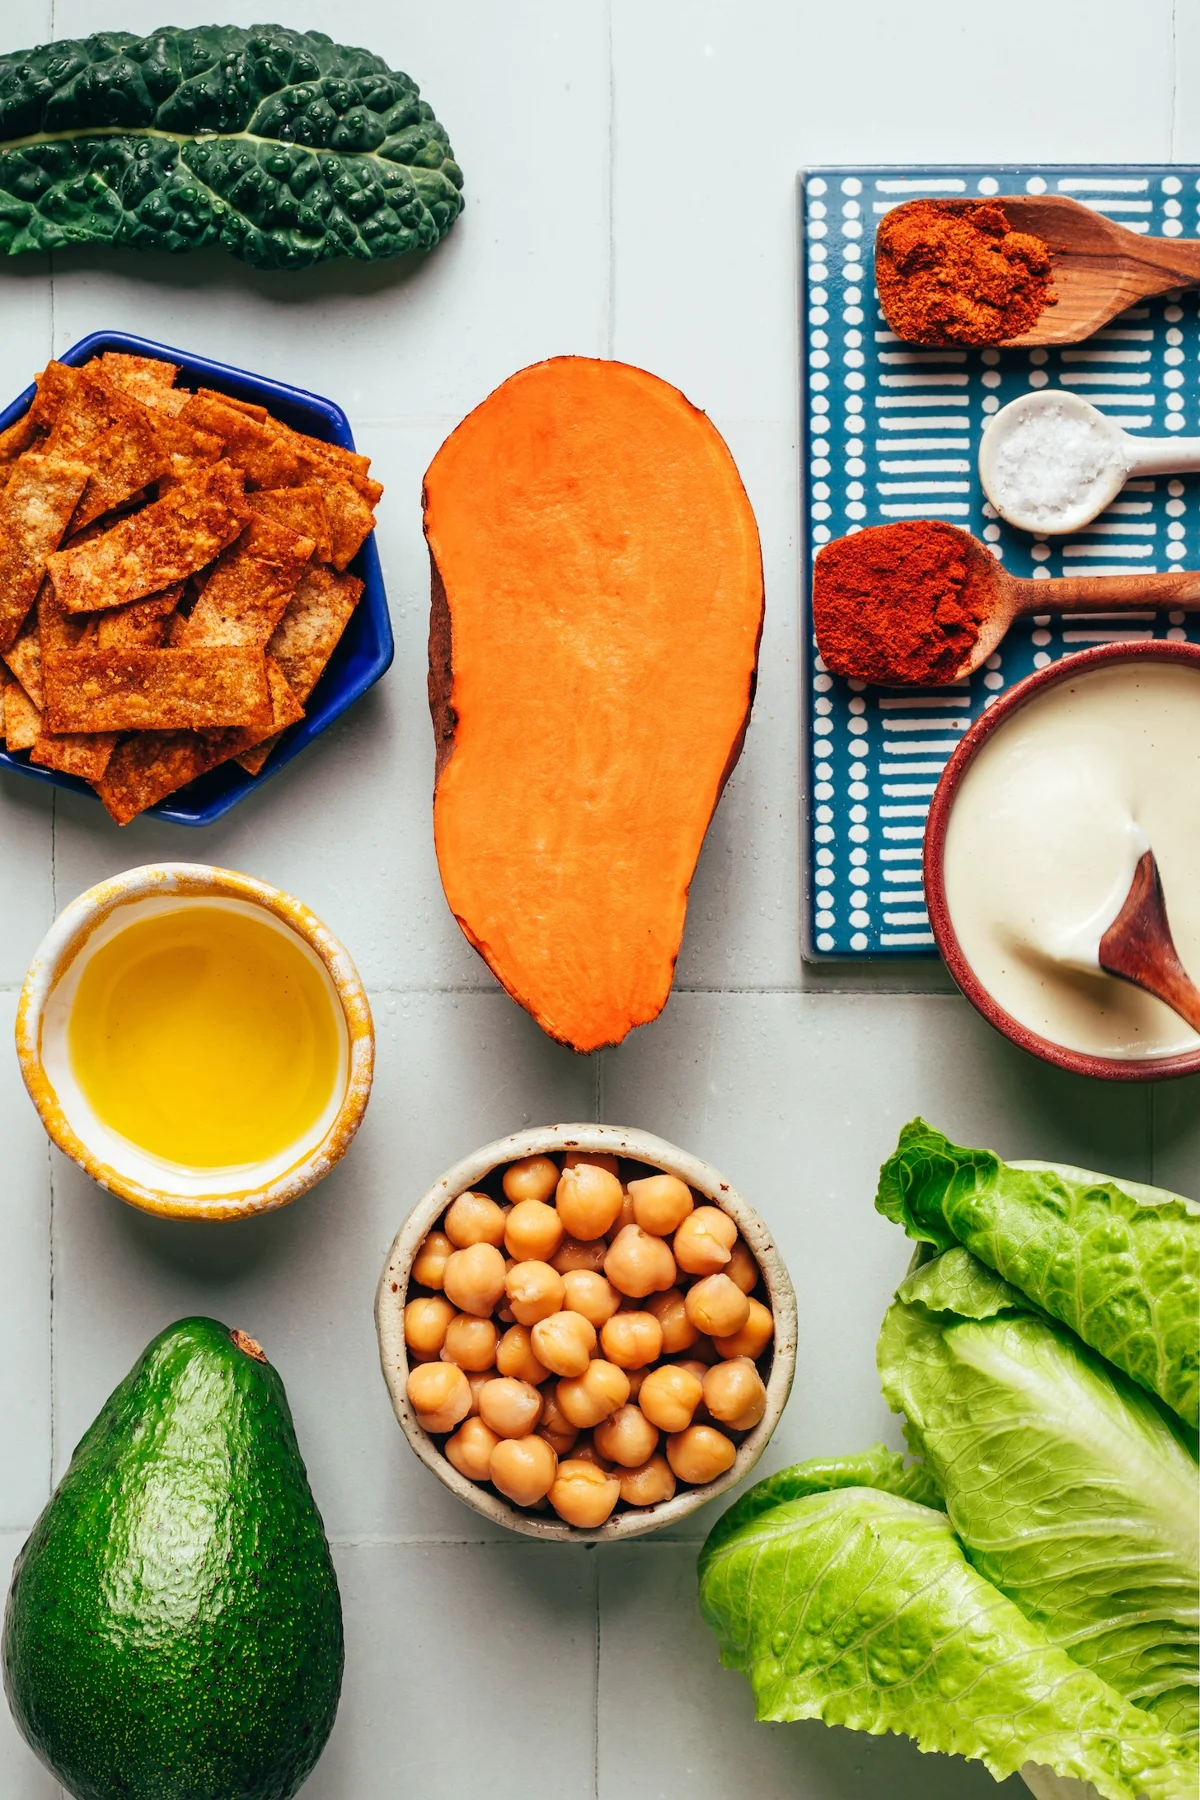
    • 2 medium sweet potatoes, cut into 1/2-inch cubes (about 4 cups or 500 g)
    • 1 can (15 oz) chickpeas, drained and rinsed
    • 2 Tbsp avocado oil, plus a little more for massaging the kale
    • 1 tsp smoked paprika
    • 1 tsp chili powder
    • 3/4 tsp sea salt
    • 3/4 cup creamy jalapeño cashew dressing (recipe below)
    • 1 small bunch lacinato kale, rinsed and chopped (about 3 cups or 100 g)
    • 1 head romaine lettuce, rinsed and chopped (about 5 cups or 270 g)
    • 2 cups tortilla chips, broken into bite-sized pieces
    • 1 large avocado, sliced (optional)

    The 5-minute jalapeño cashew dressing: blend cashews, water, lime juice, nutritional yeast, miso paste, Dijon mustard, salt, garlic, and a jalapeño until completely smooth. It’s super creamy with a cheesy tang. Adjust with a splash more water if it’s too thick for your blender.

    Method

    1. Preheat the oven to 425°F (218°C) and line a large baking sheet with parchment.
    2. Toss the sweet potatoes and chickpeas with the avocado oil, smoked paprika, chili powder, and sea salt. Spread in an even layer.
    3. Roast for 20–25 minutes, tossing halfway, until the sweet potatoes are tender when pierced with a fork.
    4. While they roast, massage the chopped kale with a little oil until it softens, then add the romaine and toss.
    5. Make the dressing and set it aside.
    6. When the vegetables are done, reserve 1/4 of them for topping. Add the rest to the salad and toss with 3/4 cup of the dressing. Taste, then add more if you want.
    7. Transfer to a serving dish, top with the reserved sweet potatoes and chickpeas, then scatter over the tortilla chips and sliced avocado.
    Creamy cashew dressing poured over the finished vegan taco salad

    Notes from my kitchen

    • Most of the chopping happens while everything is in the oven, so the hands-on time stays short. Use whatever tortilla chips you have on hand: corn, grain-free, or homemade spiced strips. I’ve used both; the store-bought plain corn chips are the zero-effort move on real weeknights.
    • Best eaten straight away, but leftovers keep 1–2 days in the fridge. The greens will soften, so the crunch is a day-one thing.
    • This is loosely inspired by a garlicky kale salad with crispy chickpeas, BBQ-style sweet potato chickpea tacos, and a vegan Caesar salad with crisp chickpeas I found in the New York Times cooking section.

    Nutrition per serving (rough estimate, made with 3/4 cup dressing and without the avocado): 442 calories, 58.7 g carbs, 12.6 g protein, 19.4 g fat, 11.9 g fiber, 967 mg sodium.

    Make it yours

    Swap the romaine for spinach or arugula if that’s what’s in the crisper. Add a handful of black beans for extra heft. Crumble in some cotija (if you’re not strict vegan) instead of the avocado for a salty, creamy contrast. And if the blender is already running, double the dressing and keep the rest for the week — it keeps well and it’s dangerously good on roasted vegetables.

    Happy cooking, Maya

    Keep Reading

  • Homemade Whipped Honey Butter (Ready in 5 Minutes)

    Homemade Whipped Honey Butter (Ready in 5 Minutes)

    The first time I made this, it flopped. Cold butter straight from the fridge, a bowl that looked more like wet sand than anything worth serving, and my husband politely pretending to enjoy a piece of toast. It has been better since.

    Now a jar of whipped honey butter lives in my fridge almost permanently. It is the thing that turns plain toast into a real moment, the spread I pull out when the counter is empty and the kids are asking for breakfast, the quick fix that makes store-bought biscuits taste homemade. It feels a little fancy and takes about five minutes. Around here, those are my favorite kinds of recipes.

    Fluffy whipped honey butter in a glass bowl

    What you are getting, honestly

    Real time: 5 minutes, most of it the mixer doing the work. Hands-on: 2 minutes. You will need softened butter, honey, and a pinch of salt if you use unsalted butter. That is the whole pantry list.

    I keep 3 tablespoons of honey in my version and it lands at the right amount of sweetness for me. Start with less if you like it milder. This makes 8 servings, which in practice means the jar disappears in about a week.

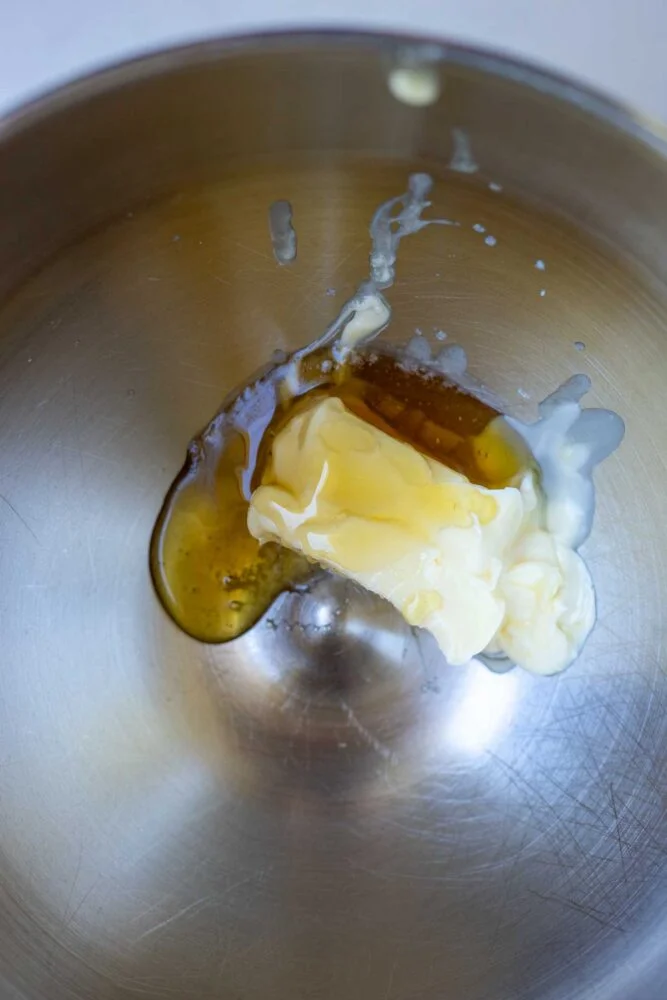
    Softened butter and honey before whipping

    Ingredients

    • 1/2 cup butter, softened to room temperature (salted or unsalted both work)
    • 3 tablespoons honey, preferably local
    • 1 pinch salt, if using unsalted butter

    Equipment

    • Stand mixer or hand mixer (a whisk works, but the mixer is easier)
    • A small bowl and a storage container or mason jar

    How to make it

    1. Combine. Put the softened butter and honey in a bowl. If you are using a stand mixer, fit it with the whisk attachment.

    2. Whip. Beat on medium speed for 2-3 minutes until it is light, fluffy, and fully combined. If you want it fluffier than you think it needs to be, whip a minute longer. That is not an exaggeration.

    3. Store or serve. Transfer to a serving dish or an airtight container. Serve it straight away or refrigerate until you want it.

    Whipped honey butter texture close-up in a bowl

    Tips that actually matter

    • Softened means softened. Cold butter is why most honey butter fails. Let it sit out until a knife slides in with almost no resistance.
    • Taste as you go. Start with less honey and add more. Every honey is a different sweetness.
    • Waking it up. If it has been sitting in the fridge, let it sit at room temperature for 10 to 15 minutes before spreading. It gets easier and the texture comes back.
    • A touch of seasoning. A little cinnamon or an extra pinch of salt is optional, but both make it better on toast.

    Make it yours

    This is a template. The base is butter and honey; everything else is a choice.

    • Cinnamon honey butter – stir in a little cinnamon while whipping. Good on sweet potatoes and cornbread.
    • Maple honey butter – swap some of the honey for maple syrup and keep it light.
    • Vanilla honey butter – add 1/2 teaspoon vanilla extract. Subtle, but it changes the flavor on pancakes.
    • Berry honey butter – fold in a spoonful of strawberry or blueberry jam. The kids fight over this one.
    • Hot honey butter – a touch of hot sauce or a pinch of red pepper flakes. Serve with dinner rolls or grilled cheese.

    What to serve it with

    Plain toast, of course. Then: biscuits, scones, muffins, whole wheat muffins, pancakes, waffles, cornbread, dinner rolls, sweet potatoes, French toast. It is a spread that shows up to everything and is not awkward about it.

    Storage

    Keep it in an airtight container in the refrigerator for up to 2 weeks. It freezes well too – store it in a freezer-safe container for up to 3 months and thaw in the fridge. After freezing it may need another minute in the mixer to get light and fluffy again.

    FAQ

    Can I use salted butter? Yes. Salted butter balances the sweetness nicely and you can skip the added pinch of salt.

    Can I make it ahead? Absolutely. It stores well and is a good thing to have on hand for quick breakfasts and snacks.

    Why is mine not fluffy? The butter was probably too cold. Bring it to full room temperature and whip again.

    A note from Maya

    I have made this probably thirty times now and the version I reach for is still the plain one, straight from a jar on the counter. But if the jar looks empty on a Wednesday, that is not a failure. That is the recipe doing its job.

    Happy cooking,
    Maya

    Keep Reading

  • Watermelon Gazpacho

    Watermelon Gazpacho

    July hits and I’m not cooking anymore. Not because I’ve stopped caring — because the oven and I have reached a polite agreement that we’ll both rest. My counter fills with salads, sandwiches, and whatever doesn’t need heat. Soup is the one cold thing I always skip… until this one.

    Bowl of cold watermelon gazpacho topped with feta, watermelon, cucumber, and basil

    Watermelon gazpacho is the soup I reach for in the dog days of summer. It’s blended, not simmered, and it comes out of the fridge cold — because nobody wants hot soup in July, right? It’s everything I want in a summer soup: light, sweet, and fast enough to build while dinner is still on the table.

    Why this one works

    Here’s the thing about gazpacho, especially if you’ve never made it: stop thinking of it as soup. It’s more of a soup-and-salad hybrid. And the watermelon is what fixes it. It softens the tomato acidity, adds sweetness, and keeps the whole bowl light — no heavy, starchy body, just a cleaner, easier-to-drink kind of soup. Perfect for when the ceiling fan is working overtime.

    Top-down view of finished watermelon gazpacho bowl with feta and herb garnish

    Real time: 25 minutes

    Prep: about 20 minutes. Hands-on: about 15. Total active work: 25 minutes — and the rest of it is just waiting for the fridge to do its quiet thing. It makes about 4 servings, or around 6 cups.

    Ingredients

    • 4 cups diced seedless watermelon (about 1½ pounds) — pick a ripe, sweet one. Seeded works fine, it just adds a little extra prep.
    • 1 small English hothouse cucumber (about ½ pound) — thin skin, few seeds, ideal for this.
    • 1½ pounds ripe tomatoes (about 3 large or 6 small) — if they don’t taste great on their own, the soup won’t either. Wait for peak season if you can.
    • 1 medium red bell pepper — this is what gives it sweetness and body.
    • ¼ cup roughly chopped red onion
    • 1 small garlic clove, very roughly chopped
    • ¼ cup fresh basil or mint leaves, plus more for garnish
    • ¼ cup extra-virgin olive oil — good oil, not the gas-station kind. This is what makes it silky.
    • 2 tablespoons sherry vinegar (red wine vinegar or lime juice work too)
    • 1 teaspoon kosher salt, plus more to taste
    • ¼ teaspoon ground black pepper
    • Crumbled feta, optional, for garnish

    Make it yours

    Want a Mexican twist? Swap the sherry vinegar for lime juice and finish with cilantro, thin jalapeño slices, and cotija instead of feta. It’s a whole different bowl.

    Step-by-step

    Set out a large bowl and a small one. This two-bowl setup is the whole trick — it’s what gives the soup body without any bread.

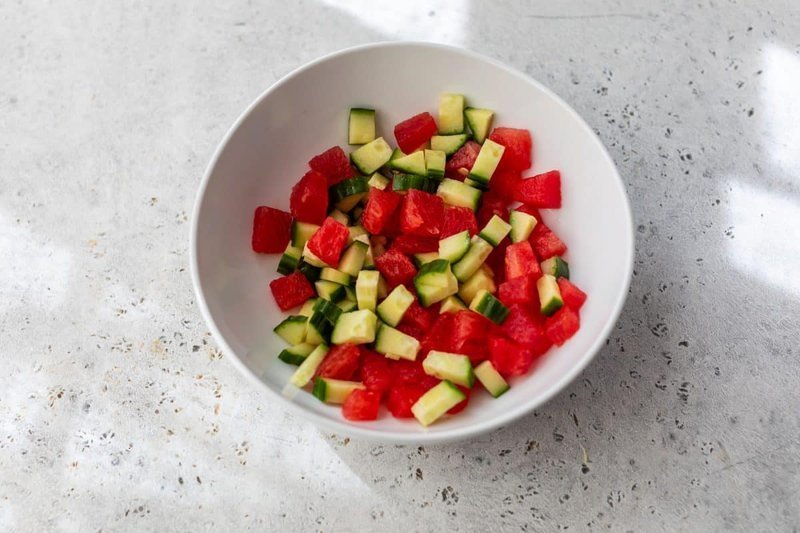
    1. Reserve the garnish. Finely chop ½ cup of the watermelon and a small piece of cucumber, and put them in the small bowl for garnish. Toss them with a pinch of salt when you’re done.
    2. Prep the vegetables. Cut the remaining watermelon, cucumber, tomatoes, and bell pepper into rough 1-inch chunks. Core the tomatoes first. Split each one: half into the blender, half into the large bowl.
    3. Blend the base. Add the onion, garlic, herbs, oil, vinegar, salt, and pepper to the blender. Start on low, work up to high, and blend until completely smooth — about 2 minutes. No visible bits of garlic or herb should remain.
    4. Add texture. Empty the large bowl into the blender. Pulse just a few times until the vegetables are broken into small pieces. You want some texture, not a second puree.
    5. Chill. Cover and refrigerate for at least 2 hours, until thoroughly cold. Give the flavors time to settle.
    6. Taste one more time. Right before serving, taste again and add more salt or vinegar as needed — watermelon sweetness varies. Ladle into bowls and top with the reserved watermelon and cucumber, feta if you’re using it, and a few small basil or mint leaves.
    Blender base blended until completely smooth for gazpacho

    Blend the base until completely smooth — this is what gives the soup its body.

    Pulsing reserved vegetables into gazpacho for texture

    Pulse in the reserved vegetables for some texture.

    Chilled watermelon gazpacho before final tasting and serving

    Chill until thoroughly cold, then taste one more time before serving. Finish with feta, the reserved watermelon and cucumber, and a few basil leaves.

    What I got wrong the first time

    The first time I made this, I blended everything at once and the result was… watery. Like juice with ambition. I tried leaving it chunky instead, and that was better, but still not what I wanted. The version that worked: blend half the vegetables into a smooth base, then pulse in the second half just until broken into pieces. That single change thickened the whole bowl without adding bread. I’ve made it this way every time since.

    And here’s the thing nobody tells you: this soup is better made the day before. It’s one of those rare recipes where the flavors actually get better as it sits. Make it up to a day ahead, keep it covered in the fridge, and stir well before serving.

    What to serve with it

    Gazpacho is a great light lunch or dinner. It works with a crusty baguette or focaccia on the side, grilled protein, or a simple green salad. I usually keep the plate quiet — the soup is the point.

    Notes

    Store: Keep in an airtight container in the fridge for up to 4 days.

    Make ahead: Up to 1 day ahead. Stir before serving.

    Salt: This recipe is written for Morton kosher salt. Diamond Crystal is less salty by volume — start with a bit more and adjust.

    Want it thicker: Blend in a 1½-ounce piece of day-old baguette with the base in step 3 for a fuller, more traditional texture.

    Happy cooking, Maya

    Keep Reading

  • Crispy Rice Salad

    Crispy Rice Salad

    The pot of rice I made the night before was already cold, and the clock was not my friend. I had maybe thirty minutes before the house got loud, so I did what I always do with leftover rice: I made it crispy.

    Bowl of crispy rice salad with roasted tofu and vegetables

    Soy-baked rice, golden roasted tofu, crunchy vegetables, and a spoonful of Thai peanut sauce. It is a little salty, a little spicy, and perfectly crunchy. Real time: about an hour. Hands-on: about 20 minutes. The oven does most of the work.

    Why this one is on repeat

    I keep coming back to the texture. Crispy rice, caramelized tofu, raw vegetables, and a creamy peanut dressing all in one forkful. And day-old rice is actually the point — it dries out just enough to crisp in the oven instead of steaming into a mush. If you ever make more rice than you need, consider it a gift.

    There is also a lot of balance going on: the lime-like brightness of the fresh vegetables, the deep savory note of soy, and the sweet-spicy pull of the peanut sauce. I have made this on repeat because it is one of the few salads where everything actually earns its place on the plate.

    Labeled ingredients for crispy tofu rice salad on counter

    Ingredients (with honest swaps)

    Precise measurements are in the recipe card below. This is the shopping list version.

    Crispy tofu

    • Extra-firm tofu — pressed well and patted dry. Skip it if you want, but it turns the bowl into a proper meal.
    • Olive oil — avocado oil or refined coconut oil work too.
    • Cornstarch — the secret behind the oven crisp.
    • Onion powder, garlic powder, fine sea salt, and black pepper.

    Crispy rice

    • 1 cup cooked jasmine rice, cold and preferably day-old.
    • Sesame oil — toasted gives a stronger flavor; untoasted is milder.
    • Light soy sauce — dark soy works if that is what you have.
    • Chili flakes — leave them out if heat is not your thing.
    • Garlic powder — milder and a little sweeter than fresh garlic, and no need to mince at 6 p.m.

    The salad

    • Coleslaw mix with carrots — or add your own shredded carrots to a plain bag.
    • Thinly sliced cucumber and red bell pepper.
    • Chopped fresh cilantro and sliced green onions.
    • Roughly chopped roasted peanuts.
    • Thai peanut sauce — homemade or straight from the bottle. No judgment.
    Finished crispy rice salad with peanut sauce in bowl

    How to make it

    Preheat the oven to 425°F (220°C) and line two baking sheets with parchment. That is the whole setup.

    Make the tofu

    1. Grate the pressed tofu with the large holes of a box grater.
    2. Stir in the olive oil, cornstarch, and seasonings until it is coated.
    3. Spread it in an even layer on one sheet. Break up any clumps.
    4. Bake for 20–25 minutes, stirring once or twice, until deep golden and crisp at the edges.
    Rice mixed with soy sauce sesame oil on tray
    Grated tofu coated with cornstarch and seasonings in bowl
    Golden crispy baked tofu spread on baking sheet

    Make the rice

    1. Break up any clumps of cold rice in a bowl.
    2. Mix in the sesame oil, soy sauce, chili flakes, and garlic powder.
    3. Spread it in a thin, even layer on the second sheet.
    4. Bake alongside the tofu for 20–25 minutes, stirring once or twice, until crispy and golden in spots. Watch the last few minutes — the edges brown fast.
    Crispy golden baked rice on parchment-lined baking sheet

    Assemble

    1. In a big bowl, toss the coleslaw mix, cucumber, red bell pepper, cilantro, green onions, and peanuts.
    2. Add the crispy tofu and rice.
    3. Drizzle in the Thai peanut sauce and toss gently until everything is coated.
    4. Serve immediately, while everything is still crisp.
    Finished crispy rice salad with peanut sauce in bowl

    Notes that actually help

    • Press the tofu. I mean it — unpressed tofu roasts into steam, not crisp.
    • Day-old rice is the move. It dries out and crisps instead of turning to glue.
    • Spread everything out. A crowded sheet steams; a thin layer crisps.
    • Serve it right away. This salad is at its best in the first five minutes.

    Make it yours

    Swap the tofu for edamame, tempeh, or nothing at all — the bowl still works. If peanut sauce is not your thing, any Asian-inspired dressing you love belongs here instead. I also like a shower of toasted sesame seeds on top, or an avocado sliced in for a little creaminess. The structure holds up to a lot of opinion.

    Leftovers

    Store the rice, tofu, and vegetables in separate airtight containers, and keep the peanuts and sauce off until you are ready to eat. Everything keeps for up to 3 days in the fridge, though it will lose some crunch. To reheat, spread the rice and tofu on separate sheets and bake at 350°F (175°C) for about 5 minutes, then build the bowl the same way and dress it. I would not freeze it — nothing in this dish thaws well. If you already assembled it, fine, store it all in one container and eat the leftovers cold.

    Happy cooking,
    Maya

    Keep Reading